
You know, I get it. For years, my life felt like a constant juggle, especially with my demanding legal career. Emotional eating was my go-to comfort, a quick fix that never actually fixed anything. Then, one evening, prepping a simple vegetable stir-fry, something clicked. As I chopped each colorful piece, focusing on the fresh scents and how the knife glided through them, it felt… calming. Almost like a little meditation session right there in my kitchen. That moment showed me cooking could be more than just fuel; it could be a path to healing and self-awareness. It inspired me to create truly mindful meals that nourish your body *and* soothe your soul. That’s how I developed The Only Healthy Meals Recipes Recipe You’ll Need (2025), a foundational recipe designed to help you build lasting dietary changes and a healthier, happier relationship with food, all backed by my background as a Mindfulness & Emotional Wellness Specialist.
Why The Only Healthy Meals Recipes Recipe You’ll Need (2025) is Your Go-To
This isn’t just another bread recipe; it’s your new best friend for making healthier choices feel easy and actually enjoyable. It’s all about connection – connecting with your food, with your wellbeing, and with a simpler way of eating.
- Super easy to make, even if you think you can’t bake!
- Packed with wholesome goodness to make you feel great.
- Helps you build a positive, lasting relationship with food.
Mindful Preparation, Lasting Habits
The beauty of this recipe is how it encourages you to slow down and actually enjoy the process. You’re not just mixing ingredients; you’re creating something nourishing. This mindful approach is key to building sustainable healthy habits that stick, moving you away from fleeting diets and towards a truly balanced lifestyle.
Simple Ingredients, Delicious Results
Forget fancy, hard-to-find items! We’re using simple, everyday ingredients that come together to create a wonderfully satisfying loaf. Trust me, the aroma alone will make you feel cozy and accomplished. You get incredible flavor and texture with minimal fuss.
Gathering Your Ingredients for The Only Healthy Meals Recipes Recipe You’ll Need (2025)
Okay, let’s get our kitchen ready for some delicious, healthy magic! When you’re making this foundational loaf, you’ll see that the ingredients are super straightforward. It’s proof that eating well doesn’t need to be complicated at all. Here’s what you’ll need to pull together:
For the Dough
This is where it all begins! For the dough itself, you’ll need:
- 3 cups of all-purpose flour
- 2 teaspoons of instant yeast (or rapid rise yeast) – This is what makes our bread nice and airy.
- 1 to 2 tablespoons of chopped fresh rosemary – This is totally optional, but honestly, it adds such a wonderful aroma and a subtle herbaceous note that just elevates everything. If you don’t have it, no worries!
- 2 teaspoons of kosher salt – For flavor and to help the dough structure.
- 1 (12 ounce) can or bottle of beer – Make sure it’s at room temperature! If beer isn’t your thing, or you’re avoiding it, you can absolutely use 1 1/2 cups of warm water instead. It works just as beautifully.
Step-by-Step Guide to Making The Only Healthy Meals Recipes Recipe You’ll Need (2025)
Alright, let’s get this delicious, no-fuss bread baking! It’s honestly so simple, you’ll wonder why you ever made it harder. This is where the magic really happens, turning those few ingredients into something truly special.
Mixing the Dough and Overnight Rest
First things first, grab a good-sized bowl. Dump in your flour, that instant yeast, your salt, and the rosemary if you’re using it – mix it all up. Now, pour in the room-temperature beer (or water). Just stir it with a spatula until it all comes together into a shaggy, sticky mess. Don’t overthink it! Cover the bowl and let it hang out on your counter for at least 12 hours, or even better, overnight. This long rest is what develops all those awesome flavors and textures.
Preheating and Preparing for Baking
About 30 minutes before your dough is done with its long rest, crank up your oven to 450°F (that’s 230°C). Now, here’s a crucial step: put your big Dutch oven right into the oven to get super hot with it. We want that pot screaming hot when the dough is ready!
Shaping and Second Rise
Generously flour up your counter space – we don’t want any sticking disasters! Gently scrape the sticky dough out of the bowl. It’ll be loose and wet, that’s exactly what we want. Just sort of coax it into a rough ball. Place this ball onto a piece of parchment paper, cover it loosely, and let it rest for about an hour. You’ll see it puff up and double in size. That’s your cue that it’s ready for the heat!
You can find a great visual guide on handling no-knead doughs like this if you’re a bit nervous about the stickiness, but honestly, just go for it!
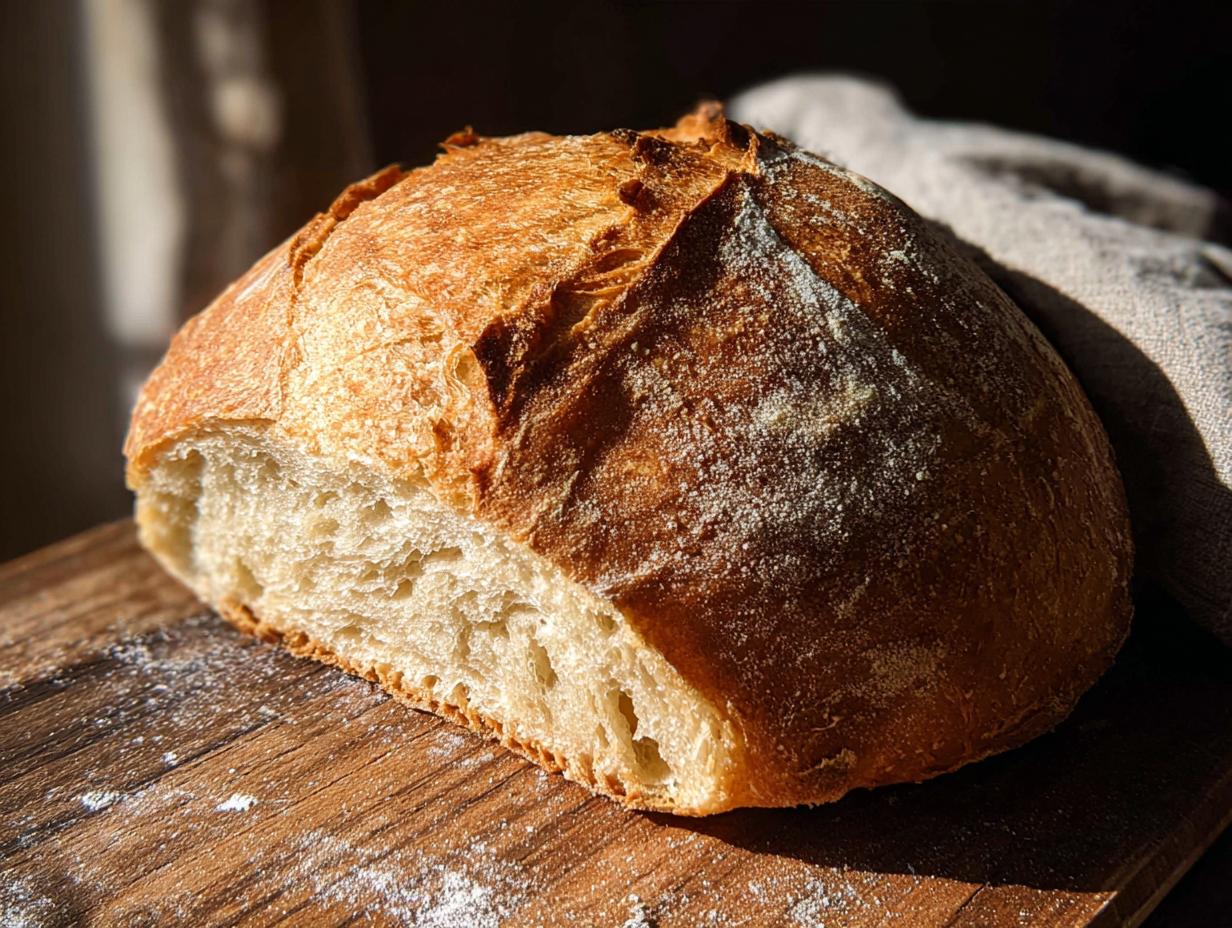
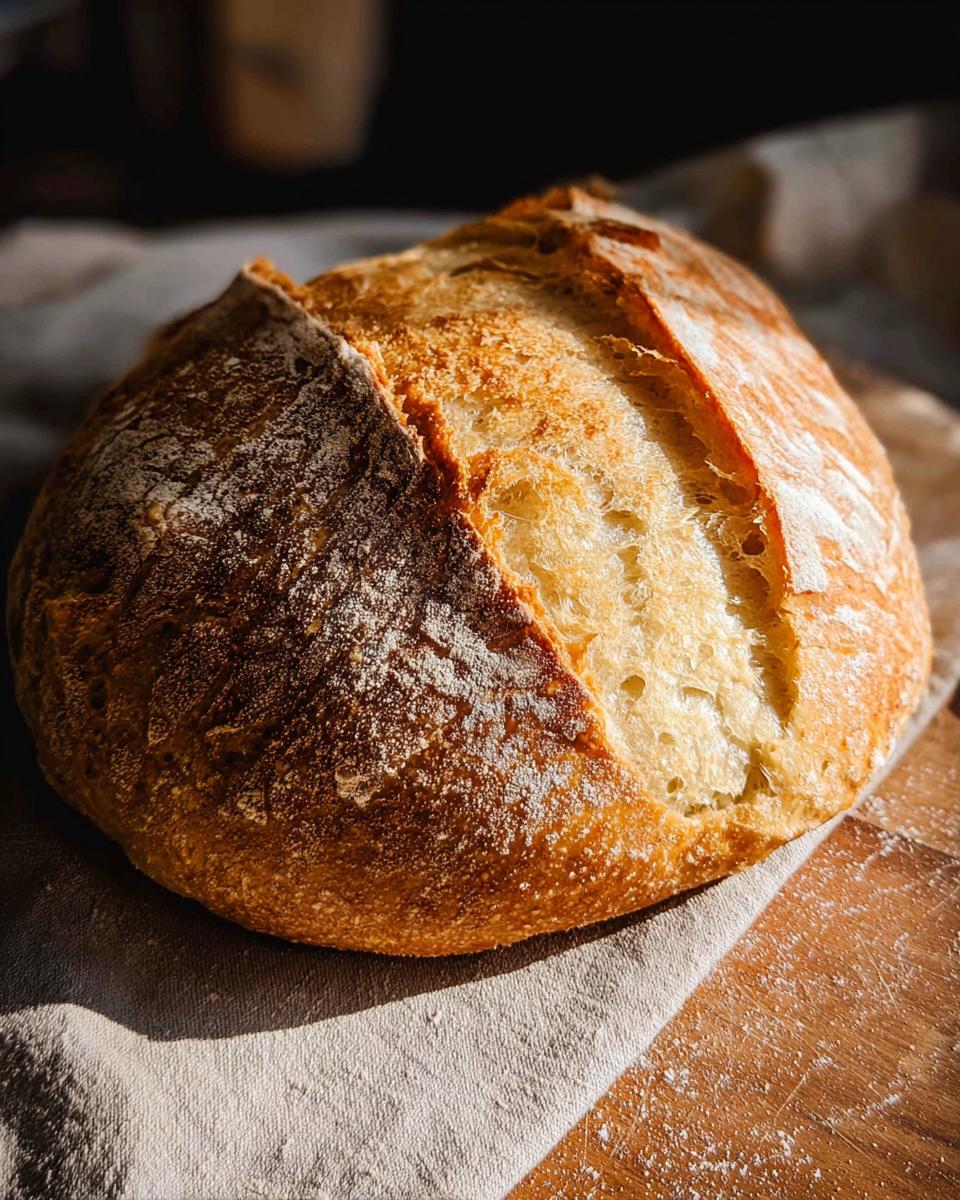
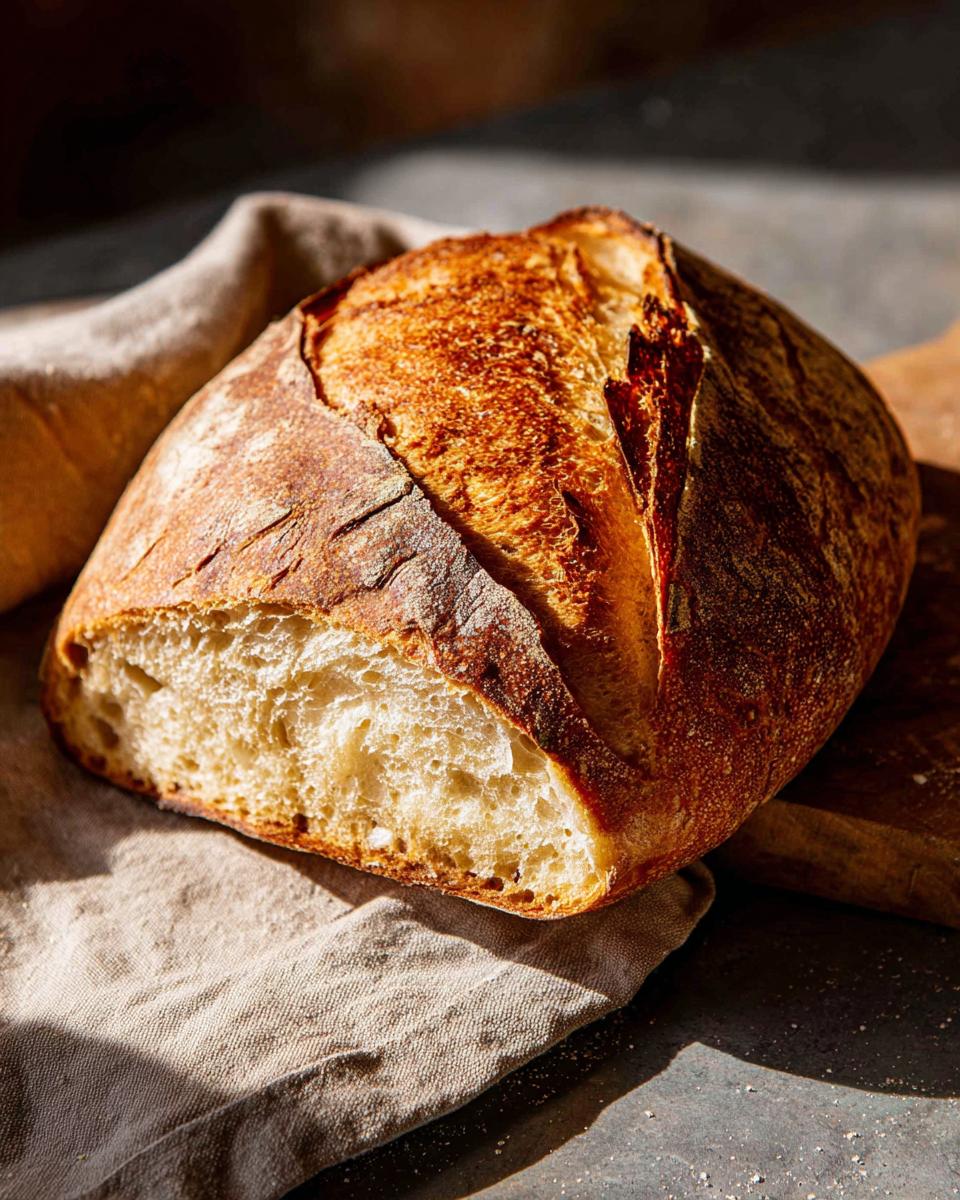
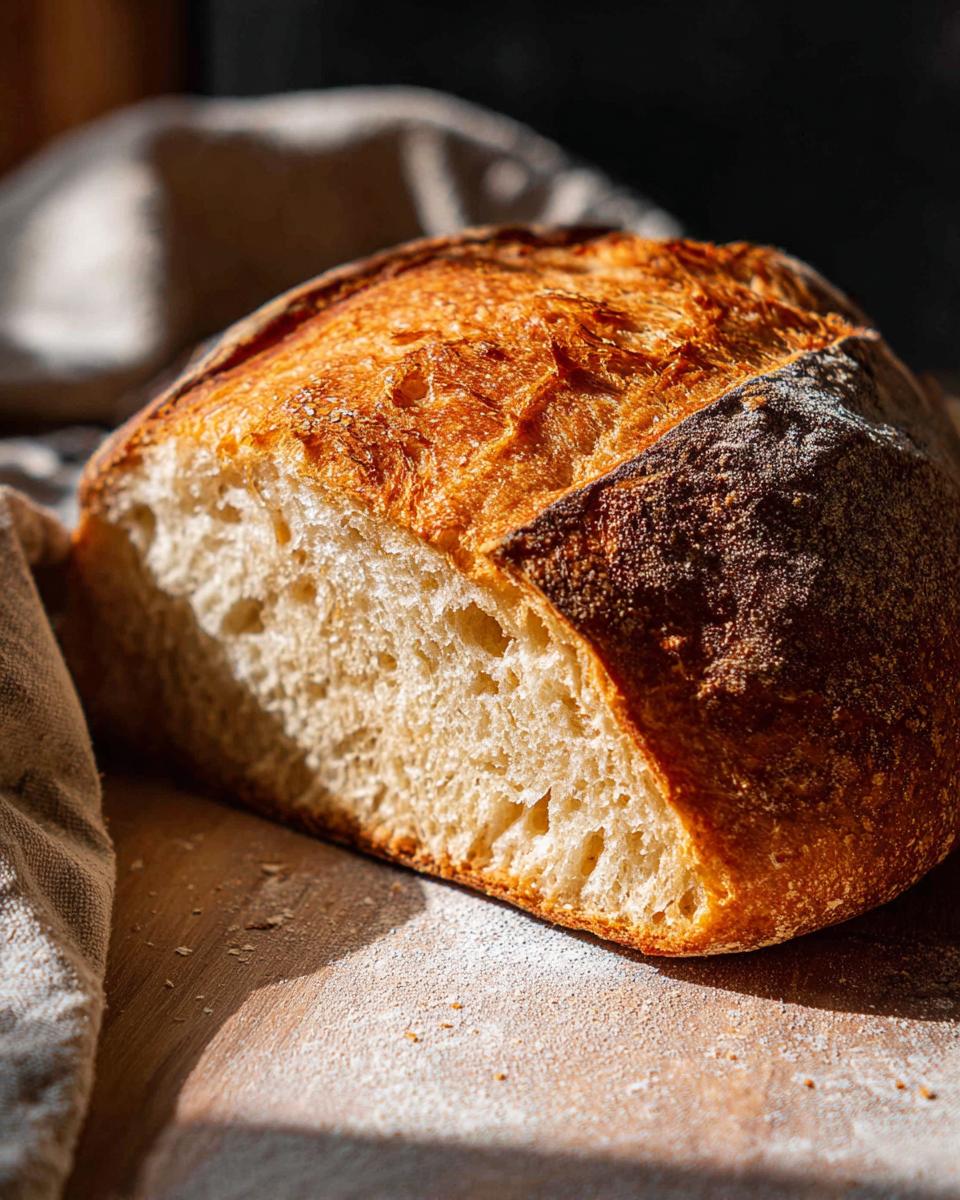
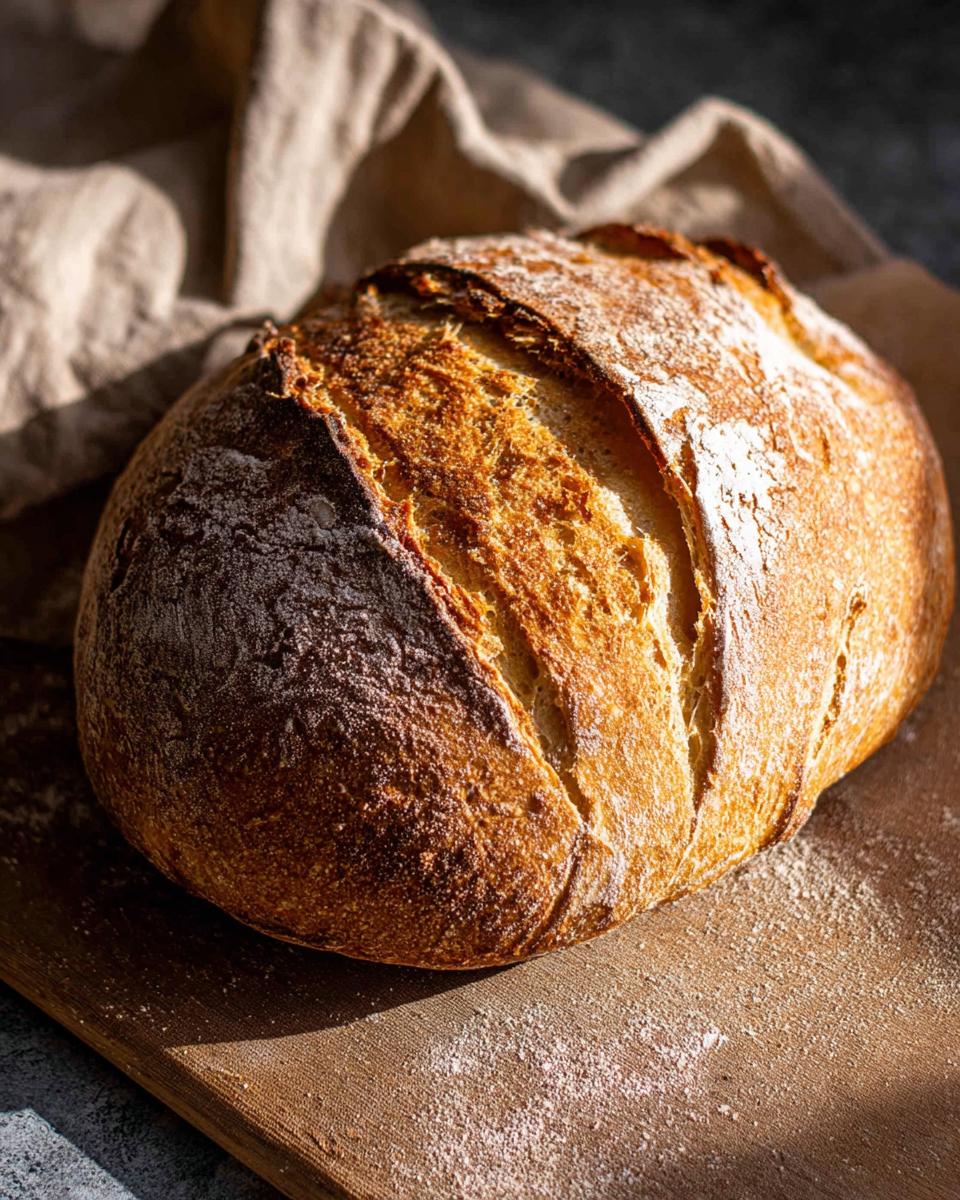
Baking to Golden Perfection
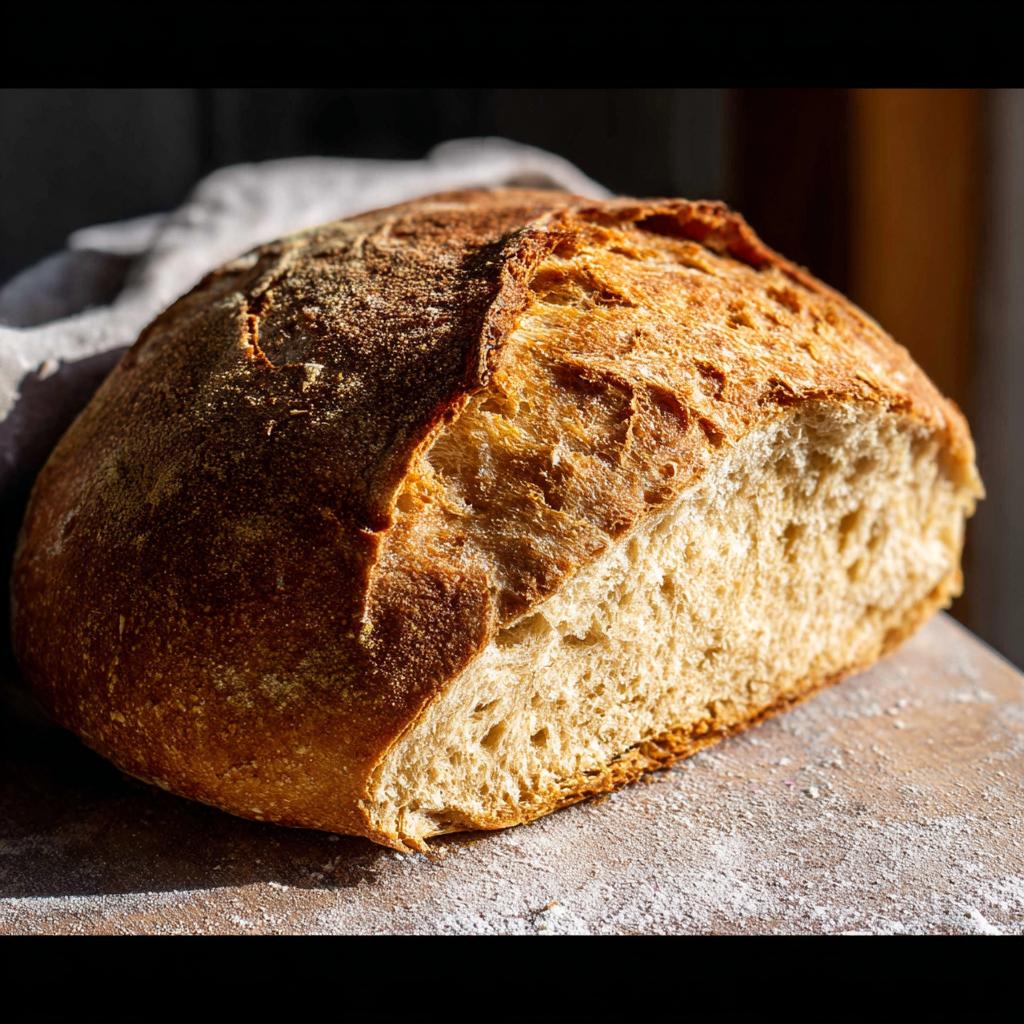
Carefully, and I mean *carefully*, take that super hot Dutch oven out of the oven. Use the parchment paper to lift your dough ball and gently lower it into the pot. Pop the lid back on and bake for 30 minutes. Then, take off the lid and let it bake for another 15-20 minutes, or until it’s a gorgeous, deep golden brown all over. It’ll sound hollow when you tap the bottom. Let it cool on a wire rack, maybe with some softened butter and a sprinkle of sea salt. Pure happiness!
Tips for Success with Your Healthy Meals Recipes
You know, baking can sometimes feel a little intimidating, but trust me, this recipe is designed to be super forgiving! It’s all about a few little tricks that make a huge difference in the final result. Following these simple pointers will make sure you get that perfect loaf every single time.
Ingredient Temperature Matters
When you’re mixing up the dough, using room-temperature beer or water is a big deal! Cold liquid can shock the yeast and slow it down, and warm liquid can actually kill it. Room temp is just perfect for waking up that yeast so it gets busy making your dough light and airy. It’s a small step, but it really helps the bread rise beautifully.
The Magic of the Dutch Oven
Using a preheated Dutch oven is like a secret weapon for achieving that amazing crust. The heavy pot traps steam released from the dough during the first part of baking. This steam keeps the crust soft and pliable, allowing the bread to expand fully. Once you remove the lid, the hot pot gives you that wonderfully crisp, crackly exterior we all love. It really makes a difference!
Ingredient Notes and Substitutions for Healthy Meals
Okay, sometimes we get into the kitchen and realize we’re missing something or just want to tweak things a bit, right? Don’t you worry, this recipe is pretty flexible! We want to make sure healthy eating feels totally doable for you. For example, if you’re curious about other healthy bread options, this whole wheat banana bread recipe is another fantastic one to try.
Beer vs. Water
So, the beer in this recipe? It’s not just for fun, though a cold one while baking is always nice! The malt and yeast in beer can add a little extra depth of flavor and help create a fantastic crust. But if beer isn’t your jam, or you just don’t have any handy, no sweat! Using 1 1/2 cups of warm water works like a charm. You’ll still get a beautiful loaf every time.
Flour Flexibility
For this recipe, I’ve written it with all-purpose flour because it gives that classic, soft crumb and great rise without much fuss. If you’re trying to swap it out, say for whole wheat or a gluten-free blend, just know that the texture might change a bit. Other flours can absorb liquid differently, so you might need to adjust amounts slightly. For the absolute best, most reliable result, stick with all-purpose for this one, especially when you’re starting out.
Frequently Asked Questions about The Only Healthy Meals Recipes Recipe You’ll Need (2025)
Got questions? I’ve got answers! It’s totally normal to wonder about things when trying a new recipe, especially one that’s meant to be so foundational for your healthy eating journey.
Can I make this bread without yeast?
For this particular recipe, yeast is really the star! It’s what gives the dough its amazing airy texture and allows it to rise so beautifully. Without it, you’d end up with a dense, flat bread. So, while I know it’s a common question, for this “no-knead” magic, yeast is pretty essential.
How do I know when the dough is ready to bake?
After that second rise, you’ll know it’s ready when the dough has puffed up and looks noticeably larger, almost doubled in size. It should also look bubbly and a bit airy, like it’s full of promise. If it looks a bit sad and hasn’t grown much, give it a little more time in a warm spot.
Can I add other flavors to the dough?
Absolutely! That’s the fun part of this recipe. While the rosemary is pretty darn delicious, you could totally add about a teaspoon of garlic powder or some finely chopped chives to the dry ingredients. Some people even like to mix in a little shredded cheese or some chopped olives for a savory twist! Just remember, adding too many wet ingredients might change the dough’s consistency a bit.
Serving and Storing Your Healthy Bread
This bread is seriously versatile, and honestly, a slice of this warm, crusty goodness is a treat all on its own! It’s the perfect canvas for whatever you’re craving.
Best Ways to Enjoy This Bread
Seriously, a swipe of good quality butter is pure bliss, especially while it’s still a little warm. It’s also fantastic alongside a hearty soup or stew. Or, toast up a slice and go crazy with mashed avocado, a sprinkle of red pepper flakes, and maybe even some garlic – talk about a guilt-free indulgence!
Keeping Your Bread Fresh
Once this loaf has cooled down completely, you can wrap it up in plastic wrap or pop it into a bread bag. It should stay fresh at room temperature for about 2-3 days. If you think you won’t finish it that quickly, slicing it and freezing some is a great idea too!
Nutritional Information for The Only Healthy Meals Recipes Recipe You’ll Need (2025)
Now, let’s talk about the good stuff inside! While this recipe is all about wholesome goodness, it’s good to have an idea of what you’re fueling yourself with. Please remember these numbers are just estimates, as they can totally change based on the specific brand of beer or flour you use, or if you add any extra goodies. But generally, a slice of this lovely bread gives you:
Calories: Around 150-180 per slice
Fat: Approximately 2-4g
Protein: About 4-6g
Carbohydrates: Roughly 25-30g
Share Your Healthy Creations!
I’d absolutely LOVE to hear how your loaf turned out! Seriously, knowing you’re making these healthy choices and actually enjoying it makes my day. Did you try the rosemary? What did you serve it with? Drop a comment below and let me know, or even better, share a pic of your beautiful bread! You can also connect with me through my contact page to share your thoughts!
The Only Healthy Meals Recipes Recipe You’ll Need (2025)
Ingredients
Equipment
Method
- In a bowl, stir together the flour, yeast, rosemary (if using), and salt. Add the beer and mix with a spatula until combined. Cover the bowl and let sit at room temperature for at least 12 hours, but ideally overnight.
- Preheat oven to 450° F. Place a large Dutch oven in the oven to preheat for 30 minutes.
- Generously dust a work surface with flour. Scrape the dough out of the bowl. It should be loose and sticky. Form the dough into a ball and place on a piece of parchment. Cover and allow to rise for 1 hour, until doubled in size.
- When ready, carefully lift the dough and the parchment and place in the Dutch oven. Bake, covered, for 30 minutes. Remove the lid and continue baking until the bread is a deep, golden brown, about 15-20 minutes more. Remove from the oven. Enjoy with softened butter and sea salt.
Notes
Tried this recipe?
Let us know how it was!
Visual Culinary Artist & Aesthetic Designer
When the pandemic killed my career as a luxury hotel photographer overnight, I was stuck in my studio apartment with nothing but time and vegetables. That’s when I started treating meal prep like photography projects—and discovered that the same principles that made five-star dishes camera-ready could turn humble zucchini noodles into social media gold.
My fine arts degree from Parsons taught me that people eat with their eyes first. After years behind the lens capturing haute cuisine, I realized that successful dieting often depends more on visual satisfaction than pure nutrition. When your food looks amazing, you actually want to stick with your eating plan.
My recipe development feels more like an art studio than a test kitchen. I use color theory to guide ingredient selections—purple cabbage with golden cauliflower, emerald herbs against ivory cheese. My “Edible Landscapes” series transforms standard low-carb ingredients into miniature scenic compositions that make vegetables feel aspirational rather than obligatory.
I spend evenings exploring art galleries and practicing watercolor painting, always looking for inspiration. My philosophy is simple: make low-carb food visually irresistible, and dietary compliance becomes an aesthetic choice rather than a health sacrifice.