
Oh, pizza night! I swear, it’s more than just dinner; it’s an EVENT at our house. There’s just something magical about gathering everyone around, flour flying, and creating your own little masterpieces right there in the kitchen. Forget those takeout menus, because I’m going to show you how to nail those amazing, restaurant-quality results with these Restaurant-Style Pizza Night Recipes at Home (2025). I still fondly remember our first real family pizza night a few years back. My son, bless his heart, was so proud of himself for rolling out the dough, and honestly, I was just as nervous and excited as he was! We ended up with flour everywhere and laughter echoing through the house as we piled on every topping we could find. It wasn’t just about the delicious pies we made; it was about that shared creativity and the stories we swapped. That’s the heart of it, isn’t it? Creating memories while making something truly yummy. I’m all about making those joy-filled cooking moments super accessible for families, and this pizza night recipe is pure gold!
Why You’ll Love These Restaurant-Style Pizza Night Recipes at Home (2025)
Seriously, this recipe is a game-changer for pizza night! Here’s why you’ll be hooked:
- It’s surprisingly easy to make the dough from scratch – even if you’re a total kitchen newbie!
- The taste is just *chef’s kiss*! You’ll get that amazing, authentic restaurant flavor right in your own home.
- It’s the perfect excuse for some fun family time. Everyone gets to play chef and create their own masterpiece.
- There’s a huge satisfaction in making pizza from scratch that’s both delicious and impressive.
- You can go wild with toppings! It’s your pizza, your rules – perfect for pleasing everyone.
- It’s super budget-friendly compared to ordering in, and you get way more bang for your buck.
Gather Your Ingredients for Restaurant-Style Pizza Night Recipes at Home (2025)
Alright, let’s get down to business and gather everything we need to make some seriously awesome pizzas! You know, the kind that make everyone at the table say “Wow!” Don’t worry, it’s not complicated, but having everything ready makes the whole process so much smoother. We’re talking about that perfect crust and all those yummy toppings. Here’s your shopping list, broken down so it’s super easy!
For the Dough:
- 1 1/4 oz. packet active dry yeast (that’s about 2 1/4 teaspoons), proofed and ready to go!
- 2 tsp. granulated sugar, to give that yeast a little wake-up call.
- 1 1/2 cups warm water – make sure it’s between 90 and 100°, we don’t want to shock our little yeast friends!
- 4 cups all-purpose flour, the foundation of our glorious crust.
- 2 Tbsp. olive oil, divided. We’ll use some in the dough and brush some on later.
- 2 1/4 tsp. kosher salt, for that essential flavor.
For the Toppings:
- 1/4 cup grated parmesan cheese, divided. It adds a nice tang.
- 1 cup Homemade Pizza Sauce (or your favorite store-bought kind!), divided. This is the heart of your pizza!
- 3 cups shredded low-moisture mozzarella cheese, divided. The classic gooey goodness!
- 1 cup cubed fresh mozzarella cheese, divided. For those creamy, melty pockets.
- Fresh basil, for serving. Nothing beats that fresh, fragrant finish!
Crafting the Perfect Dough: A Key to Restaurant-Style Pizza Night Recipes at Home (2025)
Okay, let’s get down to the nitty-gritty of making that amazing pizza dough. Trust me, this is where the magic really starts to happen for our Restaurant-Style Pizza Night Recipes at Home (2025). It might sound intimidating, but it’s pretty straightforward once you get the hang of it. We’re aiming for a crust that’s chewy on the inside and perfectly crisp on the outside – totally doable!
Activating the Yeast and Mixing the Dough
First things first, let’s wake up that yeast. In your stand mixer bowl, sprinkle the yeast and sugar over the warm water. Give it a little whisk and let it hang out for about 5 minutes. You’ll know it’s happy when you see little bubbles forming on top – that means it’s alive and ready to party! Now, toss in your flour, 1 tablespoon of olive oil, and that salt. Let your mixer do the work with the dough hook on low speed until everything starts to come together into a kinda sticky ball. Scrape down the sides of the bowl, then ramp up the speed a smidge to medium-low. Mix it for another couple of minutes until it’s well incorporated and still a little sticky. That little bit of stickiness is good; it means we’re on the right track for a great texture!
First Rise: Letting the Dough Develop
Once our dough looks good, drizzle the other tablespoon of olive oil over the top and down the sides of the bowl. Grab your rubber spatula and gently flip the dough around so it gets a nice coating of that oil. This helps prevent it from drying out while it rests. Now, cover that bowl snugly with plastic wrap. Find a nice cozy spot for it to rise – usually somewhere warm is best. Let it hang out there for about an hour and a half, or until it’s basically doubled in size. You’ll see it puff up like a happy cloud!
Preparing for Baking: Oven and Dough
About an hour before you’re ready to actually make pizza, get your oven fired up. Pop a pizza stone, steel, or even just an upside-down heavy-duty baking sheet onto the top rack. Crank that oven up to 500°F (or as hot as it goes!). We want it screaming hot for that authentic pizza experience. While the oven’s heating, gently turn your puffed-up dough out onto a lightly floured surface. Divide it right down the middle – we’re making two pizzas here! Now, we need to form these into tight rounds. Just flatten each piece into a circle, then fold all the edges into the center. Flip it over so the seam is on the bottom, and gently pull the round against the counter to make a nice, taut ball. Place these dough balls on a lightly floured baking sheet. If you’re not using them right away, you can cover them with plastic wrap and pop them in the fridge for up to two days. Just remember to let them sit out at room temperature for about 30 minutes before you start shaping them for baking, okay?
Assembling Your Masterpiece: Toppings for Restaurant-Style Pizza Night Recipes at Home (2025)
Now for the super fun part – turning these lovely dough balls into actual pizzas! This is where you get to be the artist. When we’re aiming for that Restaurant-Style Pizza Night Recipes at Home (2025) vibe, the crust is key. We want it thin and even, not thick and doughy, and definitely not soggy! So, let’s focus on getting that shaping just right.
Shaping the Dough for the Perfect Crust
Grab one of your dough balls and plop it onto a super well-floured surface – don’t be shy with the flour here! Gently press it down into an 8-inch round, making sure to leave a little bit of a thicker lip around the edge, about an inch or so. This will become our lovely crust. Now, this is a cool trick: carefully lift the dough and let gravity do some of the work. Cup your hands under the edge and rotate the dough like you’re stretching it out. Gently keep turning and stretching until you have a nice 12-inch circle. Don’t stress if it’s not perfectly round; rustic is charming! Once it’s stretched, carefully transfer it onto that piece of oiled and floured heavy-duty foil that’s sitting on your half-sheet pan. This foil is our makeshift pizza peel – trust me, it works like a charm!

Layering Flavors: Sauce and Cheese
Okay, time to build some flavor! First, sprinkle about 2 tablespoons of that grated parmesan all over your pizza dough canvas. Then, spread about 1/2 cup of your delicious pizza sauce evenly over the parmesan, but be sure to leave that 1-inch border clear for the crust – we don’t want sauce oozing over the sides. Next up, the cheese! Sprinkle on about 1 1/2 cups of the shredded low-moisture mozzarella, followed by 1/2 cup of the cubed fresh mozzarella. Those little pockets of fresh mozzarella just melt into pure creamy heaven!
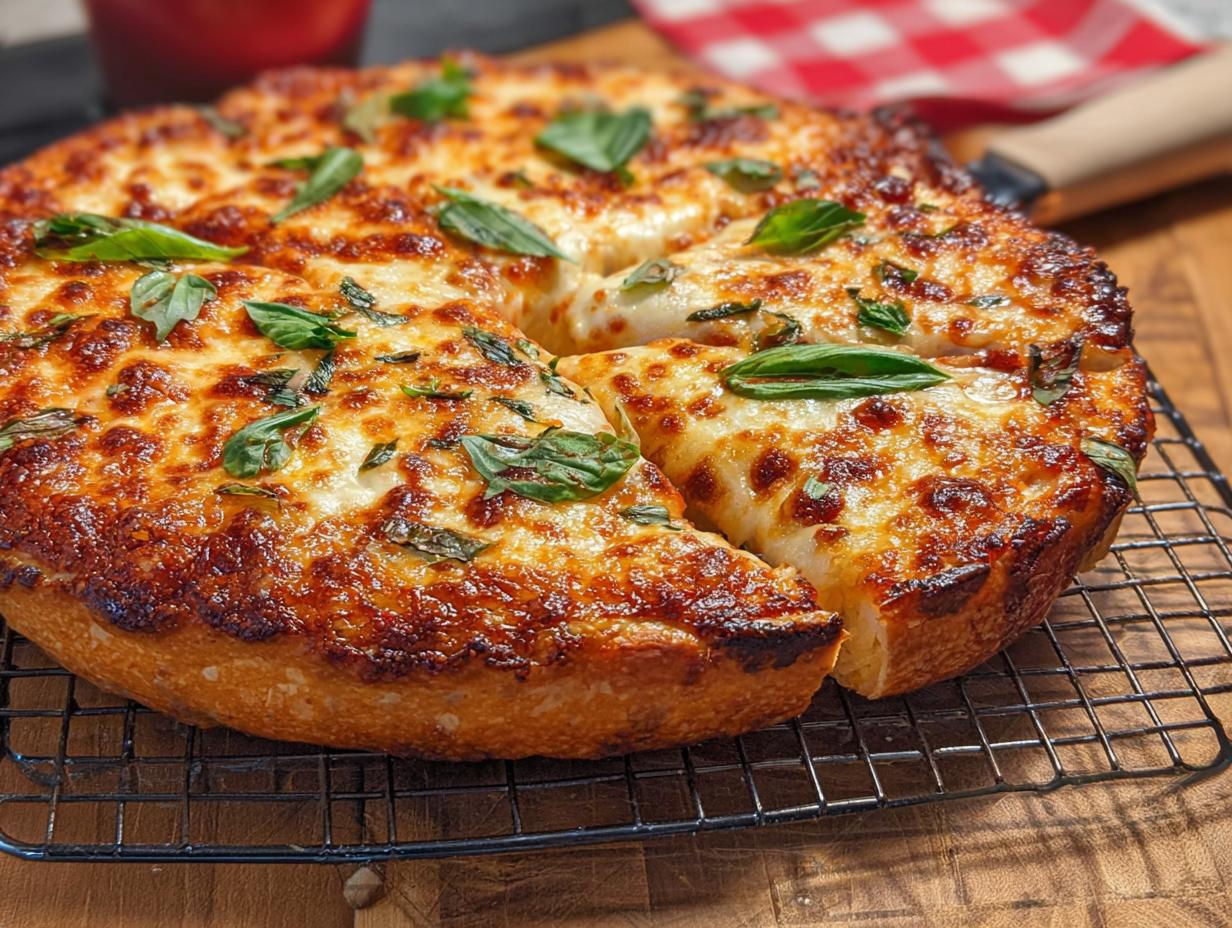
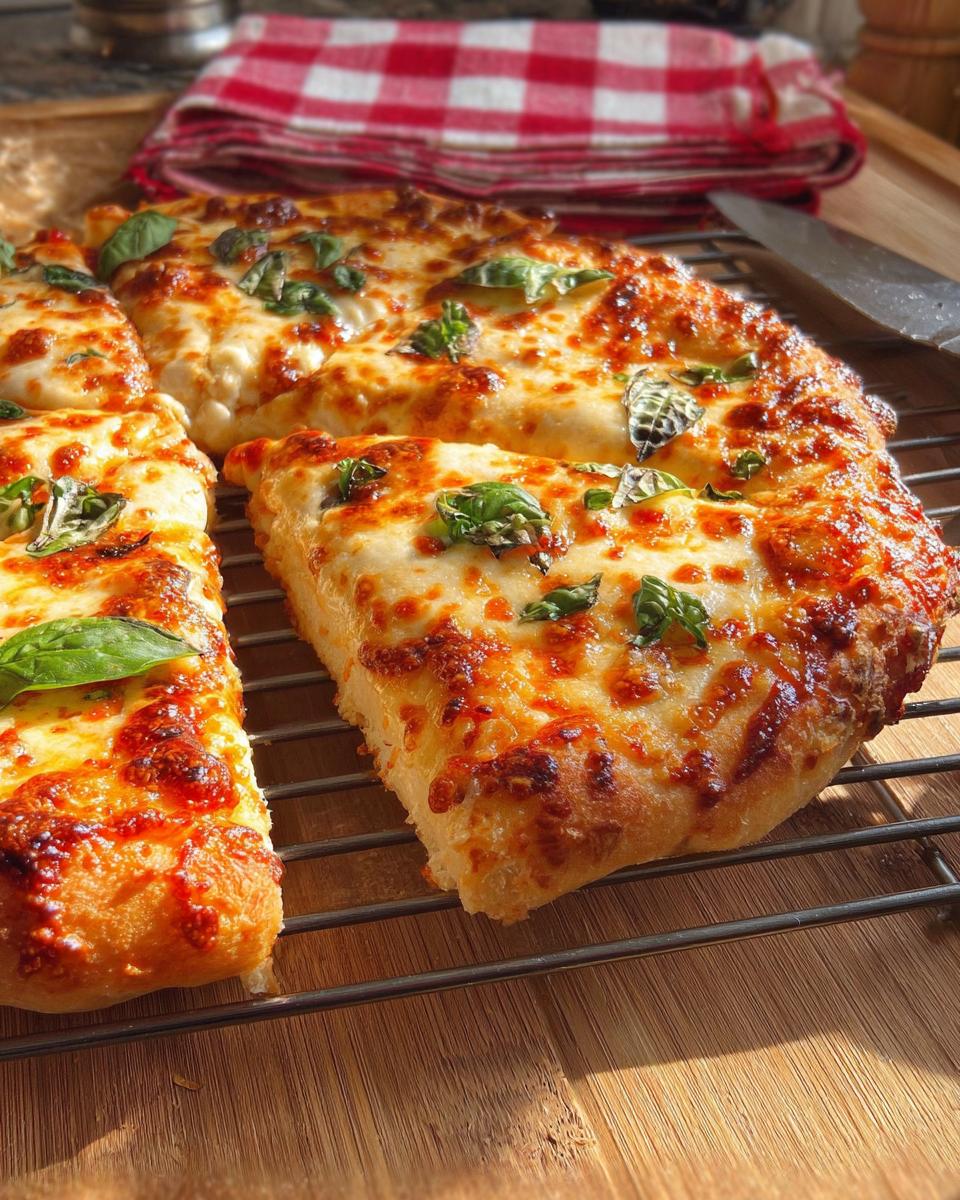
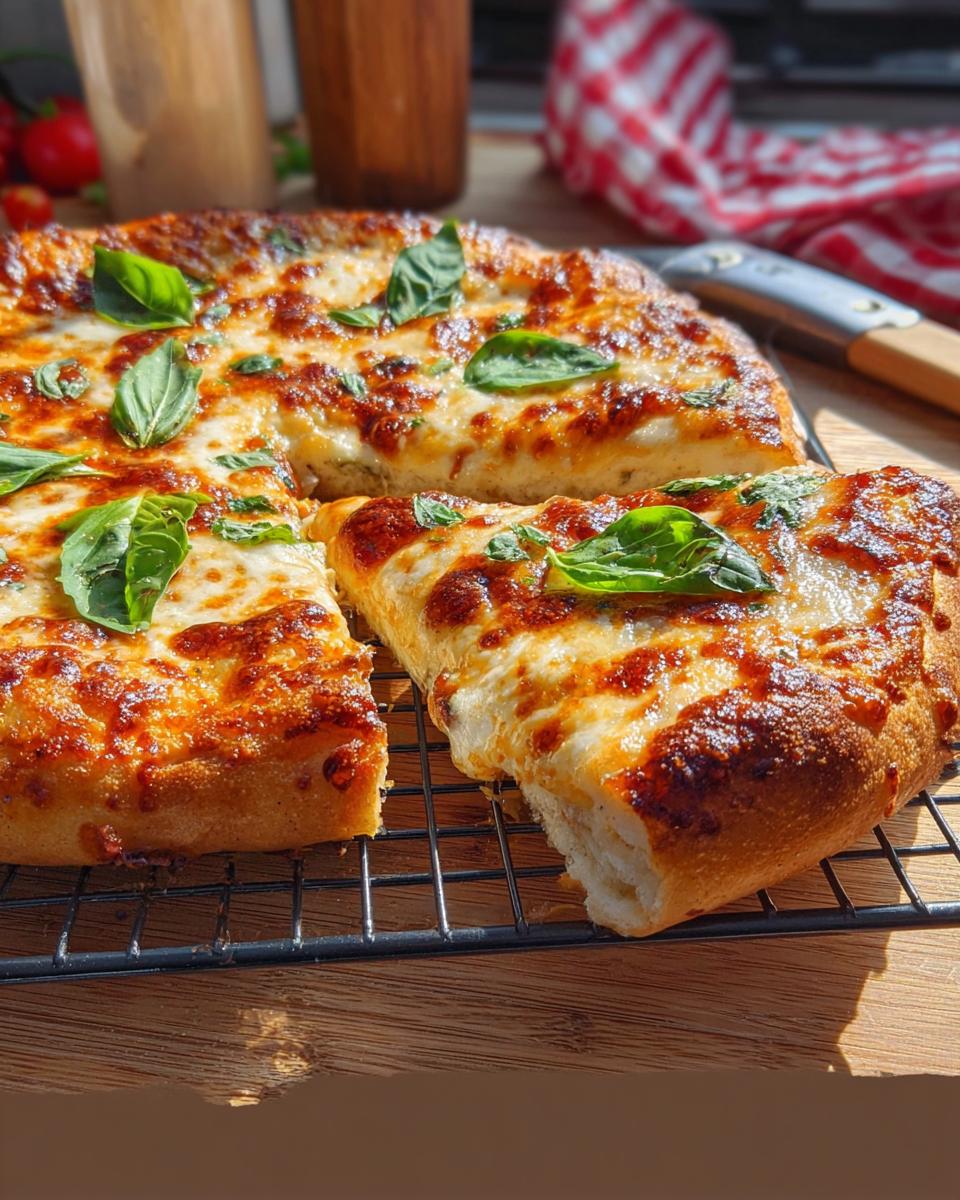
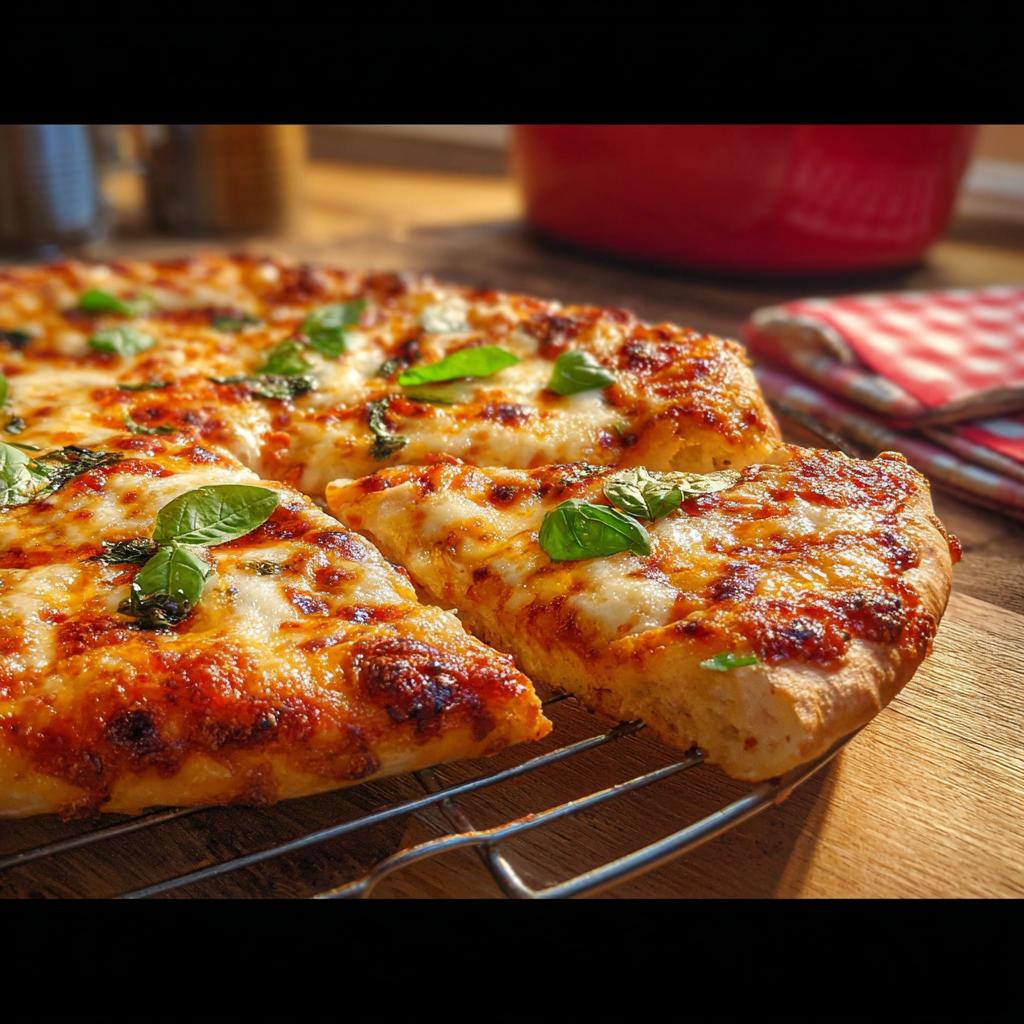
Baking and Serving Your Homemade Pizza
Alright, the moment of truth! You’ve got your beautiful pizza assembled, and it’s time to get it into that screaming hot oven. Remember that foil-covered baking sheet we prepped? Gently slide that thing onto your hot pizza stone or baking sheet in the oven. We want that crust to get nice and golden, and that cheese to be all bubbly and glorious. It usually takes about 12 to 14 minutes at 500°F. Keep an eye on it – ovens can be tricky! You’re looking for a nicely browned crust and those irresistible bubbling cheese pools. Once it’s looking *perfect*, carefully slide the pizza (still on the foil!) out of the oven and onto a cooling rack. Before you slice it, give that crust a little brush with some olive oil and sprinkle on some fresh basil leaves. Oh, the smell! It’s just incredible. This whole setup, with the homemade pizza sauce and those toppings, cooking on that hot stone really makes all the difference!
Tips for Restaurant-Style Pizza Night Success
Alright, we’ve gone through the whole delicious process, but a few extra little pointers can really elevate your Restaurant-Style Pizza Night Recipes at Home (2025) from great to absolutely phenomenal. Think of these as my secret weapons for a truly flawless pizza night!
- Use the best ingredients you can find! Seriously, good quality flour, ripe tomatoes for your sauce (if making homemade), and fresh mozzarella make a world of difference.
- Don’t skimp on preheating the oven. That 500°F (or hotter!) and a super hot pizza stone or baking sheet is what gives you that crispy, slightly chewy crust. Patience here pays off big time!
- Handle that dough gently. Try not to overwork it after the first rise. We want that lovely, airy texture. A light touch when shaping is key!
- Don’t overload your pizza. Too many toppings can make the crust soggy. Think about balance – you want each flavor to shine.
- Experiment with toppings! Beyond the classics, think roasted veggies, different kinds of cheeses, a drizzle of honey, or even some spicy pepperoni. Get creative with your family!
- Have fun with it! Remember, it’s pizza night! The main goal is to enjoy the process and the delicious food together. Don’t stress too much if it’s not “perfect.”
Frequently Asked Questions About Restaurant-Style Pizza Night Recipes at Home (2025)
Got questions about making pizza night amazing? You’re in the right spot! We get asked a lot about how to get that perfect restaurant-style pizza right in our own kitchens. Here are some common ones:
Can I make the dough ahead of time for pizza night?
Absolutely! This is a lifesaver for busy weeknights. Once the dough has done its first rise, you can pop it into a lightly oiled, airtight container or wrap it really well with plastic wrap and pop it in the fridge. It’ll keep nicely for up to 2 days. Just remember to let it sit out on the counter for about 30 minutes to an hour before you plan to shape and bake it. It makes setting up for your family pizza night so much easier!
How can I get a crispier crust?
Ah, the coveted crispy crust! The biggest secrets are a super hot oven (500°F or higher is ideal!) and a preheated baking surface like a pizza stone, steel, or even an upside-down heavy baking sheet. Letting the dough get nice and thin also helps. For an extra crispy bottom, make sure the side of the pizza touching the stone is well-floured or oiled. Baking directly on the hot surface, not on foil, also makes a big difference if you have a pizza peel!
What are some creative topping combinations for family fun?
The sky’s the limit for toppings! Beyond the classic pepperoni and mozzarella, get creative! Try a white pizza with ricotta, garlic, and spinach. Or how about a BBQ chicken pizza with red onion and cilantro? A veggie-packed option could include roasted bell peppers, mushrooms, olives, and artichoke hearts. For a little sweetness, try a drizzle of balsamic glaze or honey after baking. It’s all about making it fun and delicious for the whole family’s pizza night!
Are there good gluten-free or low-carb alternatives?
Yes, indeed! While this dough is traditional, there are fantastic alternatives. For gluten-free, you can find pre-made gluten-free pizza crusts or try recipes using cauliflower crusts or almond flour blends for a low-carb option. Just make sure to follow the specific instructions for those dough types, as they often bake differently. You can still use all your favorite restaurant-style toppings!
Sharing Your Pizza Creations
So, how did your pizza night turn out? I’d absolutely LOVE to hear about it! Drop a comment below with your favorite topping combos or tell me about your family’s pizza-making adventures. And if you tried these Restaurant-Style Pizza Night Recipes at Home (2025), please consider rating them – it helps other families find their next favorite meal!
Restaurant-Style Pizza Night Recipes at Home (2025)
Ingredients
Equipment
Method
- In the bowl of a stand mixer, sprinkle the yeast and sugar over the warm water (90 to 100°). Whisk to combine and let sit until bubbles form on the top, about 5 minutes. Add the flour, 1 tablespoon of olive oil, and salt. Mix with the dough hook on low speed until the dough comes together, about 2 minutes. Scrape the bowl. Increase speed to medium-low and mix until well incorporated and the dough is sticky, 2 to 3 minutes more.
- Drizzle the remaining 1 tablespoon of olive oil over the top of the dough and down the sides of the bowl. Use a rubber spatula to flip the dough to coat in the oil. Cover the bowl with plastic wrap and let it rise until doubled, about 1 hour and 30 minutes.
- About 1 hour before you plan to make pizza, place a pizza stone, steel, or an upside-down baking sheet on the upper third rack of your oven. Preheat the oven to 500°F.
- On a lightly floured work surface, cut the dough in half and form into tight rounds. To form a round, flatten the dough into a circle on the counter and fold all edges into the center. Flip it over and gently pull the round against the counter to form a taut ball. Place the rounds on a lightly floured baking sheet, ensuring space for them to rise. If not making pizza immediately, cover with plastic wrap and refrigerate for up to 2 days. Before proceeding, let refrigerated dough sit at room temperature for 30 minutes.
- Place a 14-inch piece of heavy-duty foil on top of an upside-down half-sheet pan. Lightly brush the foil with oil and dust with flour. While working with one dough round, cover the other with plastic wrap.
- On a well-floured surface, press 1 piece of dough into an 8-inch round with a 1-inch outer lip. Carefully lift the dough, cupping the lip to prevent flattening. Rotate the edge of the dough through your hands in a clockwise motion, allowing gravity to stretch it into a round shape. Place the dough back on the flour and stretch it into a 12-inch circle. Transfer it to the prepared foil.
- Sprinkle the surface of the pizza with 2 tablespoons of grated parmesan. Spread 1/2 cup Homemade Pizza Sauce over the parmesan, leaving a 1-inch border. Sprinkle with 1 1/2 cups of low-moisture mozzarella and 1/2 cup of cubed fresh mozzarella.
- Using the upside-down baking sheet as a pizza peel, transfer the pizza with the foil to the preheated baking stone. Bake until the crust is browned and the cheese is bubbling, 12 to 14 minutes. Transfer the pizza from the foil to a cooling rack. Brush the crust with olive oil, sprinkle with basil leaves, and serve hot.
- Repeat the process with the remaining dough, sauce, and cheese. Assemble the pizza just before placing it in the oven.
Notes
Tried this recipe?
Let us know how it was!
Visual Culinary Artist & Aesthetic Designer
When the pandemic killed my career as a luxury hotel photographer overnight, I was stuck in my studio apartment with nothing but time and vegetables. That’s when I started treating meal prep like photography projects—and discovered that the same principles that made five-star dishes camera-ready could turn humble zucchini noodles into social media gold.
My fine arts degree from Parsons taught me that people eat with their eyes first. After years behind the lens capturing haute cuisine, I realized that successful dieting often depends more on visual satisfaction than pure nutrition. When your food looks amazing, you actually want to stick with your eating plan.
My recipe development feels more like an art studio than a test kitchen. I use color theory to guide ingredient selections—purple cabbage with golden cauliflower, emerald herbs against ivory cheese. My “Edible Landscapes” series transforms standard low-carb ingredients into miniature scenic compositions that make vegetables feel aspirational rather than obligatory.
I spend evenings exploring art galleries and practicing watercolor painting, always looking for inspiration. My philosophy is simple: make low-carb food visually irresistible, and dietary compliance becomes an aesthetic choice rather than a health sacrifice.