

Who says Thanksgiving has to be all heavy dishes? I used to think that too, until I saw this *amazing* Thanksgiving veggie tray somebody made. Honestly, it looked like something straight out of a fancy magazine! The first time I tried to recreate a restaurant-style veggie tray at home for Thanksgiving, I totally overcomplicated it. I spent hours arranging veggies, and it still looked… well, a bit sad. But then I remembered a trick from a grandmother I worked with during my recipe testing days. She totally inspired me with her simple, colorful tray. Now, creating a [Restaurant-Style Thanksgiving Veggie Tray at Home] is my go-to. My food science background means I love things that are both pretty *and* practical, and this tray is exactly that – totally achievable and gorgeous!
Why You’ll Love This Restaurant-Style Thanksgiving Veggie Tray at Home
Honestly, this tray is a total game-changer for your Thanksgiving!
- Seriously Easy: You’d think it’s complicated, but it’s not! Super simple to put together.
- Looks Amazing: It’s gorgeous! Your guests will think you slaved away for hours on this [Restaurant-Style Thanksgiving Veggie Tray at Home].
- Healthy & Fresh: It’s a vibrant, healthy option when everyone’s loading up on mashed potatoes and gravy.
- Make-Ahead Magic: Prep it the day before? YES! Major stress-saver.
Creating Your Thanksgiving Veggie Tray Masterpiece
You know, making a Thanksgiving spread look amazing doesn’t have to mean hours and hours of effort. I learned that the hard way! My goal with a [Restaurant-Style Thanksgiving Veggie Tray at Home] is to make it look super impressive, like something a caterer would do, but with just simple, fresh veggies. It’s all about arranging things smartly, not about fancy ingredients. Think bright colors and fun shapes that wow your guests without any fuss.

Ingredients for Your Restaurant-Style Thanksgiving Veggie Tray at Home
Alright, let’s get to the good stuff – what you’ll need to make your very own [Restaurant-Style Thanksgiving Veggie Tray at Home]! Don’t worry, these are all super common things you probably already have or can easily grab. It’s all about making it look fancy with everyday ingredients.
For the Turkey Face: These are for our cute little turkey centerpiece!
- 2 red bell peppers (we’ll use one for the face and the other for some body decoration!)
- 1 baby carrot (this is gonna be our beak!)
- 1/4 yellow bell pepper (for the wattle, you know, that floppy bit under the beak)
- 1 candy eyeball (so our turkey can wink at you!)
For the Veggie Tray: This is where all our colorful veggies come in!
- 2 cups baby carrots
- 1 crown broccoli, cut into bite-sized florets
- 2 cucumbers, sliced
- 1 cup snap peas
- 1 dip (whatever your favorite is! Ranch, hummus, spinach dip – go wild! Just make sure it’s sturdy enough to hold up the turkey face.)
See? Nothing too crazy! We’re just working with simple stuff here to make something really special for your Thanksgiving table.
Equipment Needed for Your Veggie Platter
Okay, so to make this awesome [Restaurant-Style Thanksgiving Veggie Tray at Home] look its best, you don’t need a fancy chef’s kitchen. All you really need is a good-sized serving platter – big enough to spread everything out nicely. And, of course, a small bowl for your dip! That’s pretty much it. Easy peasy, right?
Step-by-Step Guide to Assembling the Veggie Tray
Alright, let’s get this show on the road! Putting together your [Restaurant-Style Thanksgiving Veggie Tray at Home] is actually way simpler than it looks. Trust me, when I first tried, I thought it would take forever, but it’s all about a few easy steps. We’re going to build this beautiful platter piece by piece. You can see how they do it in places like this turkey veggie tray example and get inspired!
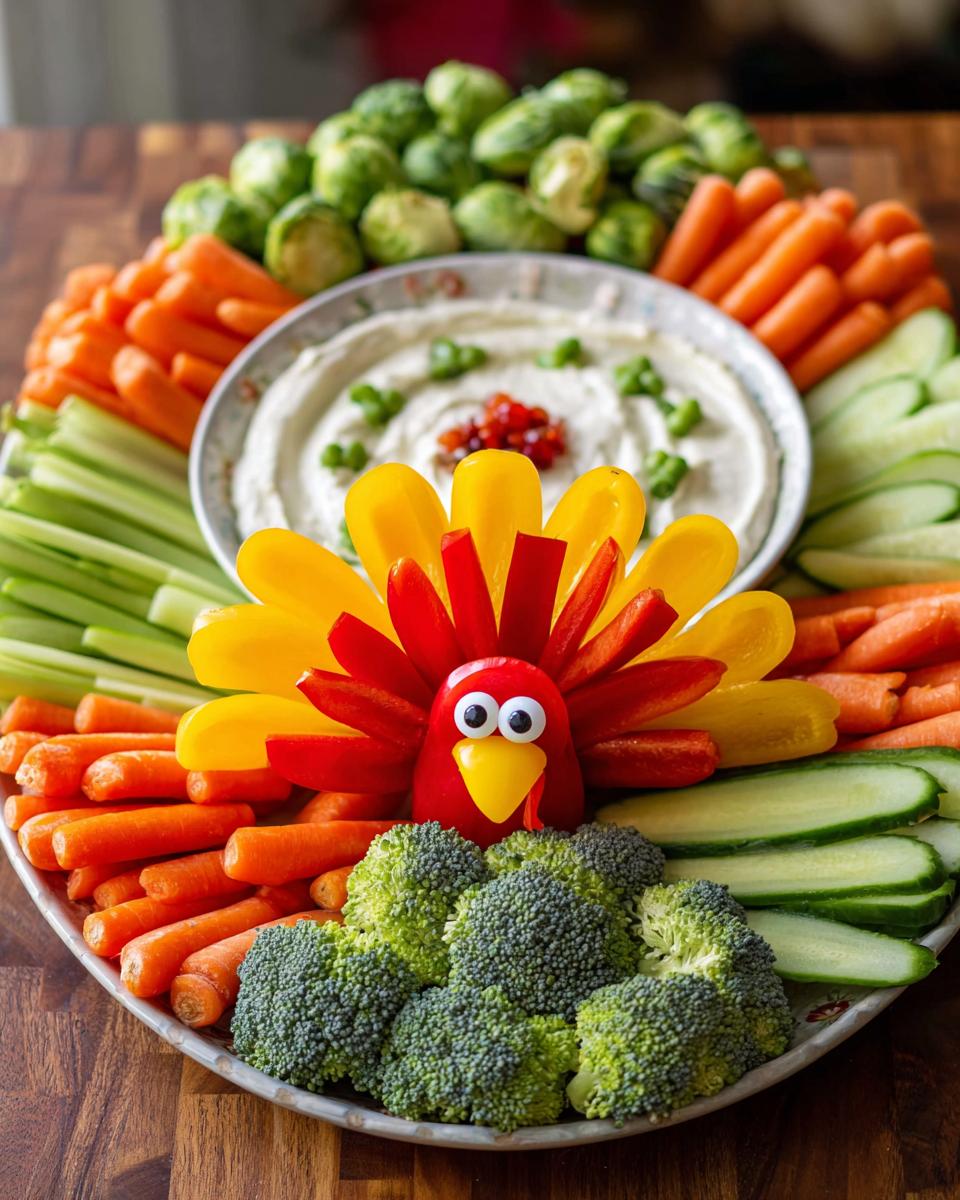
- Let’s Make That Turkey Face! First things first, grab one of your red bell peppers. Cut the very bottom off so it sits flat – that’s gonna be the base of our turkey’s head. Now, take that baby carrot and carefully stick it into the pepper for the beak. For a little extra flair, cut a small piece of the yellow bell pepper and tuck it right under the beak for a cute wattle. And for the eyes? Pop on that candy eyeball! It’s going to be adorable.
- Prep All Your Veggies: While you’ve got everything out, give all your other beautiful veggies a good wash and dry. Slice up those cucumbers, cut the broccoli into nice little florets, and just make sure everything is ready to go. It’s easier to arrange when everything is bite-sized!
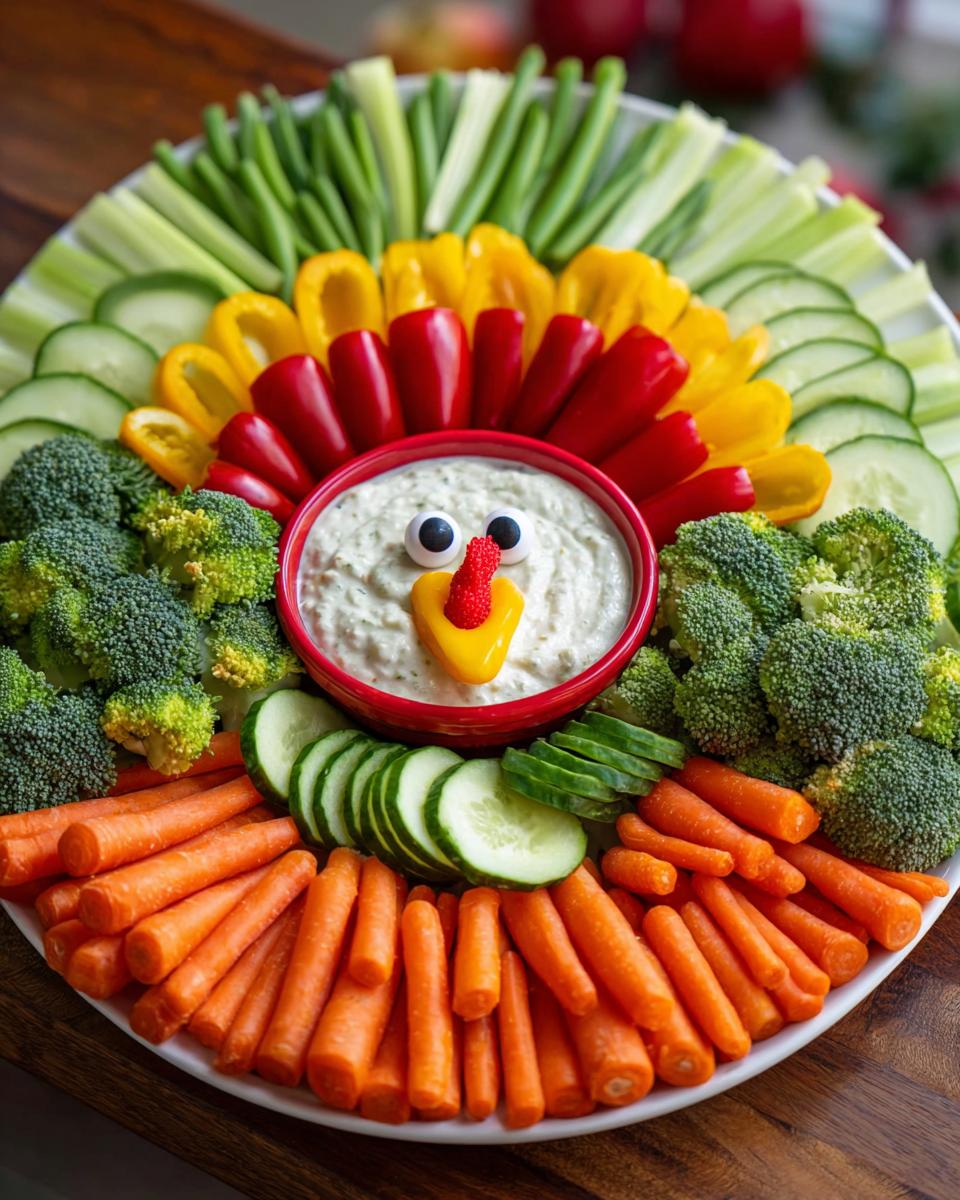
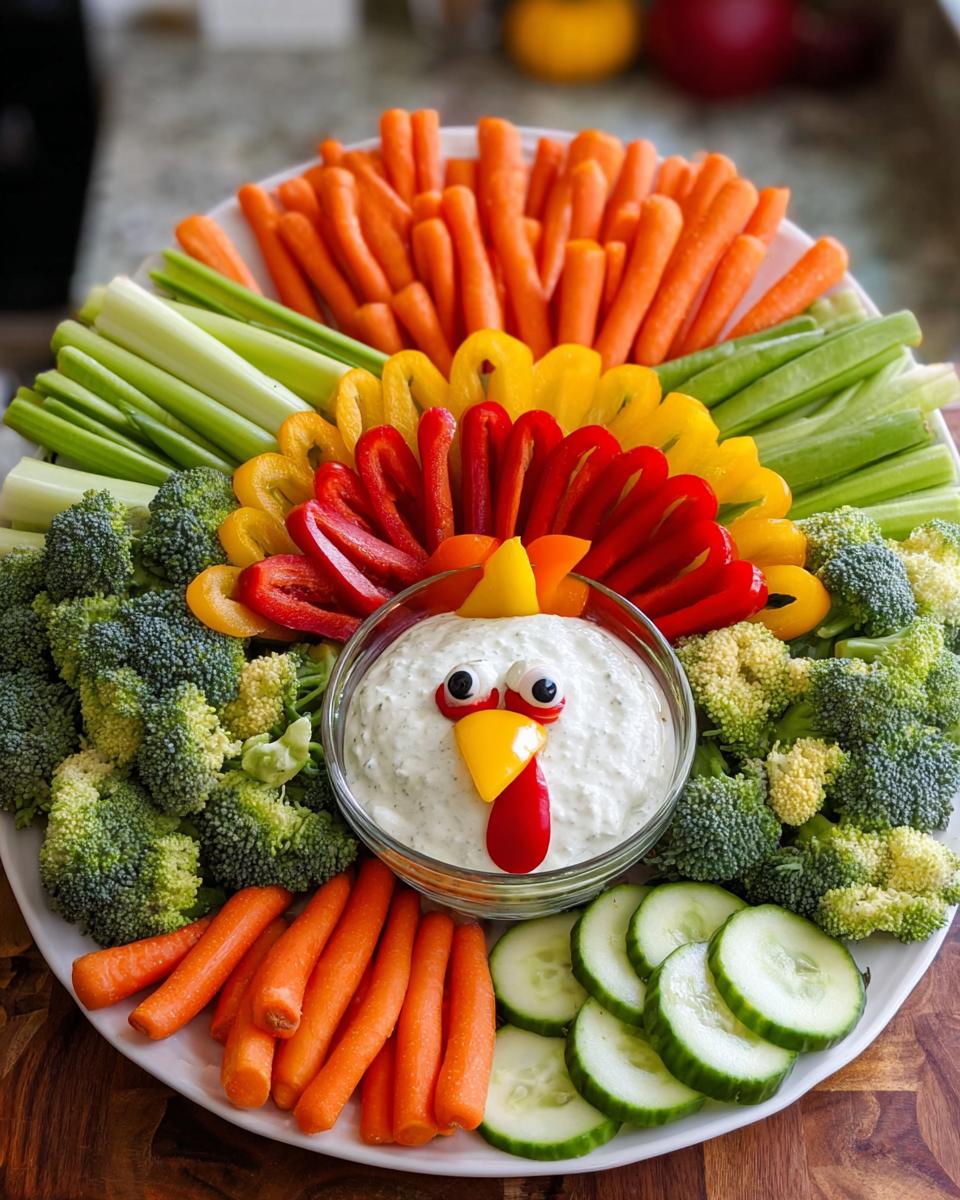
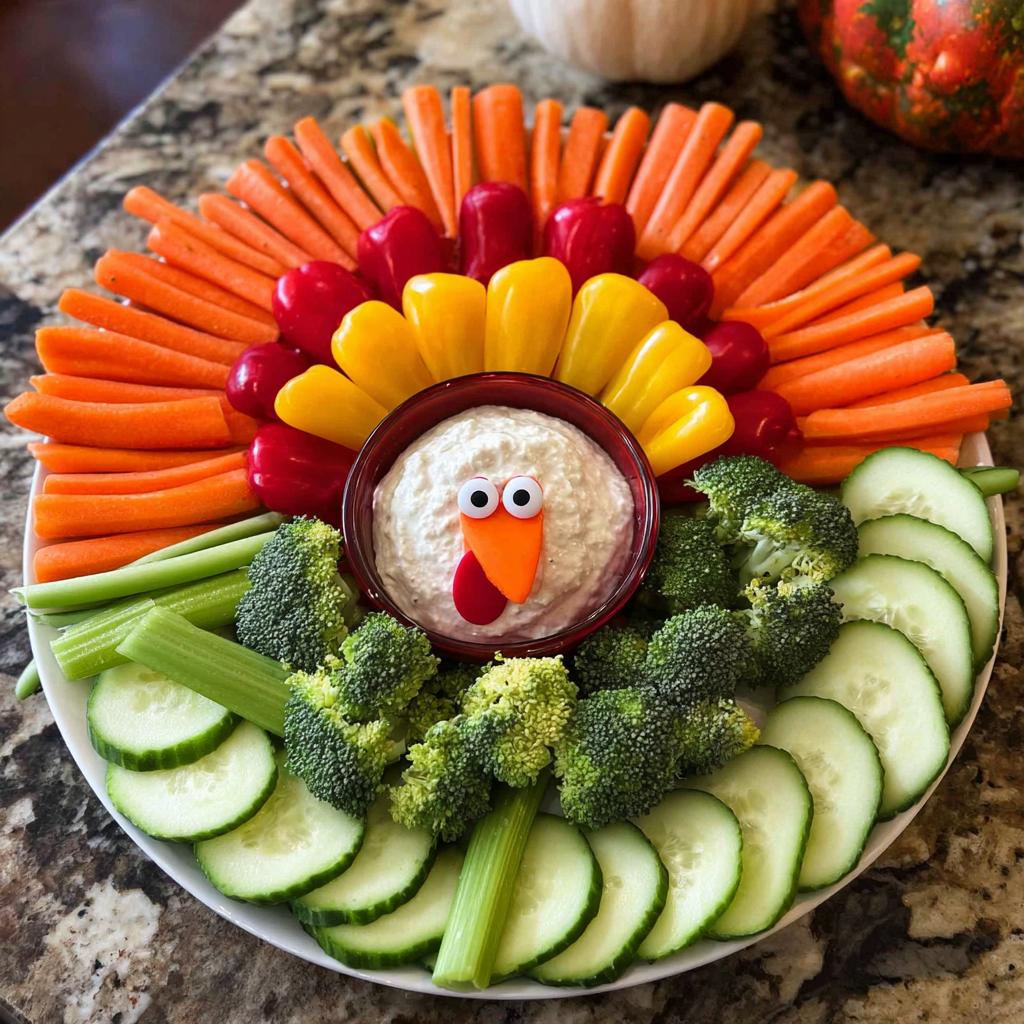
- Start Arranging the Platter: Grab your big serving platter. We’re going to build this like a beautiful rainbow. Start by arranging the sliced cucumbers in a big half-circle along the edge. Then, nestle in those baby carrots next to them. Follow that with some of the red and yellow bell pepper pieces, and then the broccoli florets. Fill in the last bit at the bottom with your snap peas. It’s all about creating these nice, colorful layers.
- Dip & Turkey Time! Now for the grand finale! Place your bowl of dip right in the center of all those gorgeous veggies. And guess what? You’re going to carefully place your perfectly crafted pepper turkey face right into that dip bowl. It’s the crown jewel of your whole [Restaurant-Style Thanksgiving Veggie Tray at Home]! And if you have extra red or yellow pepper bits, you can tuck them around the turkey’s “body” for some extra color.
See? It really comes together so easily! That bowl of dip not only holds your little turkey buddy but also acts as the perfect hub for all those crunchy veggies. For more ideas on fun Thanksgiving sides, check out these low-carb Thanksgiving sides!
Tips for Success and Make-Ahead Magic
Okay, so I’ve tested this [Restaurant-Style Thanksgiving Veggie Tray at Home] *so* many times, and I’ve learned a few tricks to make sure it’s absolutely perfect every single time. The secret weapon? Planning ahead! You can totally wash and chop all your veggies, like the carrots, broccoli, and cucumbers, up to two days in advance. Just store them in airtight containers in the fridge. They’ll stay super crisp that way. Then, the fun part: assembling! You can actually put the whole tray together, veggies and all, up to 24 hours ahead. Just cover it really well with plastic wrap and keep it chilled until your guests arrive. This totally takes the stress out of Thanksgiving day. It’s such a lifesaver during such a busy time, and it means you can just relax and enjoy the moment!
Ingredient Spotlight: Choosing Your Veggies
Honestly, the beauty of this [Restaurant-Style Thanksgiving Veggie Tray at Home] is how simple it is to make it look *stunning* just by picking the right veggies! We want a rainbow here, right? The baby carrots give us that bright orange, the broccoli those lovely green trees, and the cucumbers and bell peppers add pops of green and red. If you want to switch things up, go for it! Maybe some colorful cauliflower florets (purple or orange ones are so fun!), crunchy sugar snap peas, or even some radishes for a bit of peppery bite and a gorgeous pink hue. The key is variety – different colors and textures make it look super inviting and totally restaurant-worthy. For loads more easy, healthy side dish ideas that are totally Thanksgiving-friendly, definitely check out these easy low-carb side dishes!
Serving and Storage for Your Veggie Platter
To make sure your [Restaurant-Style Thanksgiving Veggie Tray at Home] is perfect when it’s time to serve, pull it out of the fridge about 15-20 minutes before your guests arrive. This little bit of time lets the veggies warm up just a bit from being chilled solid. If, by some miracle, you have leftovers (which honestly, rarely happens in my house!), just pack them up in airtight containers. The veggies will stay nice and crisp for a day or two, although they’re definitely best enjoyed fresh!
Frequently Asked Questions About Your Thanksgiving Veggie Tray
Got questions about making the perfect [Restaurant-Style Thanksgiving Veggie Tray at Home]? I’ve got answers! It’s all about breaking down those little details so you can feel super confident. For any other questions, feel free to reach out via our contact page!
Can I make the turkey face ahead of time?
Oh yes you can! Prep the turkey face elements the day before and store them in an airtight container. Just assemble it onto the dip right before serving so it looks its freshest!
What are good dip options for a Thanksgiving veggie tray?
Anything you love! A thick ranch, creamy hummus, or a spinach artichoke dip work great. For healthier options, try a Greek yogurt-based dip with herbs, or check out these delicious low-carb options that pair perfectly.
How do I keep the vegetables from wilting?
Make sure to wash and thoroughly dry all your veggies before cutting. Store them in airtight containers in the fridge. Once arranged on the platter, cover it tightly with plastic wrap to keep them crisp and lovely!
Nutritional Information
Here’s a ballpark of what you’re looking at per serving for this gorgeous [Restaurant-Style Thanksgiving Veggie Tray at Home]. These numbers are estimates, of course, and can change depending on your dip choice and exact veggie portions. Think: around 25 calories, 5g carbs, 1g protein, and 1g fat per serving. It’s a super healthy way to start your Thanksgiving meal!
Restaurant-Style Thanksgiving Veggie Tray at Home
Ingredients
Equipment
Method
- Prepare the turkey face: Cut the bottom off of one red bell pepper. Use a baby carrot for the beak. Place a piece of yellow bell pepper under the beak for the wattle. Add a candy eyeball.
- Wash and cut all vegetables into bite-sized pieces.
- Arrange the veggies on a large platter. Start with sliced cucumbers in a half-circle. Layer carrots, remaining red and yellow bell pepper pieces, and broccoli florets in smaller half-circles. Finish with snap peas at the bottom.
- Place your bowl of dip in the center of the platter. Position the prepared pepper turkey face into the dip bowl.
Nutrition
Notes
Tried this recipe?
Let us know how it was!
Dual-Restriction Recipe Engineer & Cross-Contamination Specialist
Everything changed when my teenage son got hit with celiac disease and Type 1 diabetes diagnoses within six months of each other. Suddenly, pizza and pasta were off the table, and most “diabetic-friendly” foods contained gluten. I went from regular mom cooking to navigating what I call “compound restriction cooking”—and I had a kid’s appetite and taste buds to satisfy.
Lucky for us, my background in pharmaceutical quality control gave me the systematic mindset this level of precision requires. My kitchen now operates under pharmaceutical-grade protocols adapted for home use: dedicated prep surfaces, separate storage systems, and testing procedures that verify both carb counts and gluten absence before any recipe gets published.
I’ve developed over 220 recipes that clear multiple dietary hurdles simultaneously—finding gluten-free thickeners that don’t spike blood sugar, creating bread alternatives that meet both keto ratios and celiac safety, and developing desserts that actually taste good to a teenager despite impossible restrictions.
Through my “Safe Kitchen Certification” program, I teach other parents that managing multiple dietary restrictions isn’t about multiplying limitations—it’s about systematic thinking that reveals unexpected possibilities. When you engineer solutions instead of making compromises, restriction becomes innovation rather than deprivation.