
Thanksgiving is all about gathering around the table, right? But for so many of us juggling dietary needs, from gluten-free challenges to keeping it low-carb, the dessert course can feel like a minefield. I remember my first attempts at GF Thanksgiving pies – let’s just say one crust could have doubled as a doorstop! It was that frustration that really sent me down the rabbit hole, figuring out the science behind why recipes fail and how to make them foolproof. That’s why I’m so excited to share this incredibly easy, no-bake Thanksgiving dessert. It’s the perfect way to learn How to Make Thanksgiving Desserts (Foolproof) without any stress, and trust me, it’s a total crowd-pleaser! As a Certified Nutritional Science Authority, I’ve spent years perfecting recipes that are not only safe but genuinely delicious for those managing celiac disease and metabolic health goals. This layered beauty is proof that you don’t have to compromise on flavor or texture to keep your holiday table happy and healthy.
Why You’ll Love This Foolproof Thanksgiving Dessert
Okay, so why is THIS dessert a total game-changer for your Thanksgiving table? Let me count the ways!
- Seriously Easy: We’re talking no baking involved, which means less stress and more time for you! It’s the perfect dessert when you’re already running around like crazy.
- Make-Ahead Magic: You can totally whip this up a day or two in advance. It just needs a little chill time to set, which is a lifesaver during the holiday rush.
- Deliciously Rich: Imagine layers of creamy, dreamy filling with a nutty, crumbly crust. It’s decadent without being *too* heavy.
- Crowd-Pleaser for Everyone: Best part? It’s naturally gluten-free and low-carb friendly, so everyone at your table can dig in and enjoy. No one will even guess it’s healthier!
Essential Ingredients for How to Make Thanksgiving Desserts (Foolproof)
Alright, let’s talk about what makes this dessert so darn good! It’s all about these simple, yet perfect, ingredients. Don’t worry, they’re all pretty easy to find, and the way they come together is pure magic. Trust me on this!
For the Crust
This is our crunchy, nutty foundation. It smells amazing while it’s baking!
- 1.25 cups all-purpose flour (Make sure it’s real flour, not that weird GF blend for this one!)
- 10 tablespoons butter, melted (Melted is key here – makes it easy to press!)
- 1 cup finely chopped pecans or walnuts (I’m a pecan fan myself, they add that classic Thanksgiving vibe!)
For the Cream Cheese Layer
This is where we get that super smooth, dreamy texture. It’s so creamy and delicious.
- 8 ounces 1/3 less fat (Neufchatel) or regular cream cheese (Just make sure it’s softened so it mixes up easily!)
- 1 cup powdered sugar (For that classic sweetness)
- 1 teaspoon vanilla extract (Don’t skip this – it adds such a nice warmth!)
- 1 container whipped topping (like Cool Whip), from 2 8-ounce containers (This makes it light and fluffy!)
For the Pudding Layer
Two kinds of pudding? Yes, PLEASE! This layer is just pure chocolatey, vanilla goodness.
- 5.1 ounces vanilla instant pudding mix (Just the powder!)
- 5.9 ounces chocolate fudge instant pudding mix (A little chocolate never hurt anybody!)
- 3 cups milk (Any milk you have on hand works, but whole milk makes it extra rich!)
- The remaining 1 container whipped topping (Yes, more fluffy goodness!)
For Garnish
This is just to make it pretty and add a little extra flavor boost!
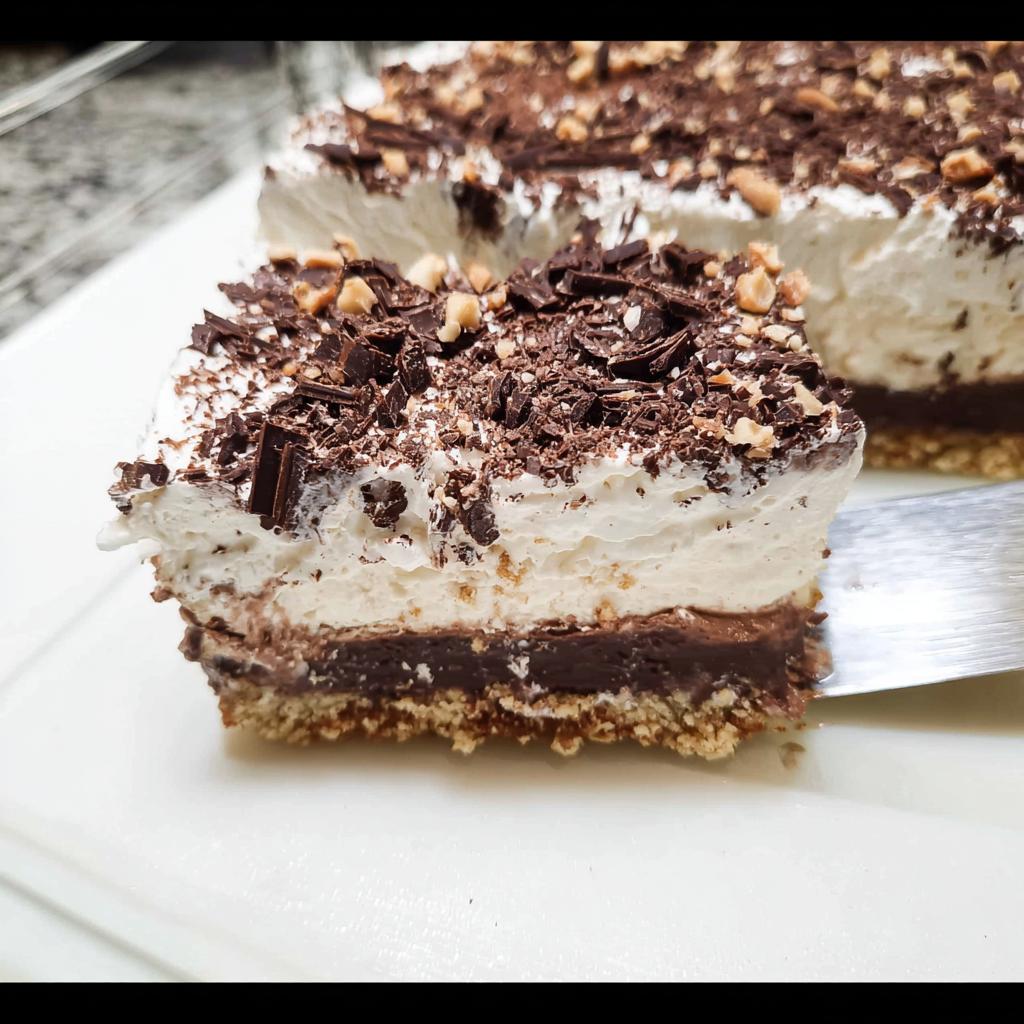
- 1/4 cup grated semi-sweet chocolate bar (Grate it yourself for the best look!)
- Additional finely chopped nuts (optional, for sparkle and crunch!)
Step-by-Step Guide: How to Make Thanksgiving Desserts (Foolproof)
Putting this dessert together is honestly the easy part, which is exactly what we want when the Thanksgiving whirlwind is in full swing! Just follow these simple steps, and you’ll have a showstopper with zero fuss. It’s so straightforward, even if you’re a total beginner in the kitchen. Grab your baking dish and let’s get started! And hey, if you’re ever curious about how to get that perfect gluten-free roux, I’ve got a great guide that might help with other baking adventures!
Preparing the Foolproof Crust
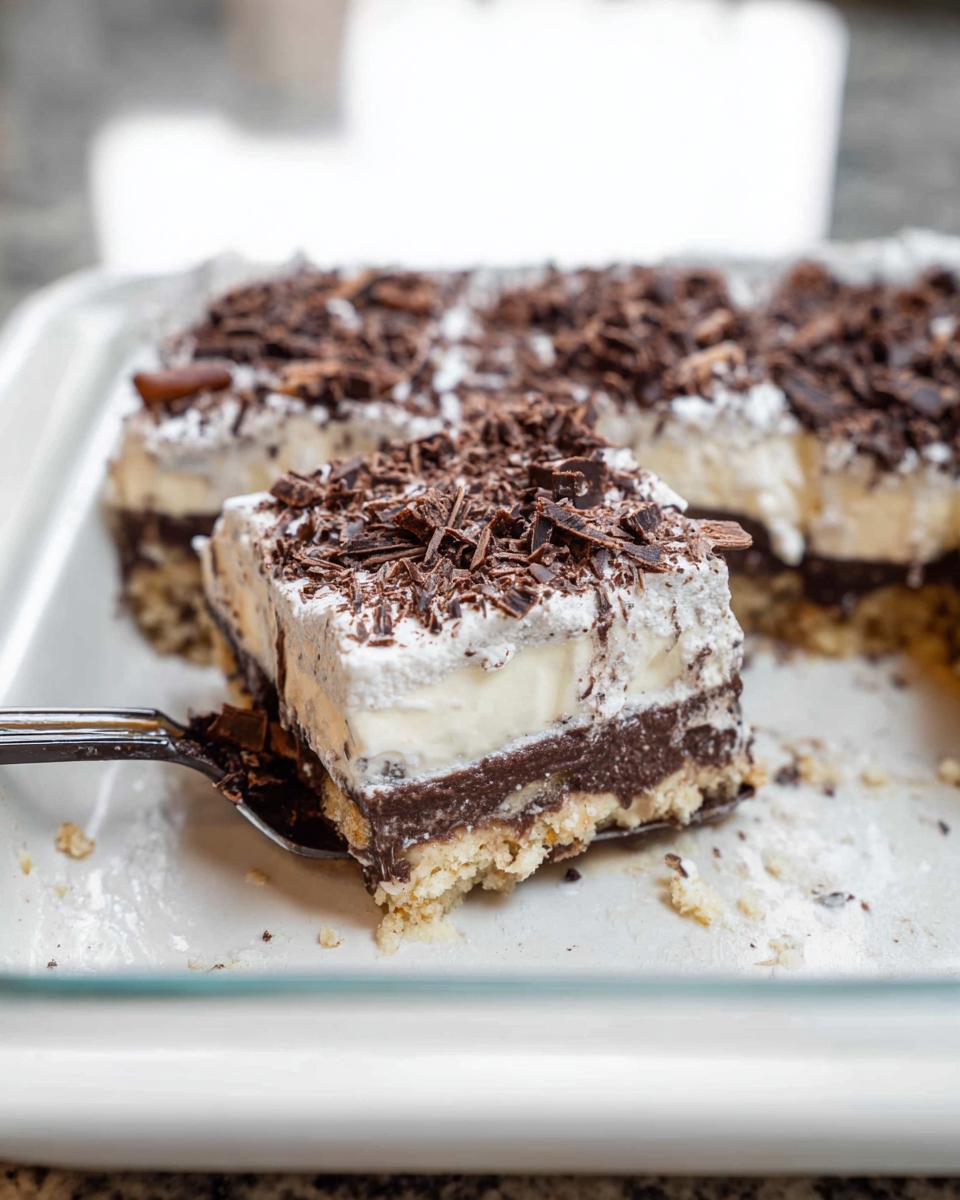
First things first, get that oven preheating to 350 degrees F. While it’s warming up, grab your 13×9 inch baking dish and give it a good spray with nonstick cooking spray. Now, for the crust: just dump your flour, melted butter, and those lovely chopped nuts into a bowl. Mix it all up until it’s nice and crumbly. Press this mixture evenly into the bottom of your prepared dish. Pop it in the oven for about 20 to 25 minutes. You’re looking for a light golden brown color around the edges. Once it’s done, take it out and let it cool completely. This is super important for the next layers!
Creating the Creamy Cream Cheese Layer
Now for the dreamy part! In a separate bowl, grab your electric mixer. Beat together that softened cream cheese, powdered sugar, and vanilla extract until it’s super smooth. Seriously, get it nice and creamy – no lumps allowed! Then, gently fold in one container of the whipped topping. Stir it until it’s all happily combined. Spread this gorgeous, fluffy mixture evenly all over that cooled crust. Don’t worry if it’s not perfectly smooth; rustic is good!
Assembling the Pudding and Top Layers
Time for the pudding! In a clean bowl, whisk together both the vanilla and chocolate instant pudding mixes. Slowly add the 3 cups of cold milk, whisking like crazy until it’s thick and smooth. Oops, still a bit runny? Don’t panic! Just give it another minute or two of whisking. Spread this delicious pudding mixture right over the cream cheese layer. Then, smooth out the *remaining* container of whipped topping over the pudding. You’re basically building delicious layers, like edible strata!
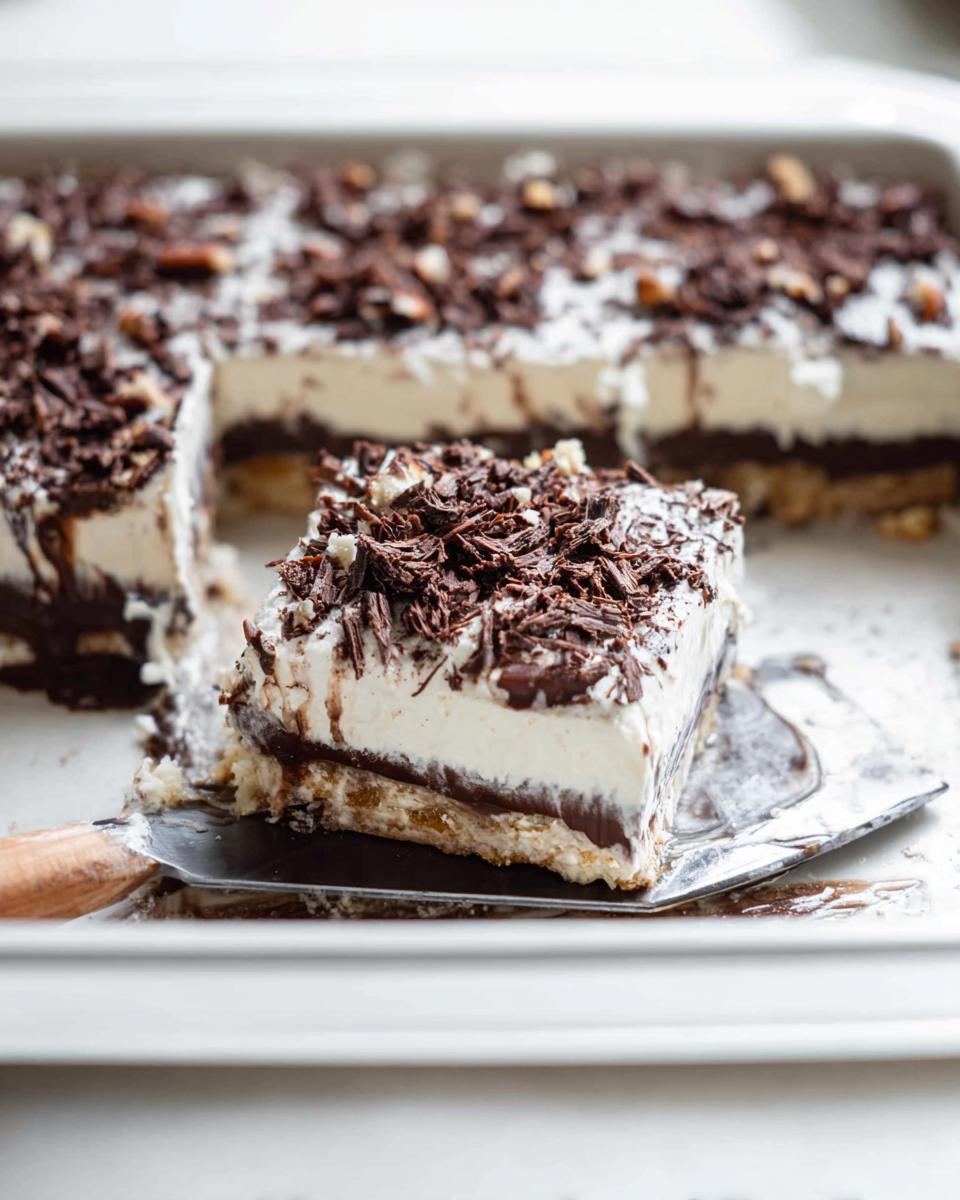
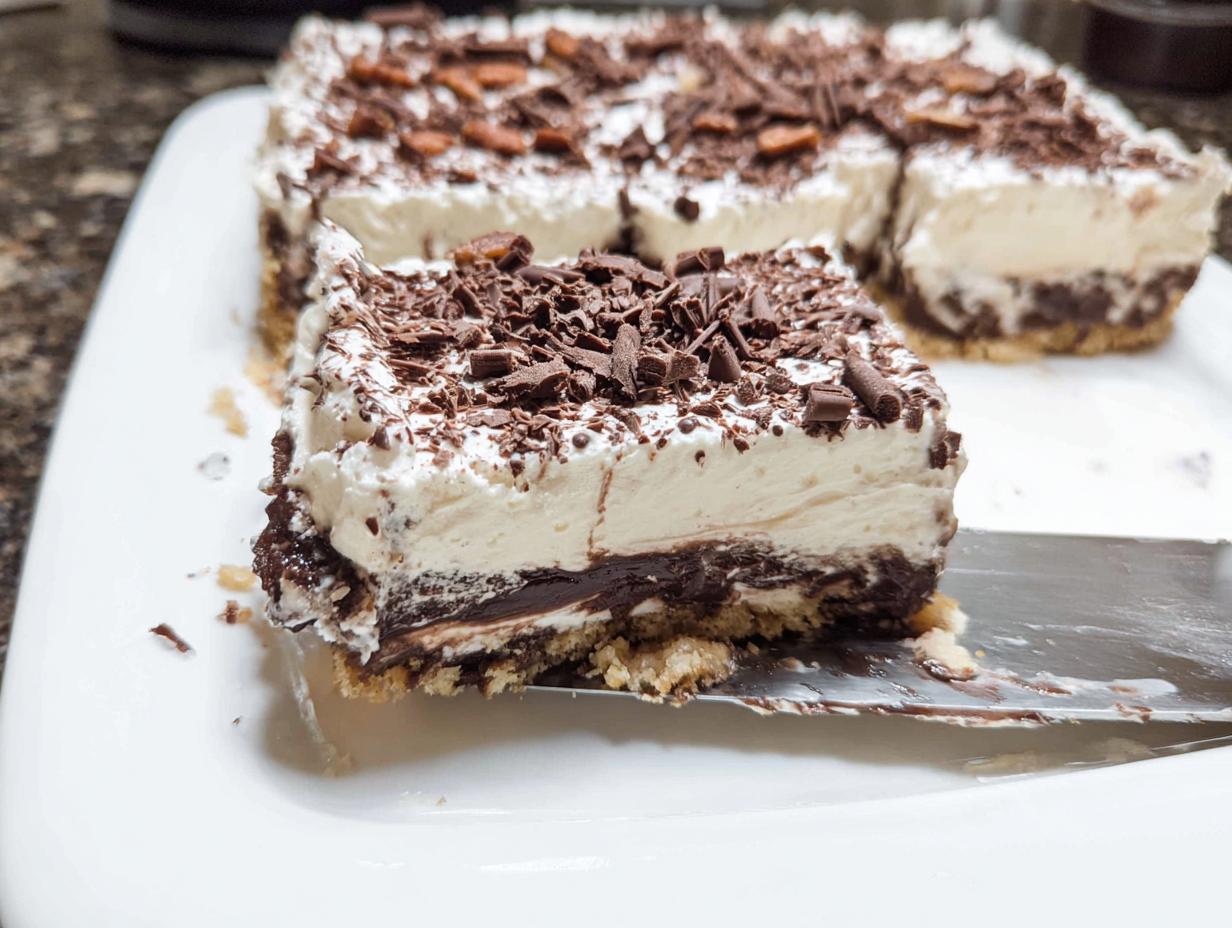
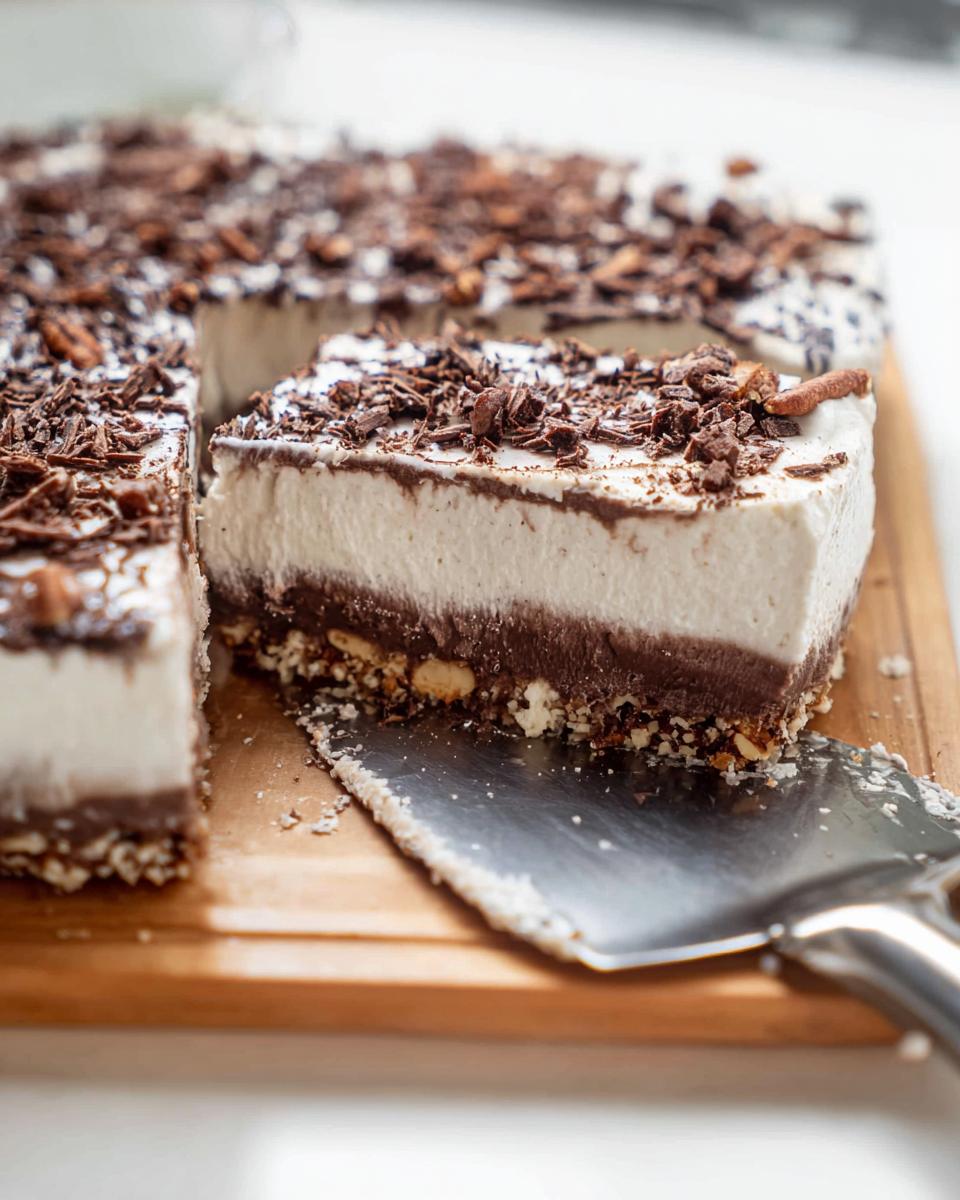
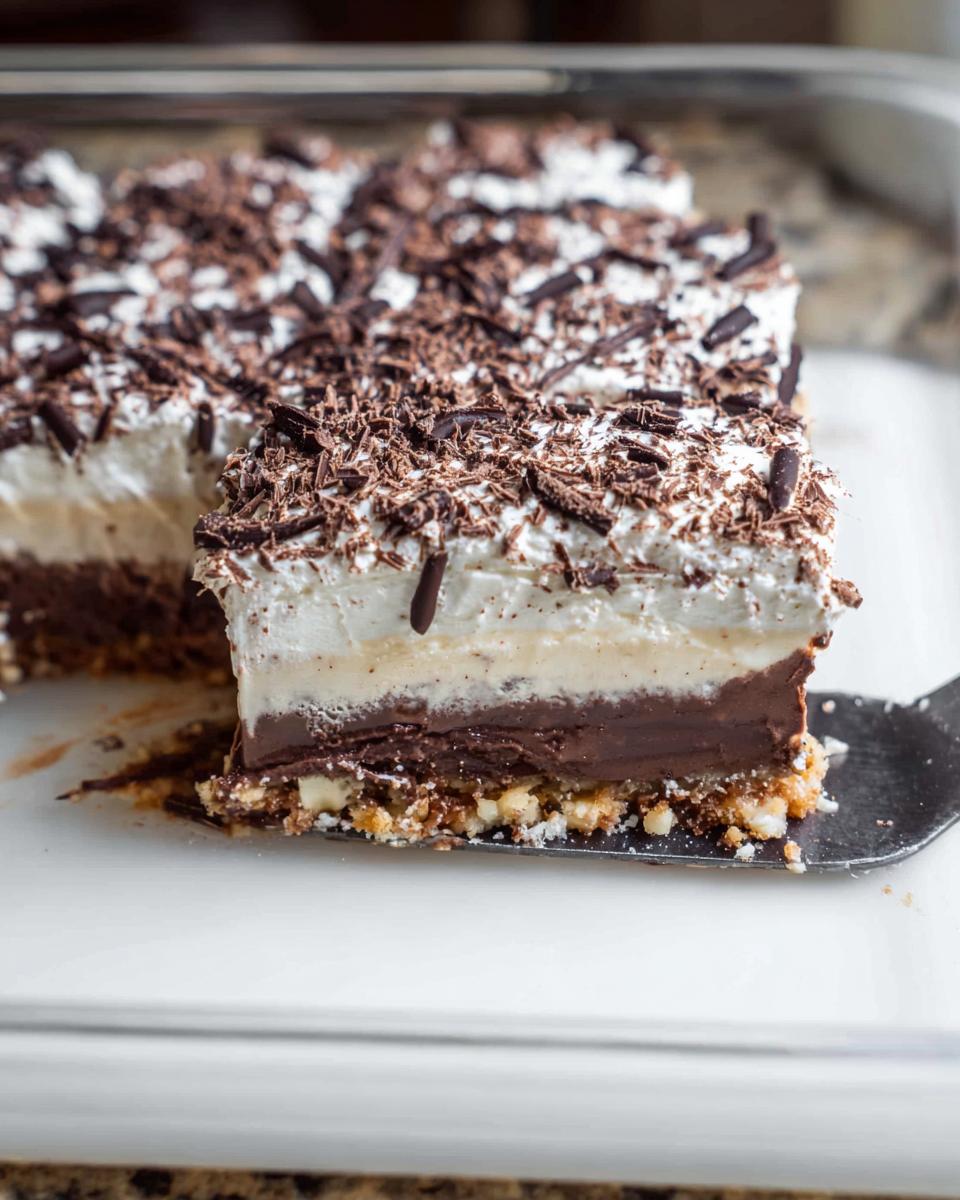
Chilling and Garnishing Your Thanksgiving Dessert
Almost there! Cover that beautiful creation tightly with plastic wrap. Now, here’s the key to making it foolproof: let it chill in the refrigerator for at least two hours, but honestly, overnight is even better. This gives all those layers time to set up perfectly. Before you serve it, sprinkle on that grated semi-sweet chocolate and a few extra chopped nuts if you’re feeling fancy. It just makes it look extra special for Thanksgiving!
Tips for Success with Thanksgiving Desserts
Okay, let’s make sure this dessert turns out absolutely perfect for your Thanksgiving table. A few little tricks can make all the difference, especially with holiday baking! First off, make sure your cream cheese is nice and soft. Cold cream cheese just doesn’t mix well, and you’ll end up with lumps – nobody wants that! I usually take it out of the fridge about an hour before I start. Also, for the pudding layer, use cold milk. That’s what helps the instant pudding thicken up properly. If you’re worried about over-mixing, don’t be! Just mix until things are *just* combined; the pudding and whipped topping are pretty forgiving. And remember, that chilling time is your best friend! It really lets everything set up nicely. If you’re looking for more easy, low-carb, and gluten-free recipes, I’ve got you covered!
Ingredient Notes and Substitutions for Your Thanksgiving Dessert
Let’s chat a bit more about these ingredients, because sometimes you gotta make substitutions, right? For the cream cheese layer, I usually stick with 1/3 less fat cream cheese (also called Neufchatel) because it’s a little lighter, but regular full-fat cream cheese works like a charm too! Just make sure it’s nice and soft before you start mixing. When it comes to the whipped topping, the stuff that comes in a tub like Cool Whip is perfect because it holds its shape really well. If you can’t find it, or have a different brand, just make sure it’s a stable whipped topping. Also, if you’re not a huge fan of pecans in the crust, walnuts are a fantastic swap, or even a mix of both! For a really special touch, check out this amazing Robert Redford dessert – it uses some cool ingredient tricks!
Make-Ahead and Storage Instructions for Thanksgiving Desserts
One of the best things about this dessert is how perfectly it fits into your Thanksgiving plans! Seriously, a lot of the work can be done ahead of time. You can totally make the whole thing, crust and all, a day or even two in advance. Just stick it in the fridge, covered tightly with plastic wrap, and let it chill. The longer it sits, the better those flavors meld together, which is *chef’s kiss* for holiday baking! This really takes the pressure off Thanksgiving Day. If you have any leftovers (which is rare, trust me!), just keep it covered in the fridge. It’s good for about 3-4 days. So yes, ‘make ahead’ is practically this dessert’s middle name! And hey, if you need some ideas for the rest of your meal, I’ve got some fantastic low-carb Thanksgiving side dishes that are just as foolproof!
Frequently Asked Questions About How to Make Thanksgiving Desserts (Foolproof)
Got questions? I’ve got answers! It’s totally normal to have a few little things bubbling up when you’re trying a new recipe, especially for a big holiday like Thanksgiving. Here are some of the most common things people ask about this dessert. I want to make sure you feel totally confident making it!
Can I use different nuts in the crust?
Oh yes, absolutely! Pecans and walnuts are my go-to because they really scream “Thanksgiving!” to me. But feel free to use almonds, hazelnuts, or even a mix of your favorites. Just make sure they’re finely chopped so they blend into the crust nicely. They might change the flavor just a tiny bit, but it’ll still be delicious!
How long does this dessert need to chill?
This is super important for that “foolproof” factor! You really want to let it chill for at least two hours, but honestly, overnight is even better. This gives all those yummy layers time to set up and become firm. If you don’t chill it long enough, it can get a bit messy when you try to cut into it. Patience here really pays off!
Is this dessert gluten-free?
Yep, you bet it is! This recipe is naturally gluten-free, so it’s perfect for anyone in your family with celiac disease or who’s sensitive to gluten. We’re not using any wheat flour in the crust – just regular all-purpose flour works for this one, but double-check your pudding mixes and whipped topping to be sure they’re gluten-free versions. It’s all about those safe, delicious layers!
Estimated Nutritional Information
Now, I gotta be real with you – this is just an estimate, okay? Nutrition can kinda wiggle around depending on the exact brands you use and how generous you are with those garnishes! But, we’re looking at roughly 477 calories per serving, about 60 grams of carbs (mostly from the pudding and crust, naturally), around 7 grams of protein, and about 24 grams of fat. It’s a treat, for sure, but a really, really good one that everyone can enjoy. For more on how I figure out nutrition for all my recipes, you can check out my about page!
Share Your Thanksgiving Dessert Creations
Alright, bakers, I’ve shared my secrets, and now it’s your turn! Did you try making this easy Thanksgiving dessert? I’d absolutely LOVE to hear all about it! Did it turn out perfectly for your crowd? Did you try any fun variations or add your own special touches? Don’t be shy – drop a comment below and tell me all your delicious details! Your feedback and success stories really make my day and help others who might be trying it for the first time. If you’re looking to get in touch for any other reason, feel free to use my contact page!
Foolproof Thanksgiving Dessert
Ingredients
Equipment
Method
- Preheat your oven to 350 degrees F. Coat a 13 x 9 inch baking dish with nonstick cooking spray.
- In a medium mixing bowl, combine flour, melted butter, and chopped nuts until well combined and crumbly. Press this mixture into the prepared baking dish. Bake for 20 to 25 minutes, or until lightly golden brown around the edges. Remove from the oven and set aside to cool.
- In a separate bowl, use an electric mixer to beat the cream cheese, powdered sugar, and vanilla extract. Fold in 1 container of the whipped topping and stir to combine well. Spread this mixture evenly over the cooled crust.
- In a clean bowl, whisk together both the vanilla and chocolate pudding mixes with 3 cups of cold milk until smooth and thickened. Spread this pudding mixture over the cream cheese layer. Spread the remaining container of whipped topping over the pudding layer.
- Cover the dish with plastic wrap and refrigerate for at least two hours or overnight. Before serving, garnish with the grated chocolate and additional finely chopped nuts, if desired.
Nutrition
Notes
Tried this recipe?
Let us know how it was!
Mindfulness & Emotional Wellness Specialist
I never thought I’d leave my career as a corporate litigation attorney, but a panic attack in a courthouse bathroom changed everything. After struggling with emotional eating for over a decade—starting in college and getting worse through the stress of law school—I realized that no diet could fix what was really going on inside me.
My breakthrough came through mindfulness meditation training. Working with Jon Kabat-Zinn’s protocols, I discovered that my relationship with food reflected deeper patterns of anxiety and perfectionism that I’d been avoiding for years. That’s when I understood that sustainable eating changes require internal transformation, not just external rules.
Now I treat meal preparation as meditation practice. My “Mindful Kitchen” workshops help people transform ordinary cooking into opportunities for self-awareness and emotional healing. I’ve developed over 180 recipes designed for slow, mindful preparation—complex enough to keep you present, simple enough not to overwhelm your nervous system.
I believe food becomes medicine when we approach it with presence rather than reactivity. The kitchen can be our monastery if we choose to enter it with reverence.