
Thanksgiving is all about making those comforting, classic dishes shine, right? And let’s be honest, the green beans often get a bit of a… well, a *meh* treatment. But what if I told you that dish could be the showstopper on your holiday table? My goal with this Ultimate Thanksgiving Green Beans Guide: Ingredients, Temps, Tips is to transform those humble beans into something truly special, something elegant and artistic that makes everyone at the table go ‘Wow!’ I still remember the first time I tried to impress my family with my green bean recipe at Thanksgiving. After a year of learning to express my culinary voice through vegetables, I decided to craft a green bean casserole that not only tasted amazing but also looked like a work of art. With fresh green beans adorned with golden slivers of roasted garlic and a sprinkle of toasted almonds, I was finally able to showcase my creative style. When my family took their first bite, the silence spoke volumes, and I knew I had transformed a traditional side dish into a centerpiece of the meal. That moment became my inspiration for sharing this guide, combining the joy of culinary artistry with the warmth of family gatherings.
Why This Ultimate Thanksgiving Green Beans Guide Stands Out
Okay, so what makes this green bean recipe, and this guide, a little different from the rest? For starters, we’re not just talking about *food*; we’re talking about edible art for your table! It’s all about that stunning presentation, that perfect balance of flavors – you know, the savory, the sweet, the little crunch – and doing it all without turning your Thanksgiving into a kitchen battlefield. I’m all about using the freshest ingredients and giving you those chef-inspired little tricks that make everything taste just that much better, but in a way that’s totally doable for you at home.
Gather Your Ingredients for the Ultimate Thanksgiving Green Beans
Alright, time to get our mise en place ready! This is where the magic starts to happen. I’ve found that using the right ingredients, and having them prepped just so, makes *all* the difference. We’re aiming for a super elegant dish, so let’s grab everything we need. You can find some other great recipe ideas over at lowcarbglutenfreedishes.com, but these are special!
For the Green Beans
You’ll want about 12 ounces of haricot vert, those lovely French baby green beans. Trust me, they’re a little more delicate and have a fantastic snap. Just give them a quick toss with 1 teaspoon of olive oil, and have 2 teaspoons of salt ready for the boiling water.
For the Shallots and Garlic
This is where we build some serious flavor! Grab 1 tablespoon of olive oil (we’ll use half for this part). You’ll need 1 large shallot, about 3 ounces, peeled and sliced super thin into rings – almost like little onions. And then, 2 cloves of garlic, minced up nice and fine.
For Garnish
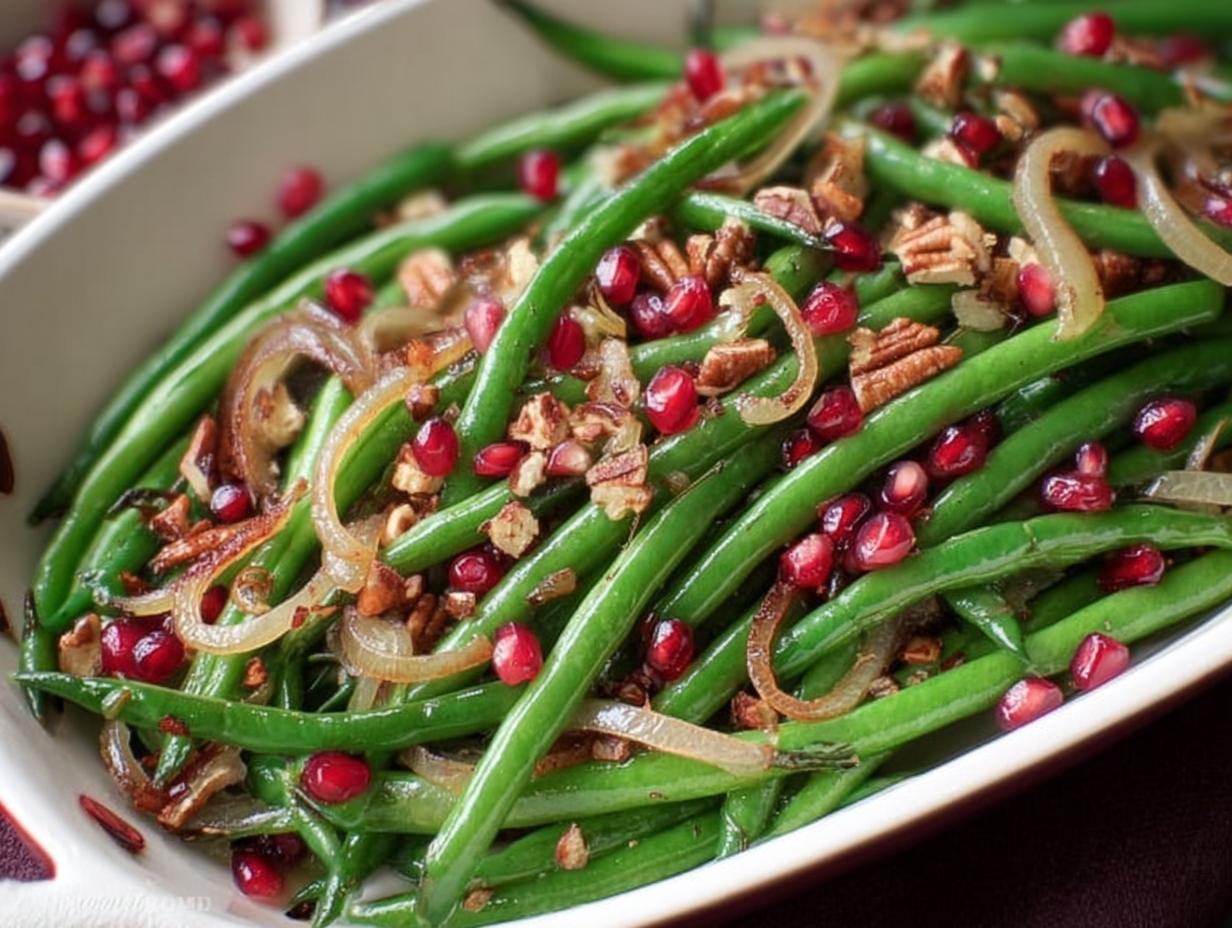
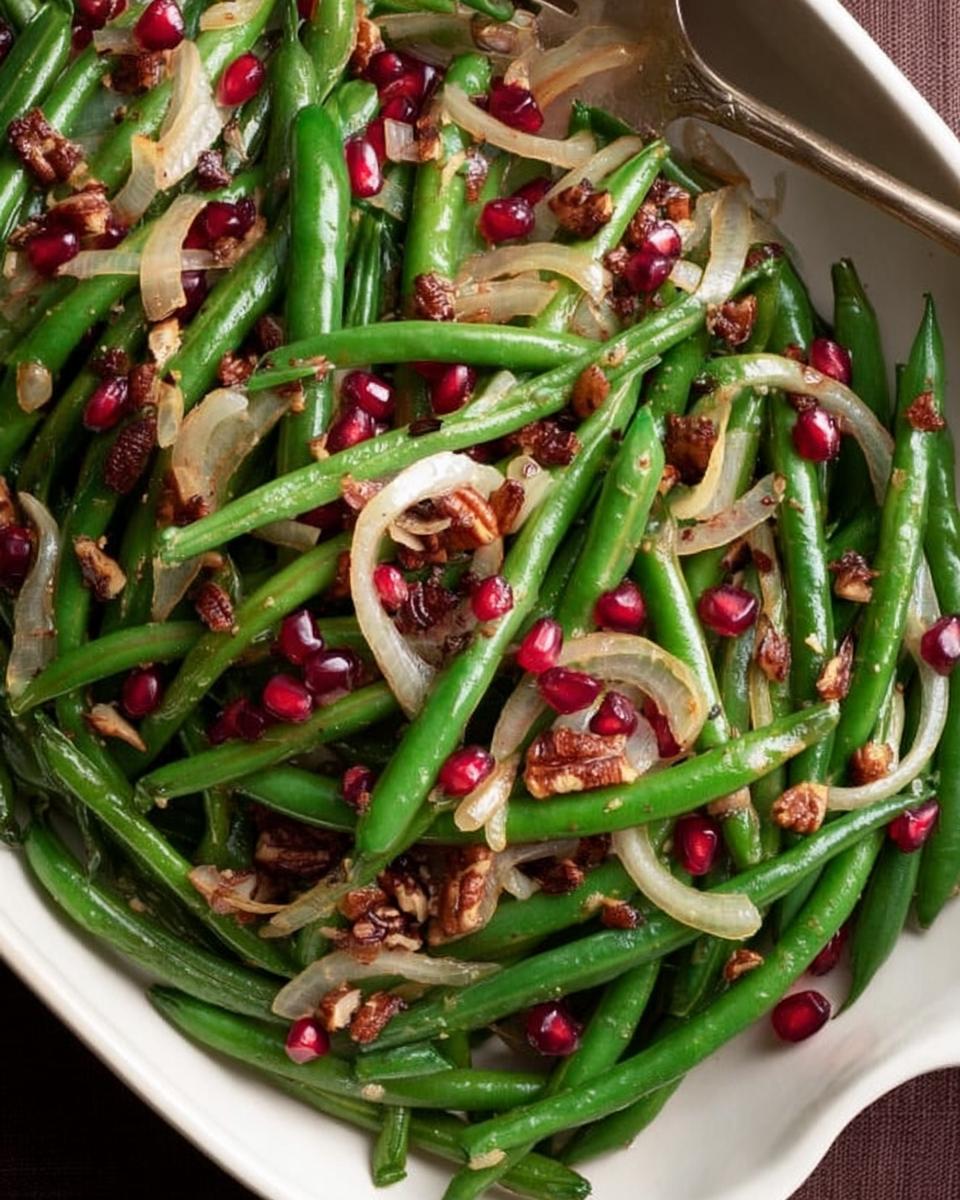
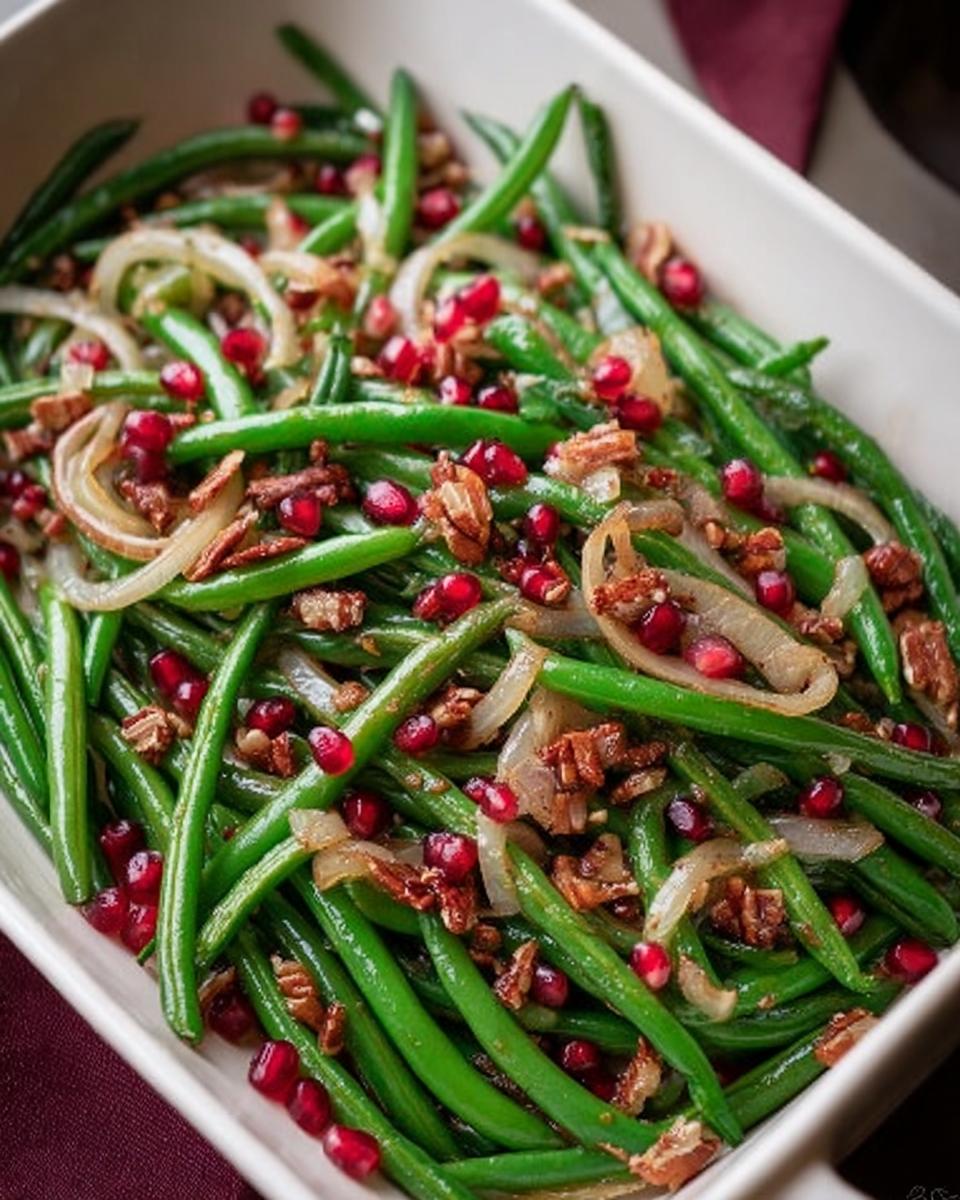
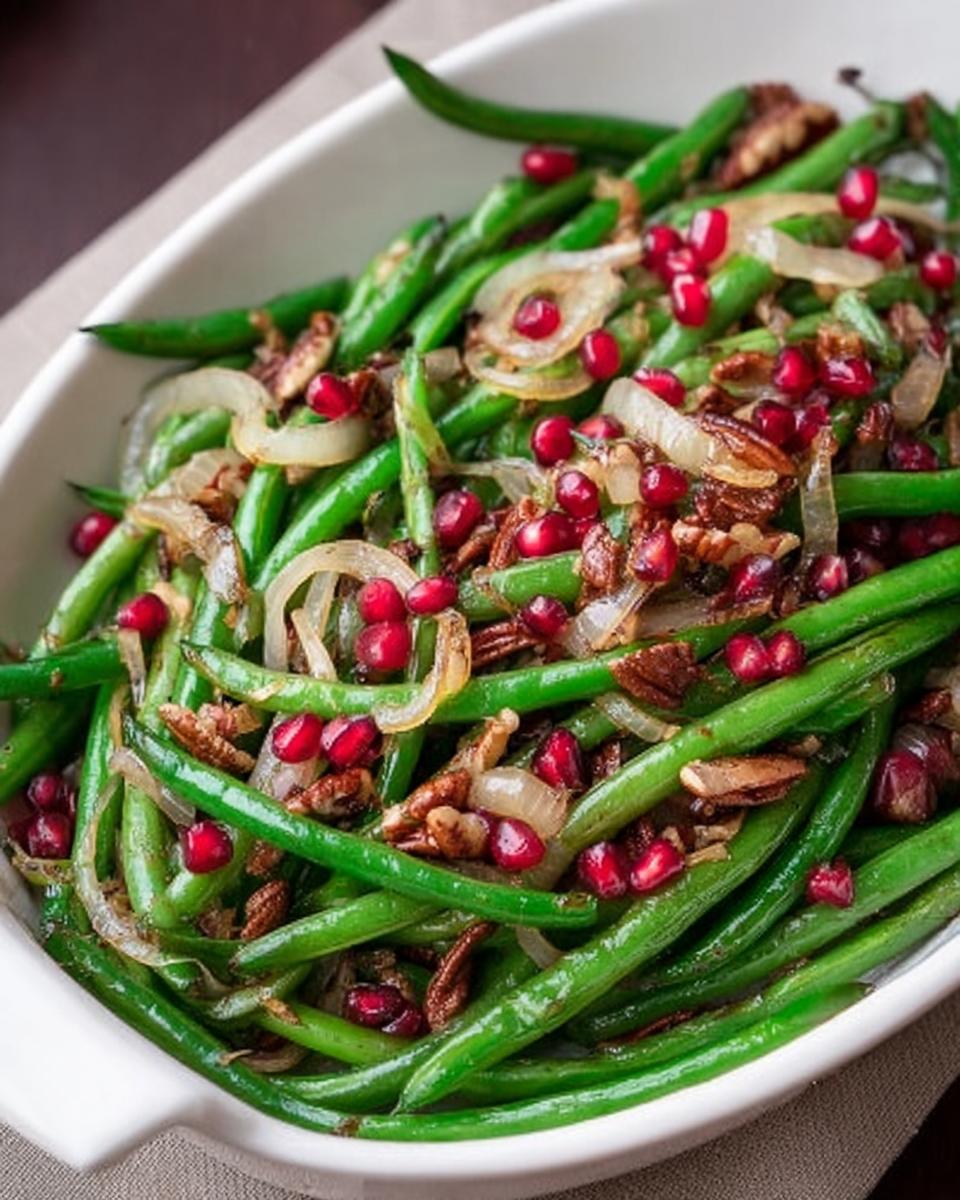
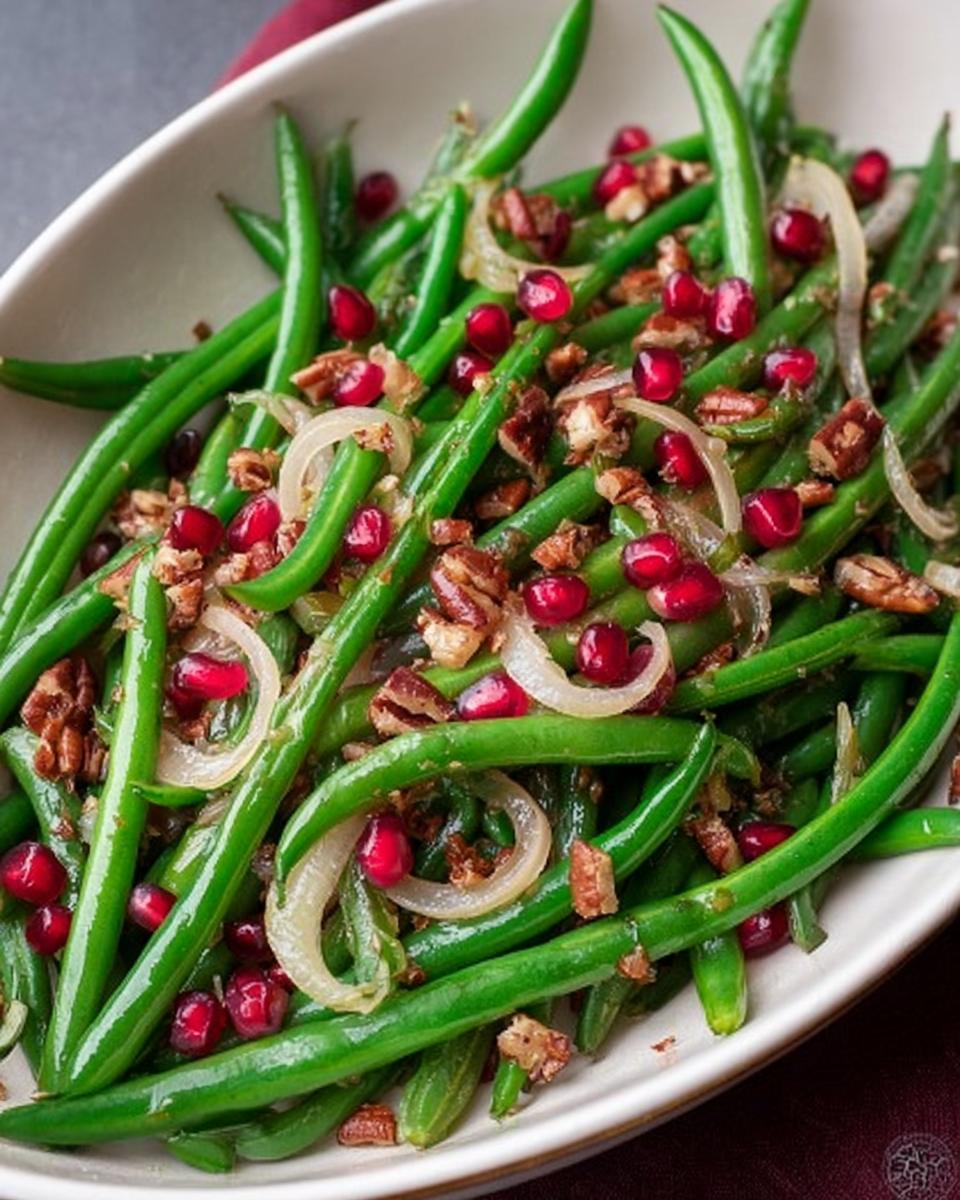
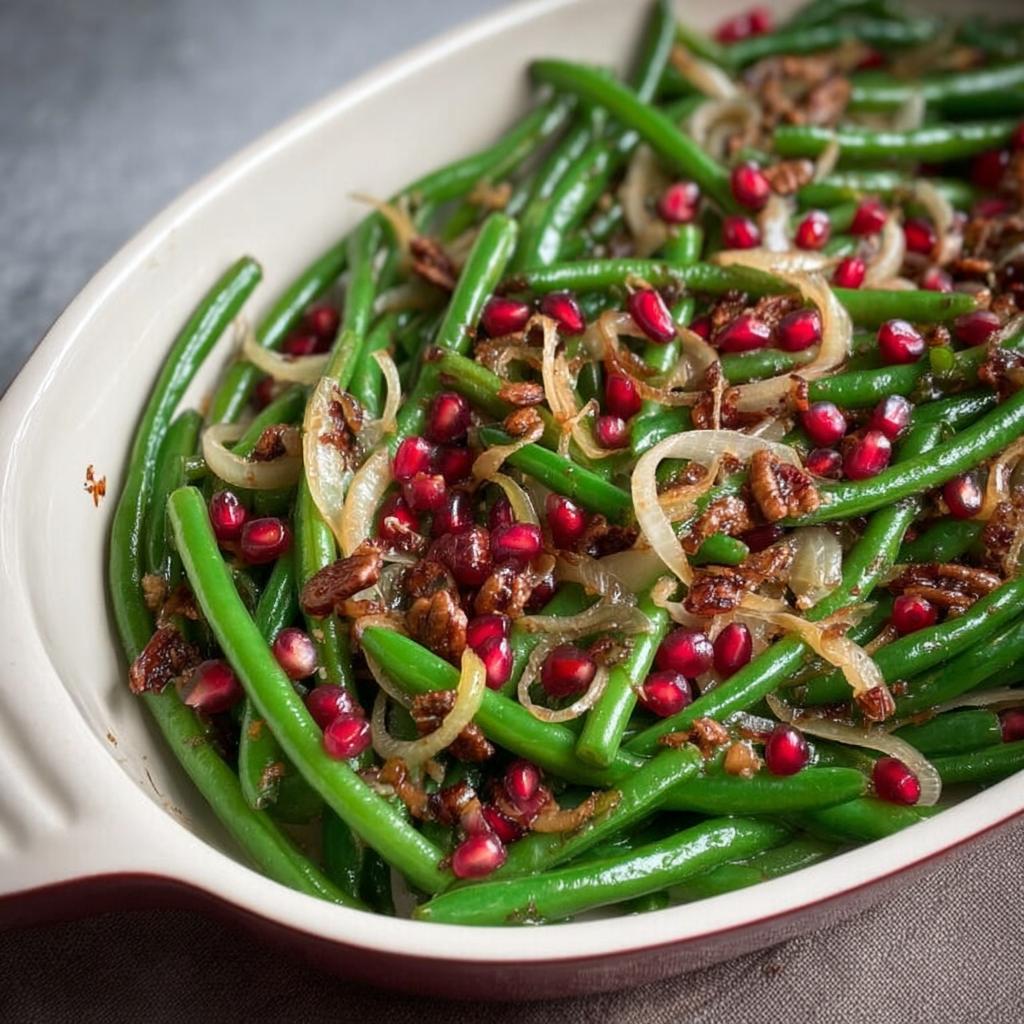
This is the jewelry for our green beans! You’ll need about 3 tablespoons of your favorite chopped nuts. Pecans, hazelnuts, or even pine nuts work beautifully. Just make sure they’re toasted – it really brings out their flavor! And for a pop of color and freshness, a sprinkle of 3 tablespoons of pomegranate seeds will be perfect. Oh, and don’t forget that final touch: just a pinch of 1/4 teaspoon salt and 1/4 teaspoon ground black pepper to tie it all together.
Step-by-Step Instructions for Your Ultimate Thanksgiving Green Beans
Alright, let’s get these beautiful beans ready for their moment in the spotlight! It’s not complicated, but a little attention to detail makes a world of difference, especially when you’re aiming for that perfect texture and flavor. Think of it like painting a masterpiece, each step is important! For more ideas on fantastic Thanksgiving dishes, check out this guide to easy low-carb Thanksgiving sides.
You can also find some other great tips on green beans from afoodcentriclife.com!
Preparing the Ice Bath and Blanching Green Beans
First things first, you gotta get an ice bath ready. Just fill a big bowl about a third of the way with ice cubes and top it off with cold water. While that’s chilling, bring a big pot of water to a rolling boil and stir in a good pinch of salt – about 2 teaspoons. Drop in your haricot vert and let them cook for just 5 minutes. We want them tender-crisp, not mushy! Immediately rescue them from the hot water and plunge them right into that ice bath. This stops the cooking cold and keeps them vibrant green!
Chilling, Drying, and Tossing the Beans
Let those beans chill out in the ice bath for a few minutes. Then, drain them really well. This is key: grab a clean kitchen towel and pat them super dry! Seriously, get them as dry as you can. Once they’re dry, toss them gently with about 1 teaspoon of olive oil. You can cover these and pop them in the fridge now if you’re making them ahead. They’ll keep perfectly for a day or two!
Cooking the Shallots and Garlic
Now for the aromatic magic! Grab a medium pan and put it over medium-low heat. Add about 2 teaspoons of olive oil. Once it’s warm (not smoking hot!), add your thinly sliced shallots. Let them soften and get translucent, stirring now and then, for about 5 minutes. Then, toss in your minced garlic and cook for just another minute until it’s fragrant. Be careful not to burn the garlic! You can cover this mixture and set it aside at room temperature, or even refrigerate it with the beans.
Heating and Assembling the Dish
About 20 minutes before you plan to serve, take those green beans out of the fridge if you prepped them. Arrange them nicely in a large, shallow casserole dish. Spoon that lovely shallot and garlic mixture right over the top. Cover the dish loosely with foil and pop it into a preheated oven at 375°F (190°C) for about 15-20 minutes, just long enough to heat everything through.
Garnishing and Serving Your Masterpiece
Once the beans are nicely heated, carefully take the dish out of the oven. Now for the dazzling finish! Sprinkle your toasted nuts all over – I love the crunch they add! Then, scatter those beautiful ruby-red pomegranate seeds for a burst of color and a hint of tartness. Give it one last tiny sprinkle of salt and pepper. Serve them right away so everyone can enjoy their vibrant color and perfect texture!
Tips for Perfect Ultimate Thanksgiving Green Beans
Okay, let’s talk about making these just *perfect*. It really comes down to a few little things that big chefs know. First off, when you’re picking out your green beans, go for the bright, firm ones – they should snap when you bend them, not just flop over. And for blanching? That 5-minute mark is crucial! Too short and they’re raw, too long and they get sad and mushy. We want that vibrant green, that little bit of *snap* left. Oh, and a little trick for those shallots: when you’re cooking them, just keep an eye on the heat. You want them soft and sweet, not browned and bitter. If they start to look too dark, just scoot that pan off the heat for a sec. For presentation, really lean into those pomegranate seeds and the toasted nuts. They’re not just for taste, they make the dish look like a million bucks! For more quick side ideas and inspiration, you can always peek at this guide to easy low-carb sides.
Make-Ahead and Storage for Your Thanksgiving Green Beans
The best part about these gorgeous green beans is that you can totally get a head start! You can prep the green beans (blanching, chilling, drying, and tossing in oil) a day or two ahead and keep them in the fridge. Same goes for cooking the shallots and garlic; just store them separately. When it’s almost time to serve, just toss them all together in that casserole dish and warm them up in the oven. This means less fuss on Thanksgiving Day and more time for you!
Ingredient Substitutions and Variations
Now, I love these beans just the way they are, but hey, cooking is all about making it your own, right? If you’re not a fan of pecans, no worries! Toasted slivered almonds or even some crunchy pumpkin seeds work wonderfully. And for the shallots, you *could* use a very mild red onion, thinly sliced, but I find shallots have a sweeter, more delicate flavor that just sings here. If you want to jazz it up even more, a little grating of lemon zest right before serving adds a bright spark, or some fresh chopped chives sprinkled in will give it a lovely fresh bite. For more ideas on how to customize your favorite dishes, check out this guide to easy low-carb gluten-free recipes.
Troubleshooting Common Green Bean Issues
Even with the best intentions, sometimes things don’t go exactly as planned in the kitchen. If your green beans end up a bit too mushy, don’t fret! That usually means they cooked a minute too long in the blanching step, or they didn’t get into that ice bath fast enough. Next time, just shave off 30 seconds from the boiling time. If your shallots seem a little undercooked or bland, it might be because the heat was too high. Try cooking them slower, over lower heat, to really let them soften and sweeten up. And if it all tastes a bit bland, remember that final sprinkle of salt and pepper – it really wakes everything up! A little taste test before garnishing is always a good idea.
Nutritional Information
Okay, so talking numbers! Here’s a ballpark for what you’re looking at with this recipe, per serving. It’s about 126 calories, 11 grams of carbs, 3 grams of protein, and 9 grams of fat. Remember, this is just an estimate, and your exact numbers might shift a tiny bit depending on the specific brands you use or if you swap out an ingredient!
Share Your Ultimate Thanksgiving Green Beans Creation
Now that you’ve got the secrets to these show-stopping green beans, I absolutely *have* to see what you create! Did you try the pomegranate seeds? How did your family react? Drop a comment below, let me know how it turned out, or better yet, share a picture on social media and tag me! If you loved this recipe, taking a moment to rate it would mean the world. For any questions or just to say hi, feel free to reach out through the contact page. Happy cooking!
Ultimate Thanksgiving Green Beans Guide: Ingredients, Temps, Tips
Ingredients
Equipment
Method
- Prepare an ice bath: Fill a large mixing bowl ⅓ full of ice, then add cold water. Set aside.
- Boil the green beans: Bring a large pot of water to a full boil. Add 2 teaspoons of salt. Add the green beans and cook for 5 minutes. Immediately remove the beans and plunge them into the ice bath to stop the cooking.
- Chill and dry the beans: Chill the beans in the ice bath for a few minutes, then drain them well. Pat them dry and toss with 1 teaspoon of olive oil. Cover and refrigerate until ready to serve. This can be done 1-2 days in advance.
- Cook the shallots and garlic: Place a medium sauté or fry pan over medium-low heat. Add 2 teaspoons of olive oil. When the oil is warm, add the sliced shallots. Cook until soft and translucent, stirring occasionally, about 5 minutes. Add the chopped garlic and cook for 1 minute longer. You can refrigerate this mixture until serving or leave it at room temperature, covered.
- Prepare for serving: If the green beans were chilled, remove them from the refrigerator about an hour before serving. About 20 minutes before serving, place the green beans in a large shallow casserole dish. Top with the cooked shallots and garlic. Cover with foil and place in the oven to heat through.
- Garnish and serve: Once the green beans are hot, remove them from the oven. Top with the toasted nuts and pomegranate seeds. Serve immediately.
Nutrition
Notes
Tried this recipe?
Let us know how it was!
Dual-Restriction Recipe Engineer & Cross-Contamination Specialist
Everything changed when my teenage son got hit with celiac disease and Type 1 diabetes diagnoses within six months of each other. Suddenly, pizza and pasta were off the table, and most “diabetic-friendly” foods contained gluten. I went from regular mom cooking to navigating what I call “compound restriction cooking”—and I had a kid’s appetite and taste buds to satisfy.
Lucky for us, my background in pharmaceutical quality control gave me the systematic mindset this level of precision requires. My kitchen now operates under pharmaceutical-grade protocols adapted for home use: dedicated prep surfaces, separate storage systems, and testing procedures that verify both carb counts and gluten absence before any recipe gets published.
I’ve developed over 220 recipes that clear multiple dietary hurdles simultaneously—finding gluten-free thickeners that don’t spike blood sugar, creating bread alternatives that meet both keto ratios and celiac safety, and developing desserts that actually taste good to a teenager despite impossible restrictions.
Through my “Safe Kitchen Certification” program, I teach other parents that managing multiple dietary restrictions isn’t about multiplying limitations—it’s about systematic thinking that reveals unexpected possibilities. When you engineer solutions instead of making compromises, restriction becomes innovation rather than deprivation.