
Oh, the holidays! Doesn’t the thought of cooking the main event just send a tiny shiver of panic down your spine? Every year I felt that pressure. I still remember the first time I tackled a prime rib for a major gathering. I was a nervous wreck, honestly, unsure if I could produce a dish worthy of my family’s high expectations.
But wow! After hours spent researching and practicing, I finally pulled it out of the oven, and that rich, beefy aroma filled the whole house. It was perfect! The roast was beautifully crusted and unbelievably juicy, and my family’s applause at the dinner table was music to my ears. That experience just ignited my passion for proper meat prep after that!
If you’re aiming for the ultimate centerpiece this year, you’ve come to the right place. Trust me, I’m going to share exactly what I learned about the whole process, especially the secret to getting a flawless result with this guide that guarantees you’ll learn about the Perfect Prime Rib — Carving & Resting Tips Inside. We’re going to make roast beef success your new tradition!
Achieving the Perfect Prime Rib: Selection and Prep
Deciding on your roast is half the battle, right? Don’t just grab the first hunk of beef you see! For a truly impressive, beautiful roast, I always aim for about a 7-pound roast with three to four bones. If the butcher has already tied the bones away from the meat, that’s okay, but you’ll want to tie them right back on (I’ll show you how in the carving notes!).
Listen, this next part is non-negotiable if you want that gorgeous, dark crust that screams ‘holiday perfection.’ You absolutely have to grab a stack of paper towels and pat that beautiful beef until it is bone dry on all sides. Moisture is the enemy of browning, plain and simple. Also, pull it out of the fridge about two hours before you plan to start cooking so it can come up to room temperature. This helps everything cook way more evenly!
Essential Ingredients for a Perfect Prime Rib — Carving & Resting Tips Inside
You don’t need a million things for this! The flavor comes from focusing on quality salt and the beef itself. If you’re making my optional zesty sauce, you’ll need heavy cream and sour cream, plus that kick of prepared horseradish. Remember that salt—use kosher salt, we aren’t really using table salt here. Make sure you have about a tablespoon handy, and don’t forget that reliable meat thermometer; it’s our best friend for knowing exactly when to pull this beauty out of the heat.
You can check out more general cooking temperature guides right here if you want, but for prime rib, precision is key!
The Roasting Method for Even Cooking
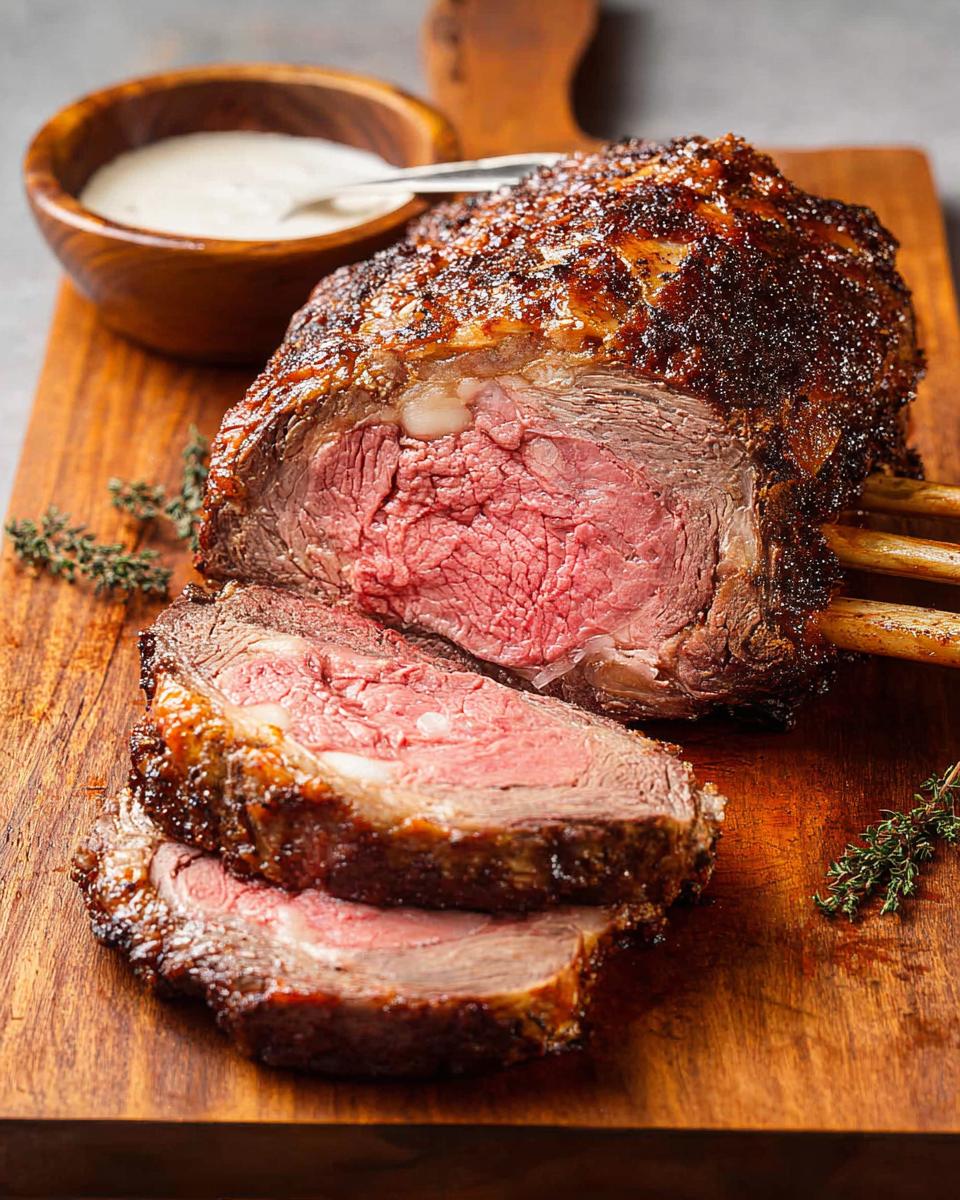
Okay, now that we’ve fussed over the beef and got it perfectly prepped, it’s time for the oven magic! For a great crust, we start hot. You want to crank that oven up to 450°F (that’s 230°C) and roast the prime rib for a quick 15 minutes. That initial blast gives us that beautiful, savory dark sear we are looking for. Don’t skip this part! After those glorious 15 minutes are up, immediately drop the temperature down to a cozy 325°F (160°C).
This two-stage process is the secret to achieving what I call ‘Even Cooking’—a great crust on the outside while keeping the inside tender. Now, this is where we rely on science, folks, not guesswork! You absolutely need a good meat thermometer inserted into the thickest part, making sure you don’t touch any bone. For medium-rare, you’re looking for about 13 to 15 minutes per pound at that lower heat. If you want medium, bump that time up just a touch, maybe 15 to 17 minutes per pound. Keep an eye on that gauge!
For general cooking guides, you can always peek at this other guide I put together, though the technique for beef is a little different, the thermometer rules always hold true!
Temperature Targets for Your Perfect Prime Rib
This is critical! Pull that roast out of the oven when the thermometer reads 120°F (49°C) if you hope for medium-rare, or 130°F (54°C) for a true medium. Why so low? Because the cooking doesn’t stop when you pull it out! It keeps climbing—that’s carryover cooking, baby. If you wait until it hits 135°F in the oven, you’ll cut into a well-done roast, and nobody wants that after all this work!
For more detailed roast beef instruction, I found this excellent guide online that talks about classic methods you might enjoy reviewing: The Kitchn’s Classic Prime Rib.
Why Resting is Key to a Tender Roast
If you think pulling that gorgeous roast out of the oven is the victory lap, hold right there! We have one more, non-negotiable step before we even think about carving. You absolutely need to let that prime rib rest for a solid 30 minutes. I know, I know, waiting is hard when your kitchen smells like heaven, but think of this as the most important part of achieving that ‘Tender Roast’ everyone dreams about.
When meat cooks, all those delicious, flavorful juices get pushed toward the center. If you try to slice it right away, all that wonderful moisture just rushes out onto your cutting board—and nobody wants a dry roast! Resting lets those juices gently move back throughout the muscle fibers. It’s like letting the meat relax after a long, hot workout.
Once it’s out of the oven, transfer that prime rib straight to a cutting board and tent it loosely with some aluminum foil. Don’t wrap it tight, or you’ll steam up that beautiful crust we worked so hard for! This 30-minute vacation is what guarantees juicy results every single time you make this roast.
If you need a refresher on general foolproof cooking techniques, always remember these core steps apply to almost everything: foolproof cooking basics can help prep you for success!
Mastering the Art of Perfect Prime Rib — Carving & Resting Tips Inside
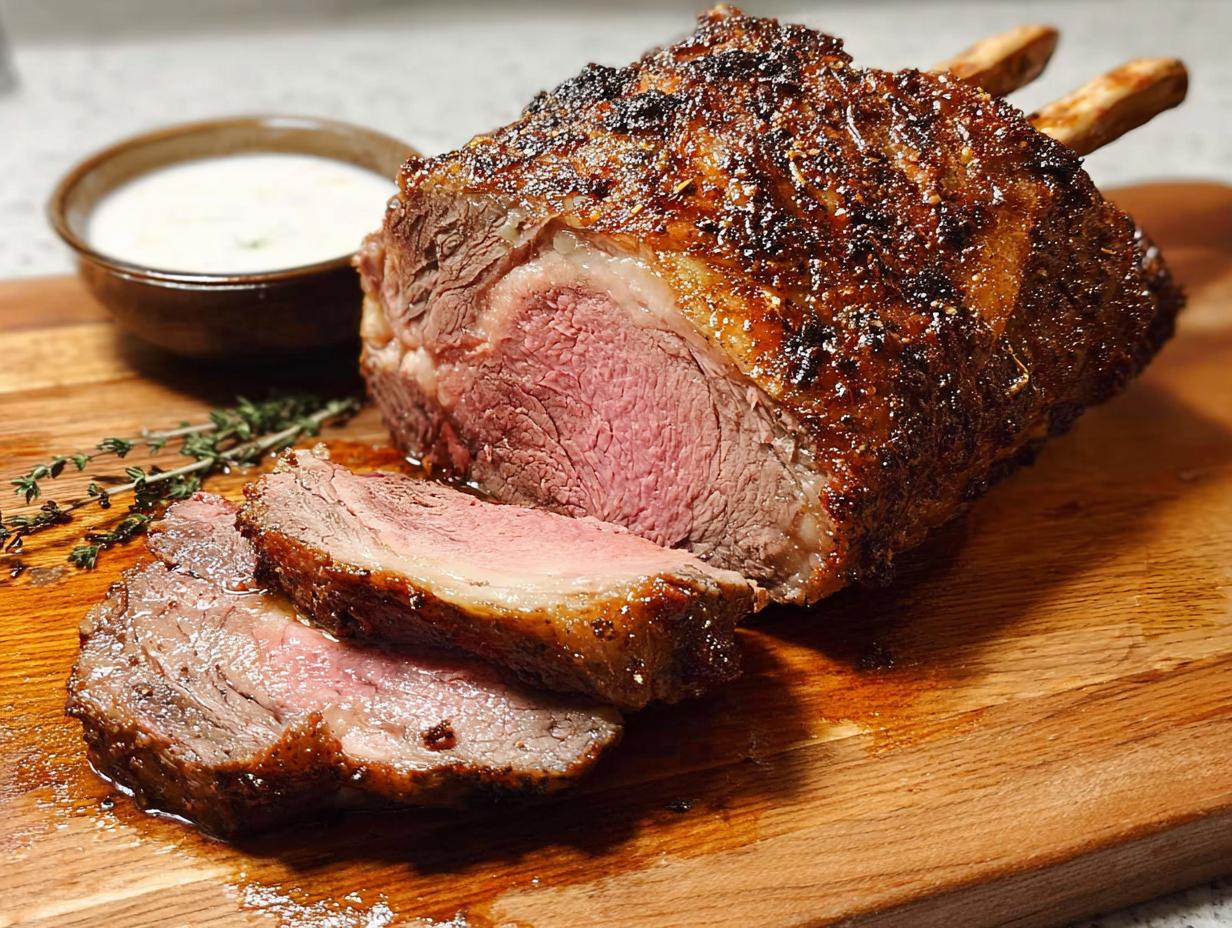
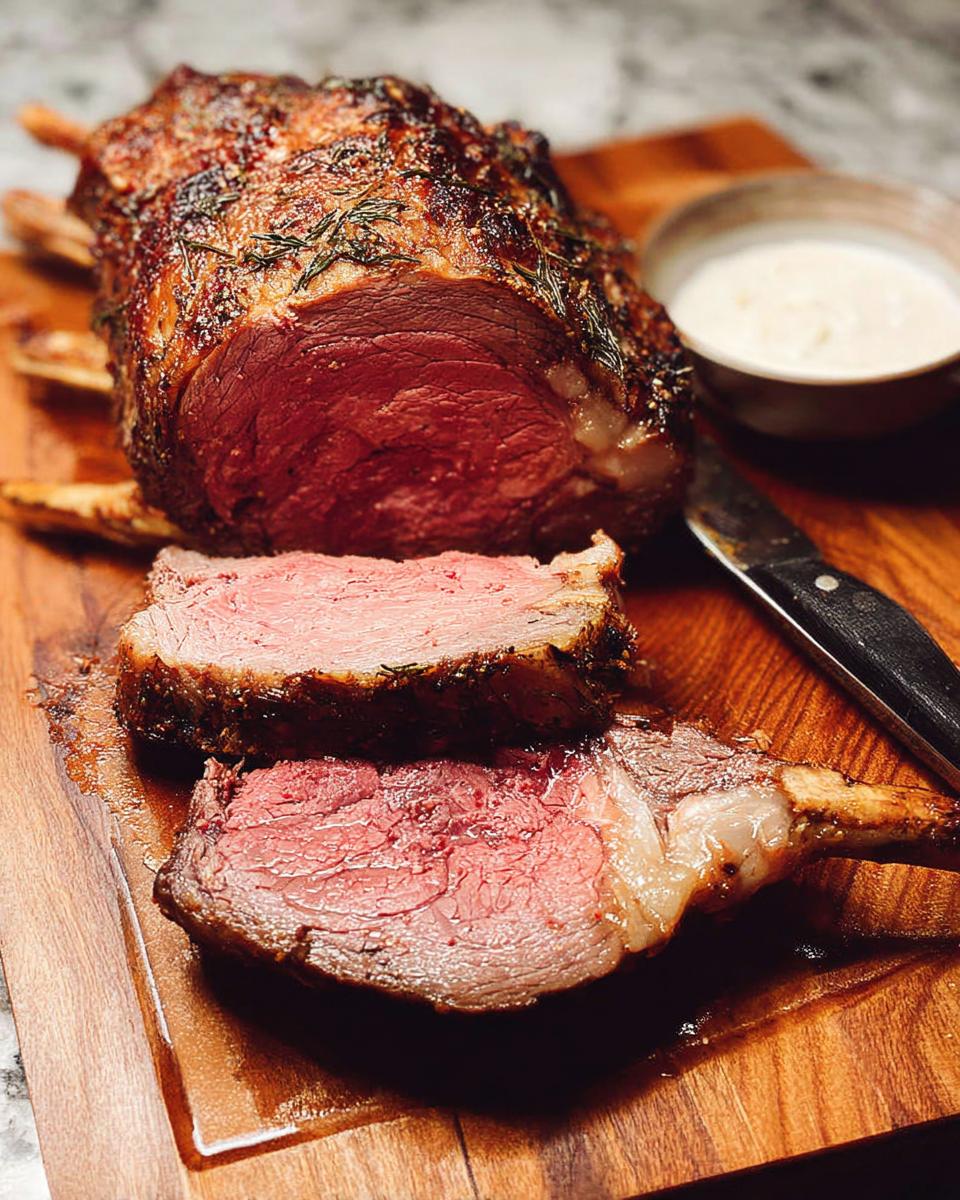
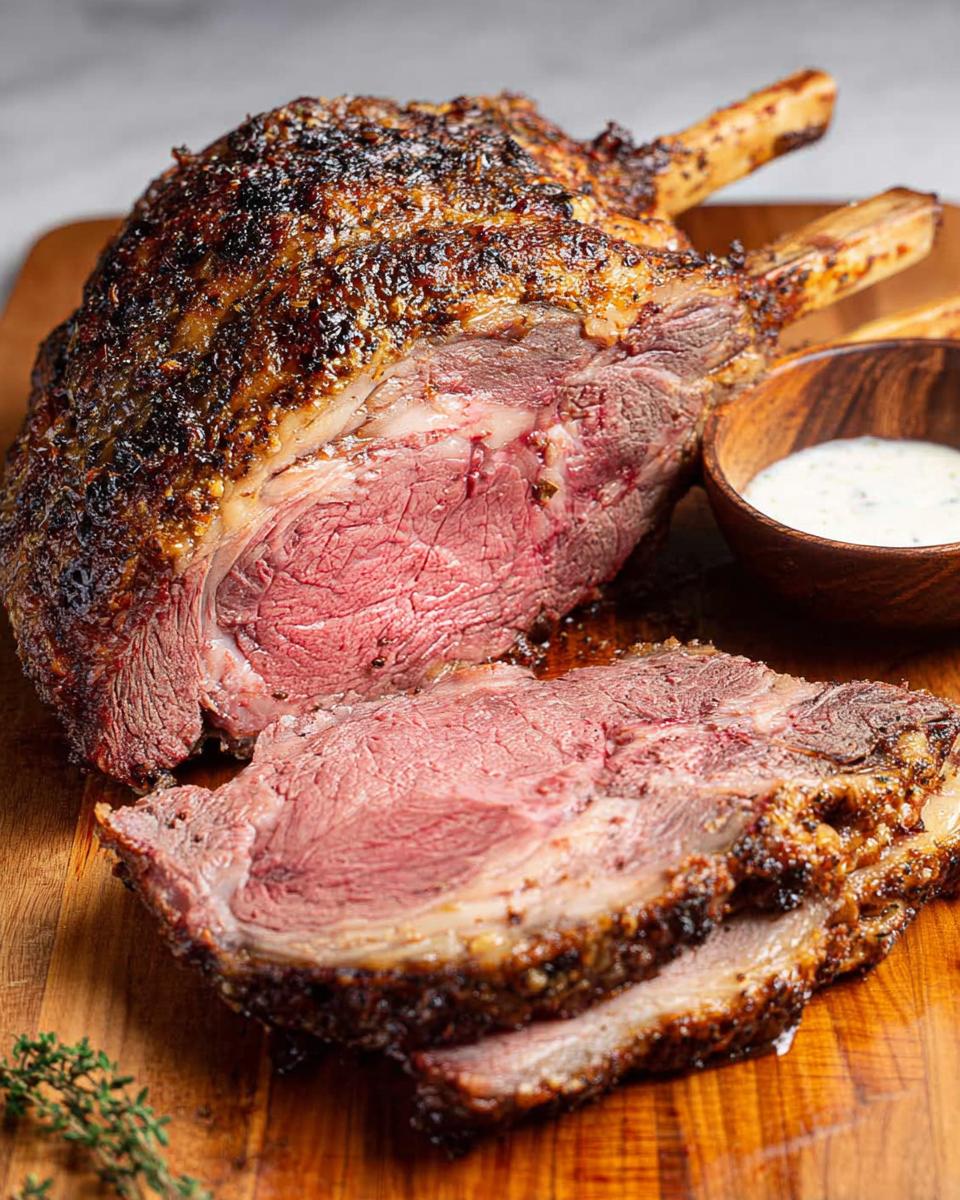
Okay, my friend, the resting is done. The moment of truth has arrived! This is where we execute on the second half of our promise: the Perfect Prime Rib — Carving & Resting Tips Inside. First things first: grab those butcher’s strings and carefully snip them away from the roast. If you tied the bones back on earlier, simply slice right between the bones to separate them from the meat chunk. Having that visual separation makes your life so much easier!
Now, you need a serious carving knife—not a flimsy steak knife! A long, sharp carving knife is your best friend here for clean, pretty slices. Take the main piece of meat and start slicing it against the grain. Slicing against the grain is what keeps every bite incredibly tender. If you cut with the grain, you end up with long, chewy strands, and we don’t want that tough texture. I usually aim for slices that are about a half-inch thick, but definitely tailor it to how your family likes it!
For extra dining pleasure, you can always serve those glorious bones right on the platter beneath the meat—it just screams ‘magnificent centerpiece!’ Plus, I always sneak the first, perfectly cooked slice (the ‘chef’s treat’) right off the cutting board before I bring the rest to the table. It’s tradition!
Carving Techniques for a Beautiful Holiday Dinner Presentation
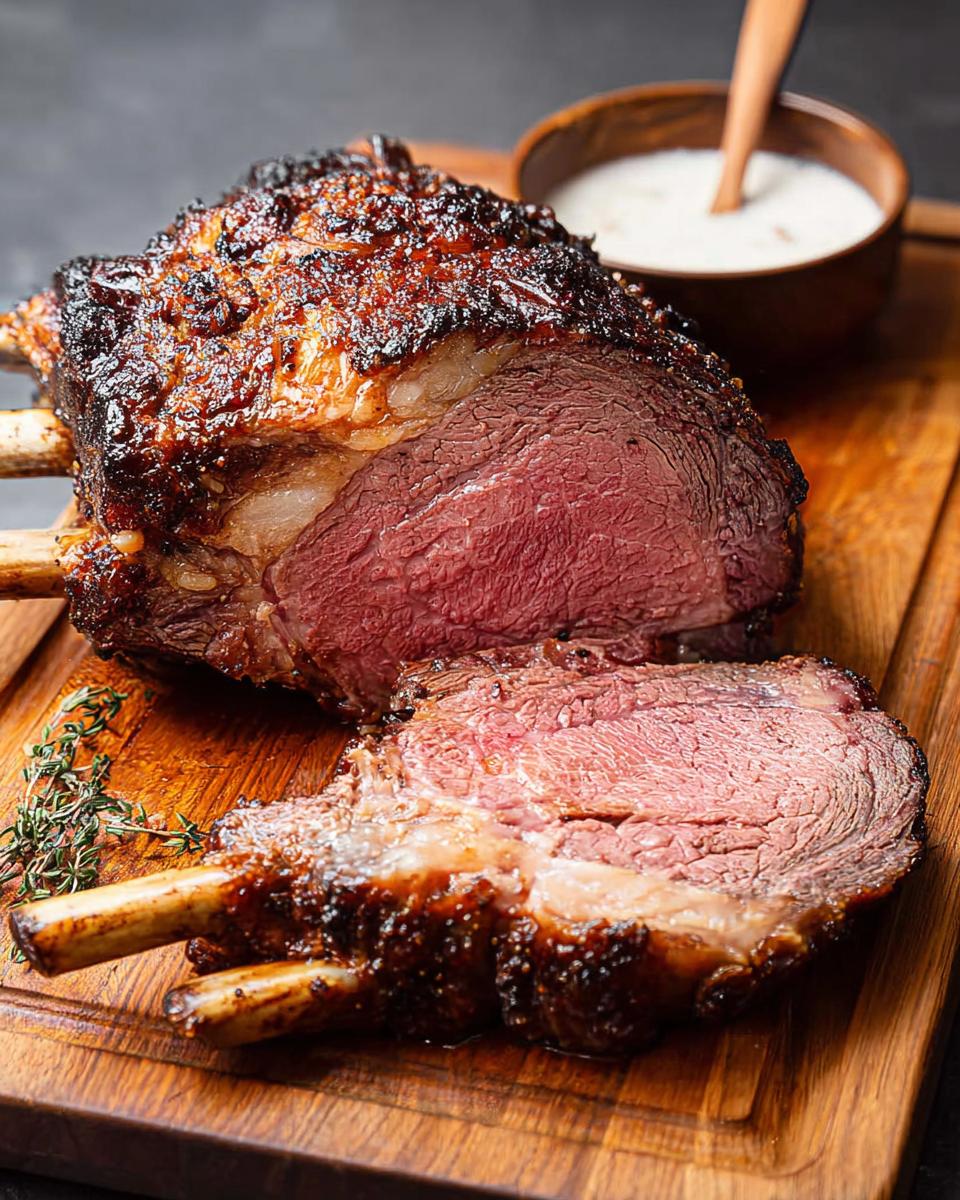
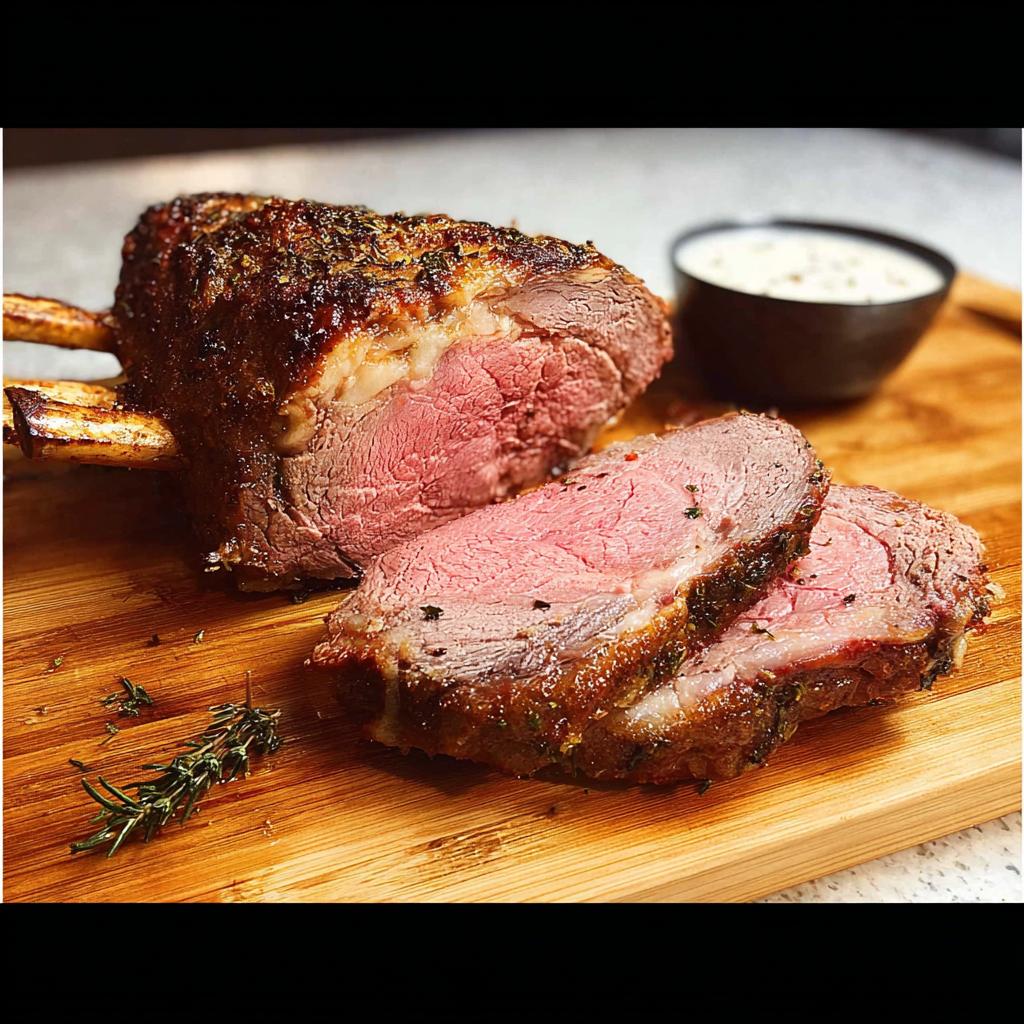
When it comes to presentation, thickness really matters for your Holiday Dinner. Aim for consistency; even slices look so much more professional than a messy pile of varying thicknesses.
Always remember to serve those spectacular bones either under the meat or alongside it on your carrier platter. It just elevates the whole look, doesn’t it?
My favorite little trick? After carving the main roast, I run my knife right along the bottom edge and scrape up any little caramelized bits stuck to the board. These crunchy bits are pure flavor gold and I toss them right over the top of the sliced meat for an extra texture boost!
For more ideas on creating that perfect meal spread, check out these great restaurant style dinner ideas.
Preparing the Horseradish Cream Sauce
Okay, so if you were following along, you know the prime rib is resting right now, which means we have a few blissful moments to whip up the absolute best companion sauce for this beef. This horseradish cream sauce is so simple, but seriously, it takes the whole experience up a notch. It cuts through the richness of the beef perfectly!
You really only need five main things: the heavy cream, the sour cream—and yes, you need both for the right texture—that prepared horseradish (drain off any excess liquid first!), black pepper, and a little bit of salt. If you’re feeling adventurous and want a little sneaky heat, add just a tiny pinch of cayenne pepper, but don’t overdo it!
The method is about as easy as it gets. Grab a medium bowl—no need to even break out the electric mixer. Just take a whisk and combine the heavy cream and sour cream until they start to smooth out. Then, fold in your horseradish, the pepper, salt, and cayenne if you’re using it. Whisk it all together until everything looks uniform and creamy. See? That’s it! No cooking required, which is great because you’re probably busy monitoring that roast.
If you wanted to make a stellar gravy alternative later on, maybe for dipping leftovers, you should definitely check out this guide on making a rich, low-carb gravy. But for now, this tangy cream sauce is the move when serving the roast fresh!
Tips for Success with Your Perfect Prime Rib — Carving & Resting Tips Inside
We’ve covered the main cooking steps, but I want to leave you with a few little insider secrets that always make the difference between a good roast and a truly great one. You know how I mentioned using a meat thermometer? Keep that thermometer handy even after you pull the roast out! You can use it to test different sections while slicing to make sure every guest gets the doneness they prefer.
If you are using a Roaster Oven Prime Rib setup—which I totally recommend if your regular oven is packed—you need to manage the lid carefully. Those roasters can sometimes shield the top from the radiant heat, so check that beautiful crust early on. If it looks pale after the initial sear, crank the lid off for the last five minutes of the high-heat phase!
Another neat trick for that amazing flavor is mixing up your salt crust, not just using plain kosher salt. I like to mix my salt with a little bit of garlic powder and dried thyme before rubbing it all over. It just deepens that classic beef flavor profile. It’s the little extras that turn this amazing meal into something truly special, and you can check out some simple one-pan cleanup tips to make the aftermath less stressful!
Storing and Reheating Leftover Perfect Prime Rib
Don’t even think about throwing away those leftovers! That amazing roast tastes just as good the next day, provided you handle it right. Once the prime rib has completely cooled, you need to store the individual slices properly. Don’t just pile them in a plastic bag! They need protection from drying out in the fridge.
Wrap those slices tightly in plastic wrap first, and then pop them into a sturdy, airtight container. You want to keep that air out! If you have any of that amazing horseradish cream sauce left, store that separately, of course.
When it’s time to reheat, the goal is gentle warming, not re-cooking. I suggest using a baking dish—lay your slices inside and pour just a tiny bit of beef broth or au jus over the bottom. Cover that dish tightly with foil and warm it in a low oven, maybe 275°F (135°C), until it reaches a nice warm temperature. This steams the meat ever so slightly, keeping it juicy! You can find some inspiration for busy weeknight dinner ideas if you need inspiration for using up those leftovers!
Frequently Asked Questions About Your Perfect Prime Rib
It’s natural to have questions when you are tackling a big centerpiece like this! People always ask me specific things once they’ve read through the roasting times, so let’s clear up the last few things before you’re ready to serve your amazing Holiday Dinner.
I’ve gathered my favorite quick answers below. Remember, the goal here is a wonderfully Tender Roast, so pay attention to those temperatures we talked about!
Can I cook this in a Roaster Oven Prime Rib setup?
Oh sure, you totally can! A lot of folks use a dedicated Roaster Oven Prime Rib setup, especially if their main oven is already tied up making sides. The main thing to watch is consistency—roasters sometimes run a bit cooler or hotter than your main oven, so you HAVE to rely on that meat thermometer. Don’t trust the dial on the roaster; trust the beef!
What is the best way to ensure a Tender Roast?
If you want that melt-in-your-mouth texture, it boils down to two things we hammered home earlier: first, using that reliable meat thermometer so you pull it out at the absolute right moment, and second—and this one trips up so many people—letting it rest for the full 30 minutes! That resting time lets the juices settle perfectly, making every slice incredibly tender. Trust me on the resting!
If you want to jump back and review the complete recipe instructions, you can find them all right here!
Serving Suggestions for Your Holiday Dinner Centerpiece
The Perfect Prime Rib — Carving & Resting Tips Inside is ready, and now we have to make sure the rest of the table matches this magnificent centerpiece! You can’t serve this beauty with limp green beans, right? Classic pairings like creamy mashed potatoes (or my favorite cauliflower mash for a lighter touch!) are always winners.
I always lean toward roasted root vegetables—carrots, parsnips, maybe some balsamic Brussels sprouts—roasted right alongside all that drippings flavor if you have room in your roasting pan! If you’re looking for some fantastic low-carb veggie ideas that truly wow people, I put together a huge list of side dish inspiration that pairs perfectly with richer meats like this roast.
Honestly, though, my favorite pairing is just simple, perfectly steamed asparagus that gets a tiny squeeze of lemon right before serving. It keeps the focus right where it belongs!
Share Your Perfect Prime Rib — Carving & Resting Success
Wow, we made it! You’ve successfully navigated the high heat, the patience of resting, and you’ve hopefully managed to carve a beautiful, juicy roast. Now the very best part comes: showing it off! I really, really want to see what you created at your table.
Did you nail that perfect medium-rare temp? Did your carving technique result in those dreamy, even slices we talked about? Please don’t keep that victory to yourself! Head down to the comments below and leave me a rating—five stars is always appreciated, of course, but I want to hear the details of your success or any questions you hit.
If you took a picture of that magnificent roast centerpiece, please snap a photo and share it on social media! Tag me so I can celebrate with you. Seeing your amazing results is genuinely what makes all this work worthwhile for me. If you need to get in touch with me directly for specific questions about your roast, you can always reach out through my contact page.
Happy cooking, and enjoy every single bite of that incredible roast!
— Leonardo Rodriguez Visual Culinary Artist & Aesthetic Designer
Perfect Prime Rib — Carving & Resting Tips Inside
Ingredients
Equipment
Method
- Preheat your oven to 450°F (230°C). Pat the prime rib dry with paper towels. Rub the entire roast with kosher salt.
- Place the roast, fat-side up, in a roasting pan. Insert a meat thermometer into the thickest part of the roast, avoiding bone.
- Roast at 450°F (230°C) for 15 minutes. Then, reduce the oven temperature to 325°F (160°C) and continue roasting. For medium-rare, roast for about 13-15 minutes per pound. For medium, roast for about 15-17 minutes per pound.
- Remove the roast from the oven when the thermometer registers 120°F (49°C) for medium-rare or 130°F (54°C) for medium. Transfer the roast to a cutting board.
- Tent the roast loosely with foil and let it rest for at least 30 minutes. This resting period is crucial for a juicy roast.
- While the roast rests, prepare the horseradish cream sauce if desired. In a medium bowl, whisk together the heavy cream, sour cream, prepared horseradish, black pepper, salt, and cayenne pepper (if using) until well combined.
- To carve, remove the strings. Slice the roast away from the bones. Then, slice the meat against the grain into your desired thickness. Serve with the horseradish cream sauce.
Notes
Tried this recipe?
Let us know how it was!
Visual Culinary Artist & Aesthetic Designer
When the pandemic killed my career as a luxury hotel photographer overnight, I was stuck in my studio apartment with nothing but time and vegetables. That’s when I started treating meal prep like photography projects—and discovered that the same principles that made five-star dishes camera-ready could turn humble zucchini noodles into social media gold.
My fine arts degree from Parsons taught me that people eat with their eyes first. After years behind the lens capturing haute cuisine, I realized that successful dieting often depends more on visual satisfaction than pure nutrition. When your food looks amazing, you actually want to stick with your eating plan.
My recipe development feels more like an art studio than a test kitchen. I use color theory to guide ingredient selections—purple cabbage with golden cauliflower, emerald herbs against ivory cheese. My “Edible Landscapes” series transforms standard low-carb ingredients into miniature scenic compositions that make vegetables feel aspirational rather than obligatory.
I spend evenings exploring art galleries and practicing watercolor painting, always looking for inspiration. My philosophy is simple: make low-carb food visually irresistible, and dietary compliance becomes an aesthetic choice rather than a health sacrifice.