
I’m Laila Stone, and trust me, the search for truly crispy wings that everyone can enjoy is over! I’m thrilled to share my recipe for Crispy Baked Chicken Wings. I know what it’s like to hunt for that perfect crunch when frying just isn’t an option, especially when you’re cooking for dietary restrictions. I’ll never forget the first time I attempted these for my son after his celiac diagnosis; pizza night was a challenge, and I wanted comfort food back on the table.
Watching him savor those first gluten-free wings, I knew I was onto something. As a Dual-Restriction Recipe Engineer, I’ve spent years perfecting techniques that deliver maximum flavor and texture without compromise. These wings are incredibly crispy without ever hitting the fryer, and they are always the biggest hit at any gathering. If you want to learn more about my background in recipe engineering, check out my About Page.
Why These Crispy Baked Chicken Wings Are a Family Favorite
Honestly, the best part about these Crispy Baked Chicken Wings is watching everyone grab seconds, kids and adults alike! They disappear fast at every Game Day party. Since they are baked, not fried, I feel great serving them often. They are a guaranteed Crowd Pleaser, and they fit right into our gluten-free life seamlessly.
- They satisfy that deep craving for crunchy, savory wings.
- They are totally Baked Not Fried, which means less fuss and less grease for me!
- They are a perfect make-ahead snack when you look at easy weeknight meals.
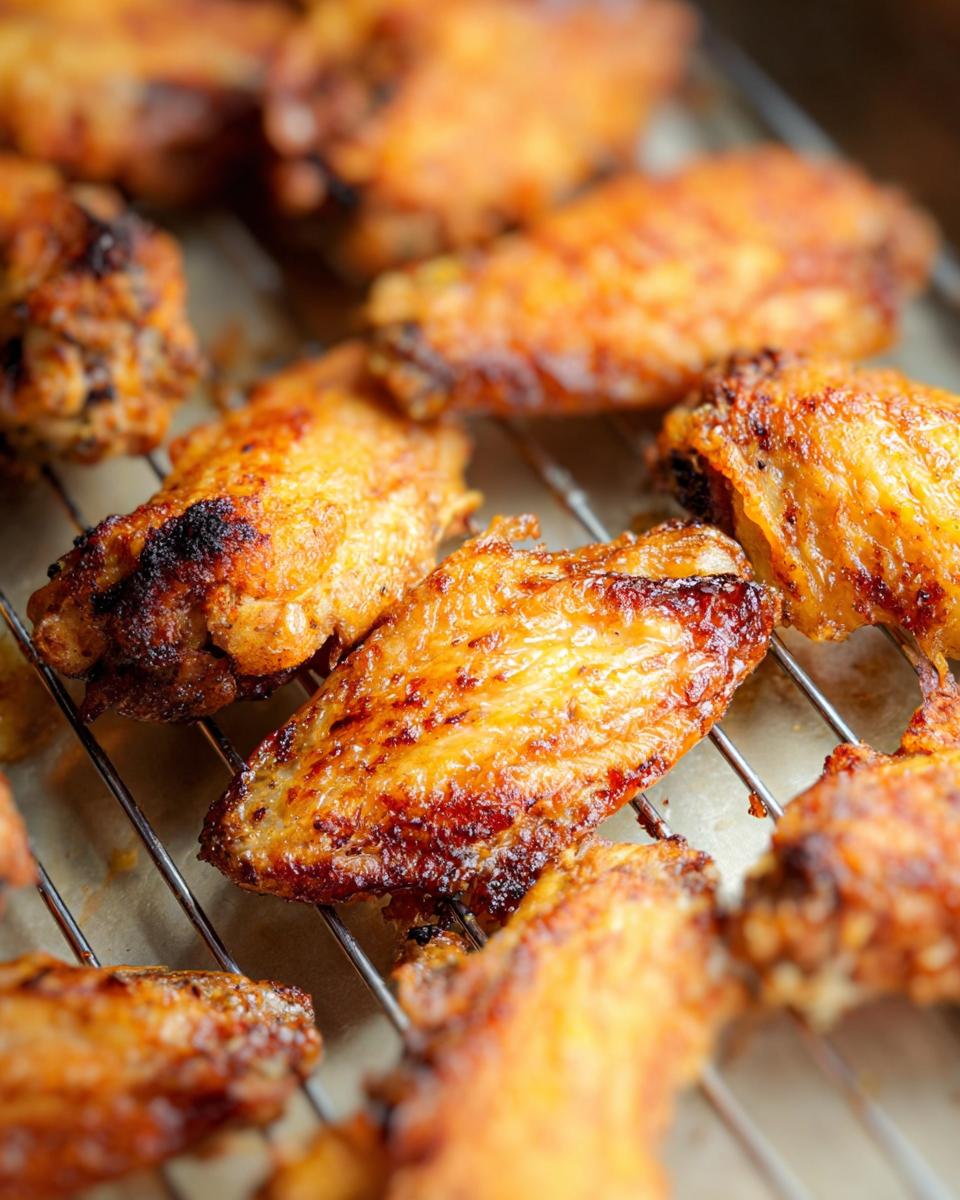
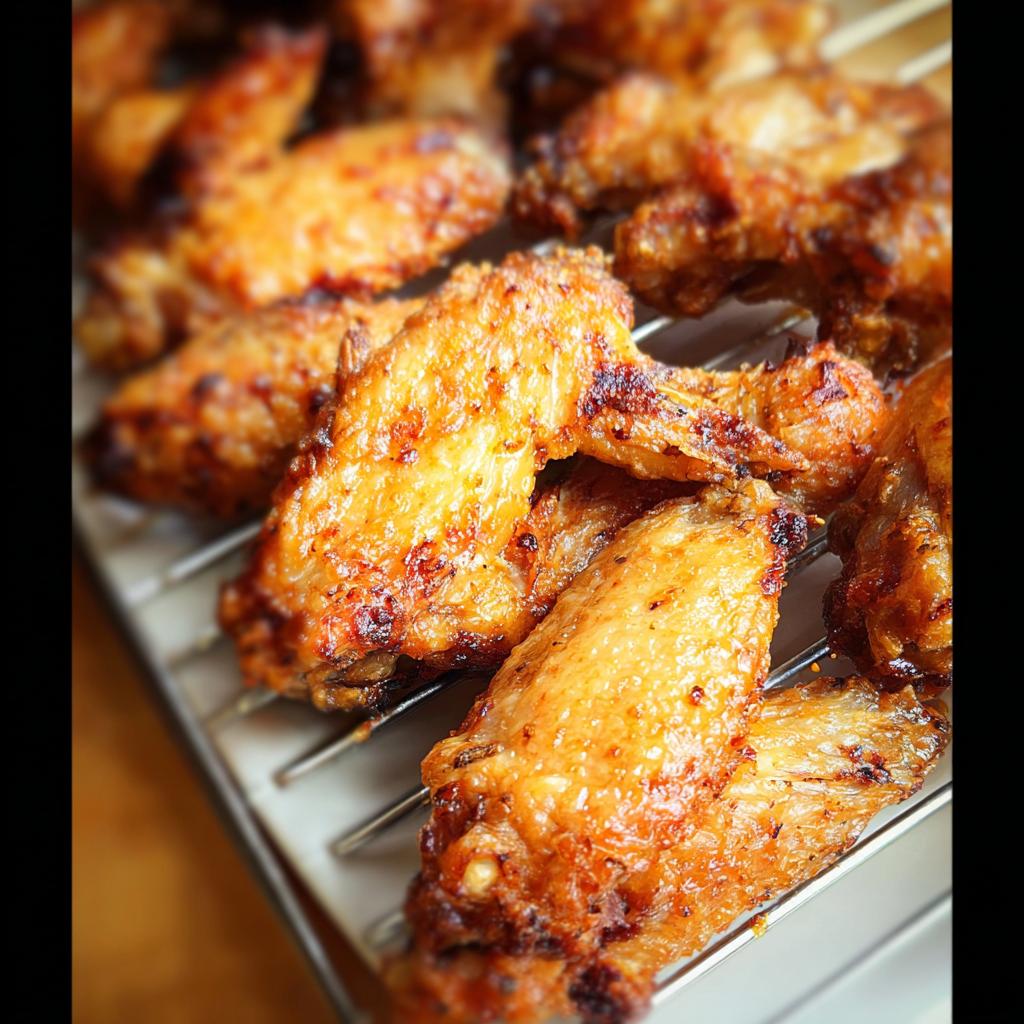
Achieving True Crispy Skin Without Frying
It’s all about the baking powder. Seriously, don’t skip it! That ingredient creates a chemical reaction that pulls every last bit of moisture out of the bird, creating the best Crispy Skin you’ve ever had coming straight from my oven.
Essential Gear for Perfect Crispy Baked Chicken Wings
You don’t need a deep fryer for this recipe, thank goodness! We are sticking to simple, good kitchen tools here. You’ll want a large bowl for tossing and a small one for mixing your spices. If you want to see my favorite reliable tools for cooking chicken, check out my guide on chicken prep.
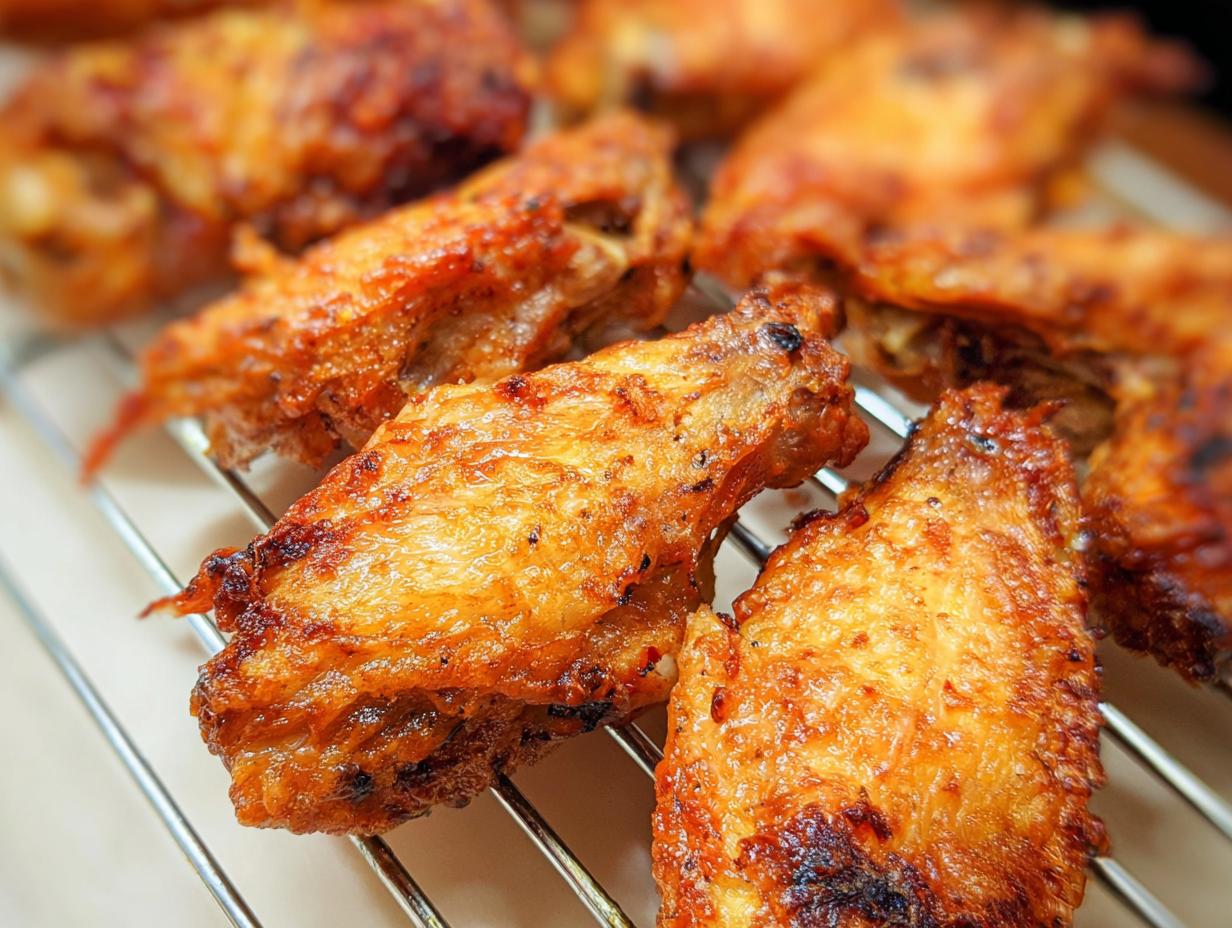
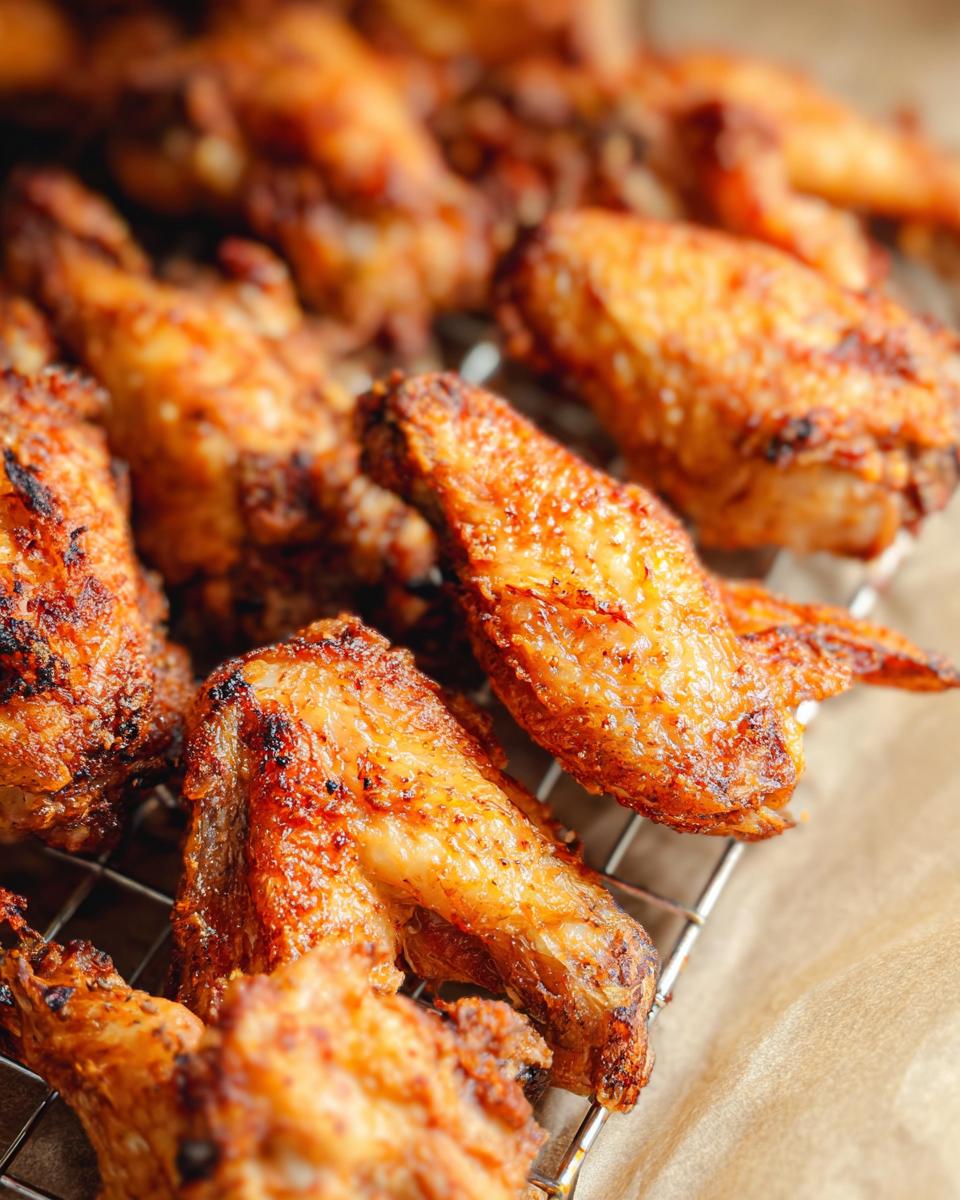
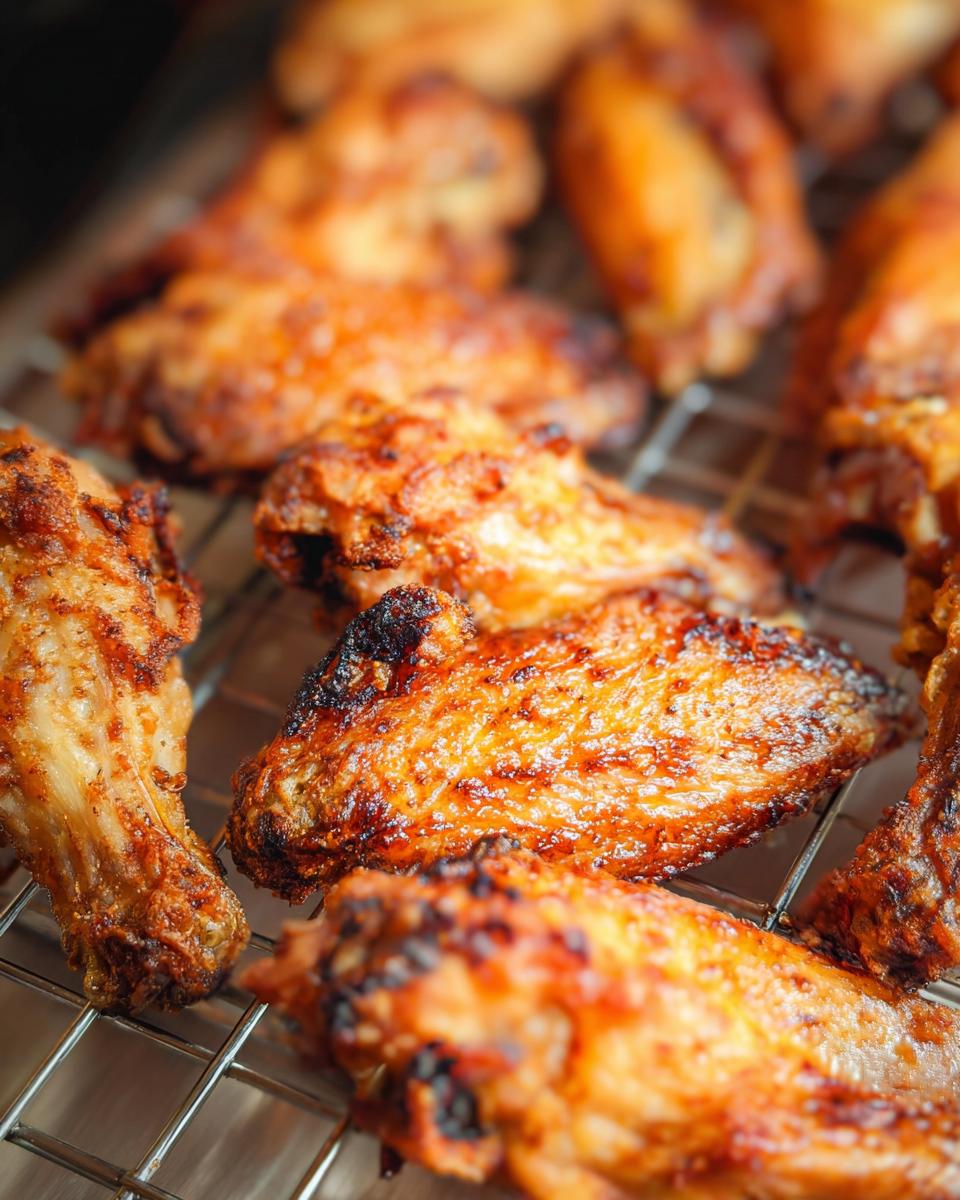
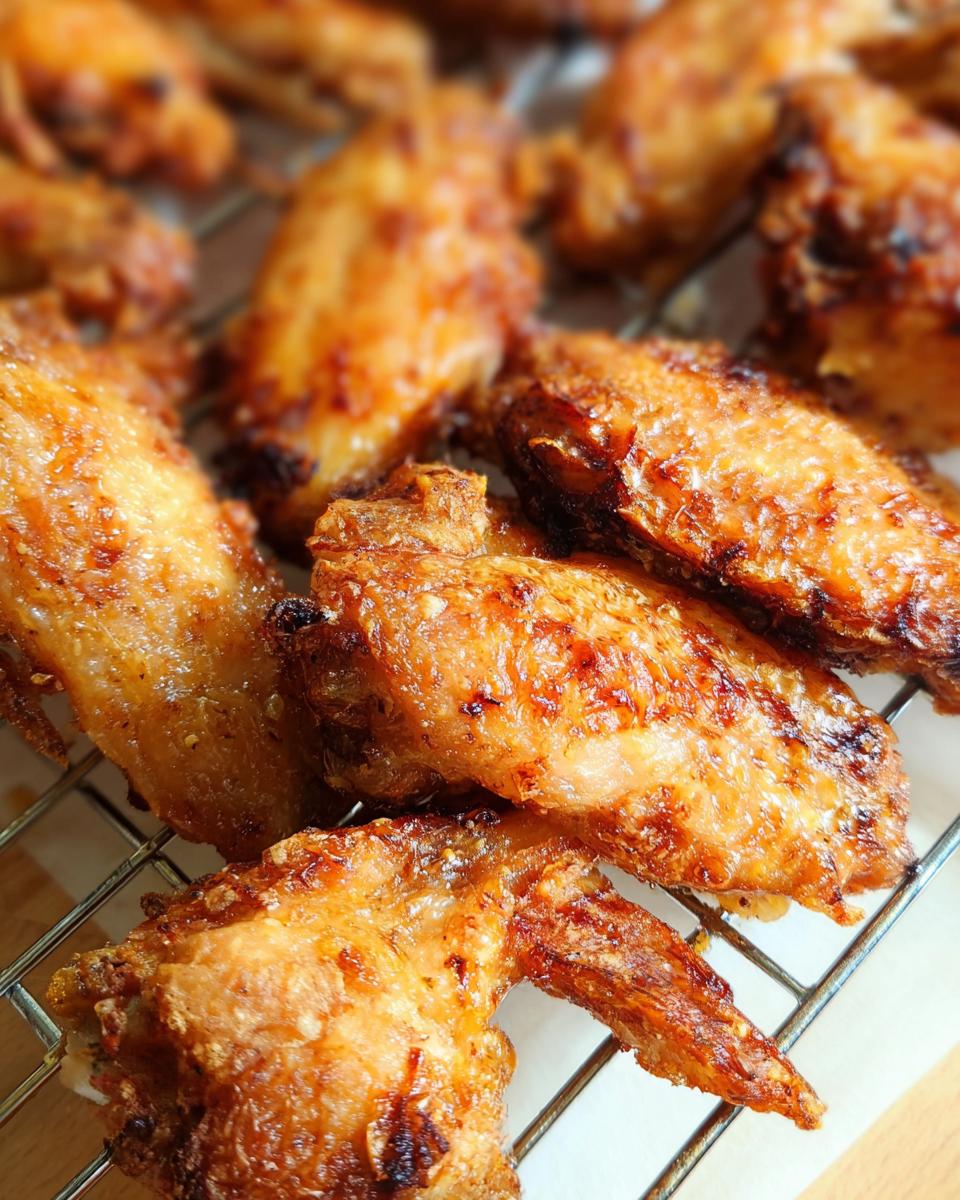
But here’s the absolute deal-breaker item: you must have a wire rack that fits inside your baking sheet. The rack is non-negotiable! It lets the air circulate all the way around the chicken wings, which is what guarantees that beautiful, all-over Crispy Skin. Without it, the bottom steams in the juices and gets sad and soggy—and we want zero sogginess here!
Ingredients Needed for Crispy Baked Chicken Wings
Gathering our ingredients is straightforward, thankfully! Since this recipe is relatively basic in what it needs, it means we can focus all our attention on that crucial pre-baking prep to make sure we get truly amazing Crispy Baked Chicken Wings. Remember, quality of prep beats quantity of ingredients every time!
The Chicken and Oil Components
First up, grab 3 lbs of chicken wings; make sure they are separated into drummettes and flats. I always tell people to avoid those really tiny wings—we want decent size pieces for this baking method. Before anything else touches them, you absolutely must pat them completely dry with paper towels. This step is why we get that amazing texture, so don’t be shy with the drying!
We only need 2 teaspoons of neutral oil to help the spices stick nicely to the wings.
The Crisping Seasoning Mix for Crispy Baked Chicken Wings
Now for the magic dust! This mix is what separates these from any other batch of Chicken Wings you’ve made before because it really nails that *Crispy Skin* when they are Baked Not Fried. You’ll need 2 tablespoons of baking powder—this is the MVP here, it’s not flour, it’s critical! Then mix in 2 teaspoons of kosher salt and 1.5 teaspoons of white pepper. Mix this seasoning well until it’s uniform before you toss it with the chicken. Trust me, no clumps!
Step-by-Step Instructions for Crispy Baked Chicken Wings
Okay, let’s get these wings into the oven! The beauty of this method is that once they are seasoned, they just need time to work their magic in a hot oven. Because they bake unattended for long stretches, these are perfect for Game Day—you can get the house prepped or tackle other snacks while these babies crisp up. For the absolute best results, make sure your oven is hot right when you start! If you want to see more ways to make sure your chicken comes out perfectly juicy alongside its crunch, check out my post on crispy and juicy chicken.
Preparing the Chicken Wings for Maximum Crispiness
First things first: we must take out every drop of moisture. Take your separated drummettes and flats and put them in that big bowl. Pour your 2 teaspoons of neutral oil over them and toss them around until they look slightly shiny. My personal secret that I swear by? Grab a huge stack of paper towels and just keep patting them down. I mean, really press into them! Any surface moisture will turn into steam, and steam is the enemy of crust.
Coating and Arranging Your Crispy Baked Chicken Wings
Once dry, pour about half of your seasoning mix over the oiled wings, toss really well to coat everything, and then pour the rest on. You want an even, dusty crust on every single piece of this batch of Chicken Wings. After they are perfectly coated, get your baking sheet ready: line it with foil and put that essential wire rack on top.
Lay the wings out on the rack, and this is super important: make sure every wing has space around it. They shouldn’t be touching! If they touch, they steam, and you ruin the whole Crispy Skin effort. Give them some room to breathe so the heat can hit all sides! For more great simple techniques, take a peek at C.J.’s oven wings.
Baking Technique for Perfect Crispy Baked Chicken Wings
Get that oven cranked up to 450°F! We want intense heat for these Crispy Baked Chicken Wings. Pop the tray in for 30 minutes exactly. If you have a convection setting, please use it; it speeds up the crisping process, which is exactly what we want! After that first 30 minutes, pull the tray out—careful, it’s hot!—flip every single wing over, and slide them back in for another 20 to 25 minutes. They should look deeply golden and feel very firm when they are done!
Tips for Success Making Crispy Baked Chicken Wings
Even with the best recipe, sometimes things go a little sideways in the kitchen! I want you to succeed, especially since getting that perfect crunch when you are deliberately going for Baked Not Fried takes a little know-how. When people write to me saying their wings are pale, it almost always comes down to one thing: temperature.
Make sure your oven is fully preheated to 450°F before those wings even see the inside of it. If the initial blast of heat isn’t hot enough, the wings start steaming before they start crisping. Also, don’t overload that rack! If you try to cram too many wings on, they touch, and again, we get sogginess because the air can’t flow.
If you ever struggle with uneven browning (some spots look perfect and others look pale), it usually means your baking powder wasn’t mixed well into the dry rub. Take a look at my guide on foolproof chicken methods—it goes deep into ensuring your coating is perfect right from the start!
Serving Suggestions for Your Crispy Baked Chicken Wings
These amazing Crispy Baked Chicken Wings are such a natural fit for Game Day snacks, but don’t stop there! They are hearty enough to be the main event for a fun family dinner, especially when paired with crunchy veggies like carrot sticks and celery.
Since we are always working to keep cleanup simple for my family, I love serving these alongside something baked right on a sheet pan, like my easy one-pan broccoli and peppers. And naturally, a side of blue cheese or ranch dressing (make sure it’s gluten-free!) makes these the ultimate Crowd Pleaser appetizer or main course.
Storage and Reheating of Crispy Baked Chicken Wings
You know these are going to disappear quickly, but if you happen to have any leftover Chicken Wings, don’t just throw them in the fridge! They do great for about three or four days sealed tight in an air-tight container.
Now, if you want that glorious Crispy Skin back—and I know you do!—please, I beg you, skip the microwave. Microwaves equal limp wings, guaranteed. The best reheating method is putting them back on a wire rack set on a baking sheet and heating them at 400°F for about 6 to 8 minutes until they are super hot and crunchy again. Remember: we want them crispy, not chewy!
Frequently Asked Questions About Crispy Baked Chicken Wings
I get so many messages about these wings, which just proves how awesome they are! Most questions revolve around getting that perfect texture through baking rather than frying. Let’s clear up a few common concerns so your basket of Chicken Wings comes out crunchy every time. If you want to browse all my certified family-friendly recipes, hop over to my main recipe index!
Can I skip the baking powder in this Crispy Baked Chicken Wings recipe?
Oh gosh, no! If you want true Crispy Skin, you absolutely must include the baking powder. It’s not there for flavor or rising like it is in cake; it’s a chemical marvel that dries out the skin surface when baked. Skipping it means you’ll end up with soft, sad wings, not the crunch you deserve!
How do I make these wings spicy?
That’s easy, my friend! Since the base recipe is perfect for a mild, crispy skin, you should season them plain and then toss them in your favorite hot sauce right after they come out of the oven. That way, the initial crust stays intact, and you get all the heat you want. It preserves the integrity of these amazing Crispy Baked Chicken Wings!
Is this recipe truly gluten-free?
Yes, the foundation of the recipe itself—chicken, oil, salt, pepper, and baking powder—is naturally gluten-free! That’s why I love them so much for my son. Just remember, if you add a sauce later on, you absolutely must double-check that sauce bottle to ensure it’s certified gluten-free, since some glazes hide wheat.
Share Your Crispy Baked Chicken Wings Creations
Honestly, I just love hearing from you all! When you try this recipe and tell me that your kids—especially those picky eaters with dietary needs—are finally enjoying fantastic, crispy wings, that makes my day. I put so much work into making sure these Crispy Baked Chicken Wings deliver that promised crunch!
If you give these a whirl for your next Game Day or family pizza night, please come back and leave a rating! Let me know how many you had to hide so you got seconds, or if you tossed them in a sauce I haven’t even thought of yet. I’m always learning and love seeing your successes!
Got a question or just want to chat about complex meal planning? You can always reach out to me on my Contact Page. Happy baking, and enjoy those crunchy little bites!
Crispy Baked Chicken Wings
Ingredients
Equipment
Method
- Pat chicken wings completely dry and add the wings to a large bowl. Add the neutral oil to the wings.
- In a small bowl, mix kosher salt, ground white pepper and baking powder until combined. Pour half of the seasoning over the wings, mix, then add the rest of the seasonings to ensure all wings are evenly coated.
- Take a large baking sheet and line it with foil. Place a wire rack on top of the baking sheet and lay the wings on the wire rack with space between each wing so they are not touching each other.
- Bake at 450F for 30 minutes (use convection if possible). Flip and bake for another 20-25 minutes until the skin is crispy.
- Toss in your favorite sauce or eat plain and enjoy!
Notes
Tried this recipe?
Let us know how it was!
Dual-Restriction Recipe Engineer & Cross-Contamination Specialist
Everything changed when my teenage son got hit with celiac disease and Type 1 diabetes diagnoses within six months of each other. Suddenly, pizza and pasta were off the table, and most “diabetic-friendly” foods contained gluten. I went from regular mom cooking to navigating what I call “compound restriction cooking”—and I had a kid’s appetite and taste buds to satisfy.
Lucky for us, my background in pharmaceutical quality control gave me the systematic mindset this level of precision requires. My kitchen now operates under pharmaceutical-grade protocols adapted for home use: dedicated prep surfaces, separate storage systems, and testing procedures that verify both carb counts and gluten absence before any recipe gets published.
I’ve developed over 220 recipes that clear multiple dietary hurdles simultaneously—finding gluten-free thickeners that don’t spike blood sugar, creating bread alternatives that meet both keto ratios and celiac safety, and developing desserts that actually taste good to a teenager despite impossible restrictions.
Through my “Safe Kitchen Certification” program, I teach other parents that managing multiple dietary restrictions isn’t about multiplying limitations—it’s about systematic thinking that reveals unexpected possibilities. When you engineer solutions instead of making compromises, restriction becomes innovation rather than deprivation.