
Oh, Thanksgiving! Just thinking about it brings back all those fuzzy memories, doesn’t it? The scent of roasting turkey, the chatter of family filling the house, and, of course, the parade of incredible dishes. For years, I’d tried to nail the perfect Thanksgiving green beans, wanting something that felt special, something my son could enjoy too, even with his dietary needs. This recipe, What Makes Perfect Thanksgiving Green Beans? Try This, is my answer! Forget the heavy, creamy casseroles of the past; we’re talking about bright, fresh green beans kissed by the oven, bursting with flavor. I remember my first solo Thanksgiving attempt – equal parts excitement and sheer panic! I wanted everything to be perfect, especially a side that tasted amazing but was also gluten-free. It was a culinary tightrope walk! But using simple things like fresh beans, garlic, and a sprinkle of herbs, I managed to create something everyone loved. It wasn’t just about the taste; it was about showing that holiday favorites can shine, restrictions or not. As a Dual-Restriction Recipe Engineer & Cross-Contamination Specialist, I get to play in this space all the time, making sure delicious food is also safe and wonderfully flavorful for everyone at the table.
Why This Recipe for What Makes Perfect Thanksgiving Green Beans? Try This
So, you’re wondering what makes this particular green bean recipe such a winner, right? Well, let me tell you, it’s a game-changer compared to those heavy casseroles! Instead of wrestling with condensed soup, we’re letting the vibrant flavor of fresh green beans totally shine. Seriously, they roast up so beautifully and get this perfect little *snap* to them. Plus, it’s naturally gluten-free, which is a huge win for so many of us during the holidays. We actually have a whole list of low-carb Thanksgiving side dishes that taste just like traditional favorites, and these green beans are right up there! And the best part? It’s ridiculously fast to whip up. You can be roasting these beauties while the turkey’s resting or that pie’s baking. It’s the kind of easy side dish that looks super impressive but barely breaks a sweat in the kitchen. If you’re looking for just one way to elevate your Thanksgiving table without all the fuss, this is it!
Ingredients for What Makes Perfect Thanksgiving Green Beans? Try This
Alright, let’s talk about what goes into making these green beans absolutely sing on your Thanksgiving table. The beauty of this recipe is its simplicity, relying on fresh, vibrant ingredients that do all the heavy lifting. You’ll want to grab a pound of fresh green beans, make sure you trim off those little stringy ends because nobody likes those! Then we’ve got about two teaspoons of good ol’ olive oil to make sure everything gets happy in the oven. For that bright, zesty pop, we’ll use two teaspoons of finely grated lemon zest from maybe one medium lemon, and just a teaspoon of its fresh juice. Don’t forget our trusty friends, kosher salt (about 3/4 teaspoon) and some freshly ground black pepper (a pinch, about 1/4 teaspoon). And for that little touch of savory magic? We’re adding about an ounce of grated Parmesan cheese. If you’re feeling fancy, or just love a little crunch, a half cup of toasted, sliced almonds is totally optional but oh-so-good!
Essential Equipment for Your Perfect Thanksgiving Green Beans
Okay, let’s talk about what you’ll need to make these green beans absolutely sing! It’s really not much, which is part of why I love this recipe so much. You’ll definitely want a good baking sheet – preferably one with a rim so nothing decides to make a break for it in the oven. Lining it with parchment paper is my go-to; it makes cleanup a breeze and prevents any cheeky sticking. Seriously, parchment paper is a weeknight saver, and for holiday cooking? It’s non-negotiable for me!
How to Prepare What Makes Perfect Thanksgiving Green Beans: Step-by-Step
Alright, let’s get these perfect Thanksgiving green beans ready to rock your holiday table! It’s really quite simple, and honestly, so much fun to watch them transform. You’ll be amazed at how quickly you can whip up this gorgeous side dish.
Preheating and Prep for Perfect Thanksgiving Green Beans
First things first, let’s get that oven fired up to 425ºF (that’s 220ºC for all you metric bakers!). While it’s heating up, grab your trusty baking sheet and line it with parchment paper. This is my little secret to avoiding any sticky messes later – seriously, it’s a lifesaver! Now, take your pound of fresh green beans and snip off those tough ends. Once they’re trimmed, give them a really good pat-down with a clean kitchen towel or paper towels. Getting them nice and dry is super important for getting that lovely little crisp we’re after. If they’re wet, they’ll just steam instead of roast!
Coating and First Roast
Okay, toss those dry green beans right onto that prepared baking sheet. This is a tip I picked up trying to make truly delicious roasted green beans – no need for a separate bowl here, we’re keeping it simple! Drizzle on your olive oil, the zesty lemon zest, that bit of fresh lemon juice, your kosher salt, and a good grind of black pepper. Now, get your hands in there! Give everything a good toss until those beans are nicely coated. Spread them out into a single, even layer. We don’t want them piled up, or they won’t roast properly. Pop that tray into your hot oven for just 5 minutes.
Adding Cheese and Second Roast
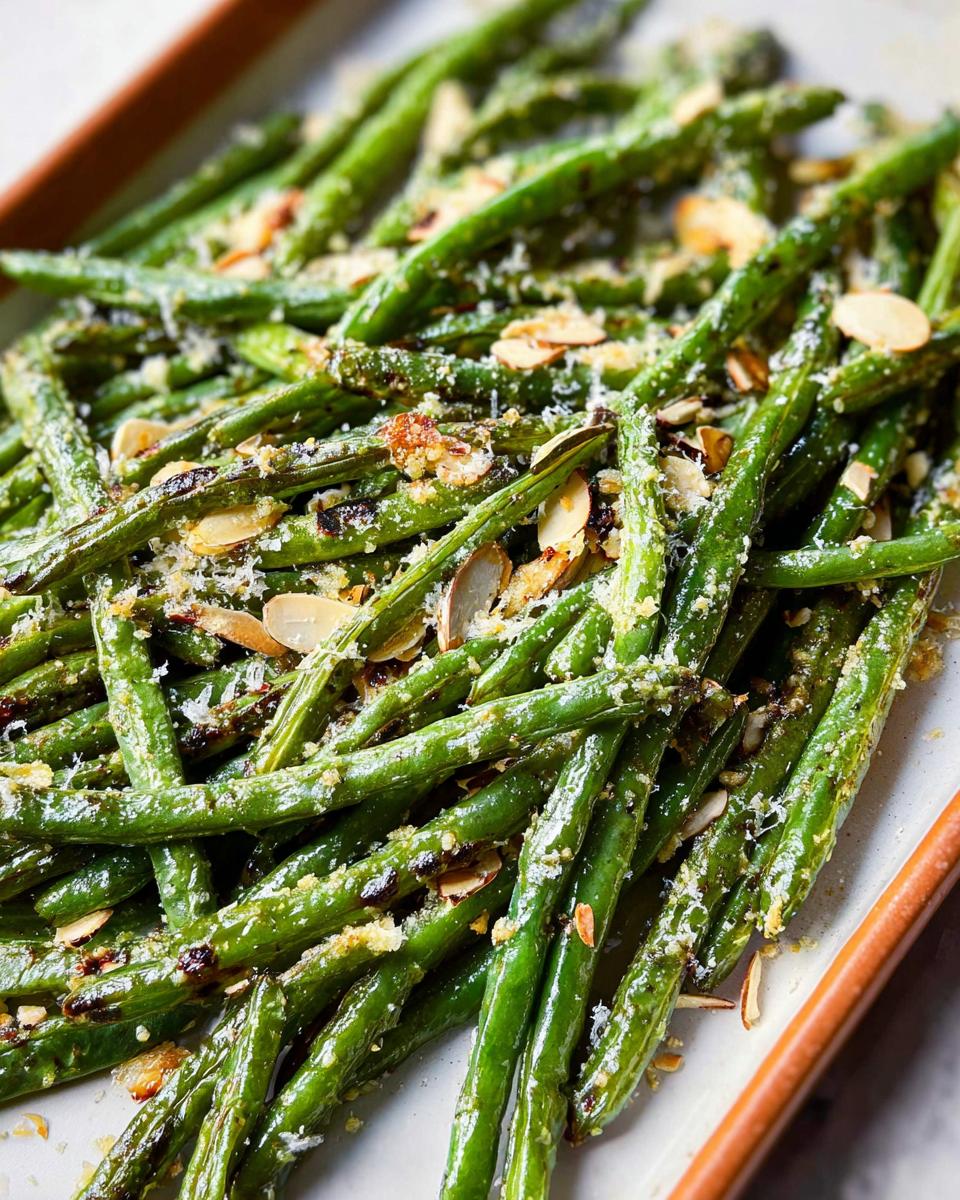
After those 5 minutes, carefully pull the baking sheet out. Give those beans a quick stir to make sure they’re cooking evenly. Now comes the cheesy goodness! Sprinkle your grated Parmesan cheese all over the green beans. Try to get it as even as you can. Pop the baking sheet back into the oven for another 5 to 6 minutes. You’re looking for the cheese to get golden and a little bubbly, and the green beans to get those nice little browned spots here and there. That’s where all the flavor is!
Finishing Touches for Your Perfect Thanksgiving Green Beans
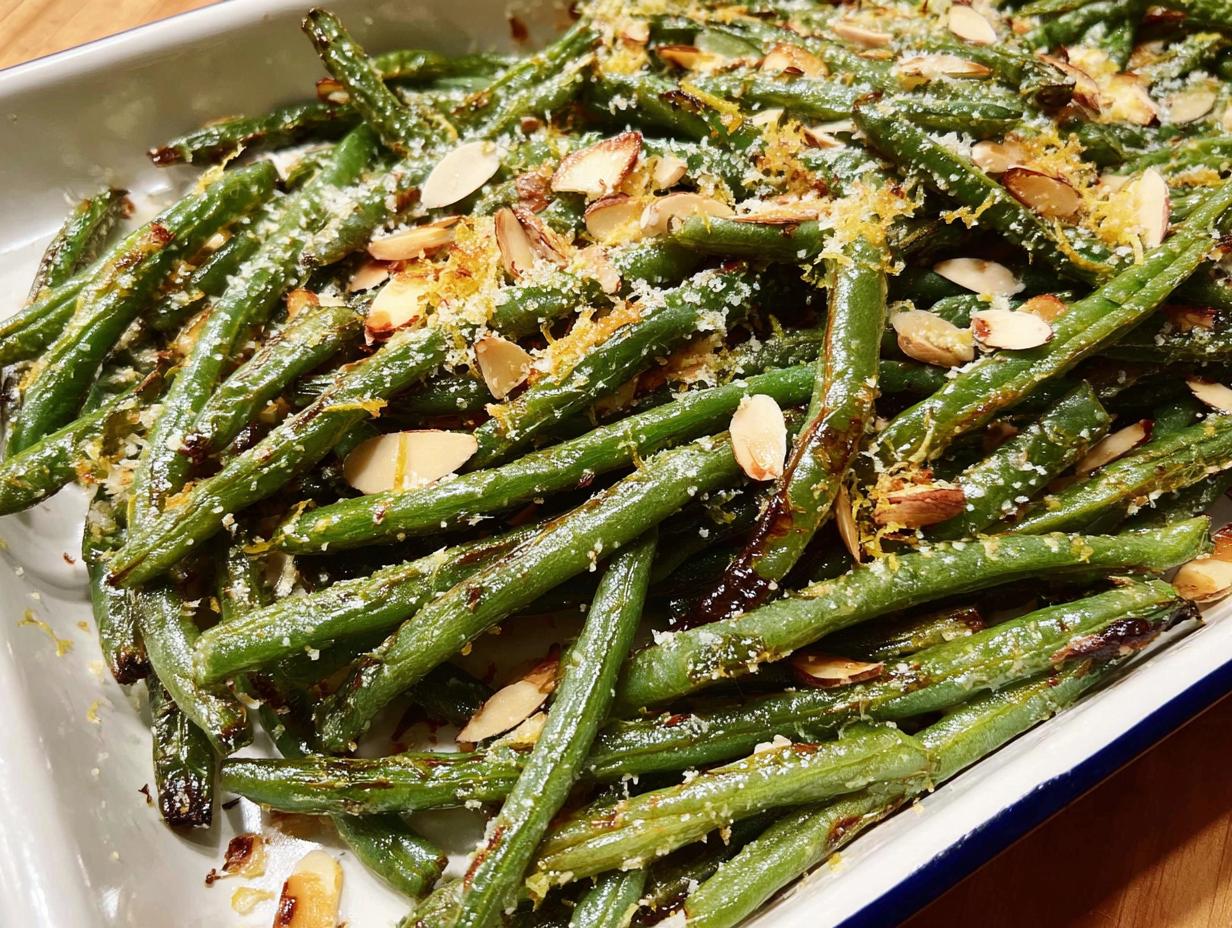
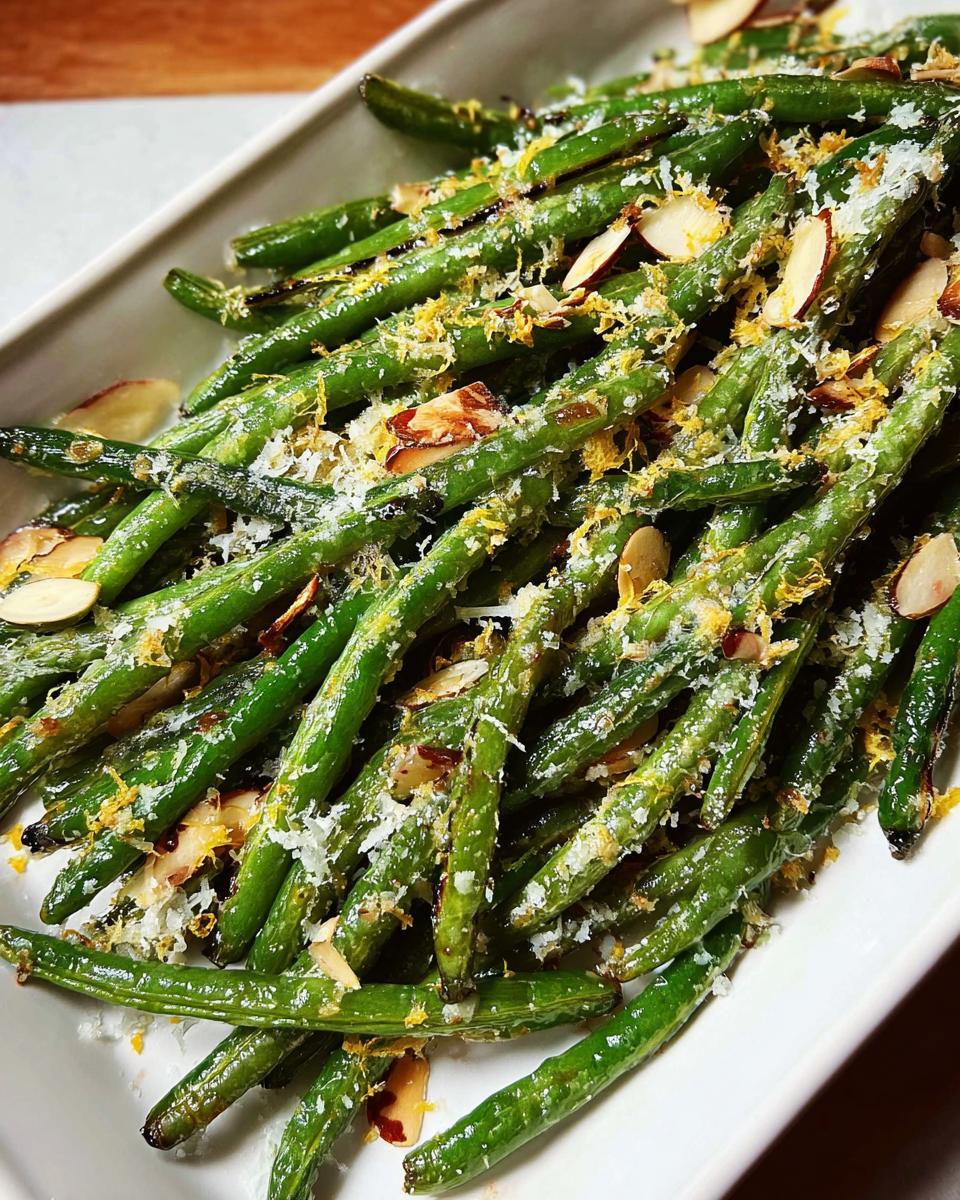
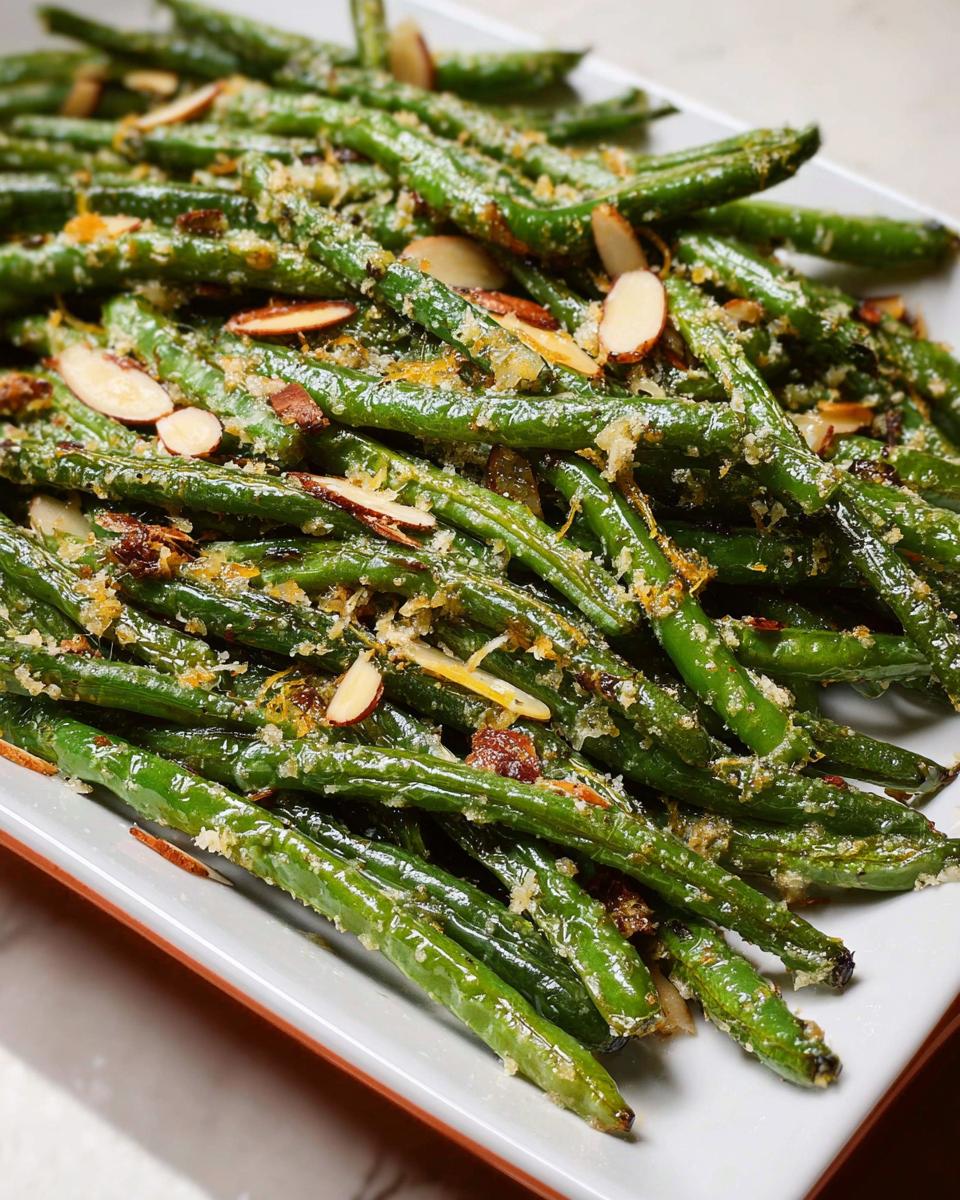
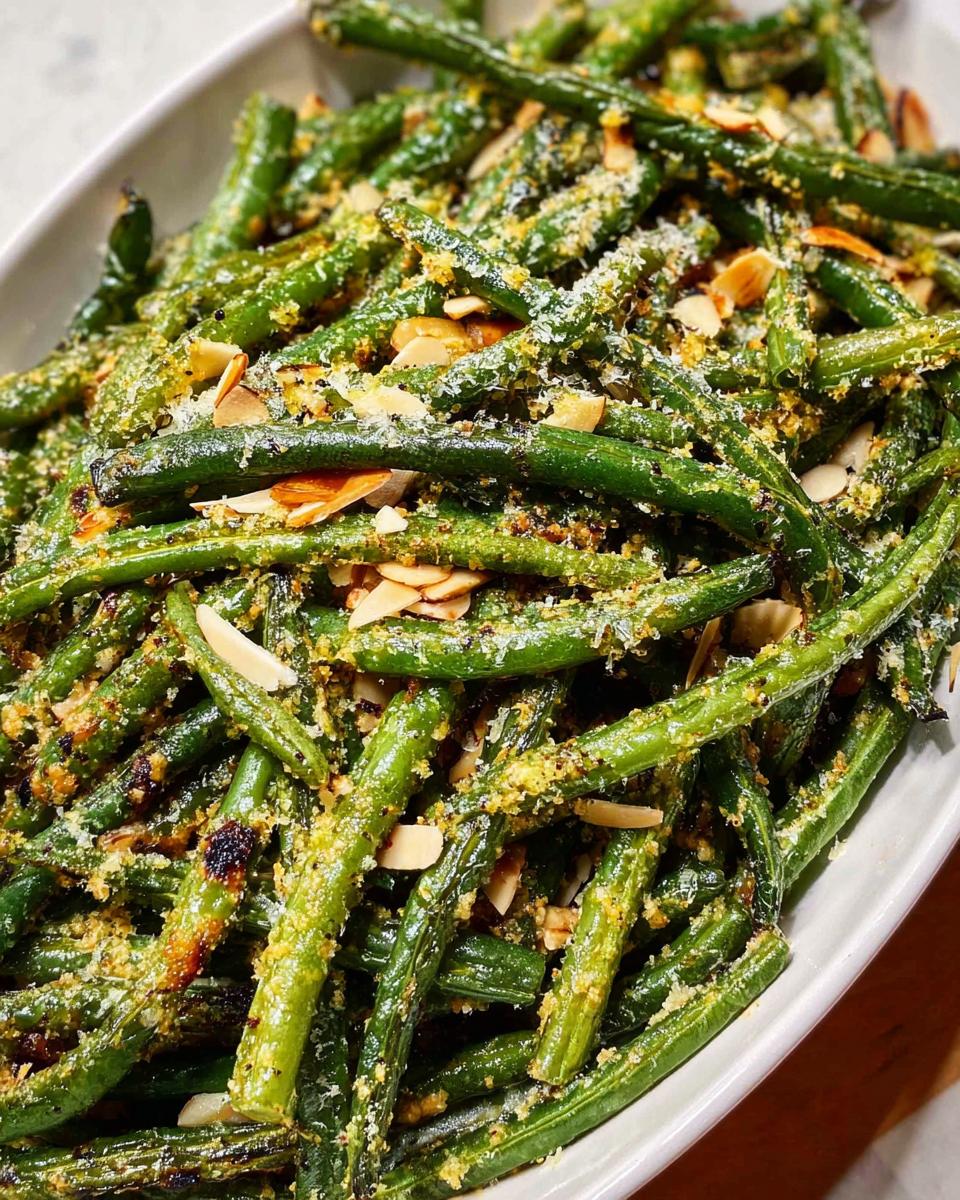
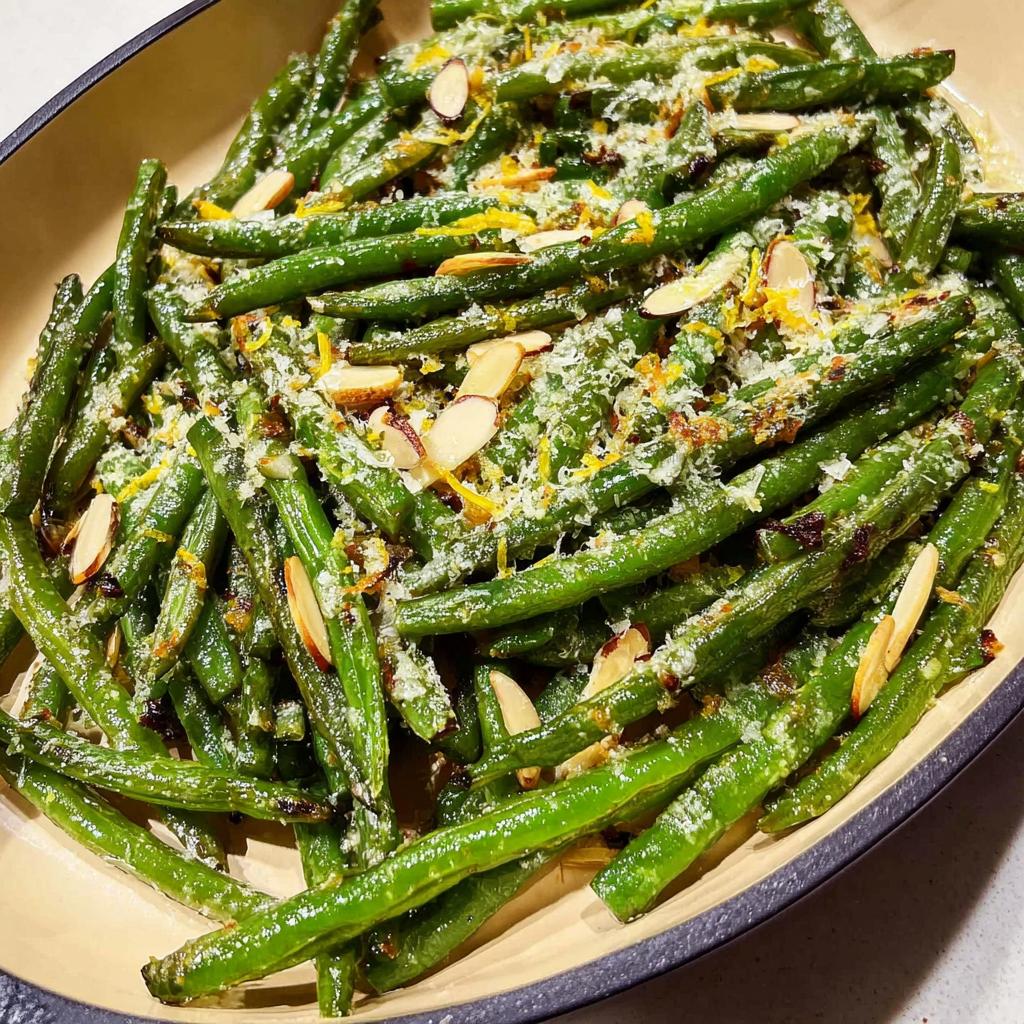
Once they look perfectly roasted and delicious, carefully take the pan out of the oven. Go ahead and transfer those beautiful green beans to your favorite serving dish. Now, for the grand finale! Sprinkle on a little extra grated Parmesan cheese, a pinch more lemon zest for that fresh scent, another grind of black pepper, and if you’re using them, scatter those toasted sliced almonds all over the top. It just adds that little bit of elegance and crunch that makes this dish truly special.
For some extra flavor ideas, you can check out our easy low-carb side dishes you can make in 30 minutes. Sometimes a little garlic powder mixed in with the coating works wonders too!
Tips for Success with Thanksgiving Green Beans
Okay, so you’ve got the recipe, but let’s talk about a few little secrets to make sure your Thanksgiving green beans are absolutely, positively perfect. Trust me, these little tips make all the difference! It’s all about giving these beautiful veggies the attention they deserve so they shine on your table. Remember these ideas for picky eaters? Well, happy green beans are happy for everyone!
Selecting the Best Fresh Green Beans
First off, the foundation of great green beans is, well, great green beans! When you’re at the store, look for beans that are bright green and firm. They should snap easily when you bend them – that’s a good sign they’re fresh and not dried out. Avoid any that look dull, feel limp, or have bumpy pods; those guys have seen better days and won’t give you that delicious crunch we’re going for.
Achieving Crispy Texture
Want those super desirable crispy bits? The absolute biggest secret is to make sure your green beans are *bone dry* before they hit the pan. I’m talking seriously dry! Use paper towels and pat them thoroughly after you trim them; any water left on them will turn into steam, and steam makes soggy beans. Also, don’t crowd the pan! Spread them out in a single layer. Give them space to breathe so they can roast and get those lovely little browned, crispy edges instead of just steaming each other into submission. Trust me on this one!
Make-Ahead and Storage for Your Thanksgiving Green Beans
You know, Thanksgiving Day is a whirlwind, and any little bit of prep we can do ahead of time is a lifesaver! The good news is these green beans are pretty quick to make, but you *can* get a head start. You can totally trim the beans a day or two in advance and store them in an airtight container in the fridge. Just give them an extra pat dry right before you toss them with the oil and seasonings. Once they’re cooked, they’ll last in an airtight container in the fridge for up to 4 days. They’re actually still pretty good cold, but for that best texture, I like to warm them up gently in a skillet over medium-low heat for a few minutes, or give them a quick 30-second zap in the microwave. Avoid overheating them, or they might get a bit mushy! If you’re looking for more ways to get ahead, check out our easy low-carb gluten-free recipes your family will actually eat for some inspiration!
Frequently Asked Questions About Thanksgiving Green Beans
Got questions about making these green beans the star of your Thanksgiving table? I’ve got answers! It’s all about making this holiday a breeze, and that includes knowing all the little tricks. If you’ve got more, don’t hesitate to reach out!
Can I Use Frozen Green Beans for This Recipe?
You know, frozen green beans *can* work in a pinch, but they won’t give you that amazing crispiness fresh ones offer. If you do use them, make sure to thaw them completely and pat them super dry. They’ll likely be a bit softer, so don’t expect that same snap, but they’ll still taste good!
What Are Good Substitutions for Almonds?
No almonds? No problem! To get a similar crunch, you can totally swap them out for toasted sliced pecans or even some crunchy toasted sunflower seeds or pepitas (pumpkin seeds). They’ll add that delightful texture that makes these green beans extra special.
How to Reheat Leftover Thanksgiving Green Beans?
To reheat, gently warm them in a skillet over medium-low heat with a tiny splash of water or olive oil, stirring occasionally. You can also pop them in the microwave for about 30-60 seconds, but watch them closely so they don’t get mushy. The skillet method is usually best for keeping them from getting too soft!
Nutritional Information
Just a little heads-up, the nutritional info below is an estimate, okay? It can totally change depending on the exact brands you use and if you add those yummy toasted almonds. For our recipe serving 4, expect roughly: Calories: ~100-150, Fat: ~8-12g, Protein: ~4-6g, and Carbohydrates: ~5-8g. Delicious *and* relatively light!
Share Your Perfect Thanksgiving Green Beans Experience!
So, have you tried making these amazing green beans yet? I’d absolutely LOVE to hear all about it! Did you make them for Thanksgiving, or maybe just a Tuesday? Spill the beans (pun intended!) in the comments below. Tell me what you thought, if you added anything special, or if you snapped some gorgeous photos! You can also connect with me and share your culinary triumphs over on my about page – I can’t wait to see your creations!
What Makes Perfect Thanksgiving Green Beans? Try This
Ingredients
Equipment
Method
- Heat the oven to 425ºF. Line a rimmed baking sheet with parchment paper or aluminum foil. Trim the stem ends from the green beans and pat them very dry.
- Place the green beans, olive oil, lemon zest, lemon juice, kosher salt, and black pepper on the prepared baking sheet. Toss with your hands until evenly coated. Spread the green beans into an even layer.
- Roast for 5 minutes. Stir the green beans and arrange them back into an even layer. Sprinkle the grated Parmesan cheese evenly over the beans.
- Return the baking sheet to the oven. Roast for another 5 to 6 minutes, or until the cheese and green beans are browned in spots. Transfer the green beans to a serving dish.
- Sprinkle with additional grated Parmesan cheese, lemon zest, black pepper, and the toasted sliced almonds, if using.
Notes
Tried this recipe?
Let us know how it was!
Mindfulness & Emotional Wellness Specialist
I never thought I’d leave my career as a corporate litigation attorney, but a panic attack in a courthouse bathroom changed everything. After struggling with emotional eating for over a decade—starting in college and getting worse through the stress of law school—I realized that no diet could fix what was really going on inside me.
My breakthrough came through mindfulness meditation training. Working with Jon Kabat-Zinn’s protocols, I discovered that my relationship with food reflected deeper patterns of anxiety and perfectionism that I’d been avoiding for years. That’s when I understood that sustainable eating changes require internal transformation, not just external rules.
Now I treat meal preparation as meditation practice. My “Mindful Kitchen” workshops help people transform ordinary cooking into opportunities for self-awareness and emotional healing. I’ve developed over 180 recipes designed for slow, mindful preparation—complex enough to keep you present, simple enough not to overwhelm your nervous system.
I believe food becomes medicine when we approach it with presence rather than reactivity. The kitchen can be our monastery if we choose to enter it with reverence.