

Oh, I know the feeling. Trying to find that perfect comfort food when you’re juggling dietary hurdles feels impossible sometimes! That’s why I pour my heart into recipes like this. This version of Cheesy Pull-Apart Bread is my secret weapon because it brings everyone to the table—no matter their restrictions. When my son got his celiac and diabetes diagnoses, I thought those cheerful, warm, cheesy meals were gone forever. But my kitchen became a lab! I still remember the first time I pulled this loaf out, and watching my son’s face light up when he took that first gooey bite? Pure magic. It reminded me why I do what I do as a Dual-Restriction Recipe Engineer. If you want to know more about my approach, you can always check out my philosophy over at my about page. Trust me, this recipe is adaptable, crowd-pleasing, and utterly delicious.
I’ve tweaked and tested so you don’t have to worry about the texture or the flavor being ‘off.’ We’re aiming for pure, unadulterated joy here, whether you’re catering to picky eaters or navigating your own needs. Grab your mixer; we are making something amazing!
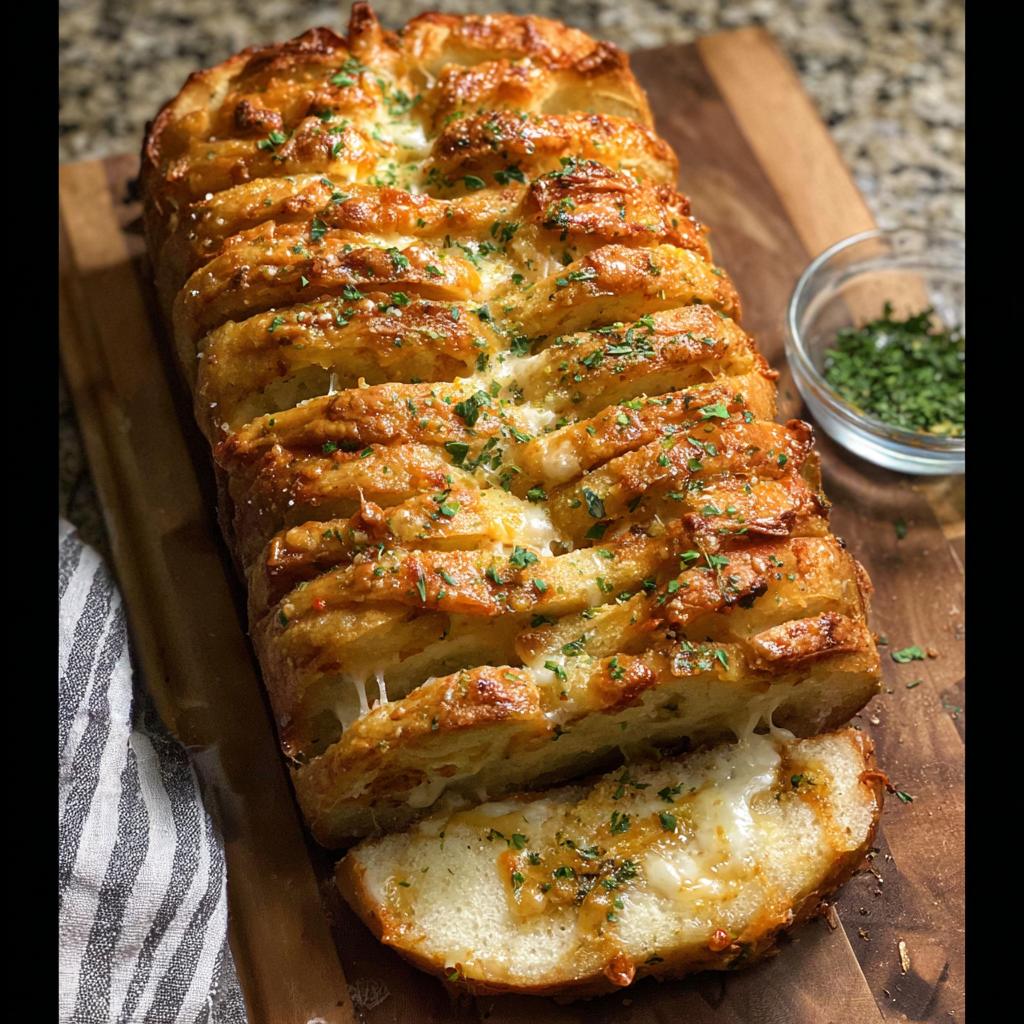
Why This Cheesy Pull-Apart Bread is Your New Party Favorite
Honestly, this is the easiest way to impress a crowd while keeping everything simple in the kitchen. As a recipe engineer who focuses on real-life results, I can tell you this bread checks every box.
- It is designed to be the ultimate Shareable Appetizer—just pull and eat!
- The soft inner dough and the loads of cheese makes even the pickiest eaters happy.
- It travels well, which is huge when you’re bringing a dish to a potluck or gathering.
If you are looking for more ideas that work for tricky diets but taste amazing, check out 27 Low-Carb Meals Your Picky Eaters Will Actually Love. This bread definitely belongs on that list!
Essential Ingredients for Perfect Cheesy Pull-Apart Bread
Okay, don’t let this list scare you! We break it down into sections so it’s super easy to shop and prep. Getting these ratios right is how we guarantee that soft, slightly sweet dough and that amazing, gooey cheese pull. Trust me, using the right milk temperature for the yeast is non-negotiable here if you are using traditional yeast.
For the Dough
This is the soft foundation for our bread. It needs to be just right!
- 2.25 cups all-purpose flour (that’s 281 g)
- 2 tablespoons granulated sugar
- 2 teaspoons instant yeast
- 1.5 teaspoons kosher salt
- 0.75 cup whole milk, warmed until it’s between 105°F to 115°F (184 g—this warmth is key!)
- 3 tablespoons unsalted butter, softened
For the Gooey Cheese Filling
This is where the magic happens and the bread earns its title as a party favorite. Don’t skimp on the stirring here!
- 0.5 cup unsalted butter, softened (that’s one full stick, or 113 g)
- 1 tablespoon garlic, minced
- 1 tablespoon parsley, chopped (plus extra for when we finish it up!)
- 0.5 teaspoon kosher salt
- 1 cup mozzarella cheese, shredded (113 g)
- 0.5 cup sharp cheddar cheese, shredded (56.5 g)
For the Toppings
Just a quick brush at the end to make these golden and shiny.
- 1 tablespoon unsalted butter, melted
- A little bit of kosher salt for garnish
Equipment Needed for Your Cheesy Pull-Apart Bread
Because we are making this bread dough from scratch, having the right tools makes the process fly by! If you don’t have a stand mixer, don’t panic—I’ll give you a quick tip later on mixing by hand, but for this gooey cheese bread, the mixer really helps build the structure.
Make sure you have these items ready before you start mixing your dough:
- A stand mixer, definitely use that dough hook attachment!
- A loaf pan—I use an 8 ½ x 4 ½-inch size, which works perfectly for this recipe.
- A sheet pan, so we can assemble the pieces before they go into the pan.
- Parchment paper; this is essential for easy transfer and cleanup!
- A wire rack for cooling the bread once it comes out of the oven.
Getting all this set up first means you eliminate any scrambling when the dough is rising or ready to bake. It just makes everything feel calmer, which is exactly what you want when baking comfort food!
Step-by-Step Instructions to Make Cheesy Pull-Apart Bread
Okay, deep breath! This sounds complex because it makes so much bread, but following these simple steps in order keeps things smooth. We move right from making the dough, letting it rest, layering the flavor, and finally, baking this wonderful party favorite. If you are ever trying to make a rich sauce on the side, make sure you check out how I manage a perfect gluten-free roux—it involves similar patience.
Preparing the Dough and First Rise
First thing’s first: we get the dough going. You need your mixer for this part! Toss your flour, sugar, instant yeast, and salt right into the mixer bowl. Get that dough hook on there.
Next, pour in your warm milk—remember, between 105°F and 115°F—and add the softened butter. Mix it slowly to start, just until everything starts coming together. Then, bump the speed up to medium and let the dough hook work its magic for a solid 5 to 6 minutes. You are looking for smooth and elastic! If it’s sticky, add just a tiny splash more milk, or a tablespoon of flour if it seems too wet.
Once it’s looking good, transfer that ball of dough to a bowl you’ve greased up nicely. Cover that bowl with plastic wrap and find a warm spot. This baby needs to relax and double in size, which usually takes about 1 hour and 30 minutes. While you wait, you can whip up the filling! If you want to see how another scratch baker approaches this, check out this inspiration piece from I Am Homesteader on their version of cheesy garlic pull-apart bread.
Assembling the Cheesy Pull-Apart Bread Layers
While the dough is doing its thing during that first big rise, mix up your filling. Soften up that half-cup of butter and beat in the minced garlic, chopped parsley, and that half teaspoon of salt. Set that savory spread aside. In a different bowl, just toss your mozzarella and cheddar together—that combo is what makes the final product so perfectly stretchy and cheesy.
Now, punch down your risen dough—it’s going to deflate like a sad balloon, which is great! Turn it out onto your clean surface and slice it evenly into 12 little pieces. You want them roughly the same size so they bake evenly. I use my kitchen scale for consistency, but eyeballing it is fine too.
Take each of those 12 pieces and flatten it into about a 4-inch round disc. Lay them out onto your parchment-lined sheet pan. Now, work quickly: paint on a little bit of that garlic butter mixture onto each disc, then top it with an equal amount of the shredded cheese mixture. Stack the pieces on top of each other—you are creating 2 stacks of 6 discs each. Gently place the dough stacks horizontally into your prepared loaf pan. Smooth them down slightly and separate the pieces just a hair.
Cover the pan and let it have a second, shorter rest for about 45 minutes. This final proofing makes for the softest texture!
Baking and Finishing Touches
When that second rise is done, it’s time for the heat! Preheat your oven to 325°F. You need to bake the loaf for about 45 to 50 minutes. Keep an eye on it! Because this is such a rich loaf, you might notice the top getting too dark before the center is cooked through. If that happens, just loosely TENT the top with aluminum foil to stop the browning. This keeps the beautiful color without burning it. If you’re ever needing a refresher on how to handle rich doughs, check out my recipe index!
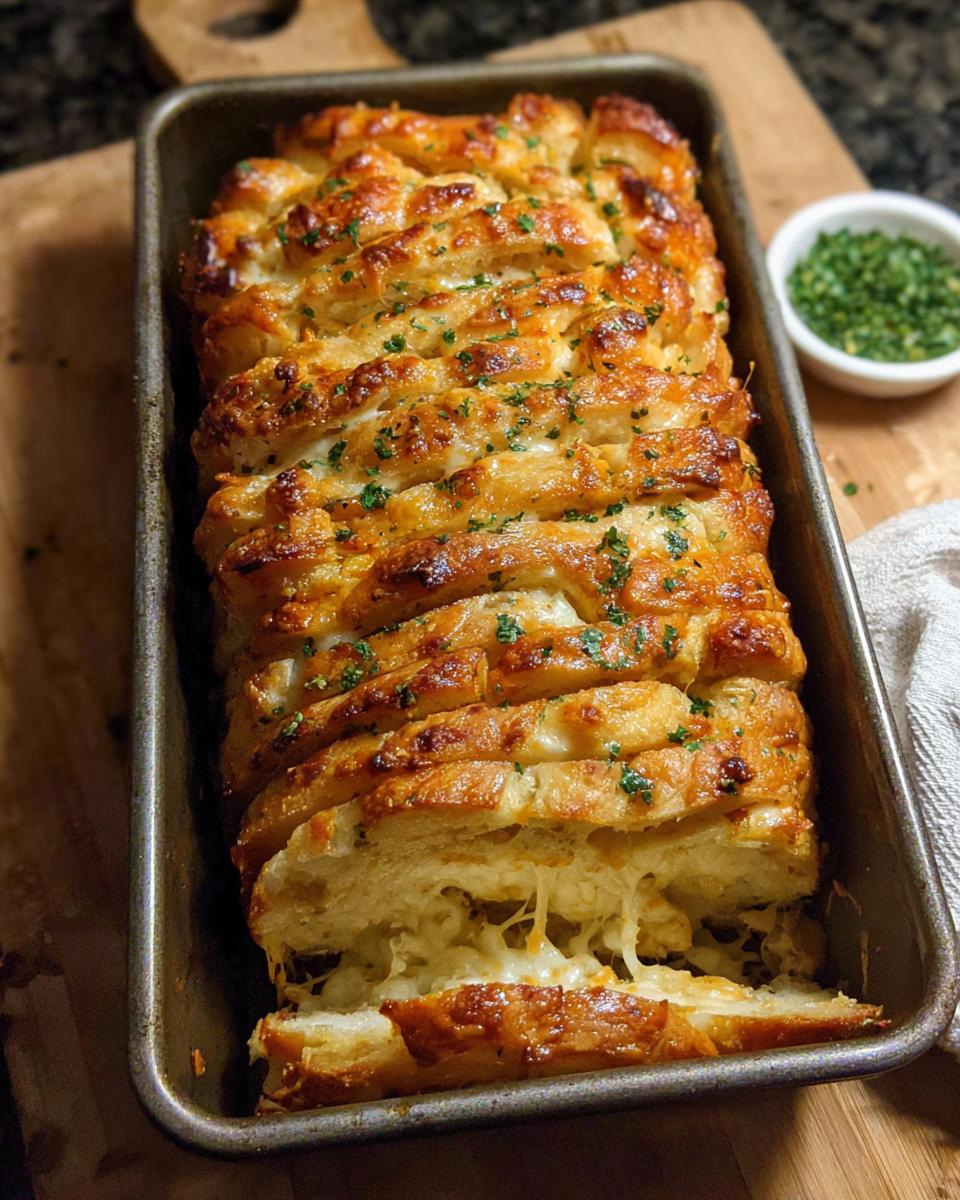
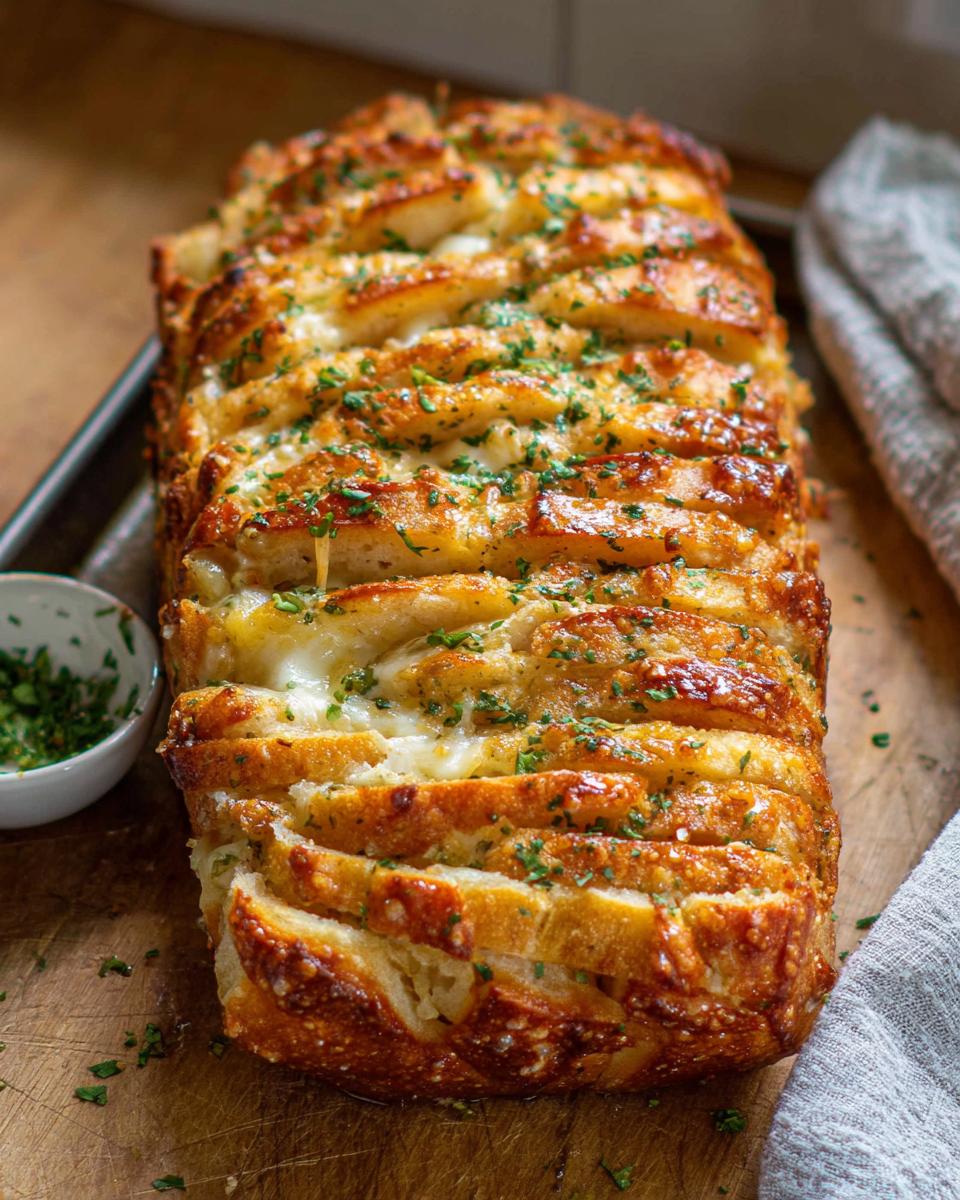
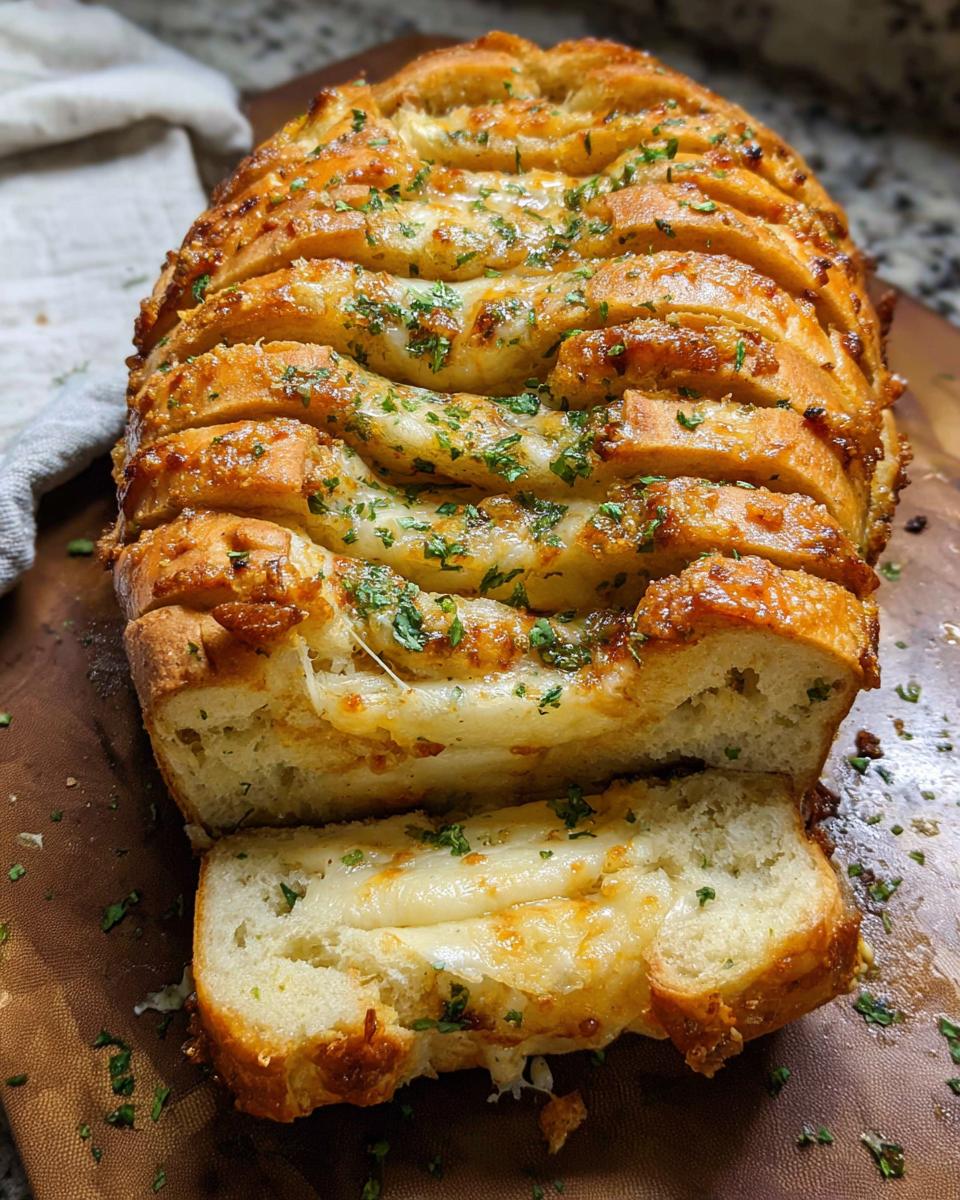
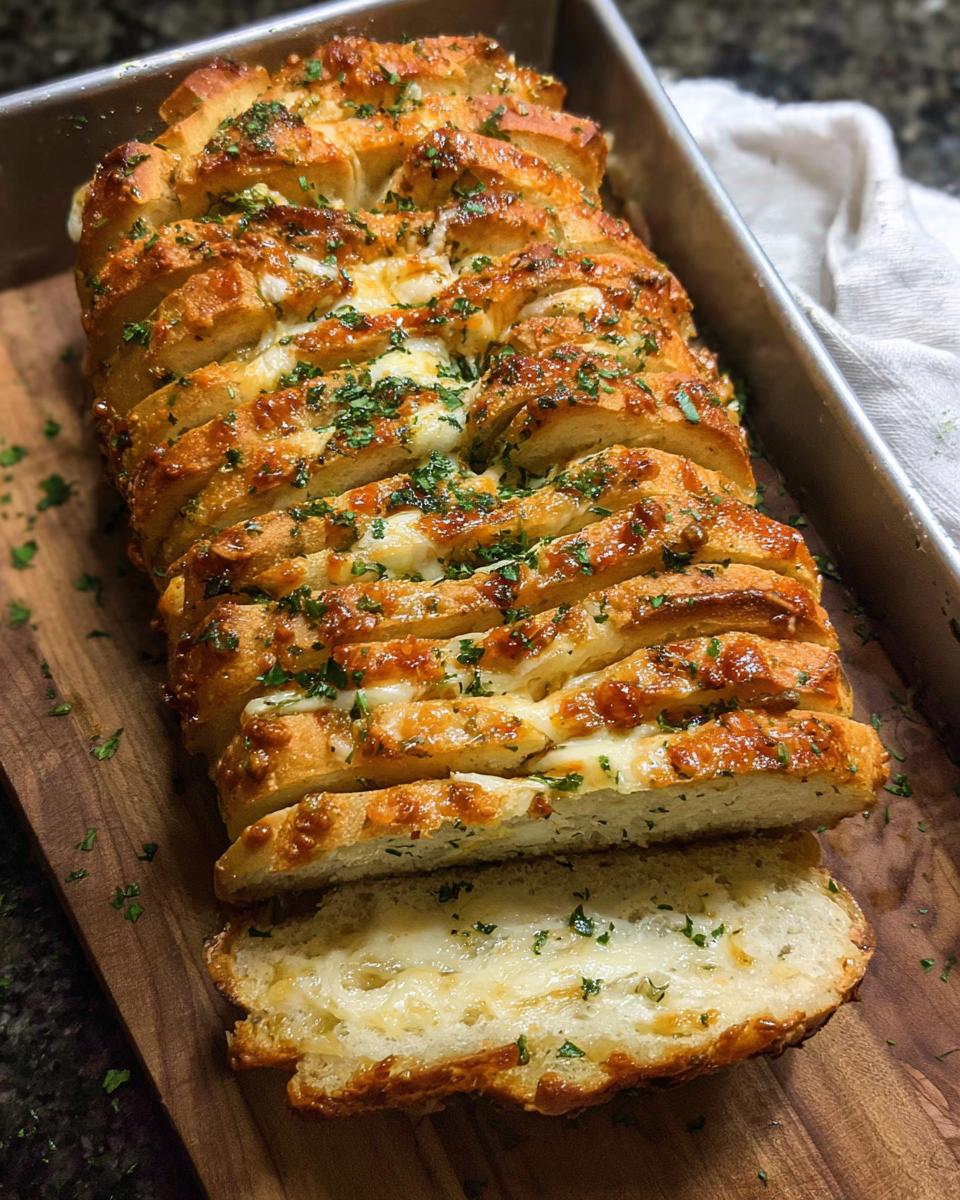
When it’s golden brown all over and cooked through, pull that loaf out! Let it cool *slightly* in the pan—maybe 5 minutes—then transfer the whole pan to your wire rack. While it’s still piping hot, brush the top with that reserved melted butter and sprinkle it right away with a little extra kosher salt and some fresh parsley if you have it. That final brush locks in the moisture and makes that crust shine. Wait just a few minutes for it to set up, and then get ready to pull!
Tips for Success with Your Cheesy Pull-Apart Bread
Look, I’ve messed up enough batches of dough to know what tiny things make a massive difference here. Because we are relying on the yeast to give us that perfect rise so the bread isn’t dense, a couple of steps are super important. When you’re working with any yeast bread recipe, pay close attention to the beginning, and you’ll avoid halfway disasters!
Here are the few things I always watch like a hawk:
First up: the milk temperature. If the milk is too cool, your yeast just sleeps, and you’ll sit around waiting for hours for that first rise. If it’s boiling hot—and trust me, boiling milk happens if you aren’t watching—you kill the yeast instantly. You want it just shy of warm to the touch, that sweet spot between 105°F and 115°F. Think of it as a nice, warm bath!
Next, remember that dough consistency I mentioned? If you’re measuring the flour by scooping straight from the bag, you often pack it in, and your dough will be stiff and dry. Always spoon the flour into your measuring cup and then level it off! But even with perfect measuring, sometimes the atmosphere makes the dough dry. If your dough looks ragged and won’t come together after kneading, add more milk one tablespoon at a time. It’s easier to add a little wetness than to try and fix a brick-like dough later.
Finally, let’s talk about those beautiful golden tops. We established covering the top with foil around the 35-minute bake mark, but here’s another pro tip: make sure the loaf pan itself isn’t sitting too close to the top heating element in your oven. Sometimes, if the pan is too high, the top browns super fast while the cheese in the middle underneath is still cool. Every oven is different, so use that foil tent aggressively if you see the color getting rich before the timer hits 40 minutes!
If you’re struggling with richness in other recipes, sometimes you just need a little binder confidence! I find my tips for making a really rich low-carb gravy translate well to dough care—it’s all about gentle, patient building!
Storage and Reheating Instructions for Cheesy Pull-Apart Bread
Okay, so this bread is so addictive that you might actually have leftovers—unlikely, but let’s prepare just in case! Since this Cheesy Pull-Apart Bread is made with a yeast dough, how you store it really matters for keeping that soft texture.
If you have any leftovers, the best way to keep them fresh is in an airtight container right on the counter. Don’t stick it in the fridge unless you absolutely have to! Cold air tends to dry out bread doughs pretty quickly, and we want to protect that delicious outer crust we worked so hard for.
Now, let’s talk about bringing that gooey cheese back to its glorious, melted self. Forget the microwave! The microwave is a cheese-stiffening villain. To truly revive this Party Favorite, you need gentle heat.
I highly recommend reheating the bread in an oven or toaster oven. Slice off exactly how many pieces you need—don’t reheat the whole loaf if you’re only eating a couple! Wrap those pieces loosely in a small square of foil. Pop them into a 325°F oven for about 8 to 10 minutes. The foil steams the bread just enough so it softens up, and the low heat allows the mozzarella and cheddar to melt back into that perfect, stretchy consistency.
If you are looking for ways to make dinner cleanup easier while reheating this, I have some fantastic one-pan dinner ideas that might inspire your next meal, but for this cheesy delight, wrapping it tight is the way to go!
Serving Suggestions for Cheesy Pull-Apart Bread
Even though this Cheesy Pull-Apart Bread is absolutely divine on its own—seriously, grab a napkin and dig in—sometimes you want to dress up the table a little more, especially if this is the star of your appetizer spread. It’s such a fantastic, satisfying Shareable Appetizer that it really deserves a good, simple partner.
When I bring this to a party, I try to balance out that rich garlic butter and cheese with something bright or acidic. Here are my go-to pairings:
- Simple Marinara Dip: You don’t need sauce to drown the flavor, but a small bowl of warm, good-quality marinara sauce on the side for dunking? Yes, please! It just adds that classic pizza shop comfort.
- A Light, Fresh Side Salad: Sometimes you need something to cut through the richness. A simple green salad dressed with a sharp vinaigrette is perfect for keeping the palette refreshed between pulls of bread.
- As a Side Dish: This is my secret weapon for turning a simple weeknight meal into something special. It acts like the perfect side for a big bowl of chili or even some amazing restaurant-style soup. It replaces a standard bread basket completely!
Honestly, you can serve this bread with anything hearty, but keep the side dish simple. You want the attention to remain right here on this glorious, warm, cheesy lump of goodness!
Frequently Asked Questions About Cheesy Pull-Apart Bread
I get so many questions about adapting this recipe, especially since we need to be so careful with ingredients when dealing with multiple restrictions. I’m happy to share the knowledge I’ve gained as a Recipe Engineer! Don’t hesitate to reach out if you have more questions after trying this out; you can always send a message through my contact page!
Can I use pre-made dough for this Cheesy Pull-Apart Bread?
That is a great question, especially if you’re short on time! For this specific recipe, I unfortunately can’t recommend using store-bought dough. Why? Because my entire method—the kneading, the specific liquid ratios, and the rise times—is calculated based on the gluten-free flour blend I use to keep this dish safe and diabetic-friendly. Store-bought dough rarely matches those specific needs, and it probably wouldn’t give you that signature soft texture we are aiming for. Stick to the scratch recipe here; it’s worth the effort for guaranteed success!
What is the best cheese combination for the best Pull Apart Bread?
This is all about balanced texture and flavor! You absolutely need both mozzarella and cheddar, and you can’t swap them out if you want that amazing experience. Mozzarella is the superstar for stretch—it provides that perfect, long, satisfying cheese pull. But mozzarella is pretty mild, right? That’s where the sharp cheddar swoops in! Cheddar gives us the depth of savory flavor we need to balance the sweetness in the dough. Aim for a generous amount of mozzarella and a slightly smaller amount of sharp cheddar for that ultimate Gooey Cheese center in every piece of your Pull Apart Bread.
Also, make sure you’re shredding your cheese yourself! Pre-shredded bags have anti-caking agents dusted on them that totally stop the cheese from melting smoothly together. We want seamless melt, not clumps!
Share Your Amazing Cheesy Pull-Apart Bread Creations
Whew! We did it! You’ve got a beautiful, steaming loaf of Cheesy Pull-Apart Bread sitting on your counter, and I just know it smells incredible. Now, I really want to know what you think!
The best part of sharing these carefully engineered recipes is hearing how they turn out in real kitchens—especially when you’re adapting things for dietary needs. Please, please leave a review and a star rating below. Don’t be shy about telling me what you loved, or if you tried a little substitution that worked out wonderfully for you.
And if you snapped a picture of that perfect, cheesy pull—I need to see it! Tag me online when you post your photos! Seeing your family enjoying these moments, especially after navigating tricky diets, truly makes my day. Knowing that we can bring back those comforting, shared meals without compromising flavor is everything to me.
If you’re looking for more dishes that spark conversation at the dinner table, you should sneak a peek at some of my other favorite dinner ideas that everyone asks for. Happy baking, and I can’t wait to hear how much this cheesy bread delighted your crew!
Cheesy Pull-Apart Bread
Ingredients
Equipment
Method
- In the bowl of a stand mixer fitted with a dough hook, combine flour, sugar, yeast, and salt.
- With the mixer on low speed, mix in the warm milk and butter until just combined.
- Knead on medium speed for 5-6 minutes, or until smooth and elastic. If the dough is too dry, add more milk, 1 tablespoon at a time. Or, add more flour if too wet until the dough reaches the desired consistency.
- Transfer dough to a greased medium bowl. Cover with plastic wrap and let rise in a warm spot until doubled in size, about 1 hour and 30 minutes.
- While the dough rises, combine softened butter, minced garlic, chopped parsley, and salt in a small bowl. Set aside.
- In a separate bowl, combine mozzarella and cheddar cheese. Set aside.
- Spray an 8 ½ x 4 ½-inch loaf pan with nonstick cooking spray. Set out a sheet pan lined with parchment paper. Set aside.
- Punch down the risen dough and transfer to a clean surface. Divide the dough into 12 equal pieces.
- Flatten each piece into a 4-inch round disc and place onto the lined baking sheet.
- To each round disc of dough, spread the garlic butter mixture. Then, top each with an equal amount of the shredded cheese mixture.
- Create 2 stacks of 6 discs of dough. Carefully place the dough stacks horizontally into the prepared loaf pan. Gently separate the pieces slightly. Cover the pan and let rise again until almost doubled in size, about 45 minutes.
- While the dough rises for the second time, preheat the oven to 325°F.
- Bake the loaf for 45-50 minutes, or until golden brown. Cover the pan loosely with aluminum foil if the top starts to brown too quickly.
- Transfer the loaf pan to a wire rack and let cool slightly. Brush with melted butter, sprinkle with salt, and garnish with parsley before serving.
Notes
Tried this recipe?
Let us know how it was!
Dual-Restriction Recipe Engineer & Cross-Contamination Specialist
Everything changed when my teenage son got hit with celiac disease and Type 1 diabetes diagnoses within six months of each other. Suddenly, pizza and pasta were off the table, and most “diabetic-friendly” foods contained gluten. I went from regular mom cooking to navigating what I call “compound restriction cooking”—and I had a kid’s appetite and taste buds to satisfy.
Lucky for us, my background in pharmaceutical quality control gave me the systematic mindset this level of precision requires. My kitchen now operates under pharmaceutical-grade protocols adapted for home use: dedicated prep surfaces, separate storage systems, and testing procedures that verify both carb counts and gluten absence before any recipe gets published.
I’ve developed over 220 recipes that clear multiple dietary hurdles simultaneously—finding gluten-free thickeners that don’t spike blood sugar, creating bread alternatives that meet both keto ratios and celiac safety, and developing desserts that actually taste good to a teenager despite impossible restrictions.
Through my “Safe Kitchen Certification” program, I teach other parents that managing multiple dietary restrictions isn’t about multiplying limitations—it’s about systematic thinking that reveals unexpected possibilities. When you engineer solutions instead of making compromises, restriction becomes innovation rather than deprivation.