
Oh, can we just talk for a minute about how impossible it feels sometimes to bake something truly decadent when you’re juggling dietary restrictions? It feels like every celebration requires endless compromises. I remember one evening, after yet another failed attempt to find a gluten- and sugar-free dessert that my son, bless his picky teenage heart, would actually enjoy, I decided I was done compromising. I was going to engineer a solution right here in my kitchen. That’s how this incredible Dark Chocolate Truffle Cake was born! I swear the rich scent of dark chocolate filling my house as I experimented with alternative sweeteners and gluten-free flours was pure magic. When we finally sliced into that perfectly moist, ridiculously indulgent cake, and I saw his genuine smile? That moment reminded me that we can turn those tricky restrictions into chances to bake something even better.
You can check out a bit more about my journey in adapting recipes over on my About page if you’re interested. Trust me on this one; this cake is the real deal.
Why This Dark Chocolate Truffle Cake is Your New Showstopper (Experience & Trust)
I designed this Dark Chocolate Truffle Cake specifically because I was tired of ‘good enough’ desserts for my family. When you have restrictions, you usually lose the wow factor, right? Not here! This cake brings back the joy of a true special occasion dessert.
- It delivers that deep, luxurious chocolate experience without relying on traditional components that might cause issues.
- This recipe lets you serve a stunning Holiday Dessert that everyone, regardless of restriction, will eagerly dig into.
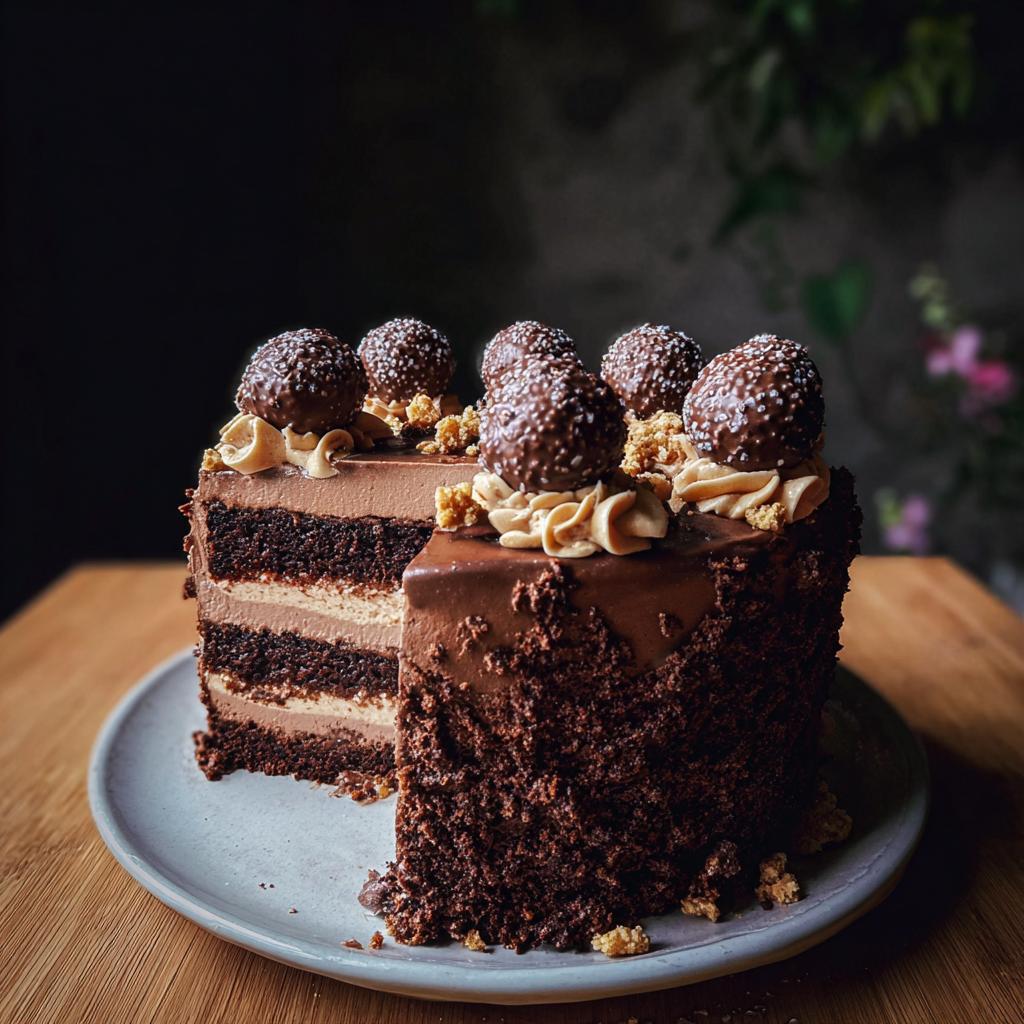
- The textures—moist cake, creamy frosting, glossy ganache—are all there!
Overcoming Dietary Hurdles with Rich Chocolate
When you’re dealing with gluten-free flour blends or alternative sweeteners, sometimes the flavor falls flat, or the texture gets spongy. That doesn’t happen when we focus on pure, intense chocolate flavor. We’re using quality cocoa and dark chocolate to punch up the taste so much that nobody notices what’s missing. It’s about resourcefulness! We’re making a truly rich chocolate experience that feels deeply satisfying.
Essential Ingredients for Your Dark Chocolate Truffle Cake
You know, when you’re baking for sensitive diets, every single ingredient matters—and measuring correctly isn’t just a suggestion, it’s the law! Because this Dark Chocolate Truffle Cake relies on those precise combinations to stay moist and decadent despite not using traditional flour or binders, we have to pay attention to the details. After tweaking dozens of test batches, I figured out exactly what works to get that rich chocolate payoff. Trust me, sourcing the right chocolate and cocoa powder is step one for achieving true showstopper status!

We are using a mix of sugars here to build moisture and flavor depth, but I’ll chat more in a second about how you might play around with those if you need to lean into that low-sugar goal. For instance, finding gluten-free baking substitutes can sometimes be tricky business, requiring knowledge often shared in guides about how to approach specialized ingredient swaps, like how they talk about making a perfect gluten-free roux—but don’t worry, we’re keeping this recipe straightforward!
Ingredient Notes and Substitutions for Dark Chocolate Truffle Cake
Okay, let’s talk specifics because this is where I spend most of my time making sure things work right for my family, and I want it to work right for yours too. That little note in the ingredient list about cocoa powder? It’s crucial.
You absolutely must use unsweetened *natural* cocoa powder, not the Dutch process kind. Natural cocoa powder is more acidic, which reacts perfectly with the baking soda we’re using to get our lift. If you swap in Dutch process, your cake will fall flat, trust me. It’s a non-negotiable for this specific chemistry!
Next up, the yogurt. We need the good stuff—full-fat, plain Greek yogurt. This isn’t just for tang; it brings necessary richness and moisture that mimics what traditional butter and buttermilk might provide in other recipes. Don’t substitute with low-fat or regular yogurt; you lose too much body!
And finally, the hot coffee. It has to be hot and strong. The heat immediately starts blooming the cocoa powder, intensifying that dark chocolate flavor! I often brew a small amount in my single-serve brewer right before I mix. If you’re looking to lower the sugar content significantly, you can look into Monk Fruit blends for the granulated sugar, but you’ll need to reduce the liquid slightly since those substitutes sometimes don’t hydrate the same way. For the brown sugar, sometimes a specialty low-carb brown sugar substitute works, but it might affect the final texture slightly.
Step-by-Step Instructions for the Ultimate Dark Chocolate Truffle Cake
Alright, gather your bowls and stand mixer! While this Dark Chocolate Truffle Cake looks like it belongs in a fancy bakery window, the steps are actually super straightforward if we take it one part at a time. Remember, we’re looking at about 60 minutes of bake time and then a solid 60 minutes of chilling time later on, so plan accordingly for this special occasion baking project. I like to tackle the cake layers first, then whip up the frosting while they cool. Keep all the tools listed ready to go—having your parchment paper cut ahead of time saves so much hassle later!
You can find links to some great general baking tutorials, like on my main recipes page, if you ever need a refresher on basic techniques.
Baking the Moist Cake Layers for Your Dark Chocolate Truffle Cake
First things first, get that oven cranked up to 325 degrees F (163 degrees C). Prep those two 8-inch pans like I mentioned—you need the butter/shortening *and* the parchment paper, especially since this rich cake might want to stick otherwise! Don’t skip that cocoa blooming step; after you combine your wet ingredients, we introduce that hot, strong-brewed coffee while the mixer is running on low. Wow, the smell that immediately releases from the cocoa? That’s the depth of flavor being built right there.
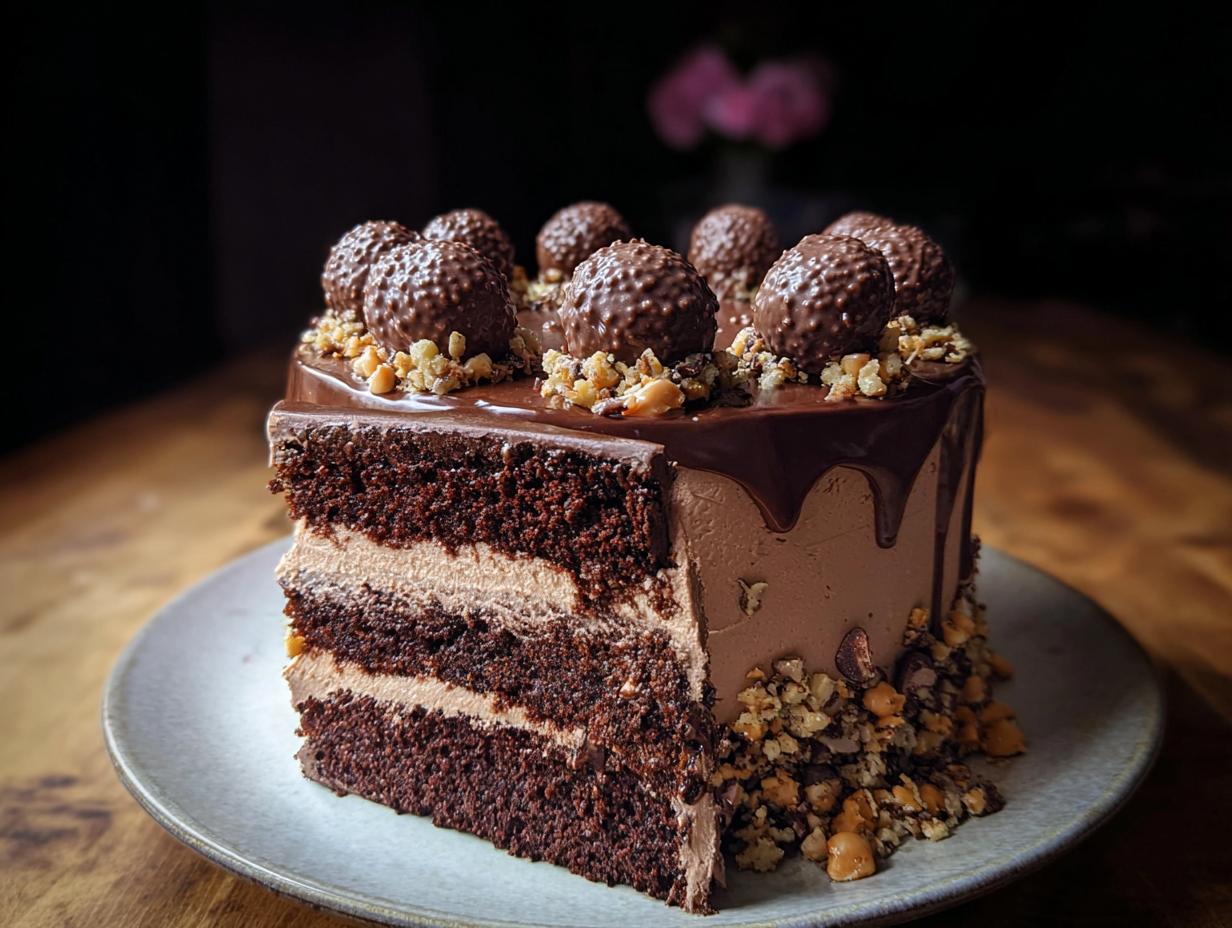
Bake these beauties for about 55 to 65 minutes. How do you test them? Forget the wet batter test; we want **moist crumbs** clinging to the toothpick, not raw batter. If that toothpick comes out wet, give it five more minutes and check again. Let them chill in the pans for just five minutes—no more!—before you flip them out onto the wire racks to cool totally. Seriously, if you try to frost them warm, you’ll have melted chocolate soup disaster. Don’t worry, you can view an amazing example of a similar truffle cake build here.
Assembling the Rich Chocolate Truffle Cake
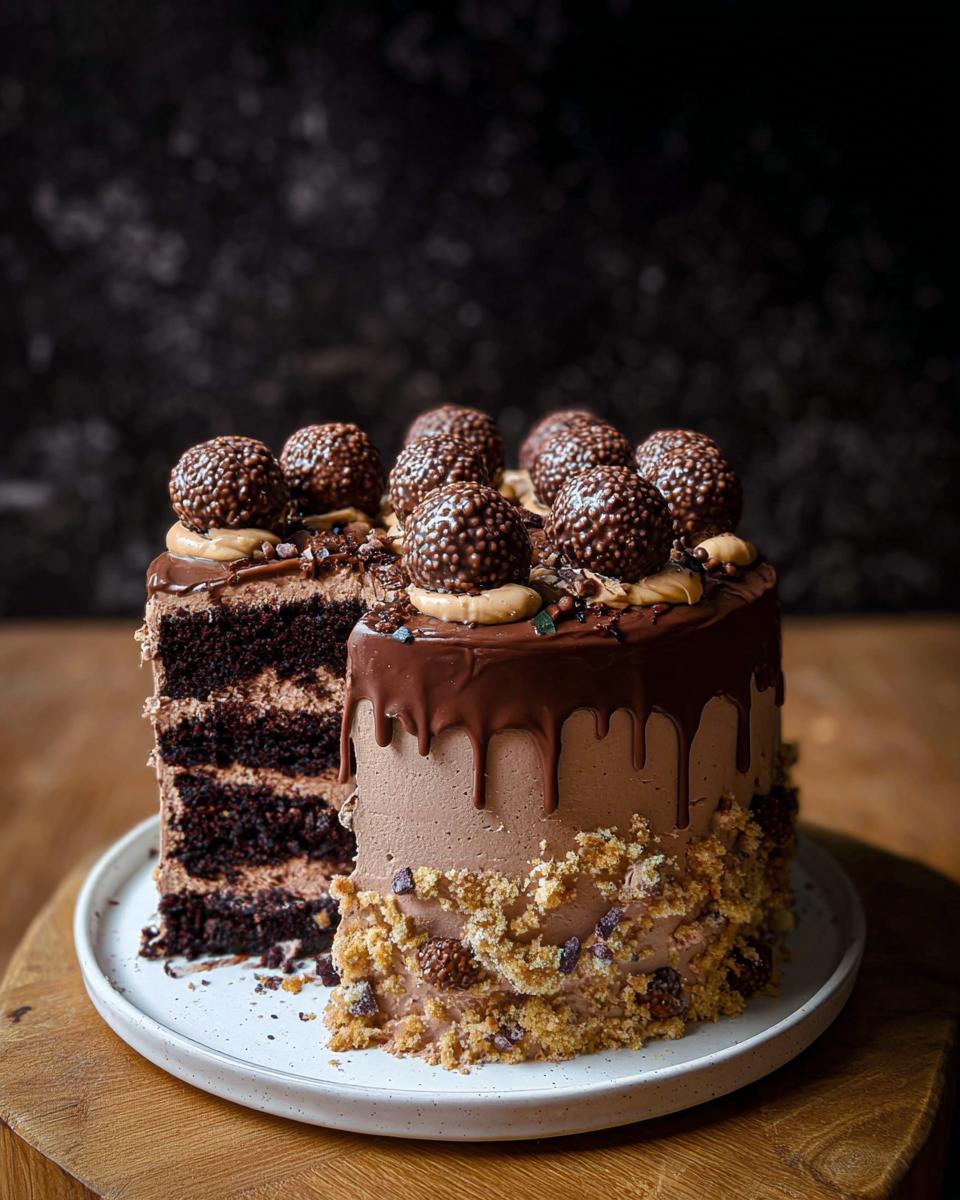
Once those layers are completely cool—and I mean fridge-cool if you’re in a hurry—it’s time to make this thing look like a showstopper! Place your first layer on your cake board. Slather on a generous amount of that milk chocolate buttercream. Now, here’s a little baker trick: put the second layer on **upside down**. This gives you the flattest possible top surface to work with! Cover the whole thing in the rest of the buttercream, smoothing the sides. Make sure you press those ground nuts right around the bottom edge—it looks so professional!
This is the crucial pause: Get that whole frosted cake into the refrigerator for exactly 1 hour. This sets that buttercream firm, and believe me, you need it firm before pouring that glossy dark chocolate ganache over the top. If you skip this chilling step, the ganache runs right off the sides, and you don’t get those elegant drips you are hoping for!
Expert Tips for a Perfect Dark Chocolate Truffle Cake Finish
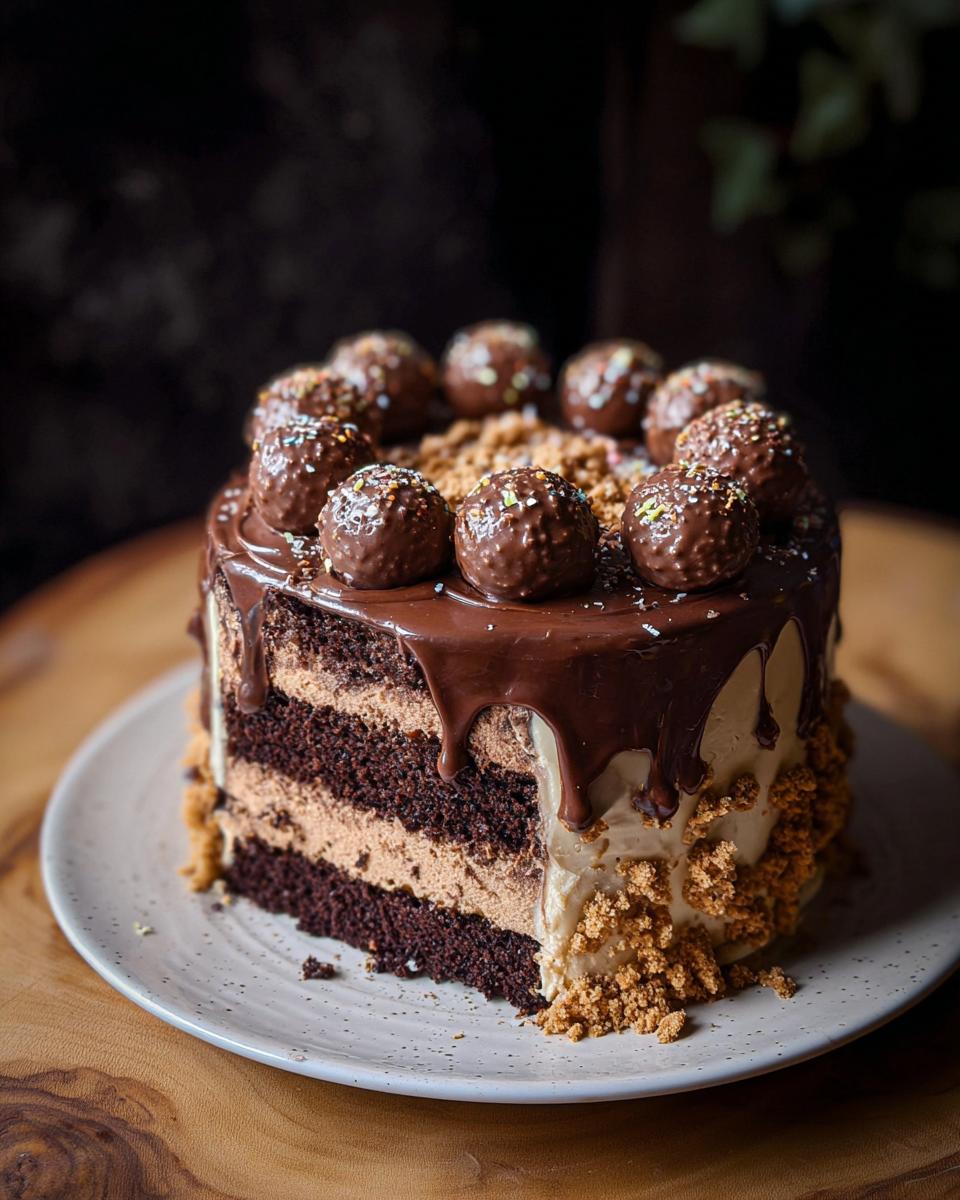
We are so close to the perfect Dark Chocolate Truffle Cake finish! That pour of ganache can be intimidating, can’t it? The biggest thing I learned is temperature control. You need that buttercream base firm—that’s why the hour chill is essential before the ganache goes on. If the cake is cold and the ganache is warm and pourable (like pancake batter, not hot soup!), it sets up beautifully.
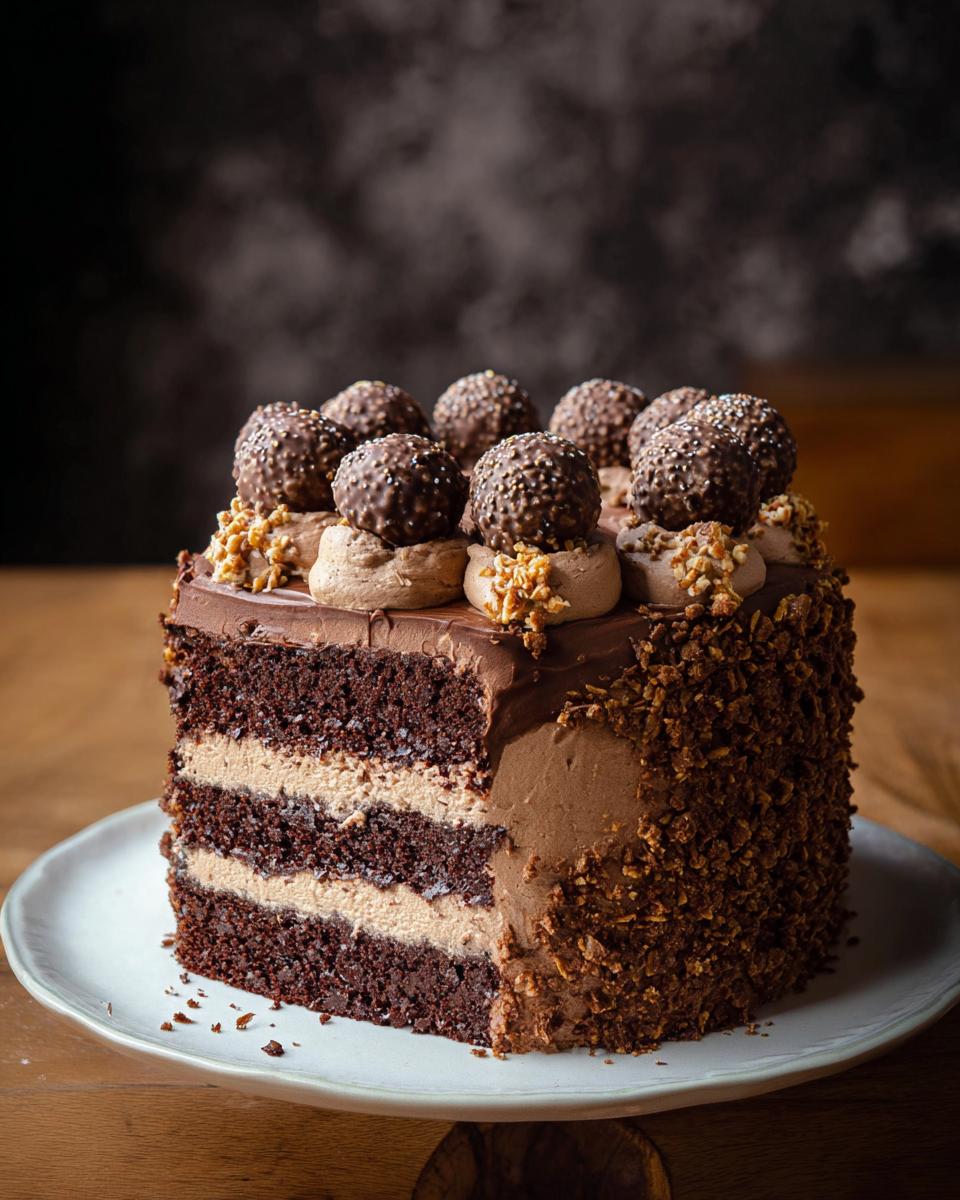
When you pour, start right in the middle and let gravity do the work, pushing it gently to the edges so it starts to cascade down. If you need a little help controlling where the drips stop, you can use an offset spatula to gently guide the very edge before it sets. Also, topping those truffles on only after the ganache has set up slightly keeps them from sinking right into the soft frosting underneath. It takes patience, but the payoff is a true showstopper!
If you’re looking for other ways to make sure your rich sauces and smooth toppings come out perfectly, check out my tips for making rich low-carb gravy; the texture rules for things setting correctly after cooling are surprisingly similar! You can read more about getting those perfect textures here: rich low-carb gravy tips.
Making Ahead and Storing Your Dark Chocolate Truffle Cake
Planning ahead is the secret weapon for any busy parent or home baker, especially when you need a proper showstopper for a holiday dessert or special occasion! The good news is that this Dark Chocolate Truffle Cake actually tastes better when you give the flavors time to marry. I always recommend breaking this down into smaller, manageable chunks.
If you’re really organized, bake those two cake layers first. Once they are completely cool, wrap each layer tightly in plastic wrap—and I mean *tightly*—before tucking them into an airtight container. They can hang out on the counter for a day, or you can put them in the fridge for up to two days. If you want to push it longer, freeze them! They freeze beautifully for up to three months. Just make sure you thaw them slowly in the fridge first.
Your milk chocolate buttercream and even the dark chocolate ganache can be made a couple of days ahead of time too. Keep the buttercream covered airtight in the fridge. You’ll need to let it sit out on the counter for maybe an hour or two before you can rework it back into a smooth, spreadable consistency. The ganache is easier; just cover it lightly and keep it at room temperature if your kitchen isn’t too hot, or chill it briefly if you need to keep things very firm. Remember, you have to let that buttercream set for that crucial 1 hour of chilling time after assembly before you even think about pouring that ganache! Preparing weeks ahead is easy, which means less stress when the big day finally arrives.
For more great ideas on how to prep meals and components ahead of time so you aren’t scrambling on serving day, I have some fun meal prep thoughts over on my meal ideas page that might inspire your dessert timeline too!
Frequently Asked Questions About This Chocolate Truffle Cake
I know when you’re baking for specific dietary needs, you always have more questions than usual! That’s totally normal, and honestly, it’s why I spent so much time testing this Dark Chocolate Truffle Cake to work reliably. Here are a few things that usually pop up when folks are making this decadent dessert for the first time.
Can I make this Dark Chocolate Truffle Cake entirely sugar-free?
That’s a big question, and the answer is yes, with a little caveat! You absolutely can substitute the white and brown sugars using a high-quality, granular, zero-calorie sweetener meant for baking, like erythritol blends or monk fruit. However, sugar does more than just sweeten; it adds structure and moisture. When you swap it out, your cake might be slightly less tender or might brown differently. You might need to add an extra splash of that Greek yogurt or oil to help keep the texture rich. The flavor will still be intensely chocolatey for a great low-sugar Holiday Dessert experience, but be ready for slight texture adjustments!
How do I ensure the cake layers are perfectly level for stacking?
This is the key to getting that smooth, professional finish on your Chocolate Truffle Cake! Never just try to stack them when they come out of the oven, even if they look flat. Once those layers are completely cool, I take a long, sharp serrated knife—you know, the one I usually use for bread—and I gently saw off the slightest dome they developed while baking. This evens out the top surface perfectly. If you have a specialized cake leveler, use that! Getting those two layers perfectly flat before you start applying the buttercream means your final layer of ganache will look crisp and professional, not like it’s melting down one side.
If you’re curious about other ways to streamline a tricky recipe, you might find some helpful guidance on my list of easy low-carb, gluten-free recipes that focus on simplicity!
Nutritional Estimate for the Dark Chocolate Truffle Cake
Now, I know many of you, just like me, watch those macros and carbs closely, especially needing accurate counts for little ones managing things like Type 1 Diabetes. That’s why I want to be super clear about the numbers here. Because this Dark Chocolate Truffle Cake is entirely adaptable—we swap out sugars, use different brands of cocoa, or choose different sweeteners for those low-carb goals—the exact nutritional breakdown changes every single time I bake it for my son.
So, consider any nutritional data you might see floating around online, or even what an online calculator generates based on this base recipe, as only a rough guideline or an estimate based on standard, non-substituted ingredients. When you start swapping granulated sugar for a different zero-calorie sweetener, or swapping vegetable oil for coconut oil, those calorie and carb counts shift!
My commitment to you is always safety and flavor first. If you are tracking precise nutritional information for medical reasons, you absolutely must calculate the figures yourself based on the exact brands and substitute ingredients you choose for your version. That way, you have the most accurate information for your specific needs while still enjoying this truly rich chocolate dessert!
Share Your Showstopper Dark Chocolate Truffle Cake Creations
I poured my heart into making this Dark Chocolate Truffle Cake work, and honestly, seeing what you all create in your own kitchens is the greatest reward! Baking with restrictions can feel isolating sometimes, but we are building such a wonderful community here where we can share those hard-won victories.
If you baked this for a special occasion or managed to nail a tricky sugar-free swap, please, please come back and let me know! Drop a comment below; I truly love hearing about your successes, especially if you had to adapt ingredients for unique allergies or carb limitations. Did substituting a specific sweetener work beautifully for you? Or maybe you decorated it differently for the holidays?
Don’t forget that if you share photos—and I hope you do!—you can tag me! I can’t wait to see your gorgeous, rich chocolate creations! If you have questions about ingredient sourcing or need to reach out directly, remember you can always connect with me via the contact page. Happy baking!
Dark Chocolate Truffle Cake
Ingredients
Equipment
Method
- Preheat your oven to 325 degrees F (163 degrees C). Prepare two 8-inch round cake pans by coating them with vegetable shortening or butter. Line the bottom of each pan with parchment paper, press it down, and coat the paper with shortening or butter. Sprinkle flour inside the pans, shake to coat evenly, and tap out the excess.
- In a large bowl, combine the granulated sugar, brown sugar, flour, cocoa powder, salt, baking powder, and baking soda. Stir to mix.
- Add the eggs, egg yolk, vegetable oil, yogurt, and vanilla extract to the dry ingredients. Beat on low speed with an electric mixer until just blended, then increase speed to medium and beat for 2 minutes, scraping down the sides as needed.
- Reduce mixer speed to low. While the mixer is running, slowly pour in the hot coffee until blended. Stop the mixer, scrape down the sides, and stir to ensure the batter is well combined.
- Divide the batter evenly between the two prepared cake pans. Approximately 920 grams of batter per pan.
- Bake for 55-65 minutes, or until the cake tops are set and pulling away from the sides. Insert a toothpick into the center; it should come out with moist crumbs, not raw batter.
- Let the cakes cool in their pans for 5 minutes. Invert the cakes onto wire cooling racks to cool completely.
- To assemble, place one cake layer right side up on a cake board. Spread a generous amount of milk chocolate buttercream over the top. Place the second cake layer upside down on top of the buttercream. Cover the entire cake with a thick layer of buttercream, smoothing the top and sides.
- Press ground nuts around the bottom edge of the cake.
- Refrigerate the cake for 1 hour to firm up the buttercream.
- Prepare the dark chocolate ganache. Ensure it has a pourable consistency, like pancake batter. If too thick, gently warm it; if too thin, chill it briefly.
- Pour the ganache over the top of the chilled cake, allowing it to drip down the sides.
- Decorate the top of the cake with chocolate truffles.
- Refrigerate until ready to serve.
Notes
Tried this recipe?
Let us know how it was!
Dual-Restriction Recipe Engineer & Cross-Contamination Specialist
Everything changed when my teenage son got hit with celiac disease and Type 1 diabetes diagnoses within six months of each other. Suddenly, pizza and pasta were off the table, and most “diabetic-friendly” foods contained gluten. I went from regular mom cooking to navigating what I call “compound restriction cooking”—and I had a kid’s appetite and taste buds to satisfy.
Lucky for us, my background in pharmaceutical quality control gave me the systematic mindset this level of precision requires. My kitchen now operates under pharmaceutical-grade protocols adapted for home use: dedicated prep surfaces, separate storage systems, and testing procedures that verify both carb counts and gluten absence before any recipe gets published.
I’ve developed over 220 recipes that clear multiple dietary hurdles simultaneously—finding gluten-free thickeners that don’t spike blood sugar, creating bread alternatives that meet both keto ratios and celiac safety, and developing desserts that actually taste good to a teenager despite impossible restrictions.
Through my “Safe Kitchen Certification” program, I teach other parents that managing multiple dietary restrictions isn’t about multiplying limitations—it’s about systematic thinking that reveals unexpected possibilities. When you engineer solutions instead of making compromises, restriction becomes innovation rather than deprivation.