
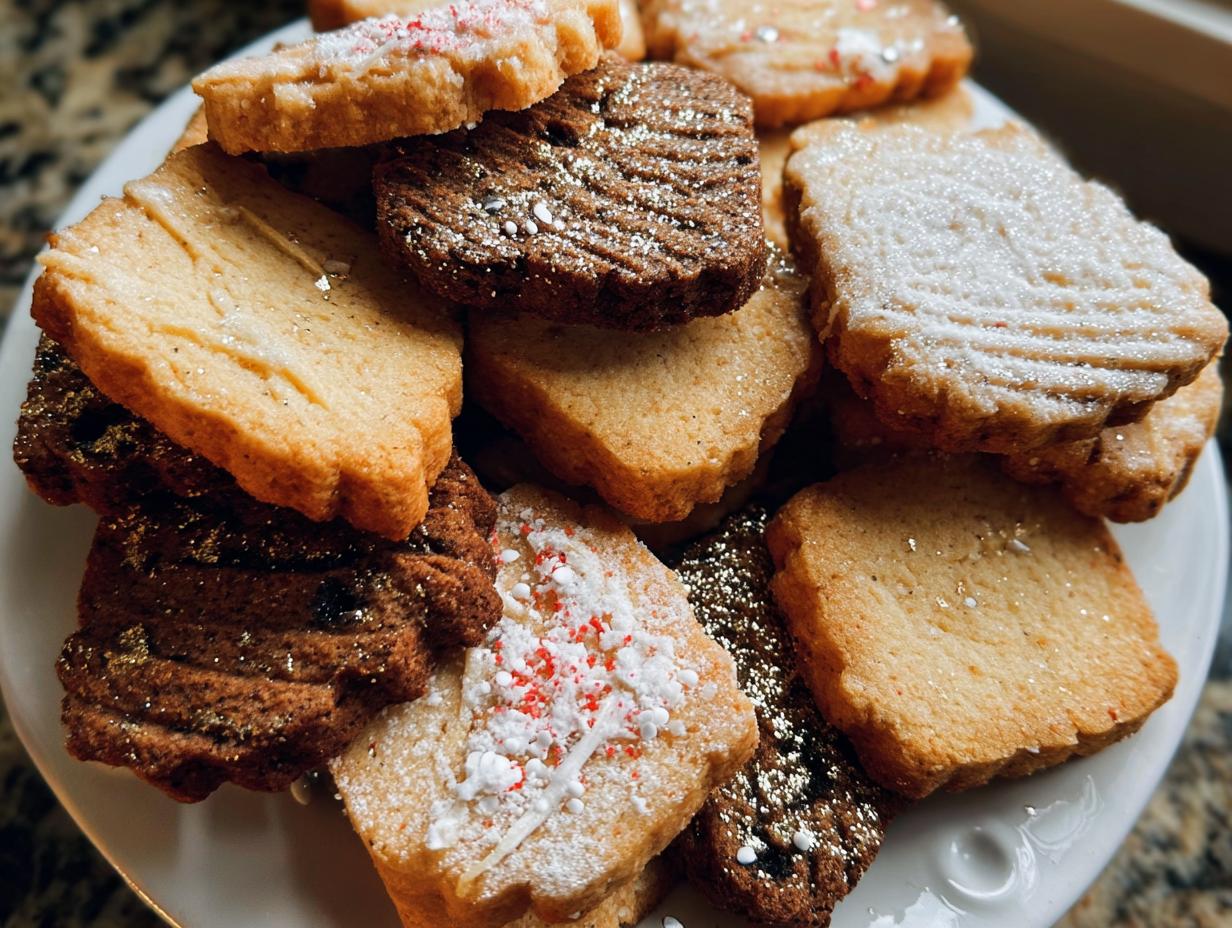
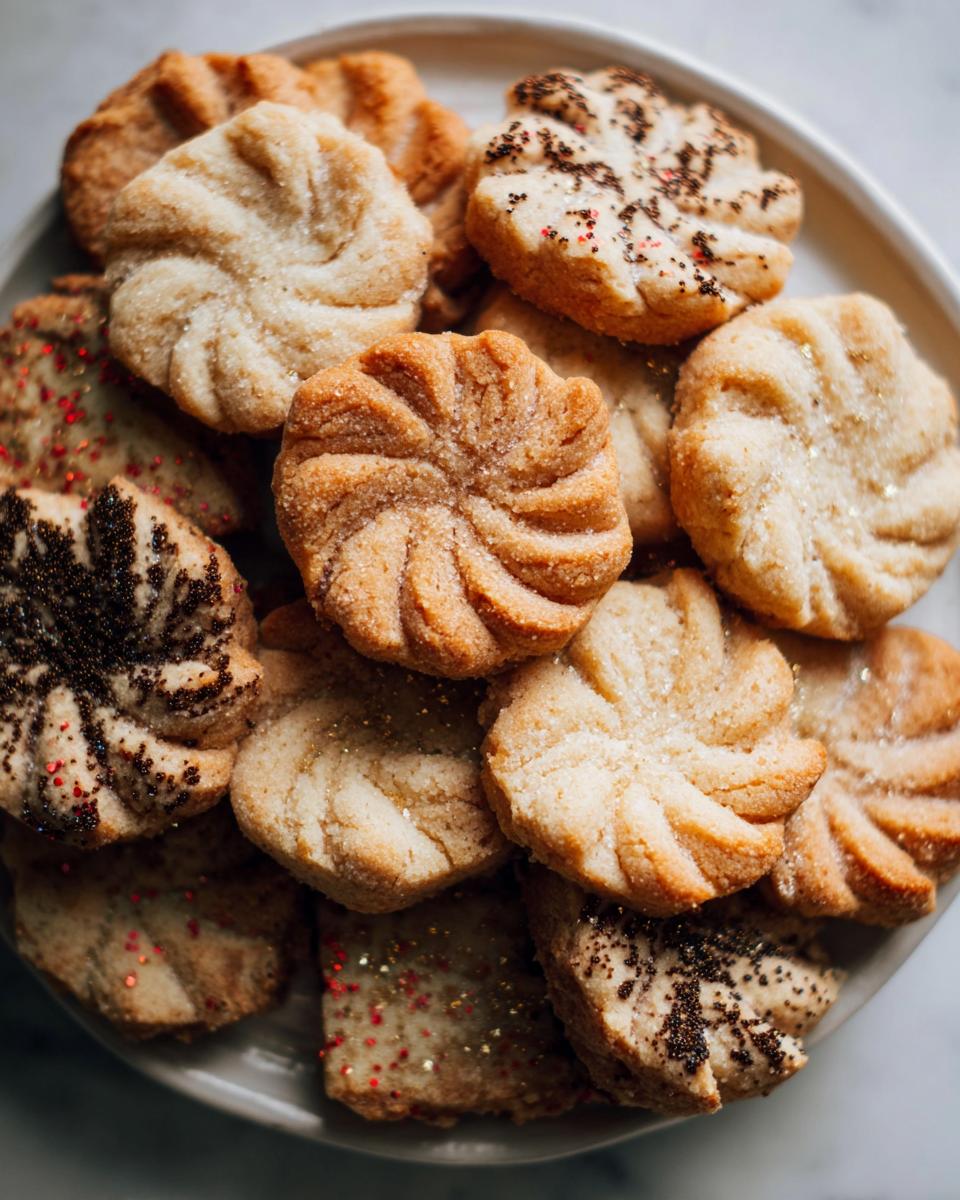
Oh, friend, have I got a recipe for you! Forget stiff, boring cookies. Today, we’re creating edible art that tastes like pure, buttery heaven. We are diving deep into the magic of Gold-Dusted Shortbread, which isn’t just a treat for your mouth; it’s a treat for your soul. This recipe feels like a form of meditation—slow, satisfying, and intentional.
I still remember the first time I made these for a family gathering. It was a chilly afternoon right after a weekend of mindfulness meditation, and something about the peacefulness of that cleanse inspired me to create a dessert that was visually enchanting. As I mixed that rich, buttery dough and rolled it out, I realized the entire process slowed my mind down. Each delicate dusting of golden shimmer on the cooled cookies felt like a tiny victory, a reflection of clarity. Sharing those exquisite, gold-dusted delights always sparks such wonderful conversations!
I’m Jolie Taylor, a Mindfulness & Emotional Wellness Specialist, and truly believe that grounding ourselves in simple, focused tasks—like baking perfect Shortbread Cookies—nurtures us deeply. Trust me; you are going to adore this multi-flavored journey!
Why This Gold-Dusted Shortbread Recipe is an Elegant Dessert Must-Have
Honestly, if you want to impress without spending hours fussing over layers, this is your moment! These Buttery Cookies are the definition of an Elegant Dessert. The way that edible gold catches the light? It’s pure magic! And because this is a slice-and-bake situation, they are wonderful to Make Ahead for parties or just for having stashed away. Once they come out of the oven, the texture is just perfect—crisp edges and that dense, melt-in-your-mouth center you expect from real shortbread.
The Joy of Making Gold-Dusted Shortbread: Flavor Variations
What I absolutely adore about this batch is that it’s really four recipes in one! We start with a beautiful, straightforward vanilla base, but then we get adventurous. You’ll get to whip up a warm Chai Spiced version, a luscious Dark Chocolate Cherry one, and my personal favorite, Chocolate Peppermint for a festive kick. It’s brilliant because everyone gets something they truly love. Feel free to check out some other unique flavor ideas over here if you want another twist!
Essential Equipment for Perfect Gold-Dusted Shortbread
Before we get into the creamy, dreamy mixing, we have to be prepared, right? When you’re aiming for that elegant look, having the right gadgets makes the process so much calmer. You don’t need anything super fancy, but having these basics ready means you won’t have to scrub your mixer bowl mid-process!
Tools for Mixing and Shaping Your Shortbread Cookies
You’ll definitely want a hand mixer or a stand mixer, but if you use a stand mixer, make sure you have that trusty paddle attachment ready to go. We need a good rubber spatula to scrape down the sides—don’t lose those buttery bits! Since this is a slice-and-bake recipe, two sheets of plastic wrap are essential for getting those perfect, tight dough logs before the chilling sets in.
Ingredients for the Vanilla Dough Base for Gold-Dusted Shortbread
Every amazing cookie starts with a fantastic foundation, and our vanilla base is what gives us that perfect, melt-away texture throughout all the variations. For the best results, please make sure your butter is truly room temperature—soft enough to press a finger into easily, but not oily or melted. That’s the key to getting that initial fluffiness!
Here is exactly what you need for the basic batch that we will divide later:
- 1 cup unsalted butter, room temp (that’s 220g, if you measure by weight)
- 1/3 cup light brown sugar, packed (about 70g—the molasses adds such depth!)
- 1/2 cup granulated sugar (100g)
- 1 teaspoon vanilla bean paste (or stick to 2 teaspoons of good vanilla extract)
- 1/4 teaspoon salt
- 2 1/4 cups all purpose flour (which amounts to 285g)
Use these measurements precisely, because when we start adding spices and chocolate, they need the base structure to hold up perfectly. Don’t skip the salt, either; it just makes that butter taste even better!
Creating Flavor Variations for Your Gold-Dusted Shortbread
Now comes the fun part where we take that perfect vanilla base and turn it into incredible works of art! Remember, we split the dough into two main halves—one for the spiced and fruity treats, and the other for the chocolate buddies. This recipe gives you some incredible options for your Shortbread Cookies. If you’re loving the slice-and-bake method, you can find heaps of inspiration for other twists right here!
Ingredients for Chai Spiced Cinnamon Sugar Coating
For the warm, cozy spice swirl, you’ll mix these into the larger half of the vanilla dough first, then roll the whole log in a fragrant coating:
- Spices folded in: 1/2 tsp cinnamon, 1/4 tsp cardamom, 1/4 tsp ginger, 1/8 tsp allspice
- Coating: 3 tbsp sparkling sugar plus 3 tbsp granulated sugar, mixed with 2 tsp cinnamon (this is for rolling the finished log in!)
Ingredients for Dark Chocolate Cherry Dough
This combination is seriously sophisticated! Fold these mix-ins into the smaller dough half:
- 2 oz dark chocolate, chopped
- 1/2 cup dried cherries, roughly chopped
- Coating: 1/2 cup raw sugar (you’ll press this onto the outside of the log)
Ingredients for Chocolate Dough Base and Flavor Additions
For the chocolate versions, you’ll actually be starting with a separate chocolate base mix, but here are the key additions for the final flavor sets:
- For Hazelnut: 1/2 cup roughly chopped hazelnuts (plus more for coating the log)
- For Peppermint: 1/2 tsp peppermint extract, 2 oz dark chocolate, and for the topping: 1/2 cup white melting chocolate and 3 crushed candy canes for sprinkling over the dipped tops.
Step-by-Step Instructions for Gold-Dusted Shortbread Dough Preparation
Alright, take a deep breath! This part is where the meditation really kicks in. We’re going to mix our bases separately and then divide them up so we can layer those amazing flavors. Remember how I talked about focusing intentionally? Pay attention to how the dough changes texture as you mix—that’s the joy of mindful baking, and trust me, it leads to the best *Shortbread Cookies*!
First things first, grab your hand or stand mixer with the paddle attachment. We start exactly where we left off: creaming that room-temperature butter with both sugars until it looks pale and wonderfully airy.
Mixing the Vanilla Base and Dividing Dough
Once the butter and sugar are fluffy, mix in your vanilla and salt. Then, add your flour, but don’t overdo it! Mix just until it comes together. I always switch to a sturdy rubber spatula right at the end; you want to finish by hand folding to keep things delicate instead of making tough cookies. Now, carefully cut that dough almost exactly in half—make one piece just a tiny bit bigger because that’s going to be our spiced half.
Preparing the Chocolate Dough Base and Variations
Wipe out your mixing bowl—no need for a deep clean! Now, cream the butter and sugar for the chocolate section. Mix in the salt and vanilla, then incorporate the flour and that beautiful dark cocoa powder. Again, switch to the spatula for the final fold. This chocolate dough needs to be divided in half, too. To one half, lovingly fold in the roughly chopped hazelnuts. To the other half, mix in that peppermint extract and the chopped dark chocolate. You are creating four distinct flavor personalities!
Coating and Chilling Your Gold-Dusted Shortbread Logs
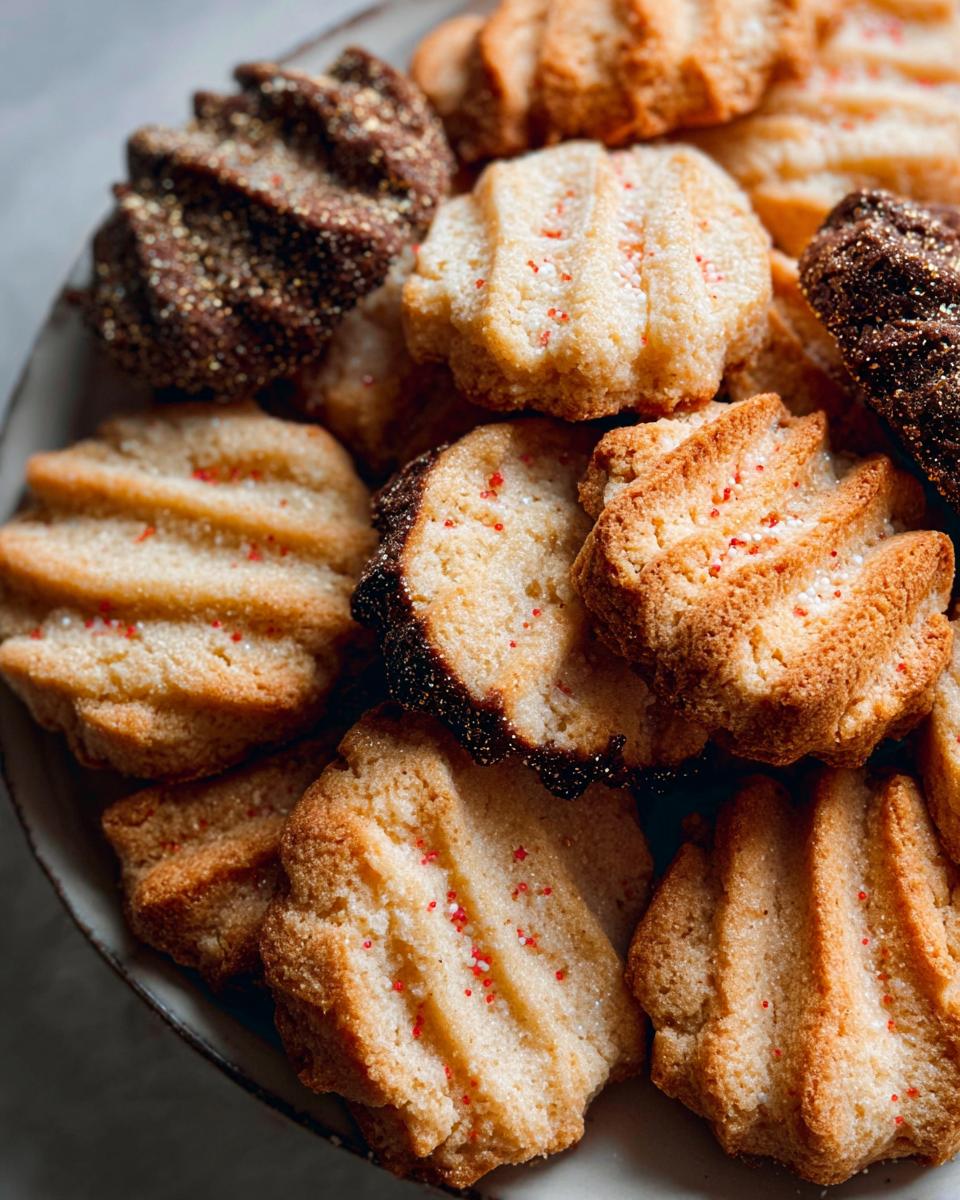
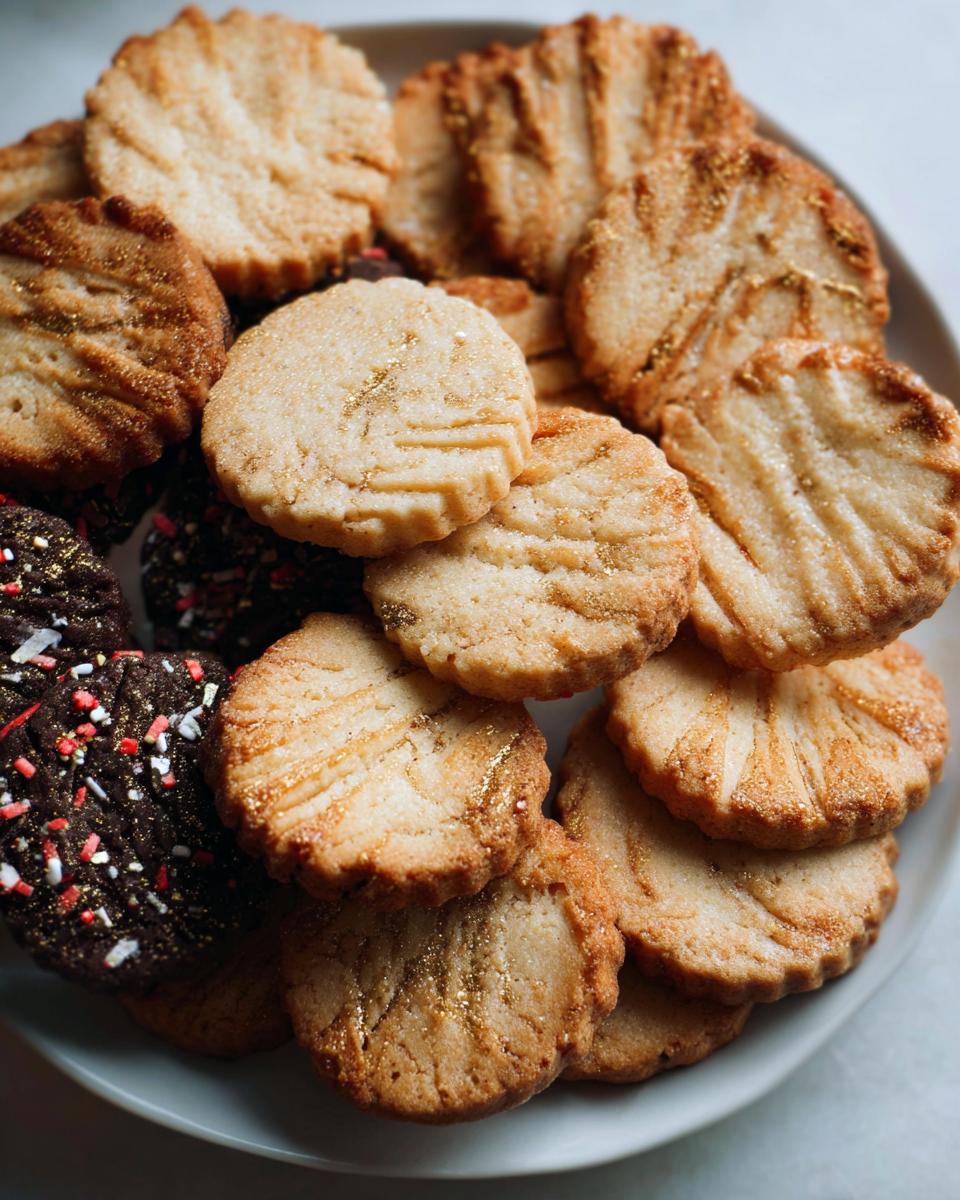
Now we shape! Lay out two separate sheets of plastic wrap for the vanilla doughs, and two more for the chocolate doughs. Form each of those four sections into a tight log, about 8 or 9 inches long. Wrap them super snugly—this is critical! Chill these beauties for a minimum of two hours, but honestly, overnight is better for super-firm logs. For the spiced log, roll it carefully in that cinnamon sugar mixture. For the cherry log, press it firmly into the raw sugar until it’s completely coated. The chocolate hazelnut gets rolled in finely chopped nuts, and the peppermint log? It stays bare for now, waiting for its chocolate dip later! You can find some great tips on handling dough before freezing right here.
Baking and Decorating Your Gold-Dusted Shortbread
The chilling time is up, pastry chef! Before we slice those beautiful logs, crank up your oven to 350F. It’s so important the oven is piping hot when these chilled beauties land inside, or they might spread too much. Line your baking sheet with parchment paper—this is non-negotiable unless you want cleanup nightmares! Slice off the ends of the logs, and carefully cut the rest into about 12 cookies per log. Pop the slices back in the fridge while the oven heats; keeping them cold ensures the perfect shape for these Buttery Cookies.
Arrange them on your sheet with about two inches between each one. Bake them for about 15 to 18 minutes. You’re looking for a very subtle change—the edges should just start turning a pale golden brown, and the tops should look matte, not shiny. As soon as they look set, transfer them immediately to a cooling rack. You want them completely cool before we add the *bling*!
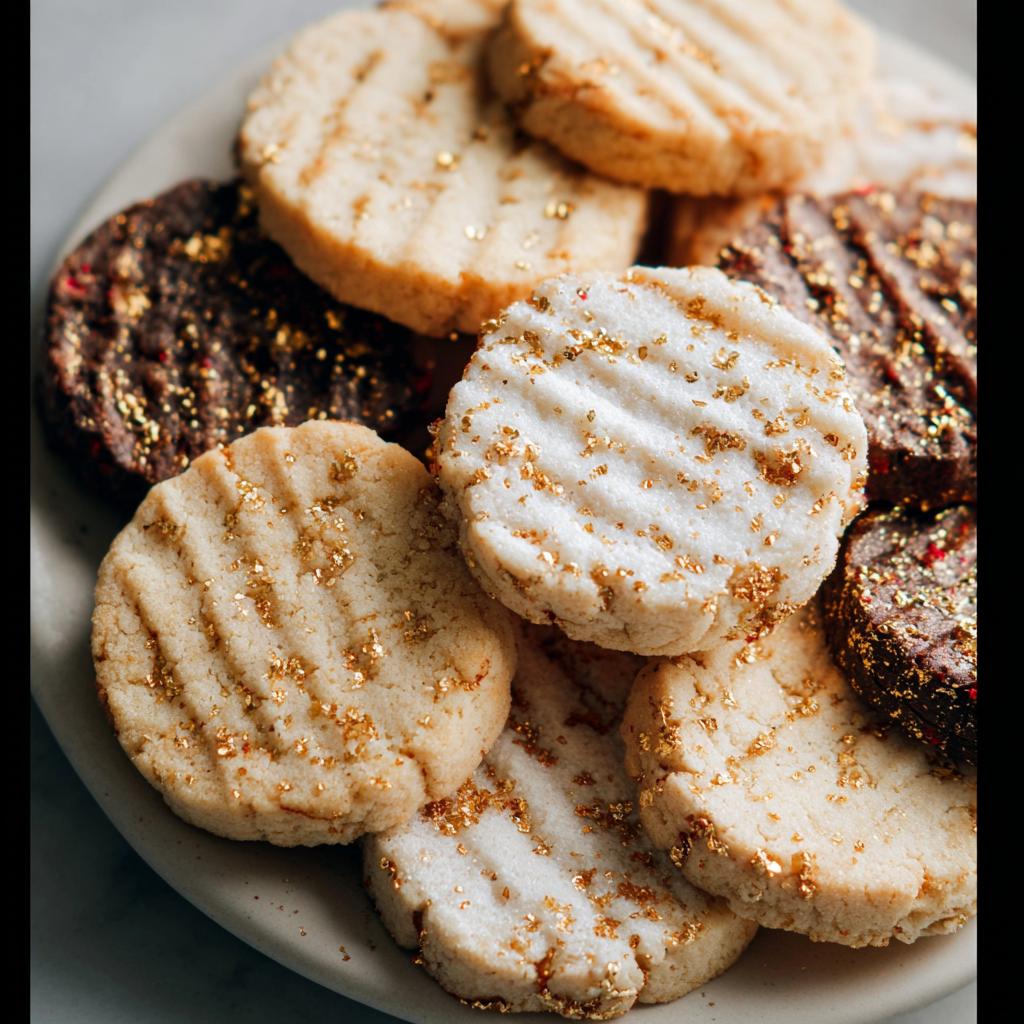
Applying Edible Gold and Finishing Touches
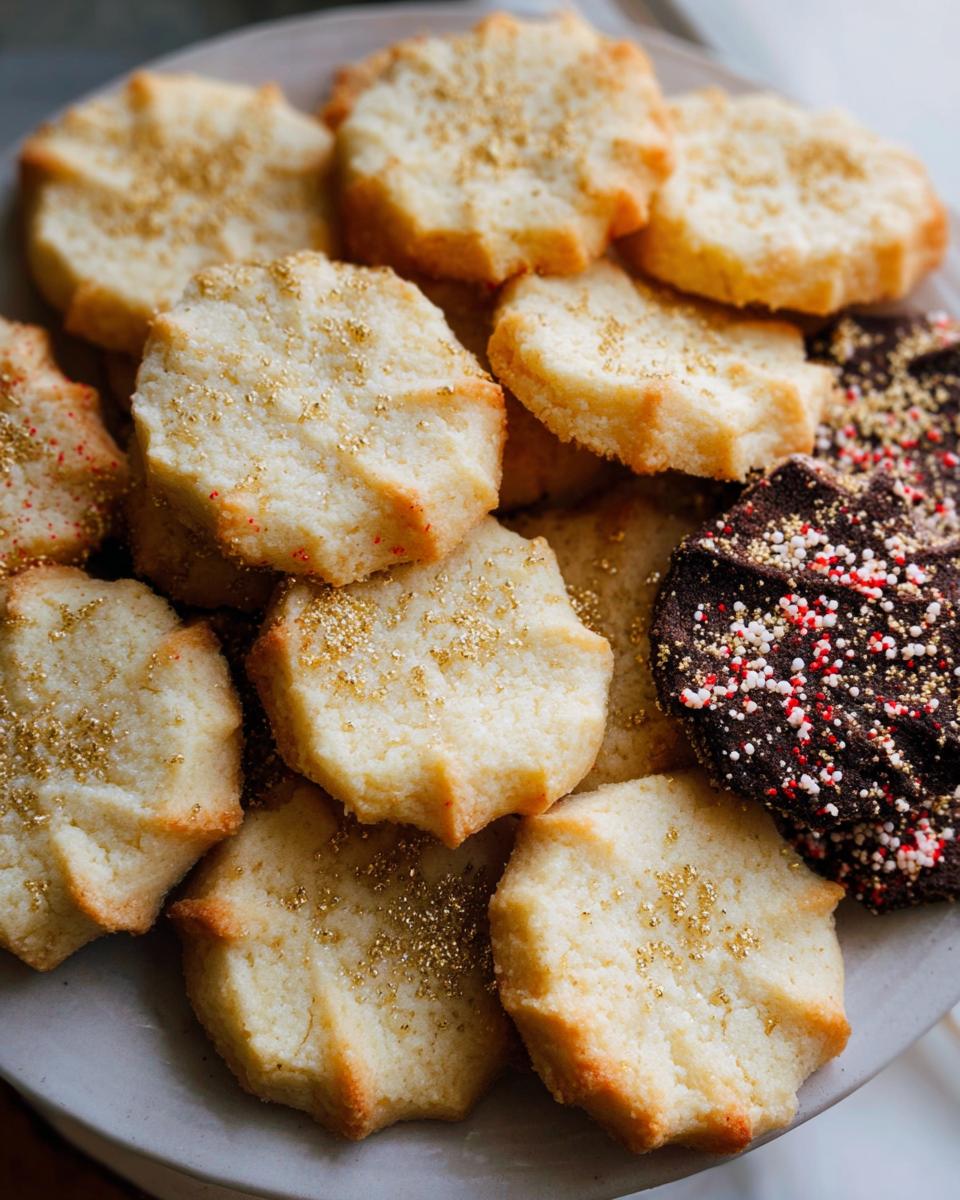
The peppermint ones get the grand finale treatment because they’re dipped! Once cooled, gently melt your white chocolate with that tiny bit of oil until it’s smooth and glossy. Dunk half of each peppermint cookie into the mixture. While the chocolate is still wet, sprinkle those crushed candy canes on top for a beautiful crunch and color contrast. Then, here’s where the gold dust comes in—grab a clean, soft, food-safe pastry brush and lightly dust the exposed white chocolate with your Edible Gold. It transforms them instantly! Pop those peppermint ones onto a clean parchment sheet and let the chocolate set firm in the fridge before serving the rest of your gorgeous haul. For the other variations, just a light, intentional dusting across the top once cooled adds that signature sparkle!
If you want to see how other bakers are achieving gorgeous results with their baked goods before you dive in, check out these great tips on baking success here.
Tips for Success When Making Gold-Dusted Shortbread
Even with a straightforward recipe like this, sometimes a little extra know-how can take your Shortbread Cookies from good to absolutely unforgettable. Since we are making these beautiful logs, temperature control is really your biggest friend. Seriously, don’t try to rush the chilling phase—it’s worth every extra minute of waiting!
The number one rookie mistake people make with shortbread is overmixing once that flour goes in. When you mix flour too much, you wake up the gluten, and suddenly, instead of those delicate Buttery Cookies that melt in your mouth, you get something a little tougher. Remember, you’re just mixing until you see no dry streaks remaining. If you’re using a stand mixer, keep it on the absolute lowest speed once the flour is added, or just switch to your trusty rubber spatula like I do. We want tender, not tough!
Another thing I learned ages ago is that the quality of your butter really shines through here, since it’s the main flavor component. Use the best unsalted butter you can find! And make sure it’s truly room temperature—that perfect squishy state. If your butter is too cold, it won’t cream properly with the sugars, and you won’t build those essential tiny air pockets needed for that lovely texture. If it’s too warm, the logs might slump when you try to roll and chill them.
For those times when you’re baking a huge batch for a gathering, remember that keeping the unbaked cookies cold while one sheet is in the oven is vital. Just keep the rest of the dough logs chilling in the fridge, and rotate them out—it keeps the edges sharp and prevents spread. It’s tiny steps like this that elevate your baking game! For tips on simplifying your life post-baking, you might want to glance at some easy cleanup ideas available here.
Storing and Gifting Your Gold-Dusted Shortbread
The beauty of this recipe is how perfectly it supports your need to Make Ahead! These Buttery Cookies are sturdy and hold up beautifully, which means you can be very relaxed before an event. For storage, once they are completely cool and any chocolate dipping has set firm, put the cookies in an airtight container. They honestly taste even better on day two, by the way, as the flavors settle in.
If you plan on sending these little treasures off in the mail, they ship incredibly well! That’s why they are such a wonderful gift idea. You need to group them by flavor first, which is important. Wrap about three cookies together snugly in plastic wrap. You absolutely must wrap the peppermint ones separately in foil *after* the plastic wrap, though. Trust me on this one; otherwise, that peppermint scent will take over everything else you package up! You can find some great meal prep ideas for other dishes here if you’re planning ahead for the week, too.
Frequently Asked Questions About These Shortbread Cookies
I always get so many questions when I share this recipe because people want their Gold-Dusted Shortbread to turn out perfectly elegant the first time! Honestly, the most common questions revolve around keeping that buttery texture intact. Let’s clear up a few things so your cookies are absolutely magnificent!
Can I substitute the butter in this Gold-Dusted Shortbread recipe?
Oh, I really, really advise against it if you want the best result. This recipe relies heavily on the fat content of real, high-quality butter to achieve those signature melt-in-your-mouth Buttery Cookies. Margarine or oil just doesn’t cream the same way or provide that rich flavor. If you want that truly luxurious, elegant shortbread experience, stick to the butter. It’s worth every penny!
How do I ensure my Gold-Dusted Shortbread stays fresh?
Keeping them fresh is simple, especially since they don’t have any eggs or high-moisture fillings! Once your cookies are completely cooled—and this is important if you dipped the peppermint ones—stack them carefully and store them in an airtight container at room temperature. They are fantastic for up to a week, but I find the flavors, especially the chai spice ones, deepen beautifully after about 48 hours!
If you’re curious about other aspects of my clean baking journey, you can sneak a peek at my ‘About’ page right here.
Estimated Nutritional Data for Gold-Dusted Shortbread
Okay, now remember, I’m a baker and a mindfulness coach, not a certified nutritionist! Because we are using slightly different sugars and adding heavy hitters like chocolate and nuts in the variations, these numbers are just an estimate based on the plain vanilla base recipe, divided by 36 cookies. Ingredient brands always make a difference, so take this as a nice guideline rather than gospel. If you compare this to a standard recipe, you’ll see why we call these totally worth the indulgence!
For the basic vanilla Gold-Dusted Shortbread cookie, you can generally expect:
- Calories: Around 150-170 per cookie
- Fat: Approximately 9-11g (hello, delicious butter!)
- Total Carbohydrates: Roughly 16-19g
- Protein: Less than 1g
This density comes from that heavy butter and sugar base, which is what creates that signature melt-in-your-mouth texture we love so much. It’s important to enjoy these beautiful treats mindfully, savoring every buttery second, and know that you made them with love!
Share Your Elegant Dessert Creations
Now that you have these stunning, jewel-like Gold-Dusted Shortbread cookies cooling on your rack, the best part is sharing them! Baking is truly an act of generosity, and I can’t wait to see how you brought these elegant treats to life in your kitchen.
Please, don’t be shy! Rate this recipe right here on the blog—it helps me know what you love! Even better, drop a comment below letting me know which flavor was your absolute favorite to make or eat. Did you stick to the classic vanilla, or did the Chocolate Peppermint steal the show?
And if you took photos—and I know you did because these are gorgeous—please tag me on social media! Seeing your beautifully decorated Shortbread Cookies truly makes my day. It’s wonderful to see how mindfulness in the kitchen can translate into something so beautiful and delicious for everyone to enjoy. If you ever have questions or want to reach out personally, my contact page is just a click away right here. Happy baking, my friends!
Gold-Dusted Shortbread
Ingredients
Equipment
Method
- In a large mixing bowl using a hand or stand mixer with the paddle attachment, cream together the butter, brown sugar, and granulated sugar until pale and fluffy.
- Mix in the vanilla and salt, followed by the flour. After mixing in the flour, switch to a rubber spatula and continue to mix the dough by hand to ensure all of the flour is incorporated.
- Split the dough nearly in half, giving one half a bit more dough. The larger half will be used for the chai spiced cookies.
- In a small dish, combine the cinnamon, cardamom, ginger, and allspice.
- Add to this larger half of dough and carefully fold in the spices. Give it a few folds to swirl the spices throughout. Do not completely mix them in.
- To the smaller half of dough that’s still sitting in the original mixing bowl, add the chopped chocolate and cherries. Mix to combine.
- Lay out two sheets of plastic wrap and place each dough in the center of the sheets. Form each piece of dough into a log that’s about 8-9 inches long.
- Tightly wrap the logs in the plastic wrap and chill for at least 2 hours or overnight.
- Scrape out the mixing bowl you used for the vanilla dough. No need to wash it, just make sure there are no large pieces of dough or mix ins left in the bowl.
- Cream together the butter and sugar until pale and fluffy.
- Mix in the salt and vanilla, followed by the flour and cocoa powder.
- Use a rubber spatula to mix the dough by hand to ensure all of the dry ingredients are incorporated.
- Split the dough in half and add one half to a separate bowl. Mix in 1/2 cup roughly chopped hazelnuts.
- To the dough that’s still in the original mixing bowl, add the peppermint extract and chopped dark chocolate. Mix well to ensure the peppermint extract is well combined with the dough.
- Lay out two sheets of plastic wrap and add each half of dough to the sheets. Roll each piece of dough into an 8-9 inch log and wrap tightly in the plastic wrap. Chill alongside the vanilla dough for at least 2 hours or overnight.
- Once the dough is chilled solid, roll each log in its coating. For the dark chocolate cherry dough, sprinkle a plate or pan with the raw sugar. Roll the dough in the sugar to fully coat. Press the sugar in with your hands to help it stick. If it doesn’t stick, brush the outside of the dough in a thin layer of egg wash (1 egg beat with 1 tbsp water).
- Repeat this process for the chai spiced cookies (rolling in the cinnamon sugar mixture), and the hazelnut cookies (rolling in 1/2 cup finely chopped hazelnuts). The peppermint cookies are left bare.
- Slice the ends off of each log and then slice each log into roughly 12 cookies.
- Preheat the oven to 350F and place the sliced cookies in the refrigerator to chill while the oven heats up.
- Line a large baking sheet with parchment paper. Place the cookies onto the baking sheet, each spaced about 2 inches apart. Keep the remaining slices of cookie dough in the refrigerator while the first batch bakes.
- Bake for 15-18 minutes or until the edges are a very pale golden brown and the tops have turned matte.
- Transfer the cookies to a cooling rack and bake the rest of the dough.
- Once cooled, dunk the chocolate peppermint cookies. Place the melting chocolate and oil in a heat safe bowl and microwave in 30 second intervals until smooth. Dunk one half of each cookie into the chocolate and then top with crushed candy canes. Transfer these cookies to the refrigerator for 15 minutes to set.
- Your cookies are ready to enjoy!
Notes
Tried this recipe?
Let us know how it was!
Mindfulness & Emotional Wellness Specialist
I never thought I’d leave my career as a corporate litigation attorney, but a panic attack in a courthouse bathroom changed everything. After struggling with emotional eating for over a decade—starting in college and getting worse through the stress of law school—I realized that no diet could fix what was really going on inside me.
My breakthrough came through mindfulness meditation training. Working with Jon Kabat-Zinn’s protocols, I discovered that my relationship with food reflected deeper patterns of anxiety and perfectionism that I’d been avoiding for years. That’s when I understood that sustainable eating changes require internal transformation, not just external rules.
Now I treat meal preparation as meditation practice. My “Mindful Kitchen” workshops help people transform ordinary cooking into opportunities for self-awareness and emotional healing. I’ve developed over 180 recipes designed for slow, mindful preparation—complex enough to keep you present, simple enough not to overwhelm your nervous system.
I believe food becomes medicine when we approach it with presence rather than reactivity. The kitchen can be our monastery if we choose to enter it with reverence.