
You know that feeling when you want a showstopper dessert but the idea of making everything from scratch just feels like too much work? Me too! That’s why I live for giving a humble cake mix a major style upgrade. It’s all about those little thoughtful additions that make people ask, “Wait, did you make this from scratch?” I remember the first time I decided to give a boxed cake mix a serious glow-up. It was a rainy Saturday afternoon, and I was feeling the pull of nostalgia while flipping through an old baking book. I grabbed a plain yellow cake mix from the pantry and thought, why not decorate it like a masterpiece? I whipped up a homemade ganache, drizzled some vibrant berries on top, and added edible flowers for that extra flair. The moment I sliced into that cake and revealed the gorgeous layers inside, I couldn’t help but smile. That cake didn’t just taste amazing; it turned an ordinary afternoon into a celebration. Since then, I’ve made it my mission to show others how a simple box mix can become a canvas for creativity, and this recipe—the **Box Mix Glow-Up: Fancy Finishes**—is my favorite way to do it!
Why This Box Mix Glow-Up: Fancy Finishes Recipe Works
Look, there’s no shame in loving a box mix! We all need that reliable base sometimes. This recipe is all about Easy Elevation. We keep the baking time quick—it’s practically foolproof—but we sneak in upgrades that make it feel like it took all day. Trust me, this isn’t just better; it’s completely different!
It’s genuinely built to be Party-Ready Cake status without the all-day panic. It’s convenience meeting something truly indulgent. You get all the compliments without all the stress.
Simple Swaps for Maximum Flavor
The base ingredients are simple for a reason, but we give them a little nudge. Remember when I mentioned adding vanilla and salt to the batter? That’s pure wizardry! That extra dash of salt cuts the intense sweetness and lets the chocolate flavor pop way more than the box hints at. It’s such a tiny step, but it totally changes the game before we even get to the good stuff.
Achieving the Perfect Box Mix Glow-Up: Fancy Finishes Texture
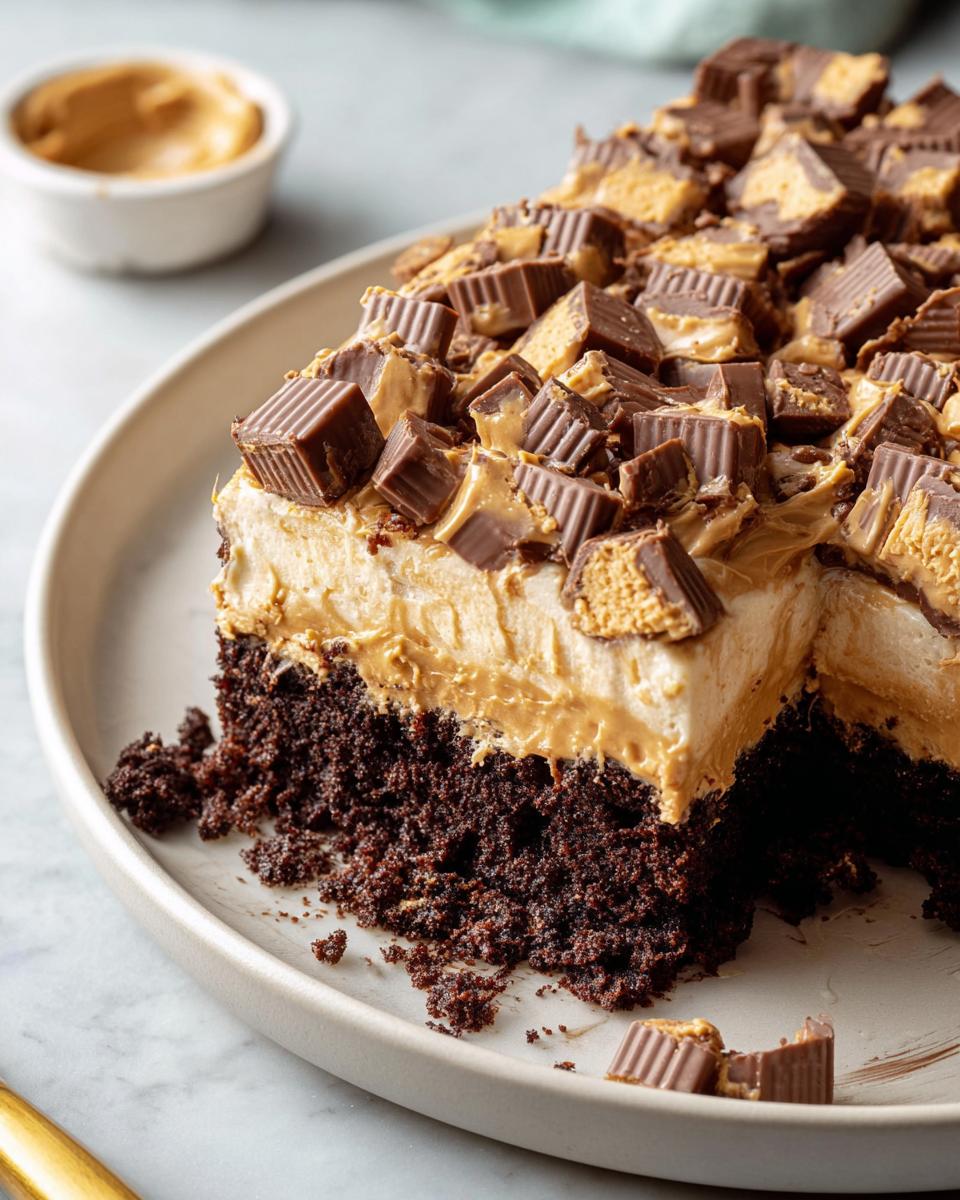
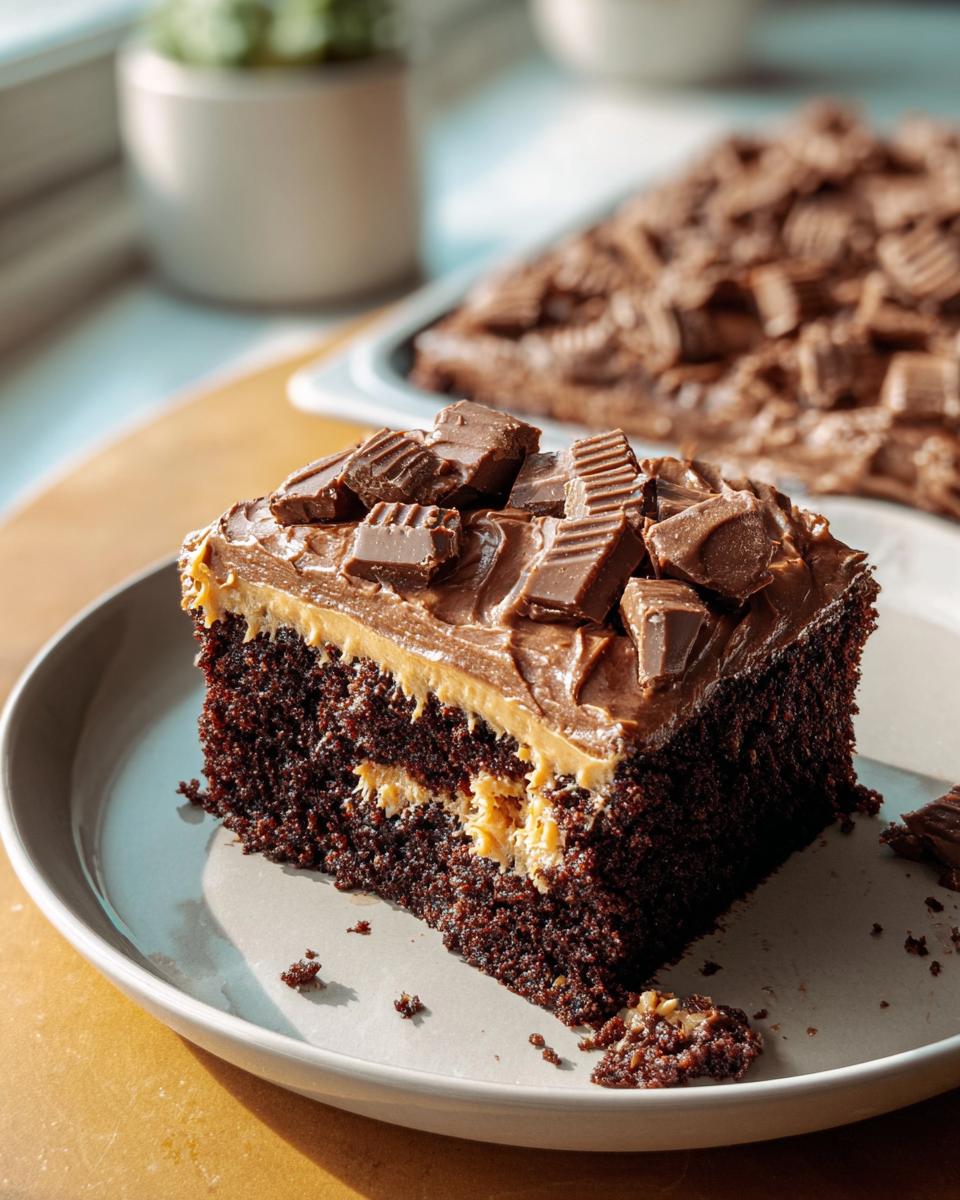
The real secret weapon here, the thing that brings the richness, is the incredible Syrup Soak we use. It’s not a light soak; it’s a dense, creamy peanut butter bath! We poke the cake right after it cools and let all that peanut butter condensed milk goodness seep down deep. This guarantees the moistest, most flavorful crumb you can imagine. Honestly, if you want to know why this turns a box mix into something special, look no further than that soak!
For more amazing cake hack ideas, check out my full collection of recipes here: these tested kitchen wins.
Essential Ingredients for Your Box Mix Glow-Up: Fancy Finishes
Okay, this is where we get down to business! Even though we’re starting with a box mix, the additions we layer on are what bring this to life. You have to be specific here; don’t just eyeball this part! I’ve broken down exactly what you need for each component. Having everything ready before you start pouring keeps everything smooth, especially when dealing with that thick, rich peanut butter mixture.
If you’re looking for even more inspiration on turning store-bought items into magic, you have to browse through this massive collection of cake magic!
Ingredients for the Cake Base
We don’t add much to the mix itself, but what we do add matters tremendously for flavor depth. You’ll need the standard contents of one regular-sized chocolate cake mix, obviously. Then, stash an extra teaspoon of vanilla extract for the batter—it really helps wake up the chocolate flavor! Also, grab just a tiny dash of salt. That’s your secret enhancement right there!
The Peanut Butter Soak Components
This is the star of the show, the richness factor! You absolutely need 2/3 cup of creamy peanut butter. Make sure it’s creamy, not crunchy, because we need this to melt smoothly. Then, you’ll need two full cans—and I mean full 14-ounce cans—of sweetened condensed milk. Don’t confuse that with evaporated milk; we need that sugar content for the right texture here!
Creating the Frosting and Toppings
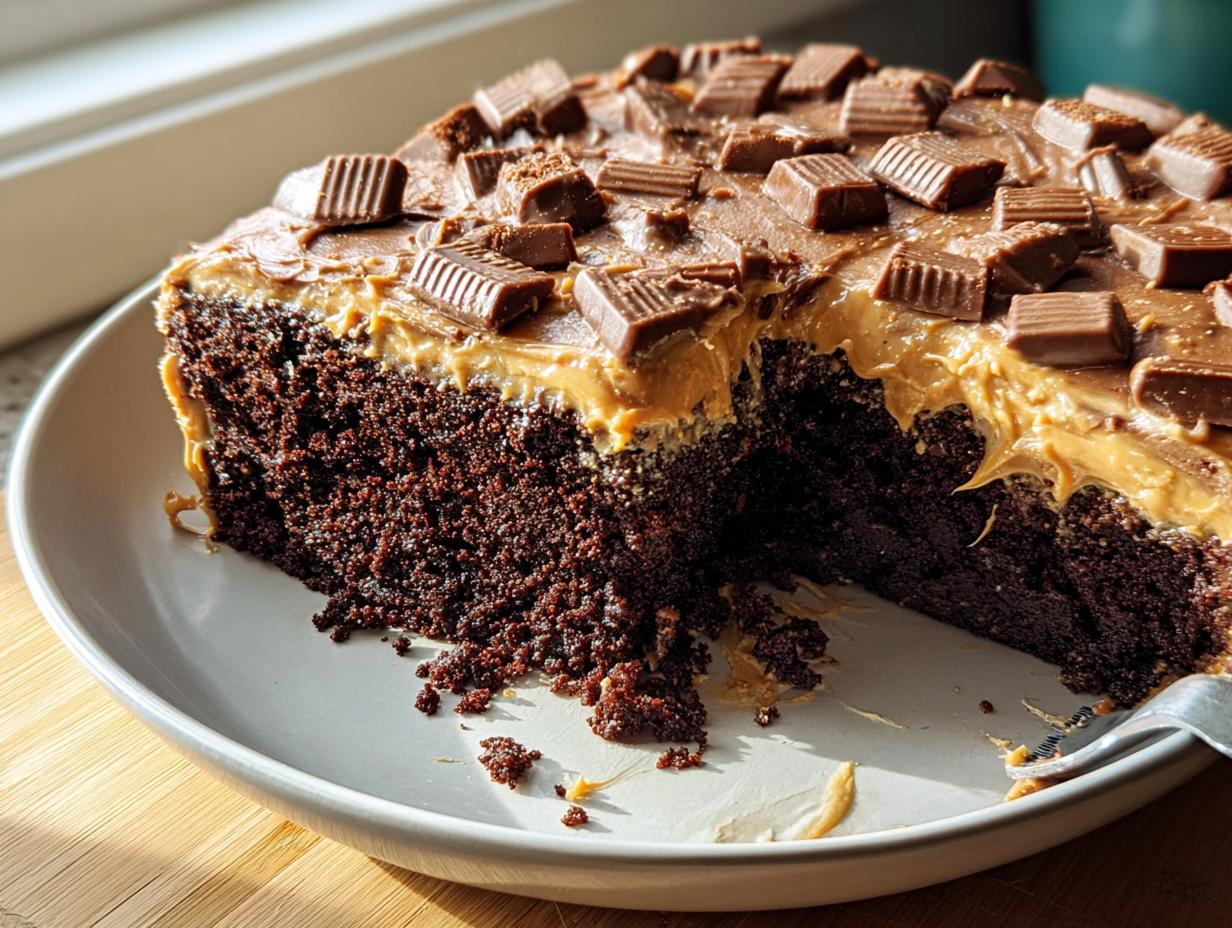
For the frosting, start with the remaining peanut butter mixture that didn’t get soaked into the cake, plus another teaspoon of vanilla. Here’s the trick: you’ll slowly beat in confectioners’ sugar until it’s just right for spreading. You might not use the whole thing, or you might need a little more—keep tasting until it’s stiff but spreadable! If you’re feeling extra, grab some chopped peanut butter-filled sandwich cookies or some fun peanut butter cups for sprinkling on top once you’re done frosting!
Step-by-Step Instructions for Box Mix Glow-Up: Fancy Finishes
Now that you have all the glorious ingredients lined up, let’s get this chocolate mix looking like a million bucks! Honestly, following these steps sequentially is what prevents a sticky mess and delivers that perfect, rich interior. Don’t rush the cooling step, though—that’s when the magic starts!
Baking the Cake and Initial Flavor Infusion
First things first, get your oven humming at 350°F (175°C). Mix up your chocolate cake according to the box, but don’t forget to stir in that extra teaspoon of vanilla extract and the dash of salt before pouring it into your greased 13×9-inch dish. Bake it for the time the box suggests, then let it cool down completely. Seriously, fully cool. Once it’s cool enough to handle but still warm-ish, grab a wooden spoon handle—the blunt end is perfect—and poke holes all over the top, spacing them about 2 inches apart. Make sure those holes go pretty deep!
Preparing and Applying the Syrup Soak
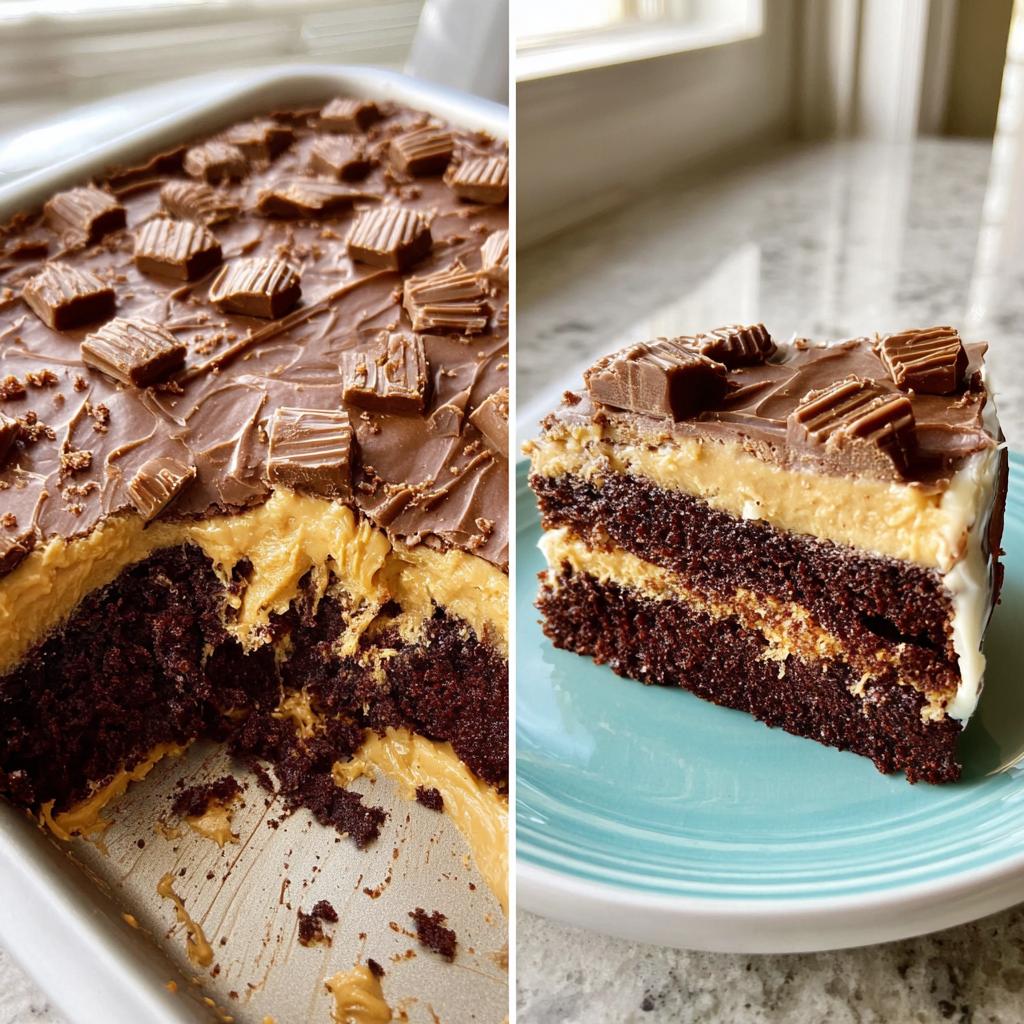
While that cake cools, whisk together that creamy peanut butter and the two cans of sweetened condensed milk until everything is silky smooth. You want zero lumps! Carefully pour about 2 cups of this mixture over the poked cake, making sure that sticky, thick glaze seeps down into those holes you just made. Once it’s all drizzled, cover the whole thing up and stick it in the fridge. It needs to chill for at least 2 to 3 hours. That rest time lets the cake soak up all that rich flavor.
If you need some quick reference on general foolproof baking checks, I wrote up a guide on how to handle tricky baking stages here: knowing when a bake is perfect.
Assembling the Box Mix Glow-Up: Fancy Finishes Frosting
Grab the small amount of peanut butter and condensed milk you saved back—yes, the rest of it! Mix in your final teaspoon of vanilla extract. Now, for the frosting consistency? You have to add the confectioners’ sugar slowly. Start beating it in a little bit at a time. You are looking for a texture that is stiff enough to hold its peaks but soft enough that it spreads easily over that chilled cake. If you add too much sugar at once, you’ll end up with crumbs instead of creamy frosting. Take your time spreading this over the cold cake for that stunning final layer!
Tips for Success with Box Mix Glow-Up: Fancy Finishes
Getting that perfect texture and finish is all about timing, especially when dealing with a dense soak. Don’t just wing it, or you risk having the cake fall apart on you! I’ve learned a few tricks over the years to make sure your **Box Mix Glow-Up: Fancy Finishes** comes out looking picture-perfect, just like mine did that first rainy day.
Perfecting the Peanut Butter Soak Application
When you pour that thick peanut butter mixture over the cake, you absolutely must make sure the cake is completely cooled down first. If it’s even a tiny bit warm, that heavy soak will just melt areas and create soup instead of flavor pockets. Pour slowly, tilting the pan so the liquid finds its way into the holes without overflowing everywhere. Patience during this soaking stage is key to getting that wonderful density in every bite!
Achieving Smooth Frosting Coverage
That peanut butter frosting is gorgeous, but it firms up fast once it hits that cold, soaked cake! If you’re struggling to get a smooth top, don’t panic. Try using a small offset spatula—it just glides so much better than a regular knife. If the frosting seems too firm for your liking, just pop your bowl of frosting into a slightly warm (not hot!) spot for about five minutes to soften it up just a hair. Check out my ultimate baking guide for more temperature tips: you need to see this!
Creative Cake Decorating and Presentation Ideas
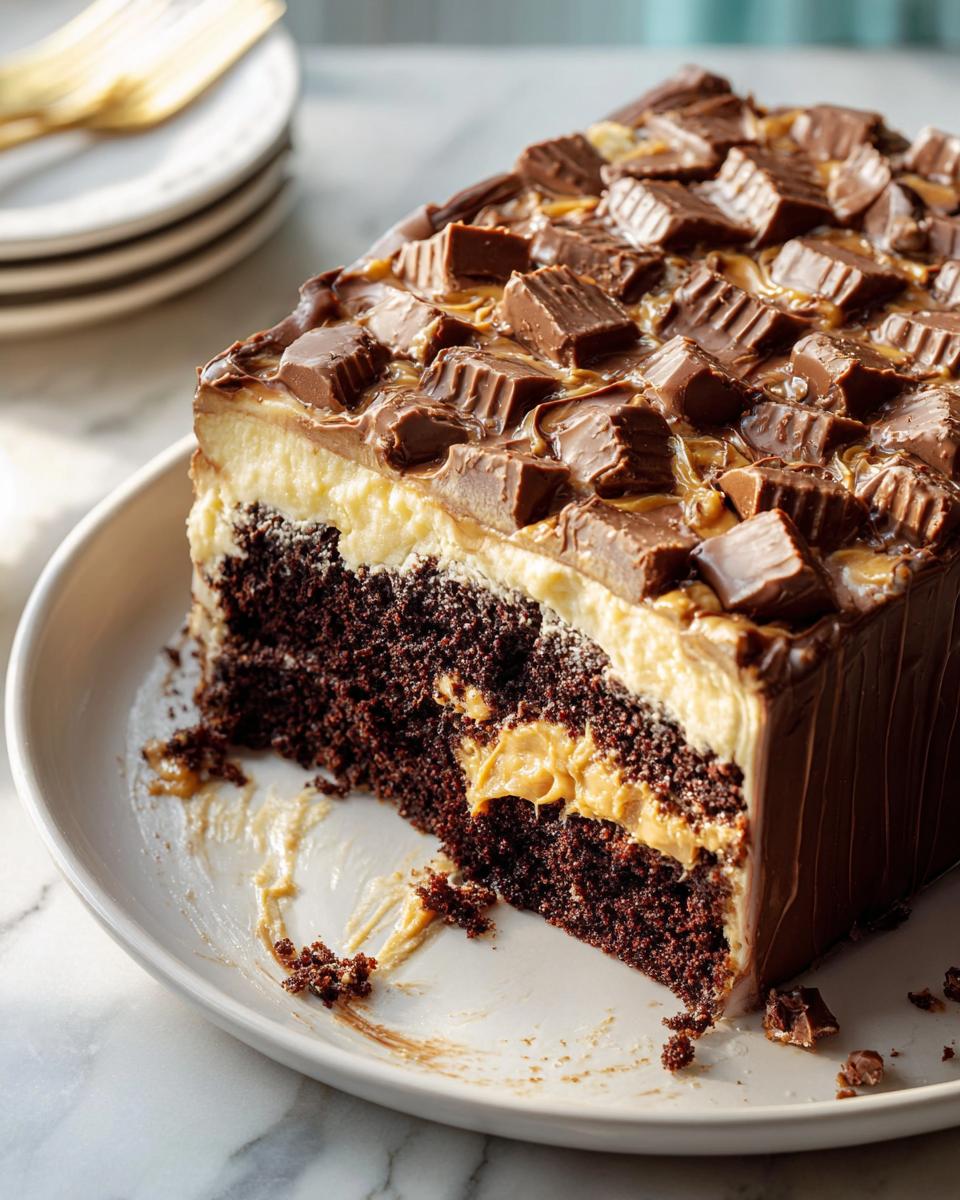
This is where the ‘Fancy Finishes’ part of the title really comes into play! You’ve done the cooking hard work, now let’s make it a work of art. Even if you aren’t naturally artistic, elevating a cake from ‘pan dessert’ to ‘centerpiece’ is surprisingly easy. We want this **Box Mix Upgrade** to look like it came straight from a fancy bakery window, not just out of a box!
Since we have this gorgeous creamy peanut butter frosting holding everything together, we have the perfect canvas. I always encourage people to move beyond just sprinkling cookies on top. Think about contrast—it’s what makes food photography look so good, and it makes your dessert look irresistible on the table!
Elevating Your Box Mix Upgrade with Textures
Texture is everything when you’re going for that high-end look. If you used the peanut butter cups, stop right there—you’re already winning! But if you want other ideas, think about texture contrast against that smooth frosting. Crushed toasted pecans or walnuts are fantastic; their slight crunch breaks up the richness of the peanut butter filling, and they look so elegant scattered around the edges.
Another fun trick? Don’t just toss on crumbs. Take a piping bag (even a Ziploc bag with the corner snipped works!) and pipe small shell borders around the edge of the cake using some of the frosting you reserved. Then, sprinkle your crushed cookies or toasted nuts *only* inside that piped border. It creates a neat, contained frame that looks incredibly professional. It immediately makes the whole thing look more finished, guaranteed!
Storage and Reheating for Your Box Mix Glow-Up: Fancy Finishes
Wow, you did it! You took a simple box mix and gave it the treatment it deserves. I am so excited for you to serve this incredible dessert. Now that you’ve mastered the Box Mix Glow-Up: Fancy Finishes, I really want to hear about it! Did you try a different cake flavor? Did you add something wild to the toppings? Drop a comment below and let me know your favorite modification that made this recipe uniquely yours.
If you snap a picture of your stunning creation, please share it! You can always reach out to me directly if you have questions or want to send photos via my contact page here: let’s connect. Happy baking!
Sharing Your Box Mix Glow-Up: Fancy Finishes Success
Okay, you’ve made a masterpiece, now we need to keep it gorgeous! Because we used that decadent peanut butter soak and rich frosting, this cake absolutely has to live in the refrigerator. Don’t leave it out on the counter; that condensed milk mixture needs to stay good and cold. Cover it tightly with plastic wrap or put it in an airtight container so it doesn’t grab any funny fridge smells.
When it’s time to eat it, I highly recommend letting it sit out on the counter for about 20 minutes before slicing. That little bit of time softens the layers and frosting back up so it’s not rock hard, but it stays perfectly chilled. For more tips on keeping your one-pan meals around until they are ready to eat, seriously check out my guide on making clean-up a breeze, because leftover storage is part of that!
Frequently Asked Questions About Box Mix Glow-Up: Fancy Finishes
I know you might have a few questions floating around, especially if you’ve never tried soaking a cake before! That’s totally normal. My goal is to make this Box Mix Upgrade feel totally straightforward, so let’s tackle the things I hear most often from friends trying this out for the first time. Don’t worry, we’ve got this!
Can I use a different cake flavor for this Box Mix Upgrade?
Oh, absolutely! While the chocolate against that peanut butter soak creates this amazing classic flavor combo, you are the boss here. If you opt for a plain yellow or white cake mix, the final product tastes a bit more like a classic peanut butter dessert bar—it’s lovely! A spice cake mix actually works wonderfully too; the cinnamon notes blend so nicely with the richness. Just remember that no matter your choice, the density that the soak adds means it’s still going to be incredibly moist!
What if I don’t have time for the chilling step?
This is the hardest part for me to advise on, because honestly, the chilling time is what lets that thick peanut butter mixture really soak down deep into the crumbs! If you absolutely must serve it sooner, I’d say give it a *minimum* of 60 to 90 minutes in the fridge just so the cake firms up. But be gentle when you frost it, and know that the cake might seem a little less saturated with flavor than if you let it rest the full two or three hours. That resting time truly marries the flavors together!
How do I make this a Party-Ready Cake without heavy decorating?
If you’re short on time or simply prefer minimalist aesthetics, you can still nail that presentation! Since this is already so rich, you don’t need fancy piping. My go-to move for an easy elevation is a delicate dusting. Sift a little unsweetened cocoa powder or powdered sugar right over the top using a fine-mesh sieve—it looks elegant immediately. Alternatively, take your highest quality peanut butter cups, chop them roughly, and arrange a tight ring of the chunks just around the outer edge. It frames the cake perfectly and screams deliciousness without needing any piping skills. For more tips on presentation, feel free to check out my general philosophy on making things look great: read more about my philosophy here.
Sharing Your Box Mix Glow-Up: Fancy Finishes Success
Wow, you did it! You took a simple box mix and gave it the treatment it deserves. I am so excited for you to serve this incredible dessert. Now that you’ve mastered the Box Mix Glow-Up: Fancy Finishes, I really want to hear about it! Did you try a different cake flavor? Did you add something wild to the toppings? Drop a comment below and let me know your favorite modification that made this recipe uniquely yours.
If you snap a picture of your stunning creation, please share it! You can always reach out to me directly if you have questions or want to send photos via my contact page here: let’s connect. Happy baking!
Box Mix Glow-Up: Fancy Finishes
Ingredients
Equipment
Method
- Preheat your oven to 350°F (175°C). Prepare the cake mix according to the package directions. Add 1 teaspoon of vanilla extract and the salt to the batter before mixing. Pour the batter into a greased 13×9-inch baking pan. Bake and cool the cake completely as directed on the package.
- In a mixing bowl, whisk together the creamy peanut butter and the sweetened condensed milk until smooth. Using the blunt end of a wooden spoon handle, poke holes in the cooled cake, about 2 inches apart. Slowly pour 2 cups of the peanut butter mixture over the cake, ensuring it fills each hole.
- Cover the cake and the remaining peanut butter mixture. Refrigerate both for 2 to 3 hours, or until the cake is cold.
- In a separate bowl, combine the remaining 1 teaspoon of vanilla extract with the reserved peanut butter mixture. Gradually beat in confectioners’ sugar until the frosting reaches a spreadable consistency.
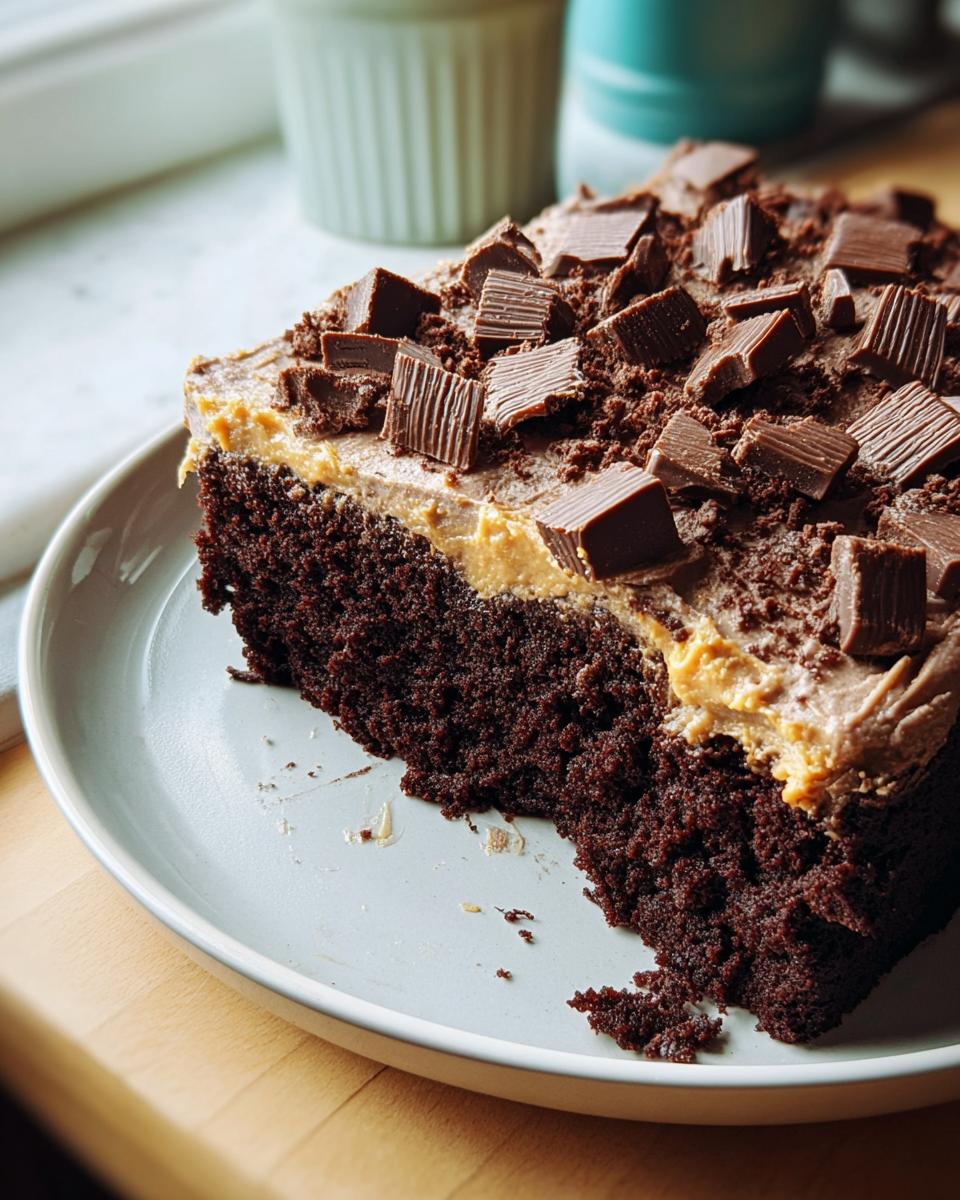
- Spread the frosting evenly over the chilled cake. Decorate with your desired toppings, such as chopped peanut butter-filled sandwich cookies or peanut butter cups.
- Refrigerate any leftovers.
Nutrition
Notes
Tried this recipe?
Let us know how it was!
Visual Culinary Artist & Aesthetic Designer
When the pandemic killed my career as a luxury hotel photographer overnight, I was stuck in my studio apartment with nothing but time and vegetables. That’s when I started treating meal prep like photography projects—and discovered that the same principles that made five-star dishes camera-ready could turn humble zucchini noodles into social media gold.
My fine arts degree from Parsons taught me that people eat with their eyes first. After years behind the lens capturing haute cuisine, I realized that successful dieting often depends more on visual satisfaction than pure nutrition. When your food looks amazing, you actually want to stick with your eating plan.
My recipe development feels more like an art studio than a test kitchen. I use color theory to guide ingredient selections—purple cabbage with golden cauliflower, emerald herbs against ivory cheese. My “Edible Landscapes” series transforms standard low-carb ingredients into miniature scenic compositions that make vegetables feel aspirational rather than obligatory.
I spend evenings exploring art galleries and practicing watercolor painting, always looking for inspiration. My philosophy is simple: make low-carb food visually irresistible, and dietary compliance becomes an aesthetic choice rather than a health sacrifice.