
Oh my gosh, if you are anything like me, you are always on the hunt for that one dinner recipe that skips the fuss but delivers HUGE flavor—especially when you are juggling allergies or just plain picky eaters! Finding ways to make food exciting when you have dietary limitations can feel impossible, but trust me, I have cracked the code.
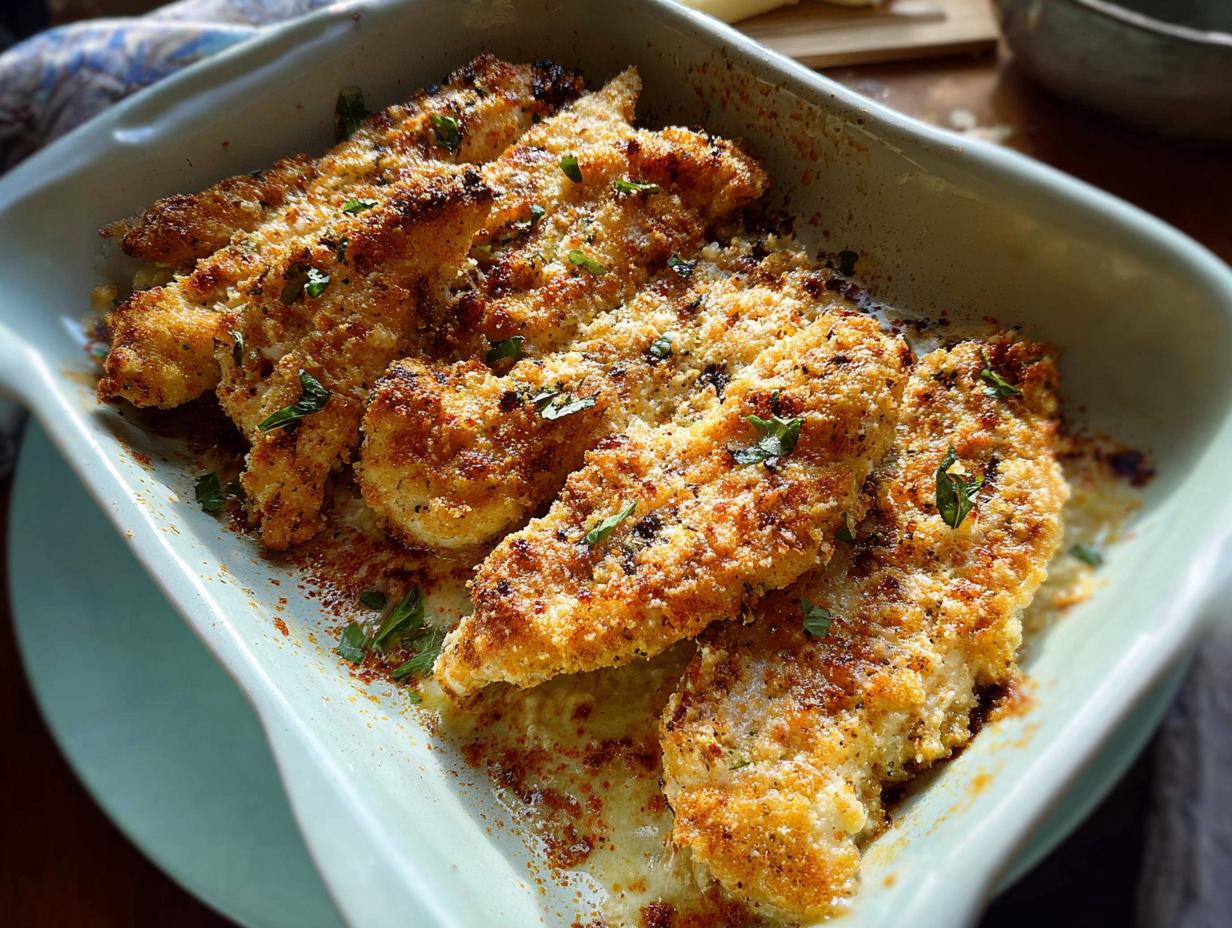
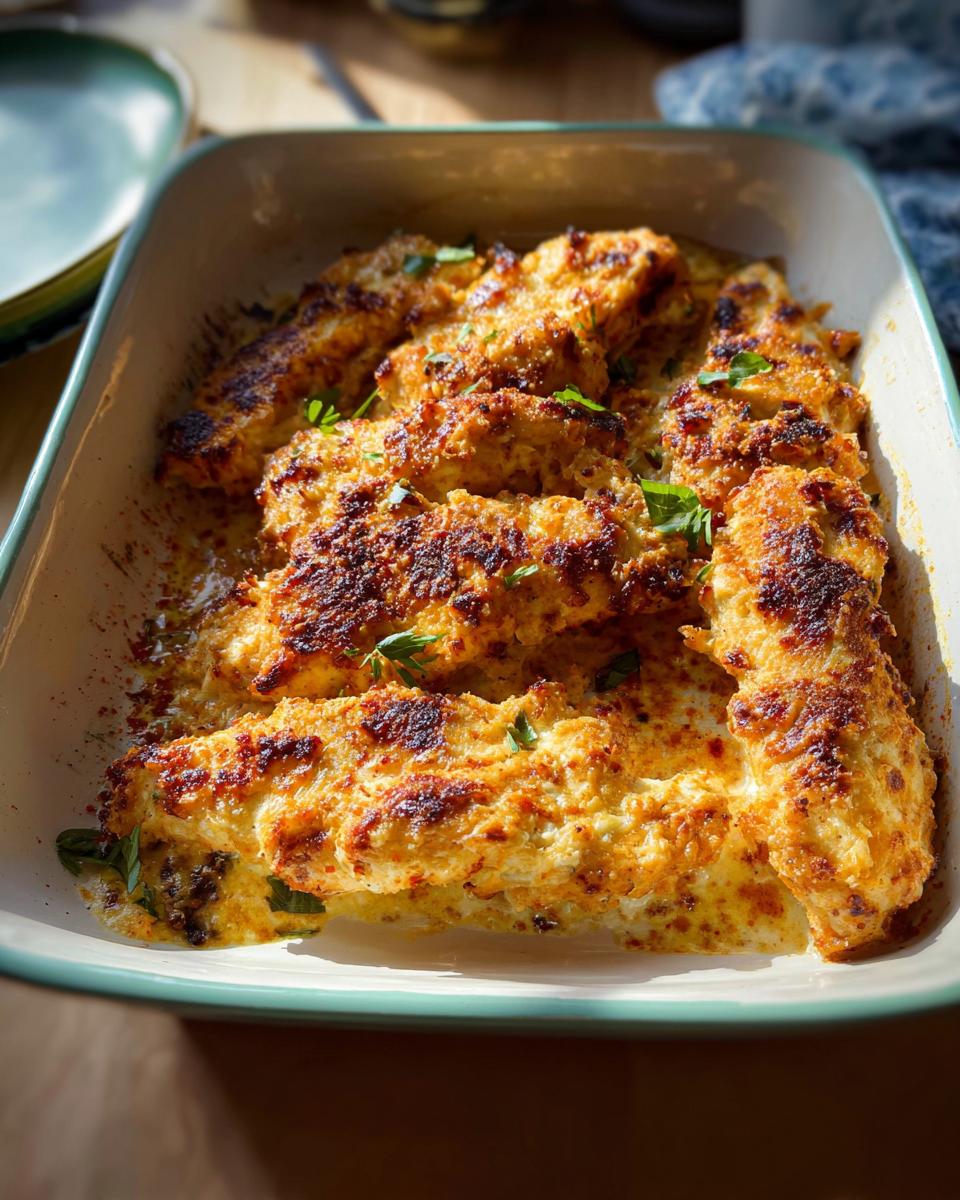
This recipe is my absolute go-to; it creates the most incredible, tender, 100% authentic Melt In Your Mouth Chicken that is naturally gluten-free. Seriously, it’s magic.
I’ll never forget the first time I made this for my son after his diagnosis. It was a tough period, and I desperately wanted him to feel special again through food. As the chicken baked at 375°F, filling our kitchen with that savory Parmesan aroma, I was just holding my breath, hoping for a wow reaction. When I plated it up, his eyes actually lit up—he couldn’t believe something gluten-free could taste this good! That moment stuck with me. It showed me that cooking with real care can turn dietary restrictions into the most cherished family memories. I’m Laila Stone, a Dual-Restriction Recipe Engineer, and I promise this dish will bring that same joy to your table! You can read all about my journey and why I focus on safe, flavorful food over at my main site.
Why This Melt In Your Mouth Chicken Recipe Works for Families
Finding a guaranteed winner every time you cook is the holy grail, especially when you need something that ticks the gluten-free box! This recipe is brilliant because it relies heavily on those easy little things we almost always have on hand—hello, Pantry Staples! Plus, it delivers the juiciest chicken you will ever pull out of the oven.
Quick Prep for Busy Weeknights
We are talking 10 minutes of actual hands-on work. That’s it! You mix the topping, smear it on, and pop it in. Better yet? You can mix up that creamy topping and let the chicken hang out in the milk bath for up to 24 hours. Pull it out, top it, bake it, and you have an amazing Easy Baked Chicken dinner ready faster than takeout.
Naturally Gluten-Free and Family Approved
The best part here is that nobody even knows it’s gluten-free! Because we are using yogurt or mayo instead of flour, we keep things safe without sacrificing any texture. That initial experience I had making this when we first navigated my son’s diet proved that this recipe is a certified winner for even the pickiest members of your crew.
Gathering Ingredients for Your Melt In Your Mouth Chicken
Okay, let’s talk ingredients! When you’re aiming for that perfect tenderness and flavor explosion in your Melt In Your Mouth Chicken, the quality and description of what you use really matter. Don’t worry; everything here is a superstar Pantry Staple, so you probably won’t need a special trip to the store. This clarity helps guarantee success!
We break the ingredients into three simple groups. Do pay attention to that note on the Parmesan—it’s important! I have a whole piece dedicated to ingredient talk later on, but for now, here’s the necessary list.
For some inspiration on how to stretch your dinner dollar with minimal items, check out my guide to 5 Ingredient Dinner Ideas!
For the Chicken
- 4 boneless, skinless chicken breasts (make sure you slice these into 2 or 3 strips each before marinating!)
- 1/2 cup milk (this is key for tenderizing!)
For the Topping
- 3/4 cup Greek yogurt (or mayo or sour cream—your choice, but they all work wonders)
- 3/4 cup grated parmesan cheese (divided—remember to save half for the top!)
- 1 tsp salt
- 3/4 tsp garlic powder
- 3/4 tsp onion powder
- 3/4 tsp paprika
- Black pepper to taste
Optional Garnish
- Fresh parsley
- Chili pepper flakes
Essential Equipment for Perfect Melt In Your Mouth Chicken
You don’t need a complicated setup for this recipe; that’s part of why it’s so fantastic for busy parents! We are keeping things super simple here, relying only on basic tools you definitely have lurking in your kitchen cabinets. The goal is maximum flavor with minimum scrubbing later, right?
When thinking about our cleanup strategy, I always suggest preparing your baking dish ahead of time. Since this coating can get wonderfully browned and caramelized, stopping sticking is half the battle!
If you want to see some other amazing dishes that keep the cleaning to a minimum, you should absolutely check out my favorite One Pan Dinner Ideas that save your evenings.
Here are the three main players you’ll need:
- The Oven (obviously! We’re baking this beauty.)
- A sturdy Baking dish (a 9×13 inch dish holds four standard breasts nicely).
- A mixing Bowl (one for the marinade/milk, and one for that killer topping combo).
My expert tip for zero stress cleanup? Grab a sheet of parchment paper and line your baking dish before you start. It catches all those little bits of yummy Parmesan and yogurt. When dinner’s done, you just lift the whole thing out! It makes cleaning up after your Melt In Your Mouth Chicken dinner a breeze!
Step-by-Step Instructions to Make Melt In Your Mouth Chicken
Now for the fun part! It’s time to turn those simple pantry ingredients into dinner gold. This process is so straightforward that you’ll wonder why you didn’t start making this Melt In Your Mouth Chicken years ago. Remember, patience during the marinating stage is what really guarantees that super Juicy Chicken result.
I love prepping this during the afternoon slump so that when five o’clock rolls around, dinner practically makes itself. For a deeper dive into making chicken consistently perfect, check out my guide on how to make chicken foolproof!
Preparing and Marinating the Chicken
First things first, we need to shape our chicken for maximum tenderness. Take those nice thick breasts and slice them right through horizontally into two or three thinner strips. This ensures everything cooks evenly and quickly. Toss those strips into a bowl and cover them completely with the milk. That milk bath is crucial! It starts tenderizing the meat right away. Pop that bowl in the fridge and let it sit for at least 30 minutes. Honestly, overnight is even better if you are prepping ahead for a truly busy night—it makes the chicken unbelievably soft.
Creating the Flavorful Topping
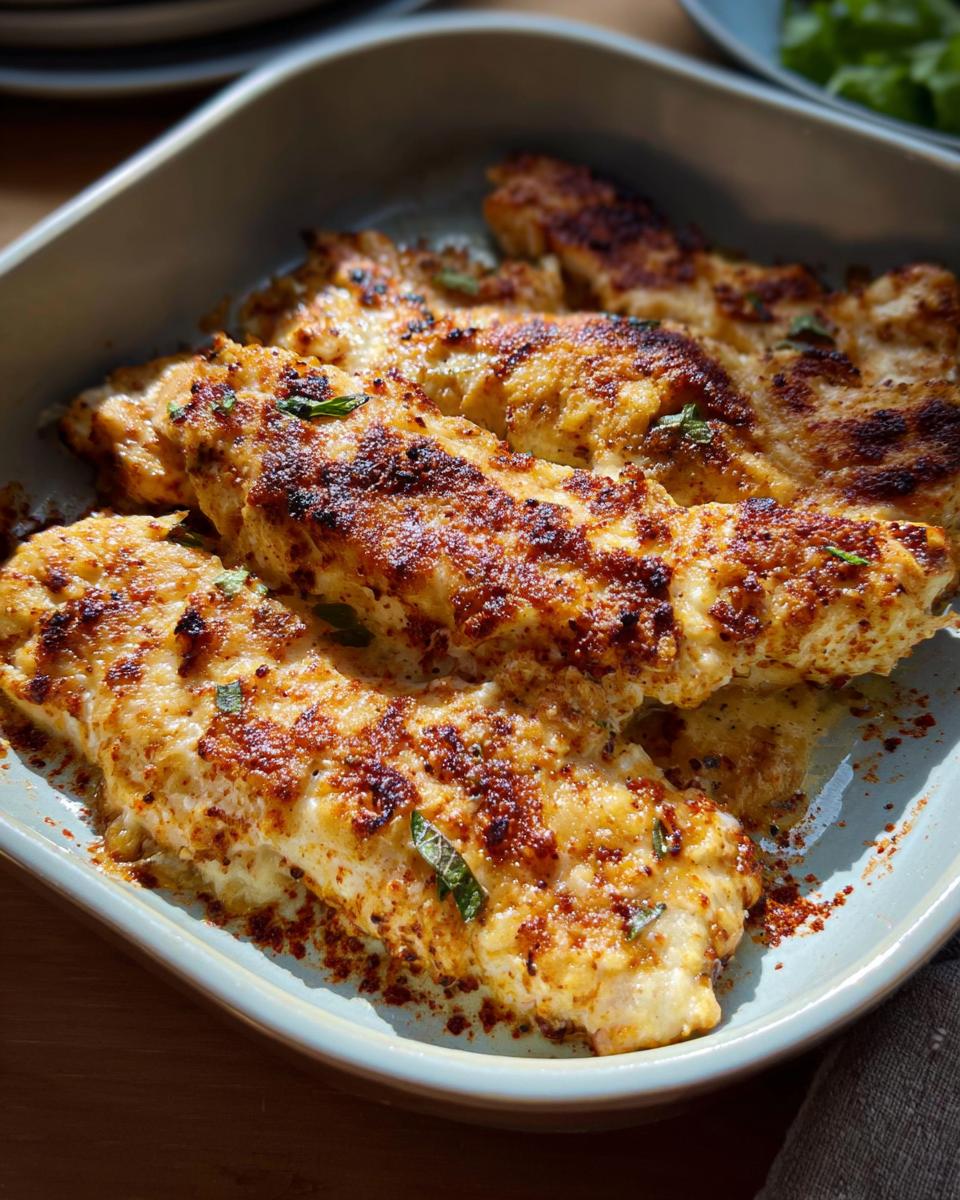
While that milk is doing its job, let’s make the superstar spread that handles all the flavor work. Grab a clean bowl. We are combining the Greek yogurt—which gives us that lovely tang—with the spices: salt, garlic powder, onion powder, and paprika. Mix in half of your grated Parmesan cheese. This mixture is the heart of what many call the Mayo Parmesan Chicken style, only we are using yogurt for a tangier, lighter lift! Don’t forget to splash in some fresh black pepper. Just stir until it’s all creamy and gorgeous.
Baking for Juiciness
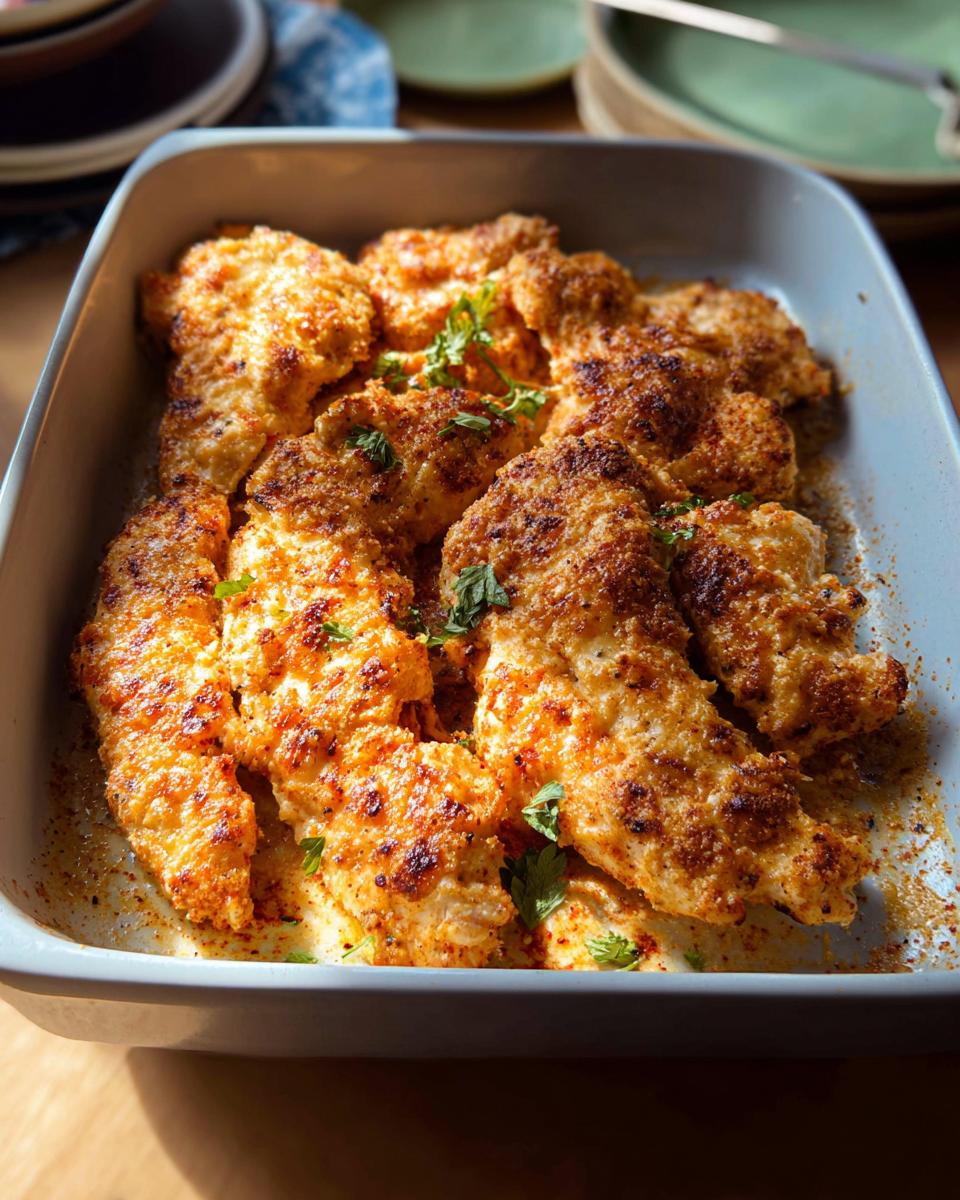
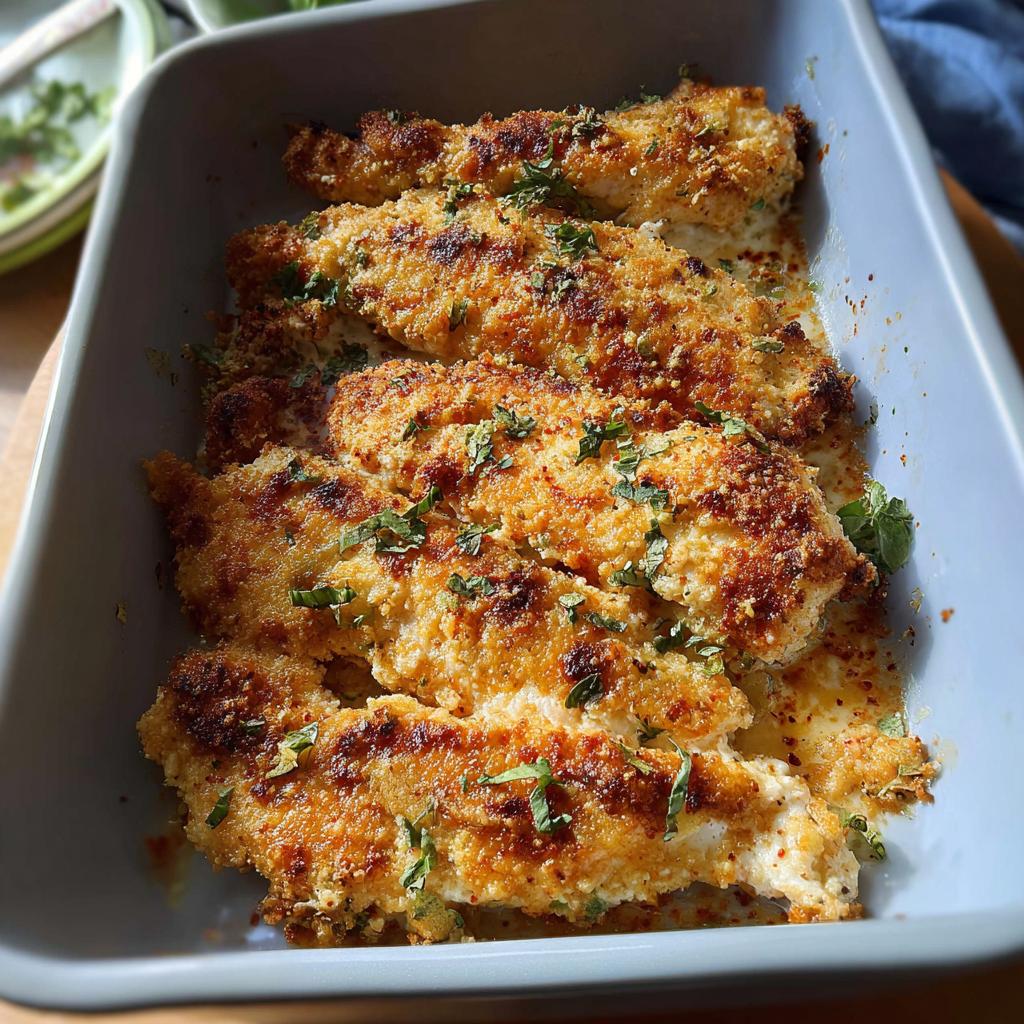
Once the marinating time is up, grab your prepared baking dish—remember that parchment paper trick?—and put your chicken pieces in. Drizzle any leftover milk off the chicken, but don’t wipe it dry! Now, take that beautiful topping and lovingly spread it across every piece. Take the reserved Parmesan and sprinkle it right over the top, maybe even another light dusting of paprika for color.
Preheat that oven to 375°F (190°C).
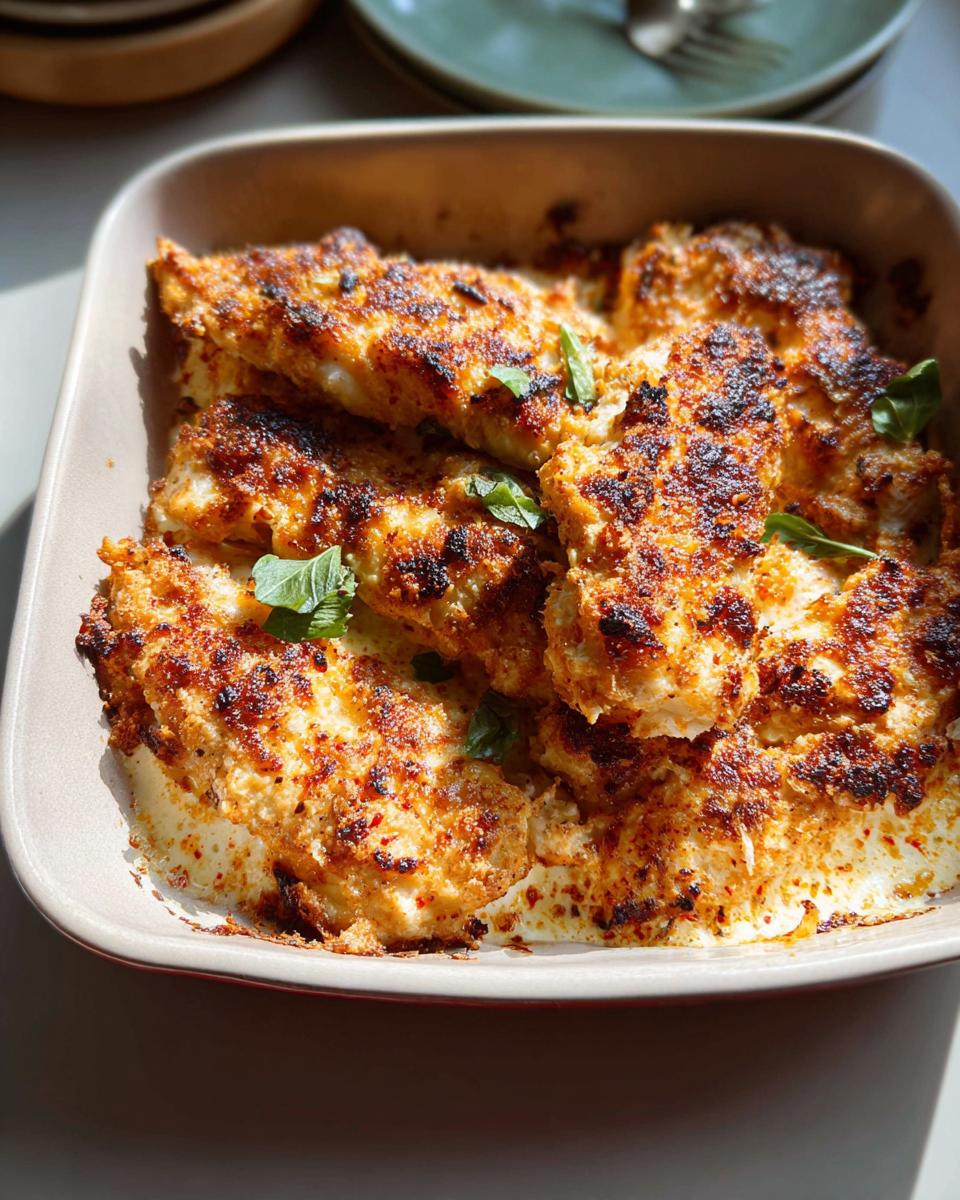
Bake for about 40 minutes. Keep an eye on it around that 35-minute mark; if you want a golden, slightly crisp top—which, let’s be real, you probably do—you can slide it under the broiler for just two or three minutes. Just watch it like a hawk so it doesn’t burn! This method guarantees you get that incredible Juicy Chicken experience every single time. You can find some great meal prep tips for leftovers here!
If you want to see what others thought of this amazing dish, check out this great review here.
Tips for Achieving Truly Melt In Your Mouth Chicken Texture
Listen, I used to be the queen of dry chicken. I honestly thought chicken breasts were doomed to be tough unless braised for hours. But that was before this technique taught me better! The secret to getting that truly Melt In Your Mouth Chicken texture is really about respecting the moisture we add in.
First, don’t skip that milk bath! That simple step using a half cup of milk is what kicks off the tenderizing process before anything even hits the oven. It makes a difference you can feel when you slice it.
Second, while Greek yogurt gives you great flavor and helps hold the Parmesan coating nicely, if you are worried about moisture, using full-fat mayonnaise instead is a fantastic swap—it seals in juices beautifully. Seriously, don’t overbake! Pull it when it just hits temperature. You can always pop it back in for five minutes, but you can’t un-dry it!
For more tips on keeping your poultry perfectly moist, take a peek at my guide on the Best Chicken Techniques for 2025.
Ingredient Notes and Substitutions for Melt In Your Mouth Chicken
One of the best things about making this Melt In Your Mouth Chicken for a Family Dinner is that it relies almost entirely on things you already have tucked away! Yes, this is your ultimate Pantry Staples recipe. We aren’t trekking to the store for exotic spices; we are using what we have to make something spectacular.
The key to customization, especially when dealing with allergies or just what you grabbed from the fridge, lies in that creamy topping. I call for Greek yogurt because I love the slight tanginess it brings, which plays really nicely with the Parmesan cheese, but you absolutely have wiggle room.
If you don’t keep Greek yogurt stocked, don’t panic! Sour cream is an exact one-to-one swap, and full-fat mayonnaise works like a charm, too. Mayonnaise, in fact, is what most people associate with that ultra-rich, Mayo Parmesan Chicken texture, so feel free to use it if that’s what you have on hand for guaranteed richness. They all seal in moisture fantastically well.
Also, let’s talk about the chicken cuts themselves. I insist on slicing the breasts thinly because thick chicken is my number one enemy when I am trying to bake something quick and Juicy Chicken. When you slice them down, the heat penetrates much faster and more evenly. This means the coating gets toasty brown right when the center hits that sweet spot of being perfectly cooked, not over-baked and dry. It’s a little extra step, but trust me, it’s the difference between good baked chicken and truly Melt In Your Mouth Chicken!
If you want to see how to swap proteins or other basics in my most useful recipes, check out my Ultimate Dinner Ideas Guide!
Serving Suggestions for Your Family Dinner with Melt In Your Mouth Chicken
Okay, we’ve mastered the main event, which is fantastic for your Family Dinner! But every great main course needs a supporting cast, right? Since this Melt In Your Mouth Chicken is so rich and flavorful from that Parmesan-yogurt topping, I usually keep the sides super quick and simple. We definitely don’t want anything too heavy fighting for attention!
My whole goal here is speed and freshness. If you only have twenty minutes left after the chicken has been in the oven for thirty, you need sides that practically make themselves. You can find some of my favorite quick-fix sides on my weeknight ideas page!
Here are my absolute favorite ways to round out the plate:
- Quick Roasted Veggies: Toss some broccoli florets or halved asparagus spears with olive oil, salt, and pepper. Pop them into a separate corner of the oven (or a separate baking sheet) for the last 15 to 20 minutes of the chicken’s bake time. They come out perfectly charred and tender!
- Simple Green Salad: Honestly, sometimes you just need the crunch! A big bowl of mixed greens with whatever is left in the crisper drawer—maybe some cucumber or cherry tomatoes—is perfection. Use a light vinaigrette; you don’t want heavy dressings competing with that creamy topping.
- Steamed Green Beans: If you are big on speed, nothing beats dropping some fresh or frozen green beans into boiling water for about 5 minutes. Drain them, toss with a little butter and a sprinkle of salt, and you are done. Quick, healthy, and the kids usually eat these without a fuss.
The point is: let the flavor of that Juicy Chicken shine. Fast sides mean less time cleaning up and more time enjoying that fantastic dinner you just made!
Storing and Reheating This Easy Baked Chicken
Even though this Melt In Your Mouth Chicken is almost guaranteed to disappear the night you make it—because seriously, who can stop eating it?—life happens, and sometimes you end up with leftovers. And you know what? Leftovers are magic, as long as you treat them right! We put so much work into achieving that perfect, Juicy Chicken texture, and I absolutely refuse to let sad, dry chicken haunt my fridge the next day.
The key to keeping this dish amazing is twofold: proper storage and gentle reheating. If you follow these quick steps, you’ll be enjoying that tangy Parmesan flavor again tomorrow!
For my ultimate guide on getting chicken right every time, including how to gauge doneness perfectly, hop over and check out this favorite post on making chicken foolproof.
Storing Your Leftover Melt In Your Mouth Chicken
As soon as the chicken pieces are cool enough to handle, you need to get them sealed up tight. Don’t just toss them in a bowl and cover it with plastic wrap—that lets air sneak in and dry everything out! Grab an airtight container. Seriously, invest in good ones because they save your leftovers every time. Make sure you put the chicken in there, and if there’s any leftover creamy sauce/topping pooled in the bottom of the baking dish, drizzle that right over the pieces before sealing.
This Easy Baked Chicken will stay fantastic in the fridge for about three to four days. Any longer than that, and you risk losing that amazing texture, so try to plan accordingly!
The Best Way to Reheat for Juiciness
Reheating is where most people ruin their perfect chicken, but not you! You know the secret now: low and slow, and add a little moisture back in. Never, ever blast this under high heat in the microwave until it’s crispy, because that coating will turn chewy so fast!
My favorite way to bring this back to life is to keep it low in the oven. Preheat your oven to about 300°F (150°C). Place the chicken pieces in a small, oven-safe dish, and here is the game-changer: add maybe a tablespoon of water or chicken broth into the bottom of the dish—just enough to cover the very bottom. Cover the dish tightly with foil. This steams the chicken gently while it warms through, locking in all that original juiciness. It usually takes about 10 to 15 minutes, depending on how much you are reheating.
If you are in a massive rush and need a single serving done in two minutes? That’s when the microwave comes in. Place the piece on a microwave-safe plate and put a crumpled, damp paper towel right over the top of the chicken. Microwave in short 30-second bursts until it’s just heated through. The damp towel acts like a little sauna to keep that Melt In Your Mouth Chicken tender!
Frequently Asked Questions About Melt In Your Mouth Chicken
I totally get it—when you find a winner like this Melt In Your Mouth Chicken, you want to make sure you nail it every time! Cooking for the family means we need reliable results, so let’s tackle some of those little worries that pop up. Getting the timing and swaps right is crucial for that perfect texture we’re all chasing!
If you’ve got more questions after this, you can always peek around my general recipe index for more answers!
Can I use chicken thighs instead of breasts for this Melt In Your Mouth Chicken?
Yes, you absolutely can! Chicken thighs are even more forgiving than breasts, which is great news. Since they have a bit more fat, they are naturally harder to dry out. However, because they are often thicker, you will need to bump that baking time up a bit. If you use boneless, skinless thighs, start checking them at 45 minutes instead of 40. They should feel springy and reach that safe internal temperature. You’ll still get incredible Juicy Chicken results!
How do I ensure this Easy Baked Chicken stays moist?
Two things are non-negotiable if you want the juiciest outcome. First, don’t skip the initial milk soak! Even those quick 30 minutes make a difference in relaxing those muscle fibers. Second, and this is the most common kitchen mistake—DO NOT overbake! Stick to that 40-minute mark since we sliced the chicken thin. If you pull it out when the topping is golden and it just starts to pull slightly from the sides of the dish, you’ve won. That’s how you guarantee that tender bite!
What if I don’t have Greek yogurt for the topping?
Oh, please don’t worry about that swap! The topping is super flexible, which is why I consider this such an easy bake. If you don’t have yogurt, reach straight for sour cream, or better yet, full-fat mayonnaise! Mayonnaise is truly the secret weapon for that rich, classic Mayo Parmesan Chicken flavor profile; it melts down perfectly and locks in moisture. Either substitute works just as well as the yogurt for holding that Parmesan coating in place.
Share Your Melt In Your Mouth Chicken Success
Okay, now that you’ve got the best, most foolproof recipe for a flavorful Family Dinner, I really want to hear what you think! Did your kiddo give that first bite a thumbs up? Did you try the sour cream swap or stick with the Greek yogurt?
Food is all about sharing those happy moments, so please don’t keep your success stories to yourself! Drop a rating right here on the recipe card—five stars if it lived up to the ‘Melt In Your Mouth’ promise!
If you snap a picture of your beautiful, golden, Easy Baked Chicken, tag me on social media! I absolutely love seeing this dish coming out of kitchens all over the place. It means the world to me knowing that a recipe born out of necessity during a challenging time can bring an easy, delicious win to your table tonight.
Have questions or want to suggest another amazing swap? You can reach out directly through my contact page. Happy cooking, and thank you for trusting my kitchen secrets!
Melt In Your Mouth Chicken
Ingredients
Equipment
Method
- Slice each chicken breast into two or three strips. Place chicken in a bowl, cover with milk, and marinate in the refrigerator for at least 30 minutes or overnight.
- Preheat your oven to 375°F (190°C).
- In a small bowl, combine the Greek yogurt, half of the grated parmesan cheese, salt, garlic powder, onion powder, paprika, and black pepper.
- Transfer the marinated chicken pieces to a 9×13 inch baking dish. Season the chicken with additional salt to taste.
- Spread the yogurt mixture evenly over the chicken pieces. Sprinkle the remaining parmesan cheese on top, followed by a little more paprika.
- Bake for 40 minutes. For extra color, you can broil for a few minutes at the end.
- Garnish with parsley and chili flakes if desired before serving.
Nutrition
Notes
Tried this recipe?
Let us know how it was!
Dual-Restriction Recipe Engineer & Cross-Contamination Specialist
Everything changed when my teenage son got hit with celiac disease and Type 1 diabetes diagnoses within six months of each other. Suddenly, pizza and pasta were off the table, and most “diabetic-friendly” foods contained gluten. I went from regular mom cooking to navigating what I call “compound restriction cooking”—and I had a kid’s appetite and taste buds to satisfy.
Lucky for us, my background in pharmaceutical quality control gave me the systematic mindset this level of precision requires. My kitchen now operates under pharmaceutical-grade protocols adapted for home use: dedicated prep surfaces, separate storage systems, and testing procedures that verify both carb counts and gluten absence before any recipe gets published.
I’ve developed over 220 recipes that clear multiple dietary hurdles simultaneously—finding gluten-free thickeners that don’t spike blood sugar, creating bread alternatives that meet both keto ratios and celiac safety, and developing desserts that actually taste good to a teenager despite impossible restrictions.
Through my “Safe Kitchen Certification” program, I teach other parents that managing multiple dietary restrictions isn’t about multiplying limitations—it’s about systematic thinking that reveals unexpected possibilities. When you engineer solutions instead of making compromises, restriction becomes innovation rather than deprivation.