
If your evenings feel like a chaotic scramble to get something (anything!) on the table, I absolutely get it. Trust me, just a few years ago, I was wading through takeout menus thinking that figuring out dinner was impossible with our family’s specific needs. That was before I cracked the code on this Stuffed Pepper Casserole.
It all started when I stared down a pile of unused peppers and realized I could make a comforting classic *deconstructed*. This recipe isn’t just easy; it’s the ultimate solution because it’s inherently gluten-free and diabetic-friendly, which is huge for us. Baking this up fills my kitchen with the best smells and brings such relief knowing the whole family is happy and fed. I’m Laila Stone, and as a Dual-Restriction Recipe Engineer, my mission is making food work for complex diets without sacrificing that amazing, home-cooked taste you crave. This casserole delivers!
Check out my philosophy on cooking for tricky dietary needs over at my About Page!
Why This Stuffed Pepper Casserole Is Your Weeknight Hero
Honestly, I developed this because I needed a win after a long day. This deconstructed Stuffed Pepper Casserole takes everything you love about stuffed peppers—the savory beef, the sweet peppers, the melted cheese—and puts it all into one glorious, low-stress pan. It tastes exactly like comfort food, but it’s designed for real life.
Why should you make this tonight? Because it checks all my boxes:
- It’s incredibly fast—we’re talking prep in under 15 minutes!
- Clean-up is a breeze since it’s an easy casserole; everything happens in one oven-safe dish.
- It navigates those tricky dietary needs. This version is naturally gluten-free and works wonderfully in a meal prep rotation.
It’s the flavor of tradition without the stuffing hassle!
Essential Ingredients for the Best Stuffed Pepper Casserole
Now, let’s talk about the actual food, because this is where the magic happens! When you’re dealing with specific dietary needs, accuracy isn’t just helpful—it’s essential for safety and success. I’ve learned the hard way that eyeballing things in a recipe like this, which must remain gluten-free and balanced for carbohydrate counts, is a recipe for disaster. Don’t worry though, the list isn’t overwhelming, but paying attention to those little notes on the measurements makes a huge difference!
We need to make sure the rice cooks perfectly in the broth before we cover it up, and that means following the ratios I settled on after weeks of testing. Here are the building blocks for your ultimate comfort dinner:
For the Stuffed Pepper Casserole Base
- 1 tablespoon olive oil
- 1 pound ground beef (I always use 85/15 for great flavor!)
- 1 diced onion
- 2 tablespoons unsalted butter
- 3 cloves garlic, minced
- 2 teaspoons kosher salt, divided across steps
- 1 teaspoon freshly ground black pepper
- 1/2 teaspoon smoked paprika
- 1/2 teaspoon garlic powder
- 1 pinch cayenne (just a little kick!)
- 2 green bell peppers, seeded and cut into 1-inch pieces
- 1 red bell pepper, seeded and cut into 1-inch pieces
- 1 orange bell pepper, seeded and cut into 1-inch pieces
- 1 cup raw basmati or other long grain white rice
- 2 teaspoons Worcestershire sauce (double-check that bottle for gluten-free status!)
- 2 cups tomato sauce or tomato puree
- 1 1/2 cups beef broth
For the Cheesy Topping
- 6 ounces Cheddar cheese, shredded, and this amount must be divided for two different steps in the process!
Step-by-Step Instructions for Your Stuffed Pepper Casserole
Okay, let’s get serious about the assembly because this is what separates a good weeknight dinner from a truly amazing one. When I first tested this deconstructed version, I realized a few little techniques really give the beef and spices a huge flavor boost, which is critical when you’re cutting back on other carbs. Don’t rush the browning—that’s where the depth comes from! This is where you really need to pay attention to the process, kind of like when I’m teaching someone how to make foolproof cacio e pepe; precision matters!
Preparing the Base and Sautéing Aromatics
First things first, turn that oven up to 375 degrees F (190 degrees C). We want everything hot! Get your ovenproof pan on the stove over medium-high heat. Add your olive oil, then toss in the ground beef along with a big pinch of salt. You need to cook this, breaking it up, until it really starts to get nice and brown—I’m talking deep color here, not just gray meat! Once it’s browned (that takes about 5 minutes), drop the heat a little bit, add the butter and garlic, and let that smell fill your kitchen for about a minute before stirring in all those wonderful spices: pepper, paprika, garlic powder, and cayenne.
Toss in your chopped bell peppers now and just cook them until they get that first little blush of color, maybe two or three minutes. Don’t soften them completely; remember, they have to cook more in the oven!
Combining Rice and Liquids for the Stuffed Pepper Casserole
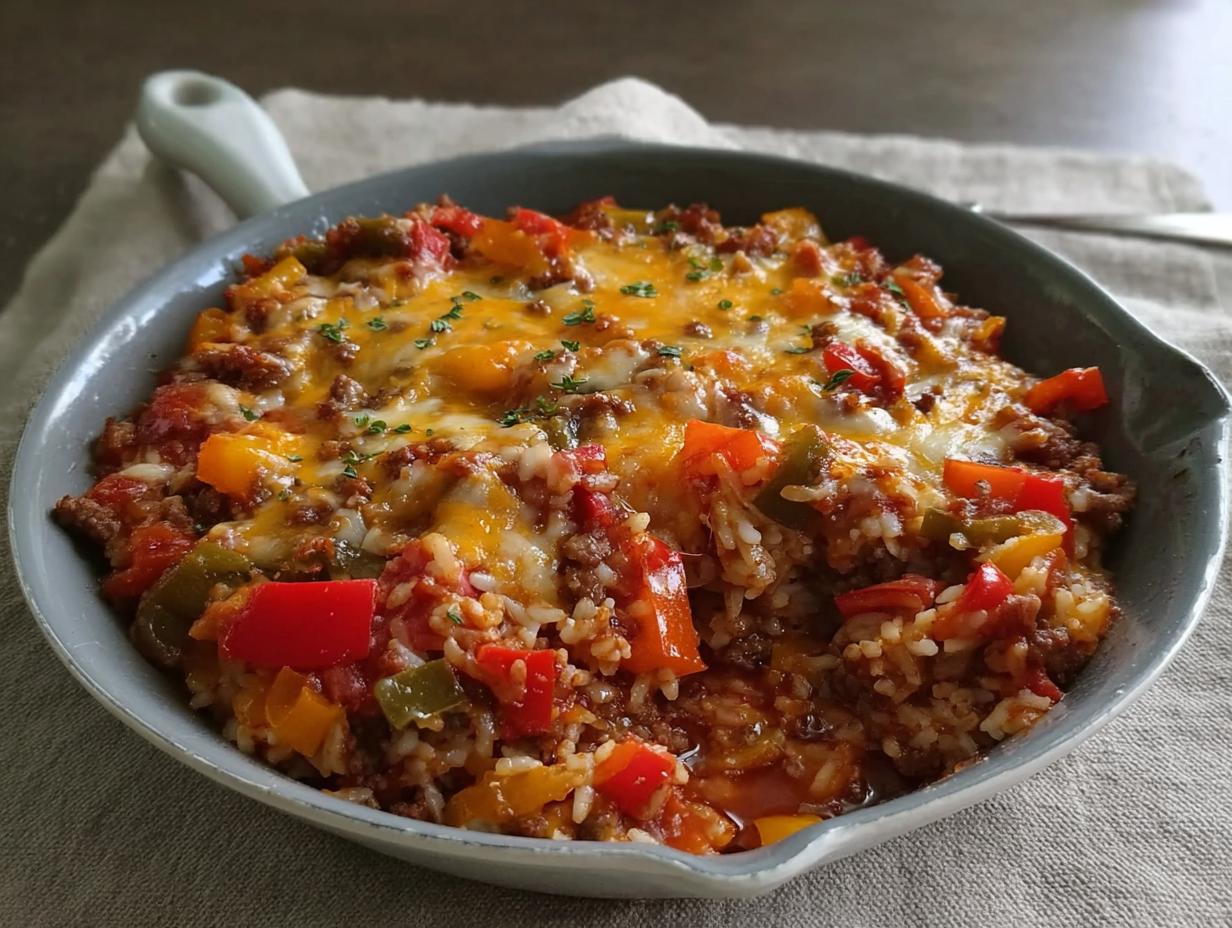
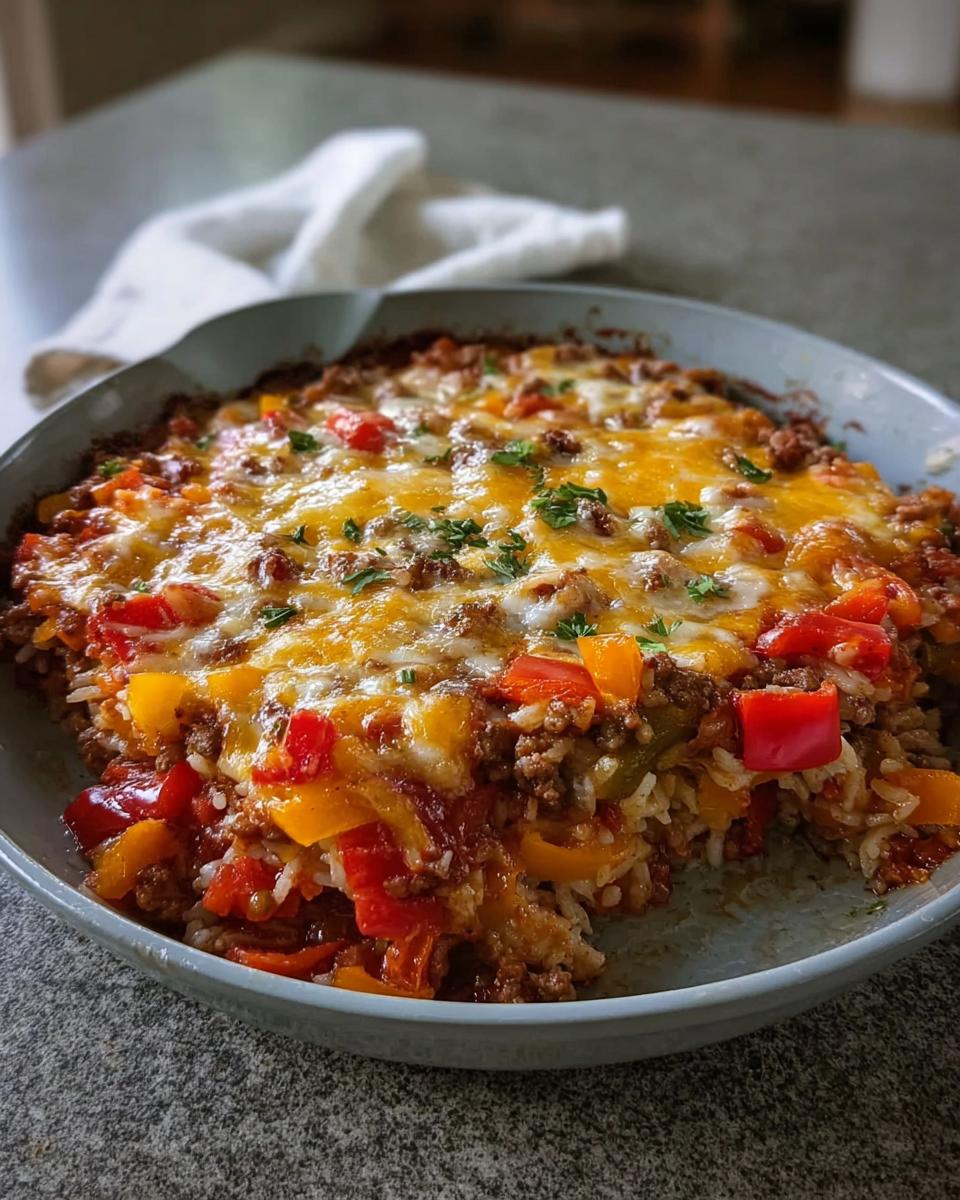
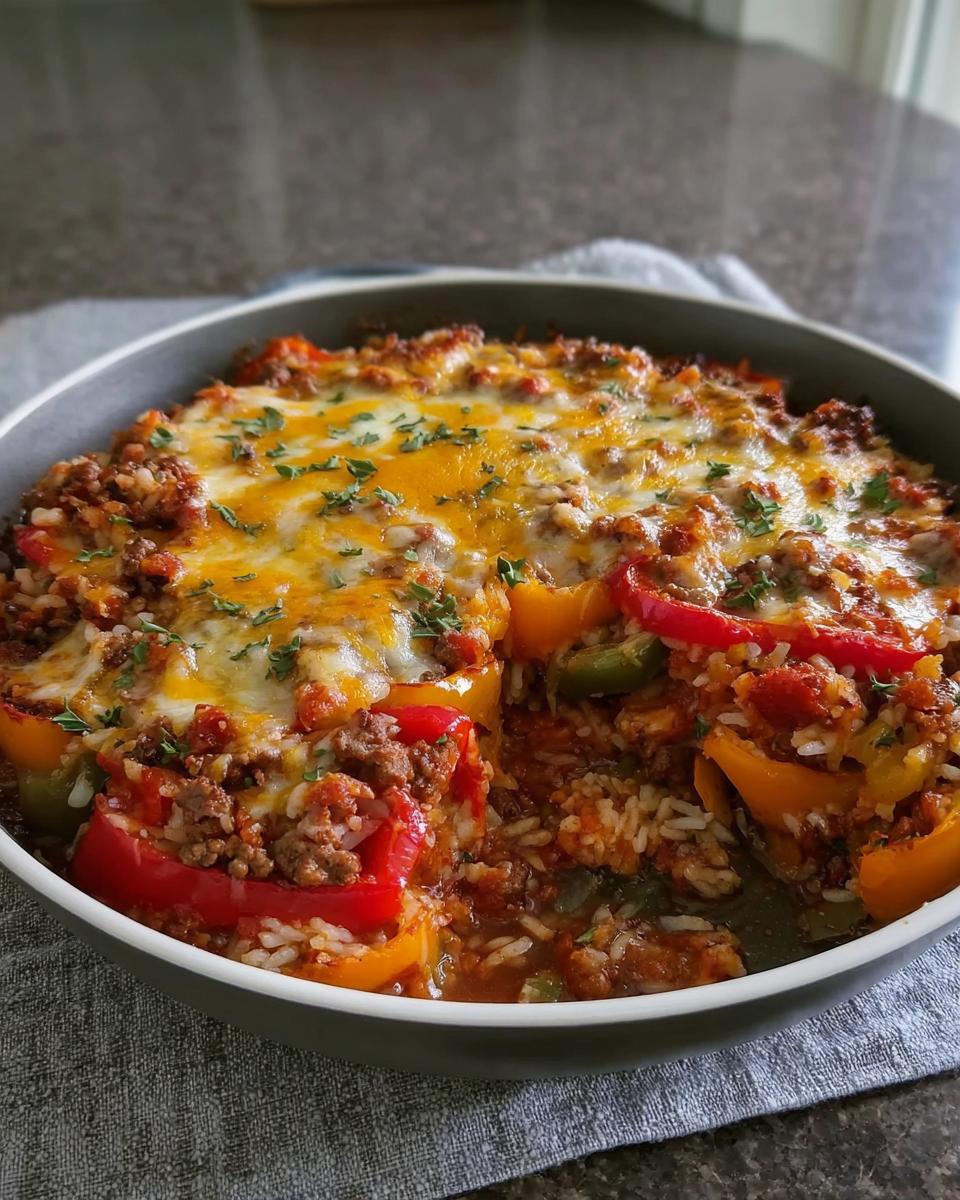
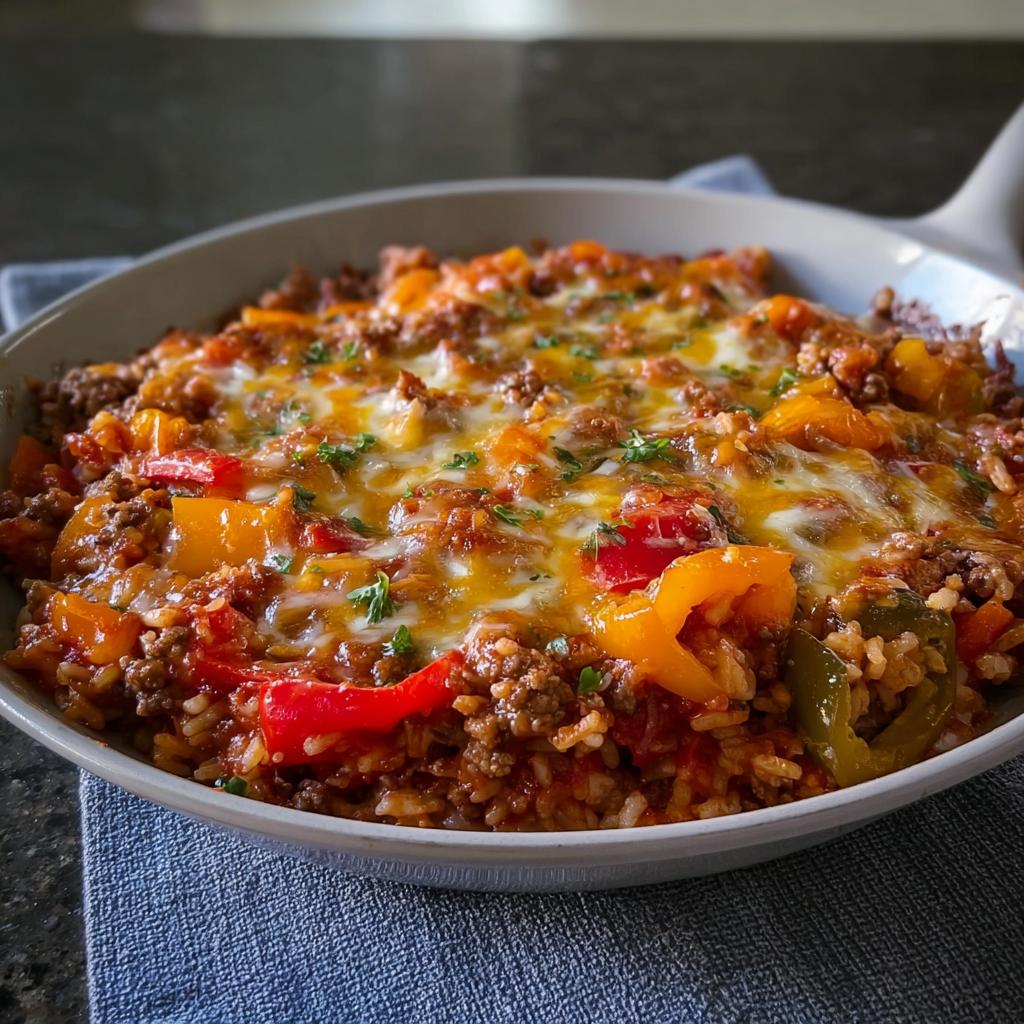
Now we introduce the rice. Stir that raw basmati right into the hot pan so it gets coated nicely in all that flavor. Then, bring in the Worcestershire sauce, the tomato sauce, and the beef broth. Give it all a good stir until things are bubbling hot. Right before you cover it, sprinkle in about *half* of your shredded Cheddar cheese.
Seriously, do not skip stirring that cheese in! Cover the whole pan super tight. We need to trap all that steam to cook that rice perfectly. If you’ve got a heavy lid, use it!
Baking and Finishing the Stuffed Pepper Casserole Under the Broiler
Slide that tightly covered pan into the hot oven for 45 minutes. This is the main cooking time for the rice and beef mixture. When 45 minutes is up, carefully pull it out—watch the steam! Remove the lid and test a few grains of rice to make sure they’re soft. If they’re still a little hard, cover it back up and keep baking until they yield.
Once the rice is tender, sprinkle that second half of the cheese right over the top. Now, switch your oven setting to broil. Keep a *very* close eye on it—it only takes 1 to 2 minutes for that cheese to go golden and bubbly. The absolute final, non-negotiable step? Let that amazing Stuffed Pepper Casserole rest, uncovered, for a full 10 minutes before you even think about scooping it out. It lets the flavors settle perfectly!
Tips for Perfect Stuffed Pepper Casserole Results
Getting this Stuffed Pepper Casserole just right comes down to a couple of little tricks I picked up trying to make sure the rice was tender every time. Because we are cooking rice *in* the sauce, it needs that steamy environment, so don’t cheat on covering that pan tightly! Seriously, a tight seal is your friend here.
If you find your rice is still a bit firm after the initial 45 minutes, just put the lid back on and give it another 5 to 7 minutes covered. It’s safer to undercook slightly than to burn it!
My favorite shortcut—which makes this an even better weeknight option—is using that high-heat finish I mentioned. If you’re impatient for that melted, brown cheese top, skip the broiler and crank your oven up to 450 degrees F (235 degrees C) for just 10 minutes after uncovering it. It yields a slightly faster melt and a crispier topping. It’s my little secret weapon, almost like knowing how to nail a gluten-free roux—it just takes practice and knowing the oven’s personality!
Ingredient Notes and Substitutions for Your Stuffed Pepper Casserole
You know, when I first started modifying recipes for my son, I thought I’d have to give up all the classics. Cooking for specific dietary needs means you have to get smart about ingredients, and that’s exactly what we did here to keep this Stuffed Pepper Casserole flavorful but safe. Ingredient choices truly impact the final dish, especially when balancing fat, carbs, and protein!
We need to make sure we hold onto that classic flavor profile, even when swapping things out. For instance, the Worcestershire sauce is crucial for that deep, savory umami note, but you MUST check the label! Many contain wheat or barley, so reading carefully is part of the E-E-A-T process for me. I always look for specific “Gluten-Free Certified” labels on those bottles.
I’ve put together some notes on what works best if you need to switch things up. If you’re looking for more ideas on how to maximize flavor while staying compliant, check out my list of easy low-carb gluten-free recipes—it’s amazing what you can still eat!
Here are the swaps I rely on most:
- **Ground Meat Swaps:** Ground turkey or chicken work fine, though they are leaner. If you use them, you might add an extra teaspoon of olive oil during the sauté step just to maintain richness.
- **Rice Alternatives (For Diabetic Needs):** If you need to keep the carbs in this Rice And Beef dish lower, you can swap the 1 cup of white rice for 2 cups of uncooked cauliflower rice. You might need to slightly reduce the amount of beef broth called for, as cauliflower rice releases more moisture. Taste test frequently!
- **Tomato Base:** If you don’t have straight tomato sauce, using an equal amount of crushed tomatoes works, but you might need to dial back the added salt just a tiny bit, as crushed varieties can sometimes be saltier.
It’s all about keeping the soul of the recipe alive while making it fit your table—and that’s what I love about this deconstructed approach!
Making Ahead and Storing Leftover Stuffed Pepper Casserole
If you’re anything like me, the biggest blessing is finding a dinner that tastes even better the next day! That’s why I’m so excited to tell you that this Stuffed Pepper Casserole is absolutely brilliant for meal prep. Having a big pan of this ready to go means one less evening spent worrying about what’s for dinner. It’s perfect for those weeks where you know you’ll be running around!
You can cook the entire casserole up front, let it cool slightly, and then store it properly. I always cut the cooled casserole right in the pan—if you have an oven-safe dish with a lid, even better! If not, just cover it tightly with plastic wrap and then a layer of foil before tucking it into the fridge. It keeps beautifully for about three or four days.
When you are ready to reheat, the key is moisture! Rice can dry out if you just blast it in the microwave. I always suggest reheating individual servings in a microwave-safe container, but add just one teaspoon of water or beef broth right on top of the portion before covering it with another plate or paper towel.
This steaming trick keeps the rice fluffy and the beef nice and juicy. It reheats perfectly, making it one of my favorite options for meal prep success stories. It’s just as satisfying the second or third time around!
Frequently Asked Questions About Deconstructed Stuffed Peppers
I know when you’re playing kitchen chemist trying to balance sensitivities, you end up with a million tiny questions. That’s totally fine! I’ve been there, scribbling notes in the margin of recipes. Since this Stuffed Pepper Casserole is designed to be a versatile, easy casserole, I wanted to make sure we covered the common hurdles right here. If you have more burning questions, you can always poke around my main recipe index!
How do I make this Stuffed Pepper Casserole low-carb?
That is such a great question, because we *love* keeping this diabetic-friendly! To make this truly low-carb, you have to swap out the main carb source, which is the basmati rice. My favorite substitute is cauliflower rice. If you use raw cauliflower rice instead of the 1 cup of white rice, you significantly cut the carbs. Be careful though—cauliflower releases a ton of water, so you might need to use a little less beef broth, or at least check the liquid level halfway through baking. You want it tender, not swimming!
Can I use different ground meats in this Rice And Beef dish?
Absolutely! This Rice And Beef base is very forgiving. While I love the flavor of ground beef, switch things up if you prefer or if you need leaner protein. Ground turkey or ground chicken work just as well. Just remember this little tip: poultry is leaner, so you might need to add an *extra* splash of olive oil during the sautéing step to make sure you still get that lovely coating on the onions and peppers. You don’t want your aromatics to stick or burn!
Is this recipe truly gluten-free?
Yes, based on the core ingredients, this Stuffed Pepper Casserole is absolutely gluten-free! The rice is naturally safe, and the vegetables are fine. However, as a Dual-Restriction Recipe Engineer, I have to give you the big warning flag: always double-check your Worcestershire sauce! Many brands sneak in wheat or barley just for the color or flavor boost. Look specifically for a certified gluten-free bottle to keep this meal safe for everyone at your table.
Serving Suggestions for Your Easy Casserole
When you’ve just pulled a giant, cheesy pan of Stuffed Pepper Casserole out of the oven, the last thing you want to do is spend another hour chopping vegetables for sides, right? I totally get it! This dish is rich, savory, and totally filling on its own thanks to the beef, rice, and cheese, so the best sides are the ones that add brightness and freshness without adding stress.
Think simple, vibrant greens! A crisp side salad is my absolute favorite pairing. It cuts through the richness of the casserole so nicely. I usually just toss some mixed greens with a light vinaigrette—maybe lemon juice, olive oil, and a tiny bit of Dijon. That simple tartness wakes everything up!
If you want something warm but still super fast, steamed green beans tossed with a little lemon zest are fantastic. They’re quick, easy, and they don’t compete with the main dish. Honestly, if you made this easy casserole on a Tuesday, you need sides that take five minutes tops!
The goal here is balance without complication. You need that fresh crunch next to the soft melted cheese, and that’s what these simple pairings offer!
Nutritional Estimates for Stuffed Pepper Casserole
So, you want the numbers? I got them! When you’re actively managing your diet, knowing roughly what’s in your food is super important, and since this is my base recipe, I can give you a good ballpark for what you’re looking at per serving. Remember, my estimates are based strictly on the ingredients listed above—if you swap out ground beef for turkey or use cauliflower instead of rice, those numbers shift, so always treat these as an educated starting point!
Per serving (this makes 8 hearty servings!), you’re looking at approximately:
- Calories: 351
- Fat: 22g
- Carbohydrates: 16g
- Protein: 23g
If you want to check other popular versions of this dish, you can see how others approach the one-pan stuffed pepper casserole out there, but I really stand by this balance for flavor and compliance. Happy cooking!
Stuffed Pepper Casserole
Ingredients
Equipment
Method
- Preheat your oven to 375 degrees F (190 degrees C).
- Place an ovenproof pan over high heat. Add olive oil, then the ground beef and a large pinch of salt. Cook for about 1 minute, breaking the meat into smaller pieces. Add the diced onion and continue cooking, crumbling the meat, until it starts to brown and the onions turn translucent, about 5 minutes. Ensure the meat is deeply browned for the best flavor.
- Reduce the heat to medium-high, or medium if the pan is very hot. Add the butter and minced garlic. Cook, stirring, until the butter melts, about 1 minute. Stir in the black pepper, paprika, garlic powder, and cayenne. Cook and stir for about 1 minute. Add the chopped bell peppers and cook and stir until just heated through, 2 to 3 minutes.
- Add the rice to the pan and stir until it is coated with the fats, about 1 minute. Stir in the remaining salt, Worcestershire sauce, tomato sauce, and beef broth. Raise the heat to high and stir everything together until the mixture begins to simmer. Turn off the heat. Sprinkle about half of the shredded cheese over the mixture, saving the remaining 1/2 cup for the top. Use a spoon to stir the cheese in evenly. Cover the pan tightly.
- Bake in the preheated oven for 45 minutes. Remove the pan from the oven, uncover it, and check the rice for tenderness in a few spots. If the rice is not tender, cover the pan and continue to bake. Once the rice is tender, remove the casserole from the oven, uncover it, sprinkle the remaining cheese over the top, and turn on your oven’s broiler.
- Broil the casserole until the cheese is melted and starting to brown, about 1 to 2 minutes. Let the casserole rest for at least 10 minutes before serving.
Nutrition
Notes
Tried this recipe?
Let us know how it was!
Dual-Restriction Recipe Engineer & Cross-Contamination Specialist
Everything changed when my teenage son got hit with celiac disease and Type 1 diabetes diagnoses within six months of each other. Suddenly, pizza and pasta were off the table, and most “diabetic-friendly” foods contained gluten. I went from regular mom cooking to navigating what I call “compound restriction cooking”—and I had a kid’s appetite and taste buds to satisfy.
Lucky for us, my background in pharmaceutical quality control gave me the systematic mindset this level of precision requires. My kitchen now operates under pharmaceutical-grade protocols adapted for home use: dedicated prep surfaces, separate storage systems, and testing procedures that verify both carb counts and gluten absence before any recipe gets published.
I’ve developed over 220 recipes that clear multiple dietary hurdles simultaneously—finding gluten-free thickeners that don’t spike blood sugar, creating bread alternatives that meet both keto ratios and celiac safety, and developing desserts that actually taste good to a teenager despite impossible restrictions.
Through my “Safe Kitchen Certification” program, I teach other parents that managing multiple dietary restrictions isn’t about multiplying limitations—it’s about systematic thinking that reveals unexpected possibilities. When you engineer solutions instead of making compromises, restriction becomes innovation rather than deprivation.