
Oh, you are going to absolutely *love* this! I’ve chased the perfect crunch for years, and I finally nailed it. Forget soggy centers and pale skins—we’re talking shatteringly crisp exteriors and fluffy insides. This method guarantees you’ll master **Crispy Roasted Potatoes (Perfect Every Time)**, even if you usually just order takeout!
I still remember the first time I attempted to make crispy roasted potatoes for a family gathering. With my son’s restrictions in mind, I was determined to make a dish everyone could enjoy. As the aroma filled the kitchen, I felt a wave of nostalgia; these were the types of simple, comforting meals that used to bring us all together. When I finally took them out of the oven—golden-brown and crackling—I served them with a hint of pride. Watching everyone dig in and hear the crunch echoed with our shared laughter solidified my belief that a great recipe can unite us, no matter our dietary needs.
As a Recipe Engineer focused on making meals accessible, I promise this technique works flawlessly. Trust me on this one!
Why This Recipe Guarantees Crispy Roasted Potatoes (Perfect Every Time)
Okay, let’s get down to the real talk here. Making **Crispy Roasted Potatoes (Perfect Every Time)** isn’t about luck; it’s about a couple of totally non-negotiable steps that change the whole game. If you skip the par-boil, you end up with chewy potatoes, and that’s just sad.
We boil them first, just until they are tender on the outside but still have a good bite left in the center. This is crucial! Then, we drain them really well. But the real trick? That’s coming up in the next little section. Seriously, follow these steps, and you won’t need to cross your fingers when you put the pan in the oven for that beautiful, golden brown finish.
We manage the heat and the moisture perfectly so that when they hit that high oven temperature, they crisp up immediately. I even toss them around a bit midway through roasting. You can check out some other great ways to handle roast veggies right here: my favorite holiday side dishes always rely on this foundation!
The Secret Ingredient for Ultra Crispy Potatoes
Here’s the little bit of kitchen science that makes my recipe stand out. When we boil the spuds, we add just a little bit of baking soda to the water. Don’t panic, it won’t taste soapy, I promise! What it does is raise the alkalinity of the water slightly.
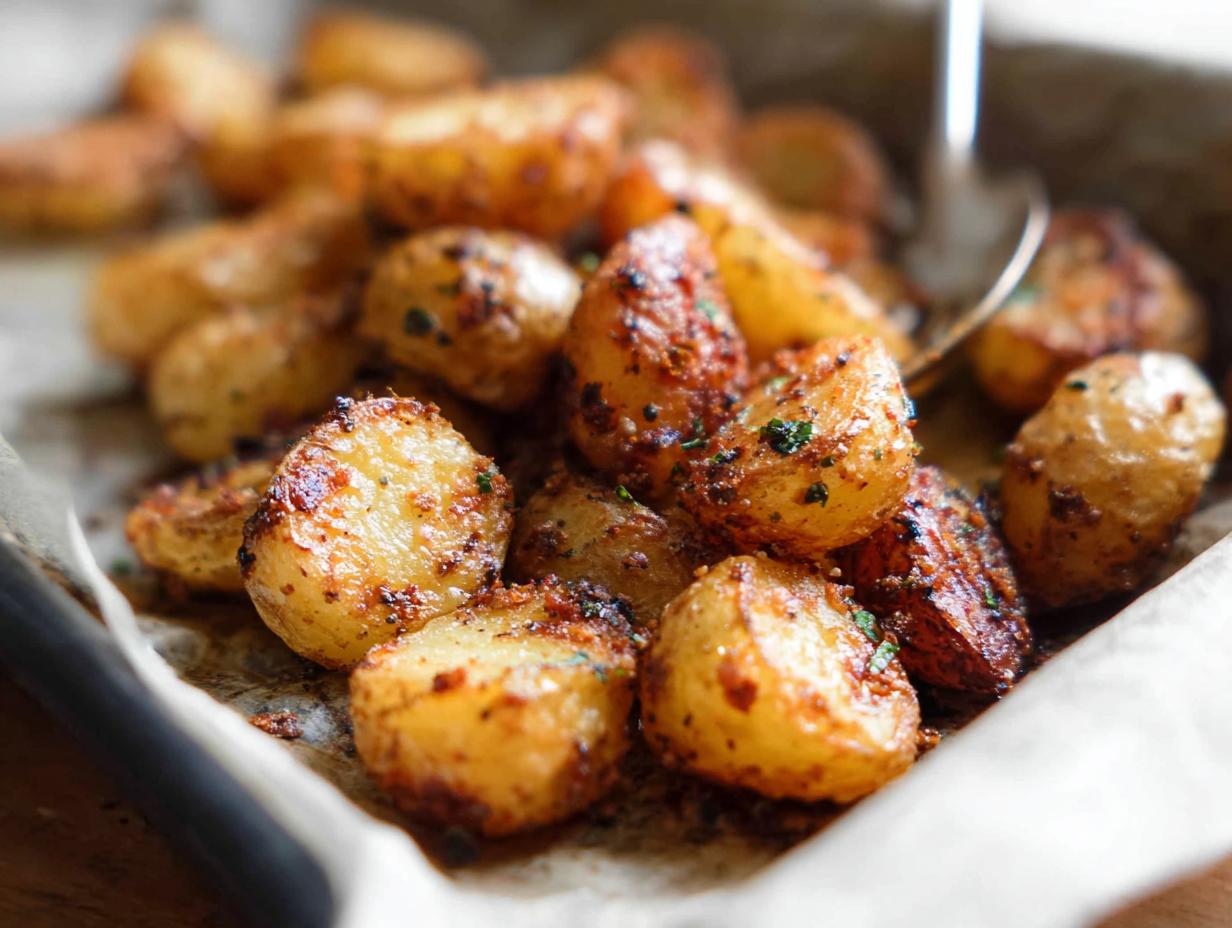
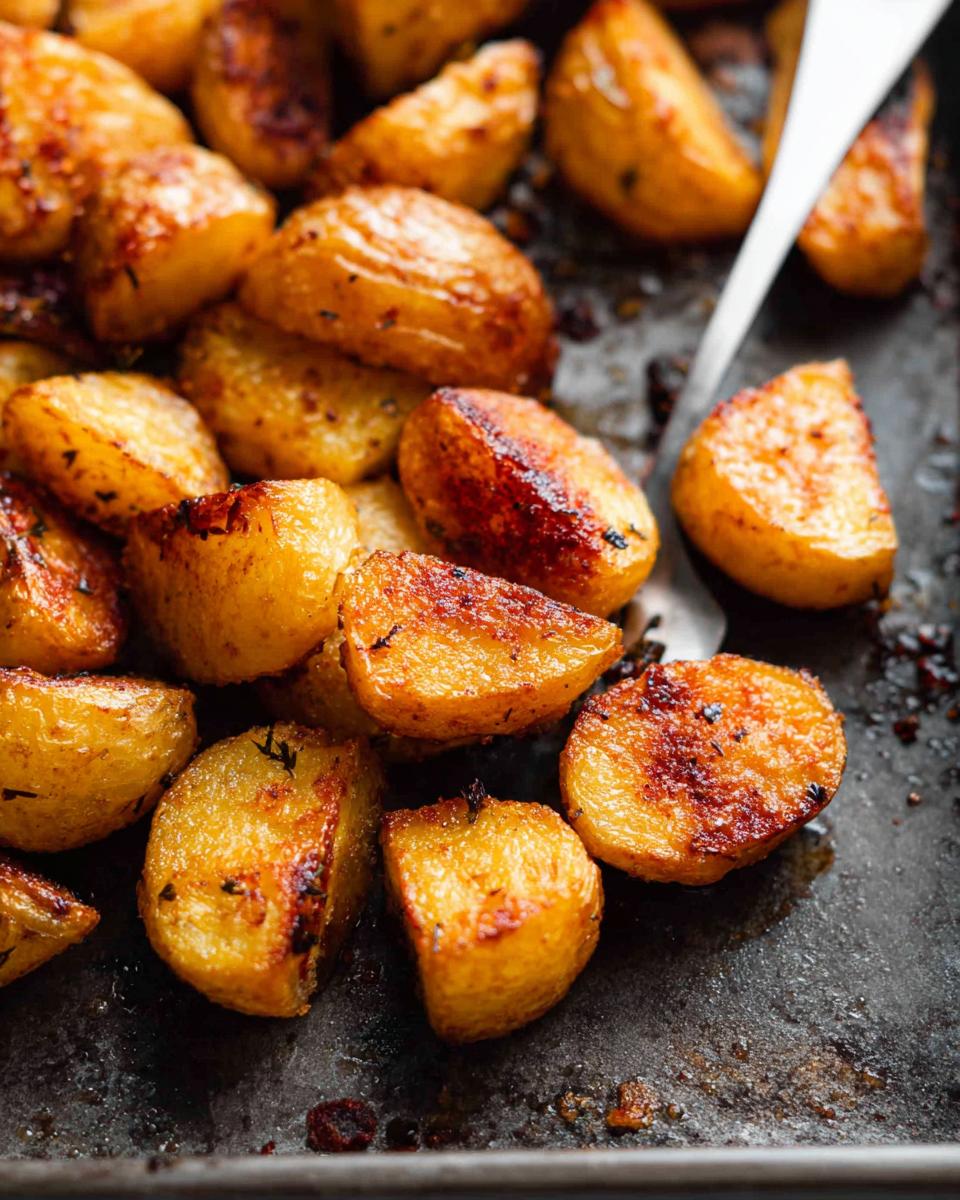
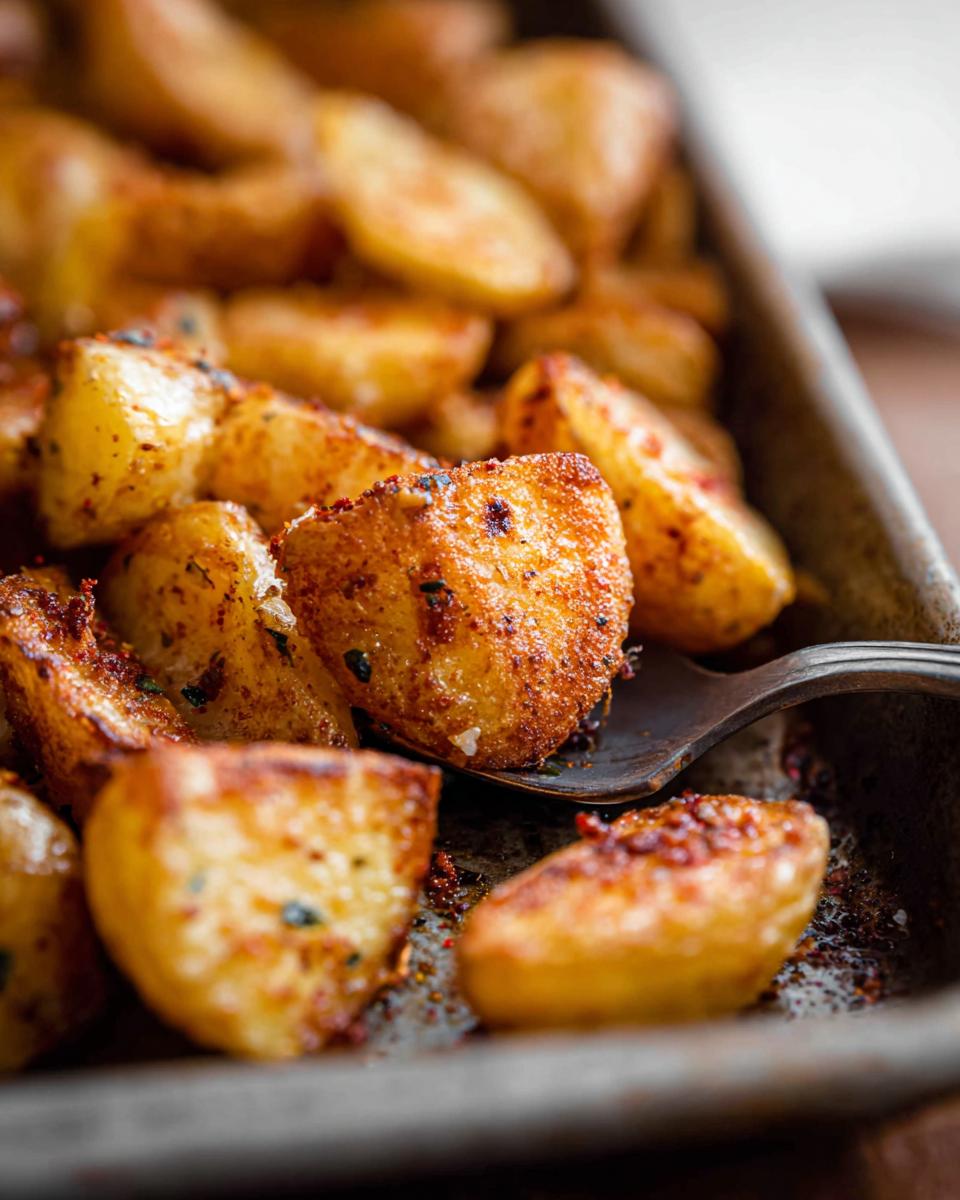
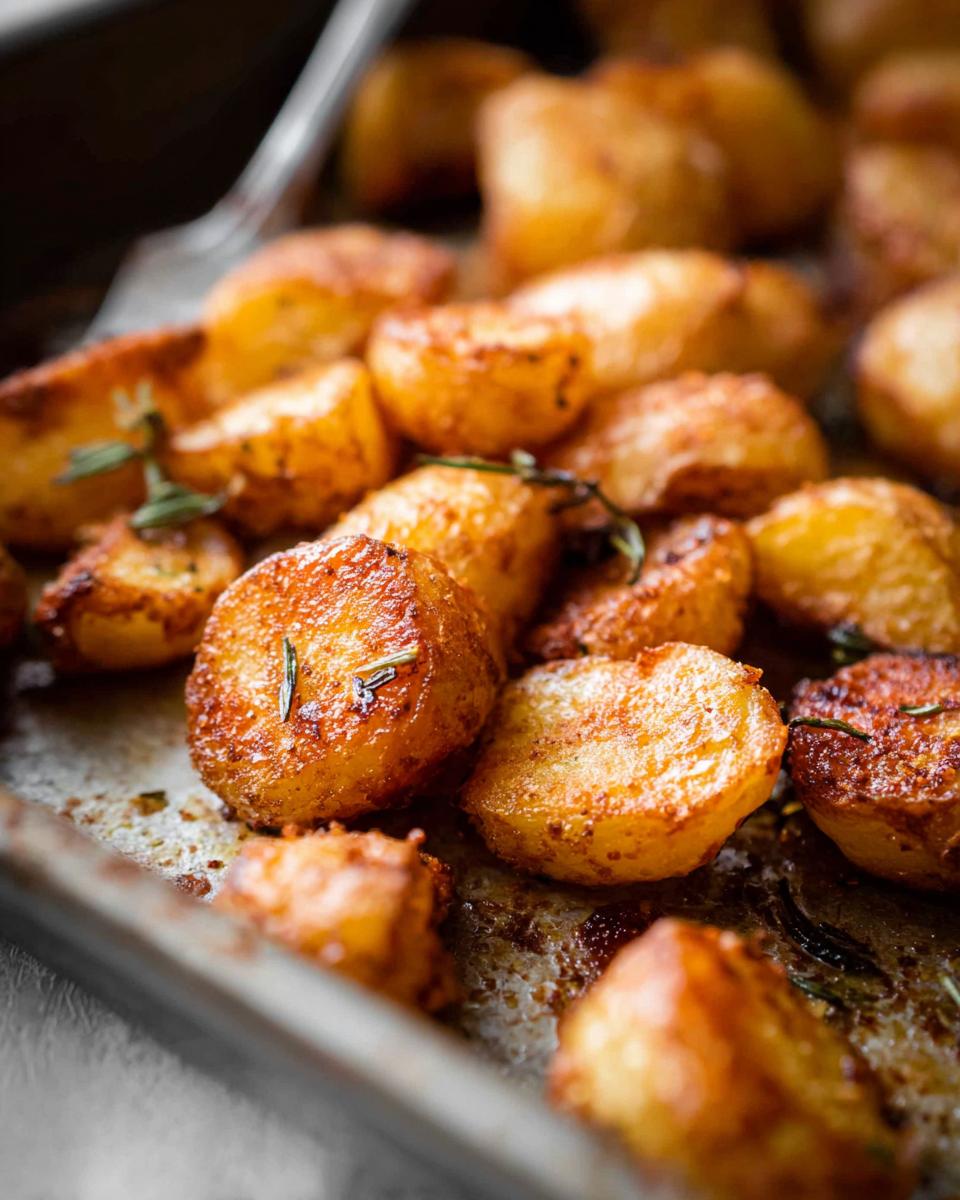
This roughs up the surface of the potato pieces just enough while they boil. When you drain and shake them next—which you absolutely must do—you create these craggy, starchy little peaks and valleys all over the surface. Those are the spots that drink up the hot oil in the oven and turn into pure, crunchy joy. It’s all about maximizing surface area for crisping!
Selecting the Best Ingredients for Crispy Roasted Potatoes
When you’re gunning for **Crispy Roasted Potatoes (Perfect Every Time)**, the ingredients you start with matter way more than you think. Forget those waxy potatoes meant for boiling whole; we need happy, starchy russets for this job. They break down beautifully in the hot water, giving us that fluffy interior we crave.
For the fat, I swap between melted ghee or a good quality olive oil. Ghee really brings a lovely, nutty depth that I adore—it just tastes richer! We need enough fat to coat everything evenly after they come out of the boil. If you’re looking for some other foundational cooking secrets, I shared my low-carb roux tips over here: my low-carb shortcut is helpful for great texture in other dishes!
Ingredient Notes and Simple Spices
Cutting is key here! Don’t underestimate the size: stick strictly to 1-inch chunks. Any smaller and they burn before the inside is done, any bigger and they steam instead of crisping. We are keeping the spice profile simple—just salt, really, letting that potato and oil shine. Toss them lightly with the fat, maybe a pinch of dried thyme if you’re feeling fancy, and get ready!
Gathering Equipment for Perfect Crispy Roasted Potatoes
Don’t show up to the battle of the crispy spuds unarmed! You don’t need fancy gadgets, honestly, but a few specific tools make this process ten times easier. First up, you absolutely must have a heavy-bottomed pot for boiling. I generally reach for my sturdy Dutch oven, but any good stock pot will do the trick.
We need that weight to hold the heat steady during the boil. For the roasting itself, a sheet pan, of course! But when it’s time to toss them mid-bake to get those even, golden brown sides, ditch the regular spoon.
My go-to tool is a fish spatula. Seriously, it’s thin and flexible enough to get under those potatoes without smashing them into oblivion. It’s perfect for flipping them gently. If you’re looking for more minimal cleaning ideas after you eat them, check out my one-pan dinner roundup!
Step-by-Step Instructions for Crispy Roasted Potatoes (Perfect Every Time)
Alright, time to put on our aprons and make some magic! This process is what takes standard potatoes and elevates them into those perfect, crunchy morsels you dream about. We’re aiming for that ideal roast that gives you **Crispy Roasted Potatoes (Perfect Every Time)**. Get your oven hot first—425ºF—and make sure that rack is right in the middle.
We are actually cooking these potatoes twice, and that’s our secret weapon! You can dig into the full process details in my recipe index, but let’s walk through it. This method is so reliable it even helps me nail my husband’s favorite chicken recipes, like my foolproof chicken!
Preparing the Potatoes for Maximum Crispiness
Peel those russets and chop them into nice, even 1-inch pieces—no uneven chunks allowed! Toss them right into a big pot with some water, our salt, and that crucial baking soda. Boil them for about 8 to 10 minutes. You don’t want soup, though! They need to soften slightly, offering just a little bit of backbone resistance when you poke them with a knife. Once they hit that “halfway cooked” mark, drain them FAST and return them to the hot, empty pot.
Creating the Flavorful Garlic Mixture
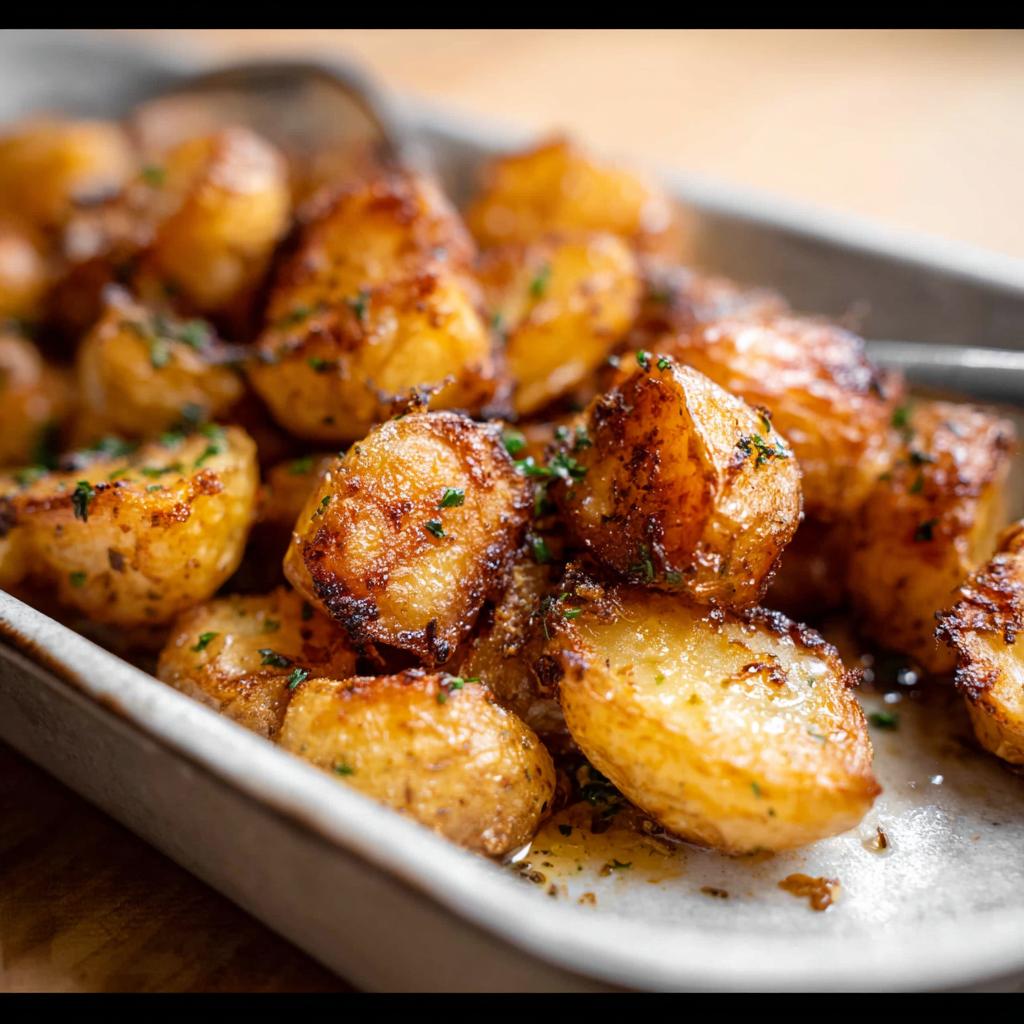
While those potatoes are cooling down a touch, whip up the seasoning! In a little bowl, mix up the minced garlic, the rest of the olive oil you saved, parsley, and thyme if you’re using it. Now, here’s a little trick I use for potatoes: I zap this mixture in the microwave for about 30 seconds. Heating the oil and garlic really wakes up those flavors before they hit the starch.
The Final Roast for Golden Brown Perfection
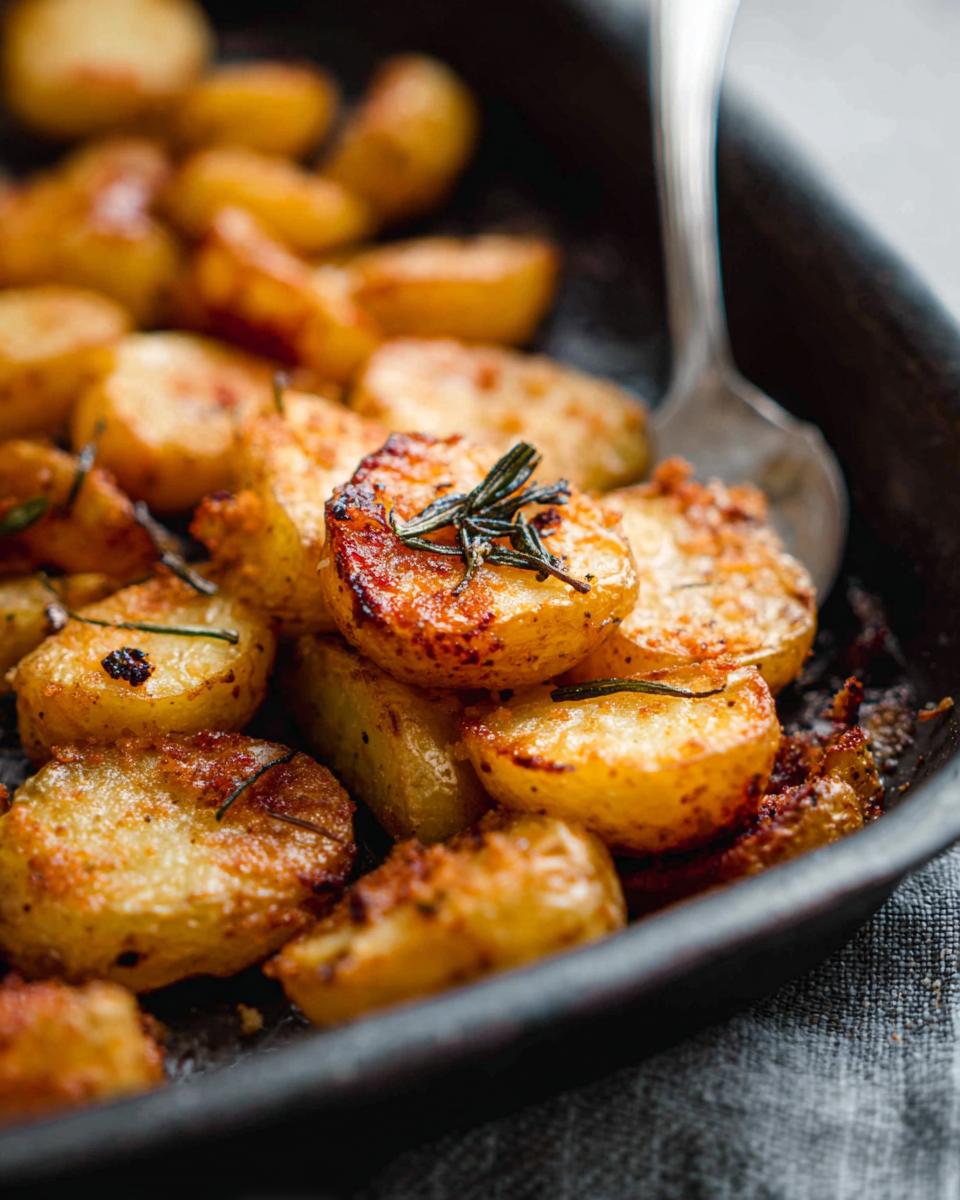
Now, take those drained potatoes—still in the pot—and shake them HARD! You need those edges to look ragged and fuzzy. Drizzle that lovely warm garlic oil all over them and toss until every piece is glossy. Spread them out on your hot sheet pan—don’t crowd them! Roast for another 10 to 15 minutes. Keep an eye out! Pull them when they look perfectly golden brown and wonderfully crackly. Remember to let them cool for about ten minutes before serving, though honestly, I can never wait that long. If you want to see what others are doing, check out this inspiration from Little Spice Jar!
Tips for Success with Crispy Roasted Potatoes (Perfect Every Time)
Even with the best recipe, sometimes potatoes decide they want to be mushy instead of magnificent. Don’t throw in the towel if your first batch isn’t quite perfect! The most common mistake I see when people try to achieve **Crispy Roasted Potatoes (Perfect Every Time)** is simply overcrowding the pan. They think that piling them up saves time, but really, it just traps steam!
Steam is the absolute enemy of crispiness, remember that! Piling them high means the potatoes touching each other steam instead of roast. When they steam, their exteriors soften instead of hardening into that glorious golden brown shell we worked so hard to create.
For this recipe, you need to use two sheet pans if you’re making a big batch. Make sure every single potato chunk has some breathing room on the hot metal. If you want to see how I tweak my spices for richer flavor sometimes, check out my thoughts on foolproof Cacio e Pepe spices—the philosophy still applies!
Avoiding Crowding the Sheet Pan
This is non-negotiable for that amazing exterior snap. When you spread the potatoes out, the hot air in the 425ºF oven can circulate all around them. That air circulation is what pulls the moisture out and lets that roughed-up starchy surface turn crispy and firm. Give them space, and they will reward you tenfold!
Serving Suggestions for Your Roasted Potatoes
Now that you have this amazing, crackly side dish, what do you serve it with? These potatoes are so versatile—they feel fancy enough for a nice night but are totally simple for a Tuesday!
Because they are so perfectly seasoned with just garlic and parsley, they match almost anything. They are the ultimate Sheet Pan Side for roasted chicken, which I shared some quick prep tips for over here: easy weeknight chicken.
They are also fantastic heaped next to a big piece of seared steak or fish. If you’re aiming for a full at-home restaurant experience, these potatoes shine brightest next to something rich. Honestly, you can toss them right into almost any restaurant-style meal idea you can think of. They are just always perfect!
Storage and Reheating Crispy Roasted Potatoes
Okay, so maybe you made a massive feast and you have leftovers. Don’t just reheat these beauties in the microwave and call it a day—that’s how you get steam-trapped sadness!
If you must store them, let them cool completely first, then tuck them into an airtight container. They are always best eaten the same day, though. To bring back that *snap* the next day, the oven is your only friend. Spread them out on a baking sheet—give them space!—and bake at about 400ºF for about 5 to 7 minutes.
That quick blast of dry heat will chase away any lingering moisture and crisp them right back up. If you need quick meal ideas for those easy nights, check out my favorite busy weeknight roundup!
Frequently Asked Questions About Crispy Roasted Potatoes (Perfect Every Time)
I get so many questions after people try to achieve **Crispy Roasted Potatoes (Perfect Every Time)**! It’s totally normal when working with starch and heat. Here are the biggest things folks ask me about that secret texture and timing.
If you follow these tips, your **Roasted Potatoes** will turn out golden brown and amazing every time. If you’re pairing them with a main dish, I highly recommend checking out my guide for making the crispiest chicken!
Can I use sweet potatoes instead of russets for this recipe?
You definitely can try, but it won’t yield the exact same results! Russets are high-starch, which is great for creating that fluffy, shaggy texture when we shake them after boiling. Sweet potatoes are wetter and contain more sugar. If you use them, you *must* reduce the boiling time—maybe just 4 or 5 minutes—because they break down much faster. They’ll still be delicious, but they won’t get that same ultra-crispy exterior we are after for the ultimate **Crispy Potatoes**!
How long do the Crispy Roasted Potatoes stay crispy?
Realistically? They are at their peak crispiness for about 15 minutes right out of the oven. That’s why we serve them immediately! If you only get to them later, don’t sweat it. The best way to revive any leftovers and get back to that **Golden Brown** perfection is reheating them spread out on a hot pan in the oven, like I mentioned before. Avoid microwaving at all costs if you want that satisfying crunch!
Share Your Experience Making Crispy Roasted Potatoes (Perfect Every Time)
Now the kitchen is yours! I am so eager to hear how these **Crispy Roasted Potatoes (Perfect Every Time)** turned out for you. Seriously, did they achieve that perfect golden brown crunch?
Please take a moment to leave a star rating below, and tell me in the comments if this became your new favorite sheet pan side! If you snapped a picture, come share it with me—I love seeing your results! If you need to get in touch with any specific recipe questions, you can always reach out on my contact page. Happy roasting!
Crispy Roasted Potatoes (Perfect Every Time)
Ingredients
Equipment
Method
- Preheat your oven to 425ºF with a rack in the center.
- Add the cut potatoes to a large dutch oven or stock pot. Season with kosher salt and baking soda. Stir to combine. Add water to cover the potatoes and bring to a boil. Cook for 8-10 minutes, or until the potatoes are halfway cooked. They should offer some resistance when pierced with a knife. Drain the potatoes and return them to the pot.
- While the potatoes are roasting, combine the grated garlic, remaining 2 tablespoons of oil, parsley, and thyme in a small bowl. Microwave for 30 seconds, or until heated through.
- Remove the potatoes from the oven. Shake the pan to loosen them, then use a fish spatula to turn them over. Drizzle the garlic mixture over the potatoes and toss to coat evenly. Return the potatoes to the oven for another 10-15 minutes, or until they are golden brown and crispy.
- Let the potatoes cool for a few minutes before serving immediately.
Notes
Tried this recipe?
Let us know how it was!
Dual-Restriction Recipe Engineer & Cross-Contamination Specialist
Everything changed when my teenage son got hit with celiac disease and Type 1 diabetes diagnoses within six months of each other. Suddenly, pizza and pasta were off the table, and most “diabetic-friendly” foods contained gluten. I went from regular mom cooking to navigating what I call “compound restriction cooking”—and I had a kid’s appetite and taste buds to satisfy.
Lucky for us, my background in pharmaceutical quality control gave me the systematic mindset this level of precision requires. My kitchen now operates under pharmaceutical-grade protocols adapted for home use: dedicated prep surfaces, separate storage systems, and testing procedures that verify both carb counts and gluten absence before any recipe gets published.
I’ve developed over 220 recipes that clear multiple dietary hurdles simultaneously—finding gluten-free thickeners that don’t spike blood sugar, creating bread alternatives that meet both keto ratios and celiac safety, and developing desserts that actually taste good to a teenager despite impossible restrictions.
Through my “Safe Kitchen Certification” program, I teach other parents that managing multiple dietary restrictions isn’t about multiplying limitations—it’s about systematic thinking that reveals unexpected possibilities. When you engineer solutions instead of making compromises, restriction becomes innovation rather than deprivation.