
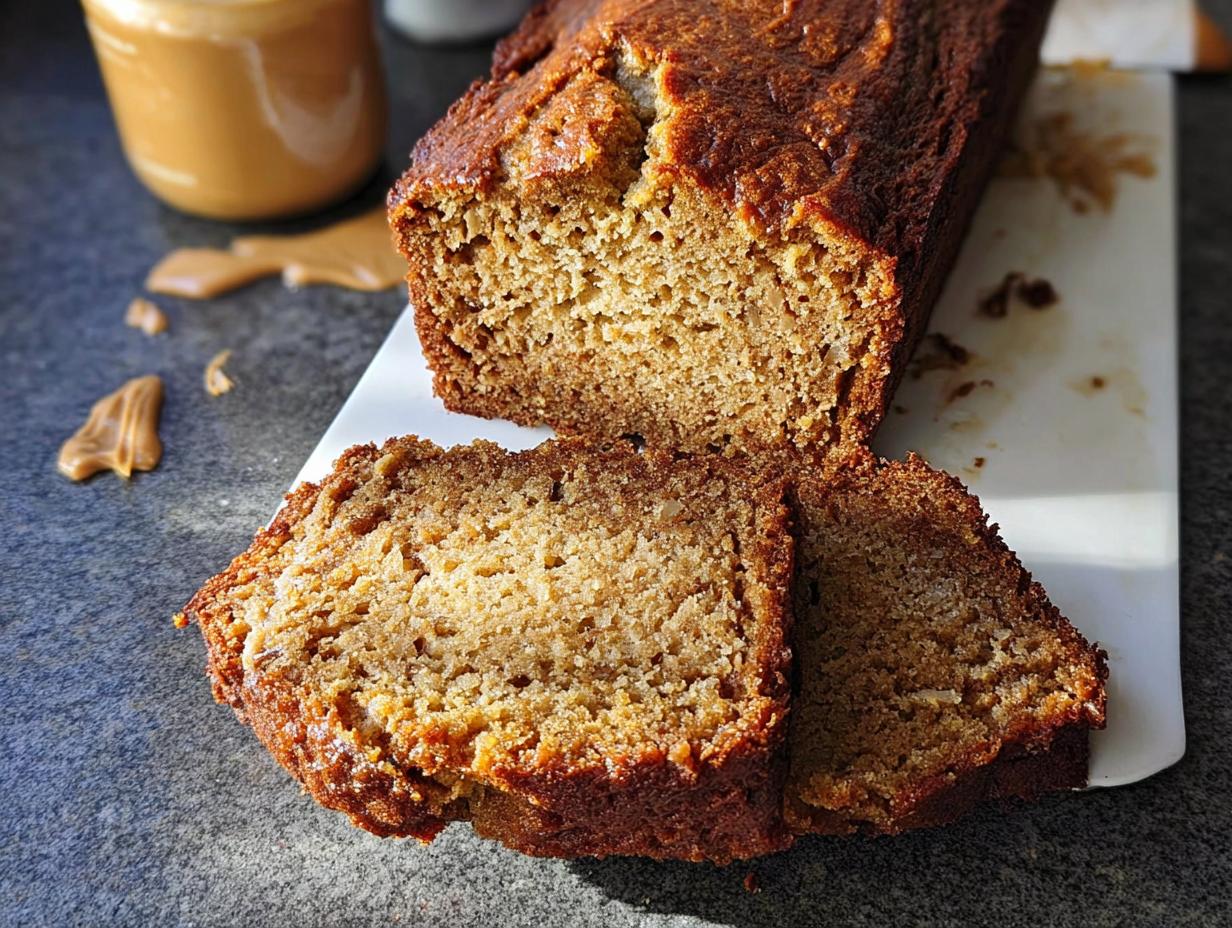
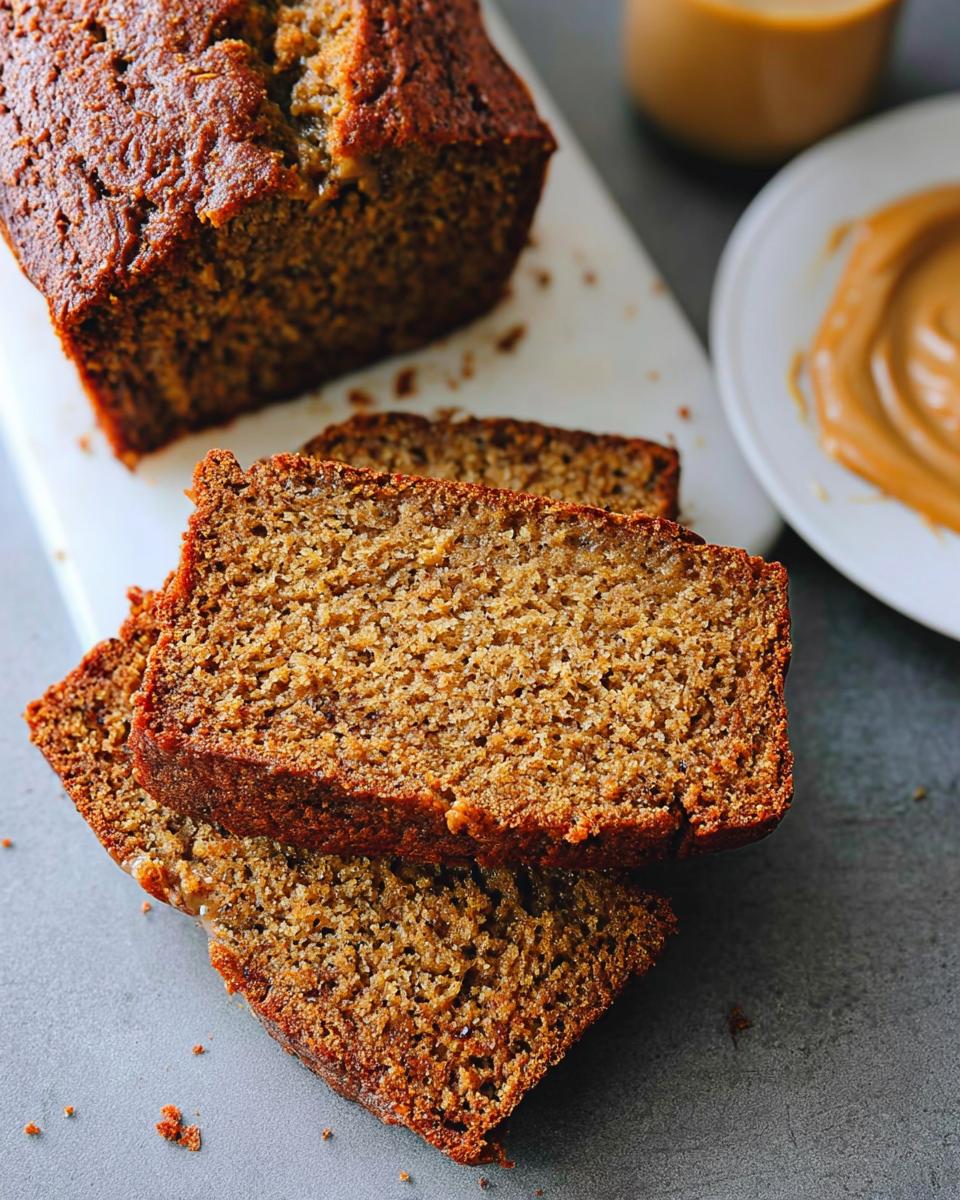
Oh, there is just nothing better than pulling something warm, sweet, and smelling like nostalgia out of the oven, is there? If you’re like me, sometimes you just need that ultimate Comfort Bake project after a long week. That’s exactly why I perfected this recipe for Peanut Butter Banana Bread. Seriously, it’s the easiest, most satisfying loaf you’ll ever make, perfect for busy families!
I still remember the first time I combined peanut butter and banana in a recipe. It was a rainy afternoon, and I felt inspired to whip up something delightful. With two overripe bananas sitting on my counter and a craving for something sweet, I decided to experiment. As the batter mixed and the familiar scents filled my small kitchen, I felt a wave of nostalgia for the peanut butter sandwiches of my childhood. The first slice of my Peanut Butter Banana Bread was like a comforting hug—soft, sweet, and packed with flavor. That day ignited my passion for creating recipes that bring comfort and happiness, reminding me that the simplest ingredients can create the most cherished memories.
Why This Peanut Butter Banana Bread is Your New Comfort Bake Staple
I designed this recipe specifically for those of you who need deliciousness without a huge time commitment. It’s fast to mix up, and who doesn’t love that classic peanut butter and banana pairing? It’s the ultimate wholesome Snack Bread for lunchboxes or an afternoon treat.
- Quick preparation—you can have it in the oven faster than you can decide what takeout to order!
- It’s a fantastic, easy Comfort Bake for when you need a little kitchen hug.
- The rich flavor means everyone in the family will happily grab a slice.
If you’re looking for more straightforward baking inspiration that keeps cleanup easy, check out my collection of recipes right here!
Essential Equipment for Perfect Peanut Butter Banana Bread
Before we get gooey and delicious, let’s make sure you have your tools ready. Having everything measured and ready to go is half the battle, trust me! Baking is much more fun when you aren’t suddenly scrambling for a clean bowl or a proper measuring cup.
You don’t need anything fancy, just the basics that every kitchen should have. Here’s the list of what I pull out every time I whip up this loaf. Remember, preparation prevents panic!
- A sturdy 9×5-inch loaf pan. This is the workhorse for this recipe!
- A couple of decent mixing bowls—one large one for the wet stuff and a medium one for the dry.
- A reliable whisk for getting the flour mix smooth.
- A good old-fashioned fork for mashing those bananas until perfectly smooth.
- All your measuring cups and spoons must be handy. Precision matters in quick breads!
- A wire cooling rack. This is crucial; you need air circulation underneath to stop the bottom from getting soggy while it cools.
- Finally, a small knife to run around the edges before you flip the loaf out!
Gathering Ingredients for Your Peanut Butter Banana Bread
Okay, ingredient gathering time! This is where the magic really starts to happen, and since we only have one bowl for the wet side, it’s super fast. I always make sure my butter is melted and just slightly cooled down before I start mixing; you don’t want it hot enough to scramble that one egg we need!
You’ll need about three really nice, spotty brown bananas—you know, the ones that look terrible but smell like pure sugar? That’s exactly the moisture we are looking for! Make sure that single large egg is sitting out at room temperature too; it blends in much nicer that way, promise.
Don’t forget the richness from that packed light brown sugar and the hint of flavor from the vanilla extract. If you want to see another wonderful take on this classic flavor combination, check out this inspiration over here! It’s all about using the best simple ingredients.
Step-by-Step Instructions for Making Peanut Butter Banana Bread
Alright, time to roll up those sleeves! Don’t let the steps intimidate you; they flow so perfectly one into the next. Once you get the hang of this, you’ll see why this loaf is perfect for those busy weeknight baking sessions. We’re aiming for foolproof deliciousness here!
If you’re looking for great ways to clean up quickly afterward, I’ve got some fantastic minimal cleanup dinner ideas that might inspire your next meal prep, but for now, let’s focus on this bread!
Preparing the Pan and Dry Mix for Peanut Butter Banana Bread
First things first, get that oven heating up to 350ºF. Don’t wait! While it heats, you need to properly grease your 9×5-inch loaf pan. A good nonstick spray goes a long way to prevent sticking magic later. Next, grab a medium bowl and whisk together your 1 1/2 cups of flour with the baking soda and the salt. Whisking dries out those lumps and gets them perfectly distributed, which is exactly what we want before we add any butter!
Combining Wet Ingredients and Finishing the Peanut Butter Banana Bread Batter
Time for the fun part! Mash those bananas thoroughly in your big bowl until they look like baby food—we want smooth incorporation. Then, stir in that creamy peanut butter and your slightly cooled melted butter. Once that’s smooth, whisk in the brown sugar, room temp egg, and vanilla until everything looks happy together. Now, gently—and I mean GENTLY—stir your dry flour mixture into those wet ingredients. Stop mixing as soon as you don’t see any more streaks of flour. Seriously, resist the urge to overmix, or our soft loaf will turn into a brick!
Baking and Cooling Your Delicious Peanut Butter Banana Bread
Pour that lovely batter into your waiting pan. It needs to bake for 50 to 65 minutes. I always start checking around the 50-minute mark by inserting a toothpick right into the center. If it comes out clean or with moist crumbs clinging to it, you’re done! Don’t pull it out immediately, though. Let the loaf sit right there in the hot pan on your wire cooling rack for exactly 10 minutes. Running a knife around the edges helps release it before you flip it out to cool completely on the rack. That little bit of in-pan rest keeps the structure strong!
Ingredient Spotlight: Achieving the Perfect Peanut Butter Banana Bread Texture
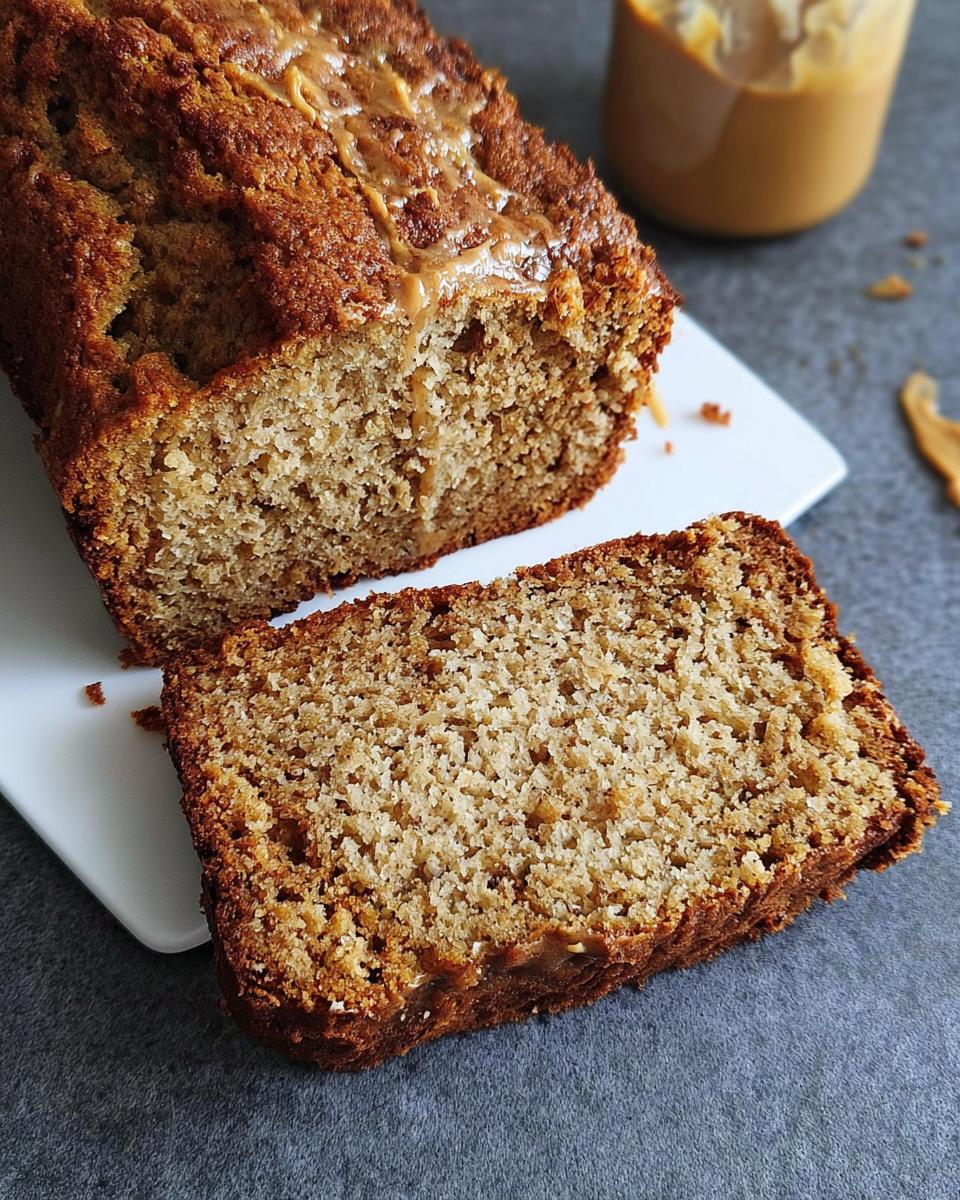
You might be wondering what makes this loaf so incredibly tender and not that dense, gummy kind of bread that sometimes happens with banana recipes. It all comes down to a couple of non-negotiables, mostly surrounding moisture and fat! I learned these secrets the hard way, believe me.
The ripeness of those bananas is actually your primary moisture source here, besides the fantastic fat content. You need bananas that are heavily speckled—almost black if you can stand it! Those deeply ripened fruits convert nearly all their starch to sugar, making them naturally sweeter and wetter. If you use bananas that are only yellow, guess what? Your bread ends up drier and less flavorful. It’s a little science trick that saves the whole loaf.
Now, let’s talk fat. I opted for slightly cooled, melted butter instead of a neutral oil like canola. Why? Because butter throws in this amazing, subtle richness that oil just can’t replicate. Plus, since we are creaming it briefly with that brown sugar before adding the egg, we build just enough structure without overdeveloping the gluten.
If you are curious about how fats and starches work in baking generally—especially when dealing with tricky flours—I found this little guide on making a perfect roux that explains some of the texture science really well. You can check out how they handle starches right here. It made me rethink how I approach moisture control in all my quick breads!
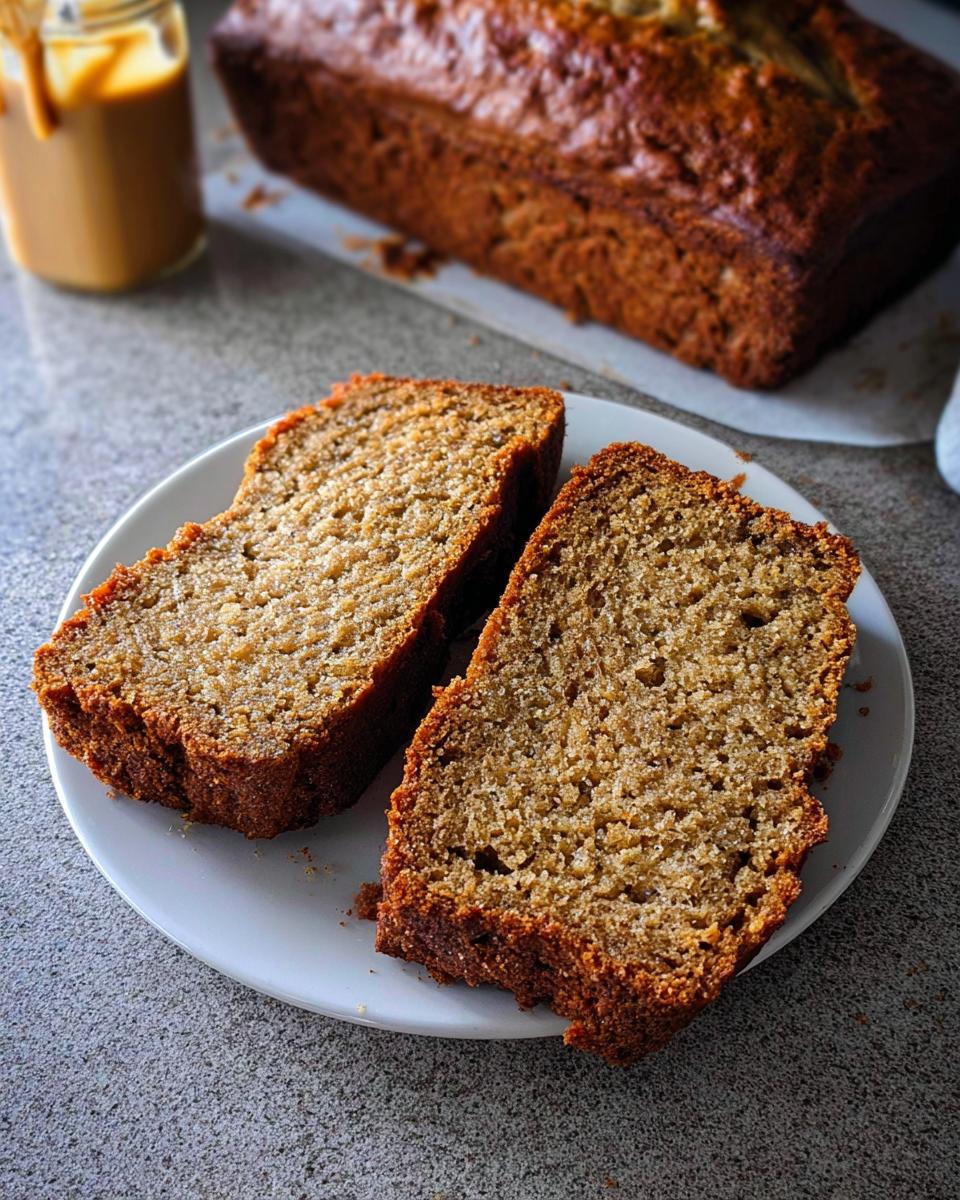
Honestly, relying on those super-ripe bananas and using real butter for that authentic flavor is how we keep this loaf tasting like the very best version of a Snack Bread.
Tips for a Protein Boost in Your Peanut Butter Banana Bread
I know we all love how comforting this loaf is, but sometimes I want it to work a little harder for my busy mornings! If you’re looking to sneak some extra staying power into this Peanut Butter Banana Bread, I have a few little tricks that give you that wonderful Protein Boost without messing up the texture too much.
My favorite simple swap is replacing about half a cup of the regular all-purpose flour with oat flour. Oat flour lends a lovely nutty flavor that just complements the peanut butter perfectly. You can find great recipes for making your own oat flour by checking out this link, if you don’t feel like buying pre-ground!
If you’re feeling adventurous, you can try adding about 1/4 cup of unflavored vanilla whey protein powder right in with your dry ingredients. Just be warned: protein powder loves to drink up moisture, so you might need an extra splash of milk or maybe just one more thin spoon of those mashed bananas to keep things happy and moist!
Storage and Reheating Instructions for Leftover Peanut Butter Banana Bread
So, you managed not to eat the entire loaf right away? Good for you! This is actually one of the best things about making a homemade Peanut Butter Banana Bread—it freezes fantastic and stays fresh!
When it comes to keeping it fresh on the counter, wrap it up TIGHTLY in plastic wrap. I mean really wrap it so air can’t sneak in! If you do that, it stays delicious for up to three full days. It’s perfect for grabbing a quick slice throughout the week when you need a little energy boost.
But if you made a double batch (which, let’s be honest, I always do), freezing is your best friend. Once the loaf is completely cool—and I mean stone cold, don’t rush this—wrap it tightly in plastic wrap first. Then, tuck that wrapped loaf into a sturdy freezer bag. This double layer is your insurance policy against freezer burn!
It lasts beautifully in the freezer for up to a month. When you finally remember it’s hiding in there and decide you need some banana goodness, just let it thaw on the counter while you’re running errands. It usually thaws out perfectly by lunchtime. If you’re looking for other easy meal prep ideas for when you are busy, I have some great freezer-friendly dinners you might find helpful!
Frequently Asked Questions About Peanut Butter Banana Bread
I know you probably have a few lingering questions about perfecting your loaf! Baking is all about experimenting, but for a classic like this, knowing the rules of thumb helps a ton. No question is silly when you’re aiming for that perfect Snack Bread!
I’ve gathered up some of the most common things folks ask me when they start their first batch of Peanut Butter Banana Bread. If you’ve got a question that isn’t listed, drop it in the comments below—I love chatting baking with you all!
And hey, if you’re happy with how this turned out, I’d be thrilled if you stopped by my ‘About’ page just to say hi to the person behind the recipe!
Can I substitute the brown sugar in this Peanut Butter Banana Bread?
You sure can, but you need to keep in mind what that brown sugar does for us! It brings deep moisture because of that molasses content, which is key for a soft loaf. If you switch to white sugar, the flavor will be cleaner, but you might lose a bit of that deep caramel note that pairs so well with the peanut butter. If you must swap, use an equal amount of coconut sugar; it usually browns nicely and keeps the flavor profile closer to the original. Don’t stress too much, though; any sugar replacement will still make a tasty loaf!
How do I ensure my Peanut Butter Banana Bread is not dense?
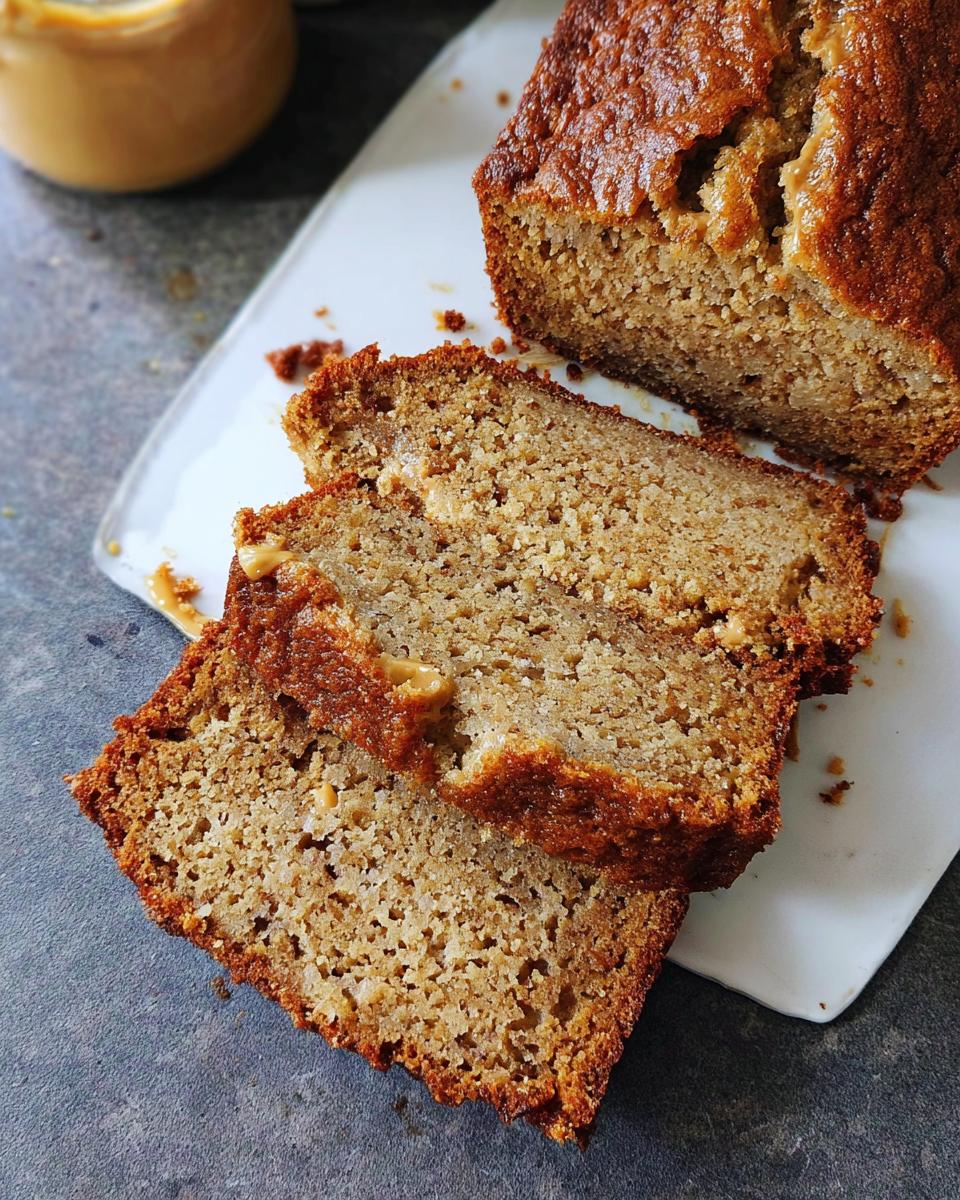
This is the million-dollar question for any quick bread! Density comes from two main culprits: not enough lift or over-stirring. First, make sure your baking soda is fresh. If it’s old, it won’t activate properly, and you get a flat brick. Second, and this is huge, STOP STIRRING once the flour is incorporated. You are making a Comfort Bake, not concrete! Mix until just combined, maybe 5 or 6 gentle strokes after the last streak of flour disappears. That minimal mixing keeps the gluten relaxed, resulting in that beautiful, tender crumb instead of something heavy and dense.
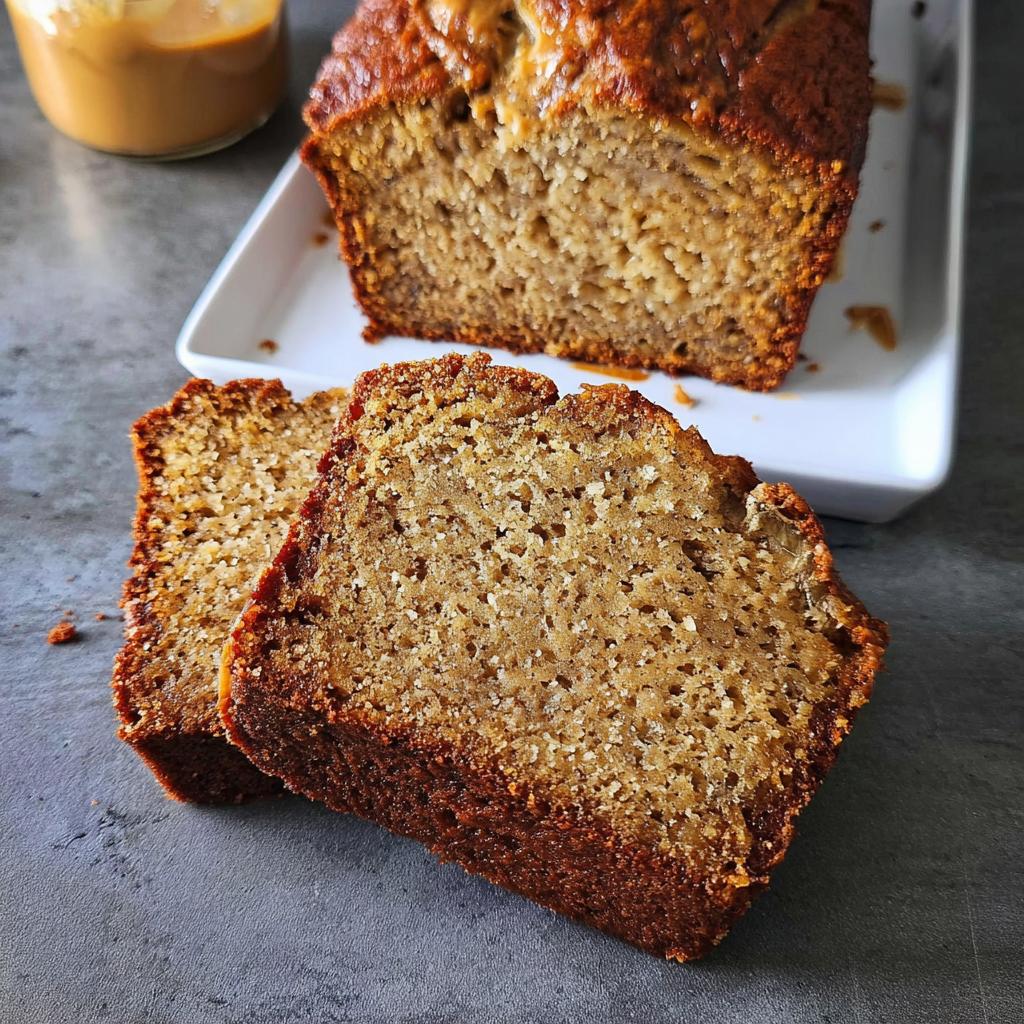
Sharing Your Perfect Peanut Butter Banana Bread Creation
Well, that’s it, friends! We’ve mixed, we’ve baked, and now you have a glorious loaf of Peanut Butter Banana Bread sitting on your cooling rack. Doesn’t that smell like success?
I really, truly, deeply want to know how it turned out for you! Baking is always better when shared, and your feedback is what keeps me inspired to keep experimenting in the kitchen.
Did you try my trick of adding a tiny pinch of cinnamon to the mix? Did you load it up with extra peanut butter swirl? Please, drop a rating for the recipe below—it helps other bakers see just how wonderful this loaf is! And if you snapped a picture of your beautiful creation, tag me on social media so I can see that perfect slice!
If you ever have questions about ingredients or want to share your own twists, feel free to pop over to my contact page. I read every message, and I love hearing about your kitchen adventures!
Peanut Butter Banana Bread
Ingredients
Equipment
Method
- Preheat your oven to 350ºF. Grease a 9×5-inch loaf pan with nonstick cooking spray and set it aside.
- In a medium bowl, whisk together the flour, baking soda, and salt. Set this aside.
- In a large bowl, mash the ripe bananas with a fork. Add the peanut butter and melted butter and stir until combined. Stir in the brown sugar, egg, and vanilla extract until smooth.
- Stir the dry ingredients into the wet ingredients. Do not overmix.
- Pour the batter into the prepared pan. Bake for 50-65 minutes, or until a toothpick inserted into the center of the bread comes out clean. Check the bread at 50 minutes, as oven times vary.
- Remove the pan from the oven and place it on a wire cooling rack. Let the bread cool in the pan for 10 minutes. Run a knife around the edges of the bread and carefully remove it from the pan. Let the bread cool on the wire cooling rack until slightly warm. Cut into slices and serve.
Nutrition
Notes
Tried this recipe?
Let us know how it was!
Visual Culinary Artist & Aesthetic Designer
When the pandemic killed my career as a luxury hotel photographer overnight, I was stuck in my studio apartment with nothing but time and vegetables. That’s when I started treating meal prep like photography projects—and discovered that the same principles that made five-star dishes camera-ready could turn humble zucchini noodles into social media gold.
My fine arts degree from Parsons taught me that people eat with their eyes first. After years behind the lens capturing haute cuisine, I realized that successful dieting often depends more on visual satisfaction than pure nutrition. When your food looks amazing, you actually want to stick with your eating plan.
My recipe development feels more like an art studio than a test kitchen. I use color theory to guide ingredient selections—purple cabbage with golden cauliflower, emerald herbs against ivory cheese. My “Edible Landscapes” series transforms standard low-carb ingredients into miniature scenic compositions that make vegetables feel aspirational rather than obligatory.
I spend evenings exploring art galleries and practicing watercolor painting, always looking for inspiration. My philosophy is simple: make low-carb food visually irresistible, and dietary compliance becomes an aesthetic choice rather than a health sacrifice.