
There is just nothing in the world that beats waking up on a slow Saturday morning knowing pancakes are on the menu, right? Forget those thin, floppy things you get at diners; we’re talking about true, towering stacks of deliciousness. This recipe for Fluffy Buttermilk Pancakes (Classic) delivers that perfect, light texture every single time. It’s a tradition that means so much to me as Laila Stone, especially given my background as a recipe engineer—I want everyone to enjoy these staples.
I’ll never forget the first Sunday morning after my son’s diagnoses when I decided to make “Fluffy Buttermilk Pancakes (Classic)” as a special treat. I wanted to create a joyful moment, a chance for him to enjoy a breakfast favorite without worrying about gluten or carbs. As I mixed the batter, the scent of butter and vanilla filled the kitchen, reminding me of my own childhood breakfasts with my family. That first bite was met with a smile and a thumbs up from my son, and I realized that even with all our restrictions, homemade magic could still happen in the kitchen. Since then, those pancakes have become our family tradition, a symbol of the love and care that goes into overcoming challenges together. If you’re looking for that incredible, cloud-like breakfast, you’ve found it right here. You can explore more joyful morning ideas over at our breakfast hub, but trust me, start here!
Why This Fluffy Buttermilk Pancakes (Classic) Recipe Creates the Best Weekend Treat
What separates these pancakes from the everyday variety? Everything! This recipe isn’t just about mixing flour and milk; it’s designed for genuine lift and that melt-in-your-mouth tenderness. We use simple tricks that professional bakers rely on, turning a regular Sunday into a memorable occasion.
- The combination of buttermilk and sour cream gives us a tang that white milk just can’t match.
- Separating the eggs is non-negotiable for that towering height we all crave.
- A quick rest lets the flour fully hydrate, leading to a tender, less chewy final product.
The Secret to Truly Fluffy Pancakes
The magic truly happens when you treat the egg whites separately. We whip them until they form beautiful, stiff peaks—you know, like snowy mountain tops! Gently folding those clouds into the batter is the key to airiness. Secondly, don’t skip the 10-minute resting period. It gives the ingredients time to relax and work together, ensuring you get that beautiful, spongy texture when they hit the hot griddle. It’s a little patience for a massive reward!
Gathering Ingredients for Your Fluffy Buttermilk Pancakes (Classic)
Okay, let’s get our station ready! Getting your ingredients lined up before you start mixing is half the battle—it keeps you calm, and trust me, it prevents you from accidentally using baking soda when you meant to grab the powder! We’ll handle the dry things first, then the wet components that give these Fluffy Buttermilk Pancakes (Classic) their incredible flavor and lift. Don’t forget to peek over at some fun breakfast topping ideas while you’re gathering these supplies!
Dry Ingredients for the Fluffy Buttermilk Pancakes (Classic) Base
For our base structure, we need reliability. Get out:
- 10 ounces of all-purpose flour (that’s about 2 cups, don’t stress about a perfect gram count here!).
- 1 teaspoon of baking powder.
- 1/2 teaspoon of baking soda—this reacts perfectly with the buttermilk!
- 1 teaspoon of kosher salt (yes, salt matters, even in sweet things!).
- 1 tablespoon of sugar to help with browning.
Wet Components and Finishing Touches
This is where the tang and richness come from. Grab these:
- 2 large eggs, but remember, we are separating these later—keep those whites safe!
- 1 1/2 cups of buttermilk (it must be buttermilk for this recipe to work right!).
- 1 cup of sour cream—if you don’t have sour cream, I often use Greek yogurt instead; it gives you almost the exact same great texture.
- 4 tablespoons of unsalted butter, melted, plus extra for the griddle.
- And of course, warm maple syrup for the absolute best classic breakfast experience!
Equipment Needed for Making Fluffy Buttermilk Pancakes (Classic)
You don’t need fancy gadgets for this classic breakfast, just good old basics! Having these ready means you can pivot straight from mixing to the griddle without scrambling around the kitchen looking for things.
- You’ll definitely need two mixing bowls—one for your dry stuff and one for those lovely wet ingredients.
- A sturdy whisk for combining everything nicely.
- Your trusty griddle or a good solid frying pan.
- A spatula that slides easily for flipping those tall pancakes.
Step-by-Step Instructions for Perfect Fluffy Buttermilk Pancakes (Classic)
This is where the magic really comes together! Following these steps carefully ensures you get that wonderful, tender crumb that makes this Fluffy Buttermilk Pancakes (Classic) recipe so special for a weekend treat. Grab your equipment, put on some good music, and let’s get cooking! I found a great demonstration on technique you might find helpful over at Serious Eats if you want an extra visual guide!
Mixing the Dry Base and Wet Yolks
First things first, grab that big bowl and whisk all your dry ingredients—flour, baking powder, soda, salt, and sugar—until they look perfectly uniform. In a separate bowl, gently whisk those two egg yolks. Now, whisk your buttermilk and sour cream into the yolks slowly until everything is just cooperating. Remember, we don’t want speed here, we want connection!
Achieving Maximum Lift: Folding in Egg Whites
This step is crucial! Take those two egg whites that you set aside earlier and beat them until they stand up stiffly on their own—we’re aiming for those perfect peaks! Now, pour the yolk mixture into the dry ingredients and stir just until they meet. See those lumps? Leave them! Then, gently, I mean gently, fold in those fluffy whites in two additions. If you stir too hard, you deflate all that hard work!
Griddling Your Fluffy Buttermilk Pancakes (Classic)
Once folded, you absolutely must let that batter rest for about 10 minutes; this is non-negotiable for maximum fluffiness! Heat up your griddle or pan over medium heat and give it a light grease. Pour about 1/4 cup of batter per pancake. Wait patiently until bubbles pop on the surface and stay open—that’s your cue to flip! Cook the other side for maybe 2 or 3 minutes until it’s golden brown. You can find more general recipe guidance over at my main recipe index.
Tips for Success with Your Fluffy Buttermilk Pancakes (Classic)
Even though this is an easy recipe, I have a few secrets to make sure you nail that height every time. When you’re mixing the wet into the dry, remember my rule: stop mixing when you still see a few streaks of flour. Over-stirring develops gluten, and gluten makes pancakes chewy, not cloud-like!
On the griddle, temperature management is everything. If the first batch burns immediately, it’s too hot. If they sit there looking pale and sizzling softly for five minutes, it’s too cool. Medium heat is the sweet spot for getting that beautiful, even golden color while the inside cooks through completely.
Finally, don’t panic if your batter seems a little unusual after folding in the whites; it should look light and airy, maybe even a little foamy. That foam is trapped happiness, waiting to turn into the fluffiest pancakes you’ve ever made!
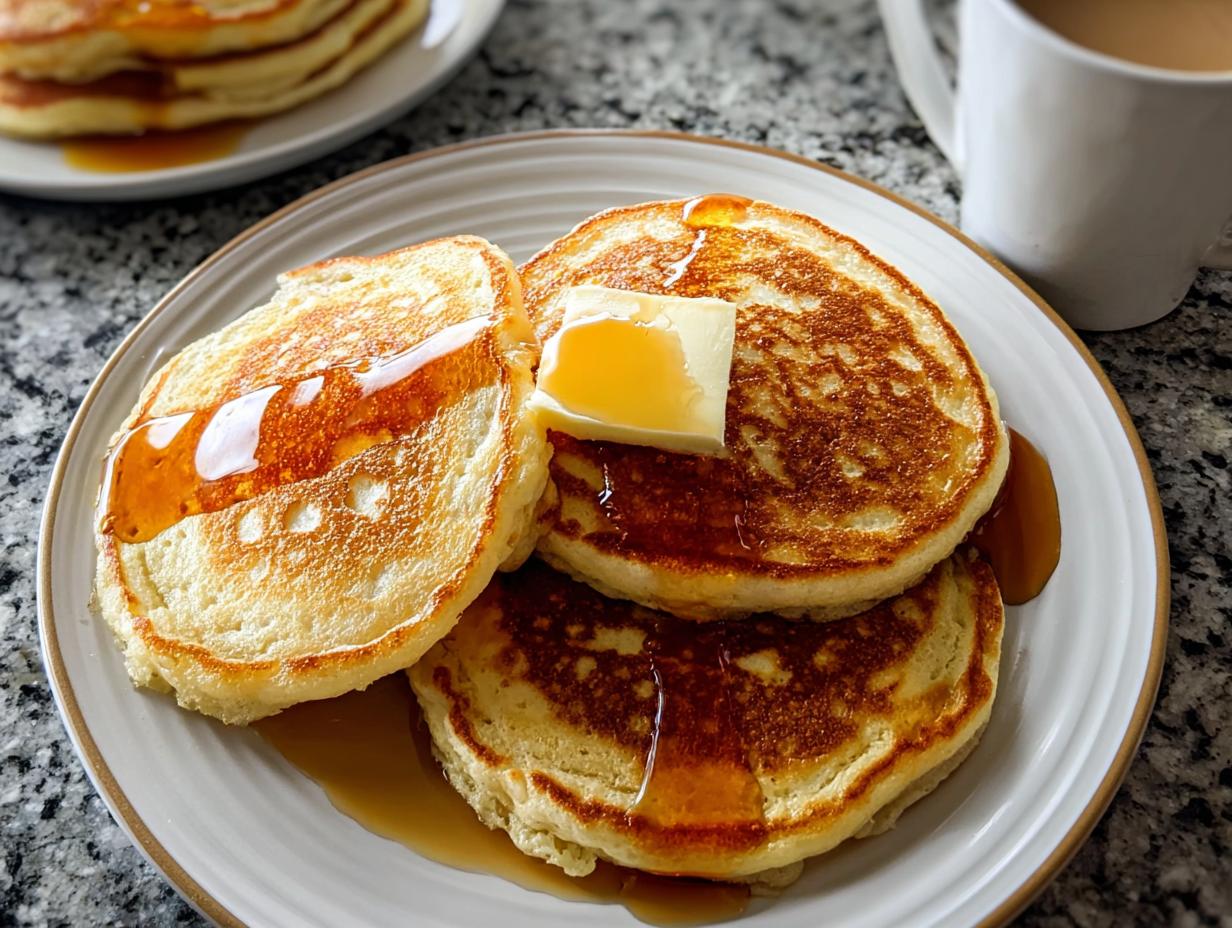
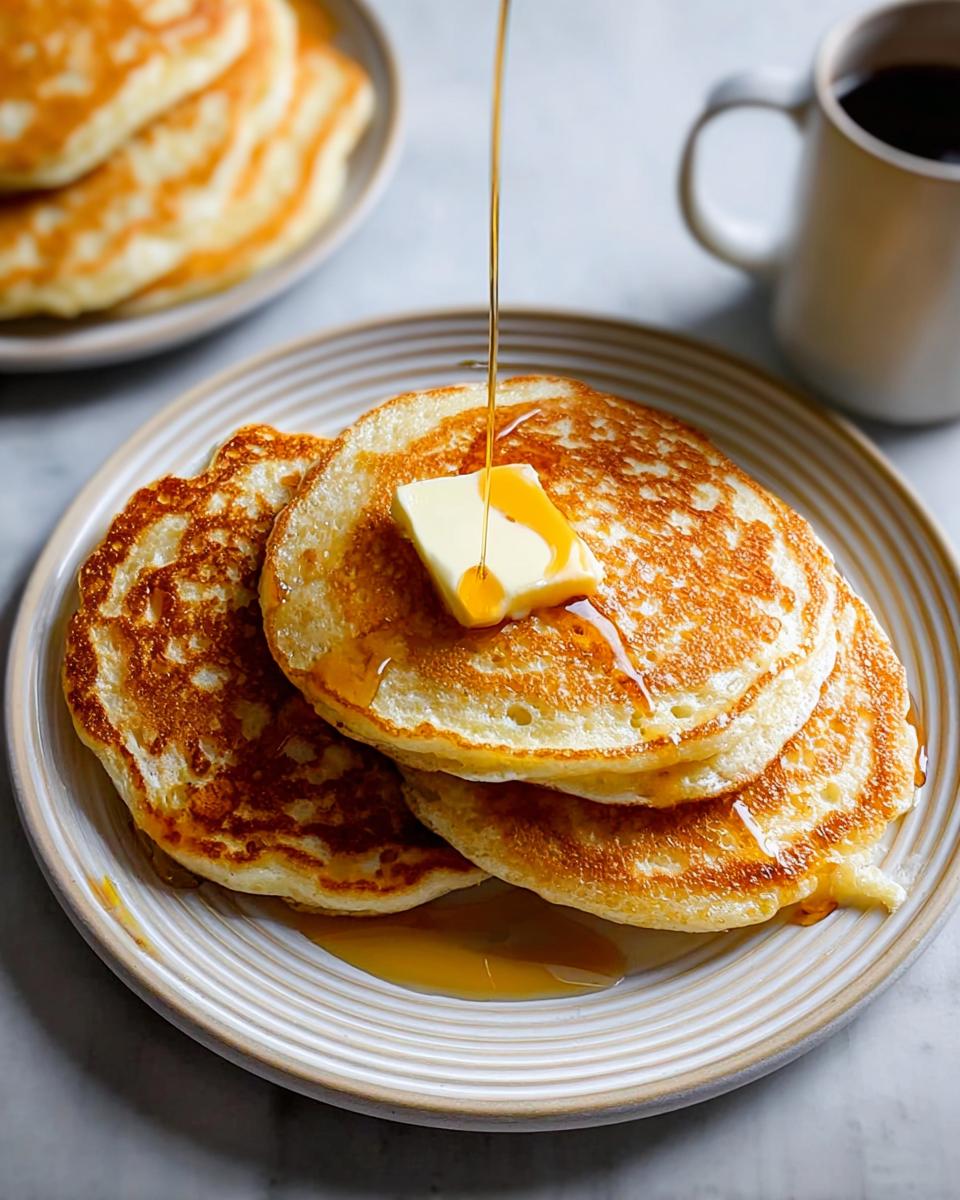
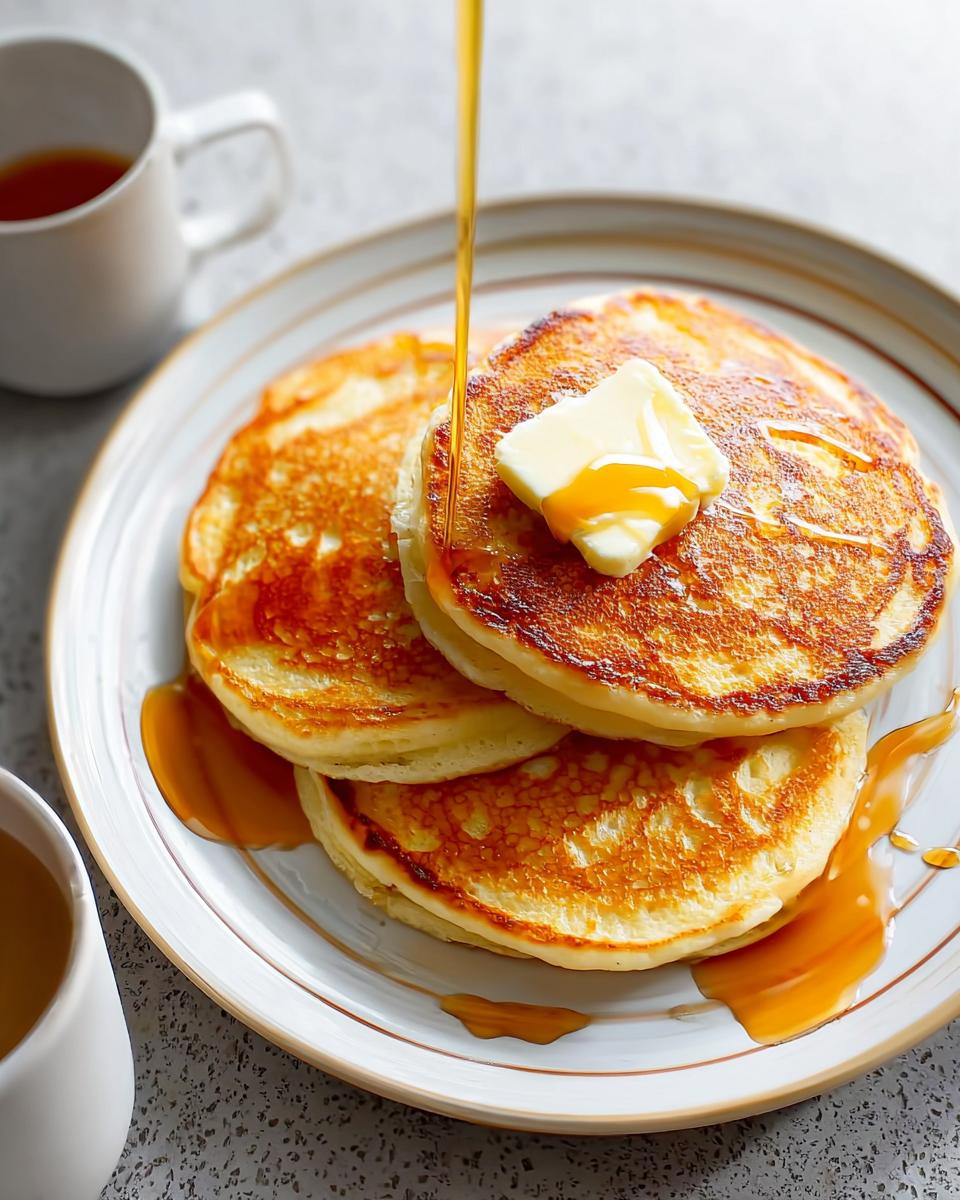
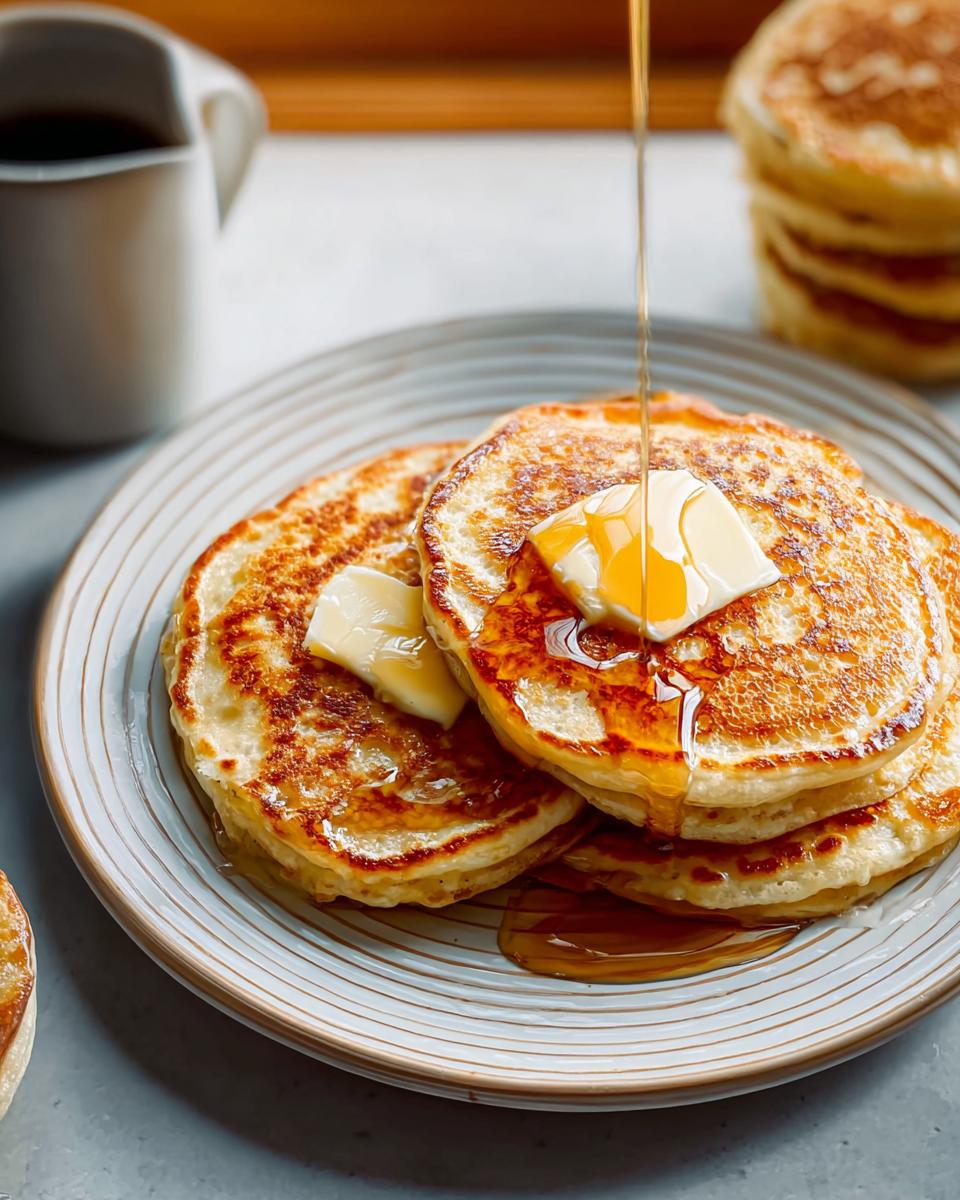
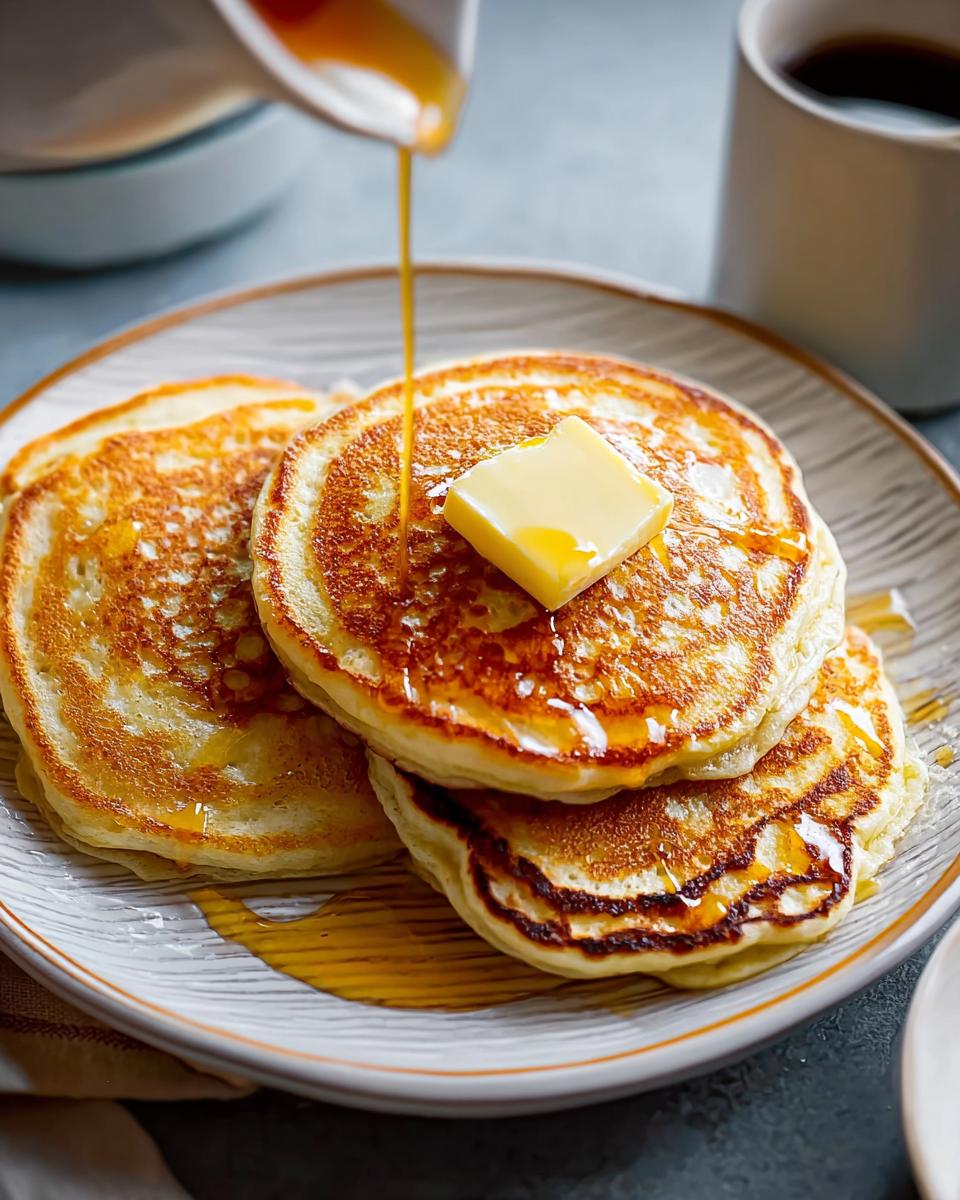
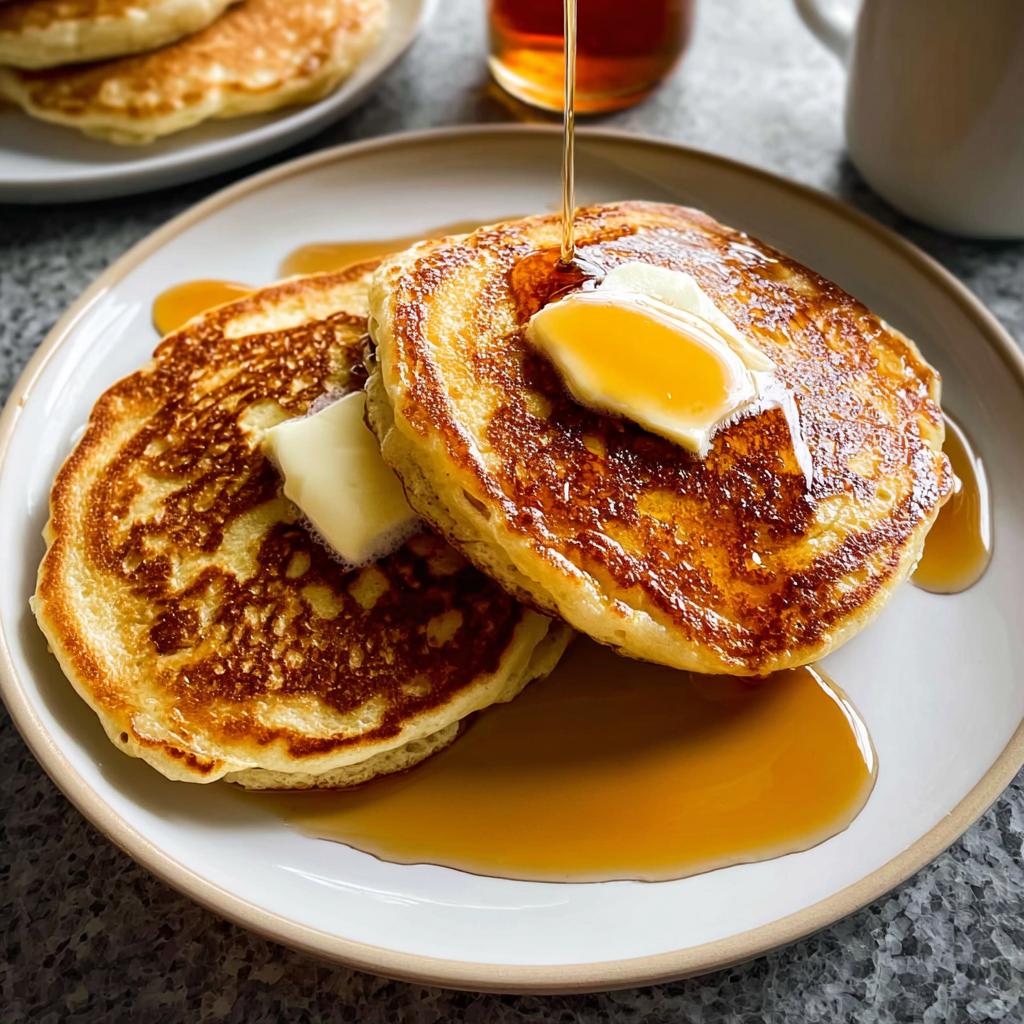
Serving Suggestions for Your Classic Breakfast
Once those beautiful, golden rounds are stacked high—and that smell is filling your whole kitchen—it’s time for the fun part: the toppings! Of course, you need loads of melted butter and plenty of warm maple syrup; that’s just the law of the land for a Classic Breakfast.
But if you want to dress them up just a tiny bit, try adding a handful of fresh, bright berries right over the top—strawberries or blueberries are fantastic. Sometimes, when I want a slightly lighter touch, I skip the heavy syrup and just dust the entire stack lightly with powdered sugar. It looks so elegant, almost like snow, and makes this whole experience feel extra special for everyone. You can find more inspiring breakfast ideas if you want to create a whole spread!
Storage and Reheating Instructions for Leftover Fluffy Buttermilk Pancakes (Classic)
Pancakes are always best fresh off the griddle, but let’s be real—sometimes you make too many! Don’t toss those leftovers! You can easily save them for a quick weekday breakfast later in the week. Just make sure they cool down completely first, otherwise, you’ll create steam and mush inside your container. Pop them into an airtight container and stash them in the fridge; they’re usually good for about three days.
When you’re ready for round two, skip the microwave if you can—it makes them a bit rubbery. I find the best trick is popping them right into the toaster for a minute or two until they are warm and slightly crispy again. If you have a whole stack, warming them on a baking sheet in a 350-degree oven for about five minutes works wonders, too. They come out tasting almost freshly made!
Frequently Asked Questions About This Buttermilk Recipe
I get so many questions about this classic breakfast, and honestly, it shows how much you all love making Fluffy Pancakes! It’s lovely to hear from you all. Here are a few things people ask most often about tweaking this Buttermilk Recipe so you don’t run into any trouble achieving that perfect stack.
Can I make this Fluffy Pancakes recipe ahead of time?
While fresh is always best, this recipe freezes like a dream! Once they’re completely cooled, lay them flat on a baking sheet and pop them in the freezer for about an hour. Once they’re individually frozen “pancakes,” stack them up with parchment paper squares between each one and store them in a heavy-duty bag. They reheat beautifully in the toaster for a quick Classic Breakfast anytime!
What is the best substitute for sour cream in this Buttermilk Recipe?
That’s a great question if you’re swapping ingredients around! As I mentioned before, full-fat Greek yogurt is my favorite alternative; it lends that wonderful thickness and tang. If you don’t have that, use heavy cream instead of buttermilk and sour cream combined, but you’ll lose a little bit of that signature sourness we need for the baking soda to react properly. For this specific recipe, try hard to stick to the buttermilk and either sour cream or Greek yogurt for the best results!
If you have other questions about cross-contamination or tweaking ingredients, feel free to read more about my specialized work here. Happy cooking!
Share Your Fluffy Buttermilk Pancakes (Classic) Creations
I truly hope this recipe brings a little bit of that cozy, joyful feeling to your kitchen! Please come back and tell me how they turned out—rate the recipe and share your best family breakfast moments in the comments below. I absolutely love seeing your stacks of Fluffy Pancakes!
Don’t forget to share a photo on social media so I can see your handiwork! You can get in touch with us right here if you have any feedback or ideas. Happy flipping, friends!
Fluffy Buttermilk Pancakes (Classic)
Ingredients
Equipment
Method
- In a large bowl, whisk together the flour, baking powder, baking soda, salt, and sugar for the dry pancake mix. Set aside.
- In a separate bowl, whisk the egg yolks. Gradually whisk in the buttermilk and sour cream until combined.
- Pour the wet ingredients into the dry ingredients and stir until just combined. Do not overmix; a few lumps are okay.
- In another clean bowl, beat the egg whites until stiff peaks form. Gently fold the beaten egg whites into the pancake batter.
- Let the batter rest for about 10 minutes. This helps make the pancakes fluffier.
- Heat a lightly greased griddle or frying pan over medium heat. Pour about 1/4 cup of batter onto the hot griddle for each pancake.
- Cook for 2-3 minutes per side, or until golden brown and cooked through. Flip when bubbles appear on the surface of the pancake.
- Serve immediately with melted butter and warm maple syrup.
Notes
Tried this recipe?
Let us know how it was!
Dual-Restriction Recipe Engineer & Cross-Contamination Specialist
Everything changed when my teenage son got hit with celiac disease and Type 1 diabetes diagnoses within six months of each other. Suddenly, pizza and pasta were off the table, and most “diabetic-friendly” foods contained gluten. I went from regular mom cooking to navigating what I call “compound restriction cooking”—and I had a kid’s appetite and taste buds to satisfy.
Lucky for us, my background in pharmaceutical quality control gave me the systematic mindset this level of precision requires. My kitchen now operates under pharmaceutical-grade protocols adapted for home use: dedicated prep surfaces, separate storage systems, and testing procedures that verify both carb counts and gluten absence before any recipe gets published.
I’ve developed over 220 recipes that clear multiple dietary hurdles simultaneously—finding gluten-free thickeners that don’t spike blood sugar, creating bread alternatives that meet both keto ratios and celiac safety, and developing desserts that actually taste good to a teenager despite impossible restrictions.
Through my “Safe Kitchen Certification” program, I teach other parents that managing multiple dietary restrictions isn’t about multiplying limitations—it’s about systematic thinking that reveals unexpected possibilities. When you engineer solutions instead of making compromises, restriction becomes innovation rather than deprivation.