
You know that feeling? That moment when you’re at a restaurant, tasting the most incredible, comforting stuffing, and you think, “How do they DO that?” Well, get ready, because we’re bringing that restaurant magic right into your kitchen with these Restaurant-Style Stuffing Recipes at Home (2025). I still remember the first Thanksgiving dinner I hosted after the pandemic shifted everything. With a limited dining options, I was determined to recreate the restaurant-style stuffing that had always been a highlight of our family celebrations. Armed with leftover herbs from my balcony garden and a selection of artisan breads, I combined textures and flavors that felt indulgent yet nostalgic. When I pulled that first batch from the oven, the aroma filled my small apartment, and as I served it, I could see the smiles on everyone’s faces. That stuffing became a centerpiece of my new holiday tradition—proof that even in difficult times, good food can bring joy and connection around the table. Trust me, this recipe is going to make your holiday meals totally unforgettable.
Why You’ll Love These Restaurant-Style Stuffing Recipes at Home (2025)
Seriously, why *wouldn’t* you want restaurant-quality stuffing without leaving your house? This recipe is a total game-changer for your holiday table. Forget sad, soggy bread – we’re talking about that perfect balance of crispy bits and tender, flavorful bites that just screams “special occasion.” It’s surprisingly easy to whip up, even with all the holiday chaos going on, and the aroma alone will make your guests think you’re a culinary genius. Get ready for all the compliments!
- Unbeatable Flavor: We’re packing in those savory herbs and rich chicken broth for a taste that’s miles beyond average.
- Perfect Texture: That crucial step of drying the bread? It’s the secret to getting lovely crispy edges and a wonderfully tender inside.
- Super Accessible: You probably have most of the ingredients already, and the steps are straightforward enough for anyone to follow.
- Instant ‘Wow’ Factor: This stuffing looks and tastes like it came straight from a high-end restaurant, impressing everyone around the table.
Gather Your Ingredients for Restaurant-Style Stuffing
Alright, let’s get down to the nitty-gritty of what makes this stuffing truly special! You know, the secret to that incredible restaurant-quality flavor and texture really boils down to using the best ingredients and treating them right. For our Restaurant-Style Stuffing Recipes at Home (2025), we’re starting with good ol’ white bread – about 30 slices, and they need to be lightly toasted and then dried until they’re rock hard. This is key for that perfect, non-soggy texture. Then, we’ve got 2 tablespoons of butter to get things going, one big ol’ onion and two celery stalks, both finely chopped to really spread their flavor. For liquids, it’s 2 cups of chicken broth for that savory depth, and two large eggs, lightly beaten, that act as a binder. Sometimes, if things feel a little too stiff, I’ll add about 2 tablespoons of water, but it’s totally optional. And for that classic stuffing taste? We’re using 2 teaspoons of rubbed sage, 1 teaspoon of garlic powder, and of course, salt and pepper to taste. These simple things working together are what make restaurant stuffing taste so darn good!
Essential Equipment for Making Stuffing at Home
Okay, so you’ve got your ingredients ready to go, right? Now, let’s talk about the tools that’ll help us make this stuffing absolutely amazing. First up, you’ll want a couple of baking sheets – these are perfect for getting our bread slices nice and dry. Then, you’ll need a 9×13-inch baking dish for, well, baking the stuffing itself! A medium saucepan is essential for sautéing those onions and celery until they’re perfectly soft. Finally, grab a big bowl for mixing everything together, and a rolling pin to get those bread slices into lovely crumbs. Having these on hand makes the whole process super smooth sailing!
Step-by-Step Guide to Restaurant-Style Stuffing Recipes at Home (2025)
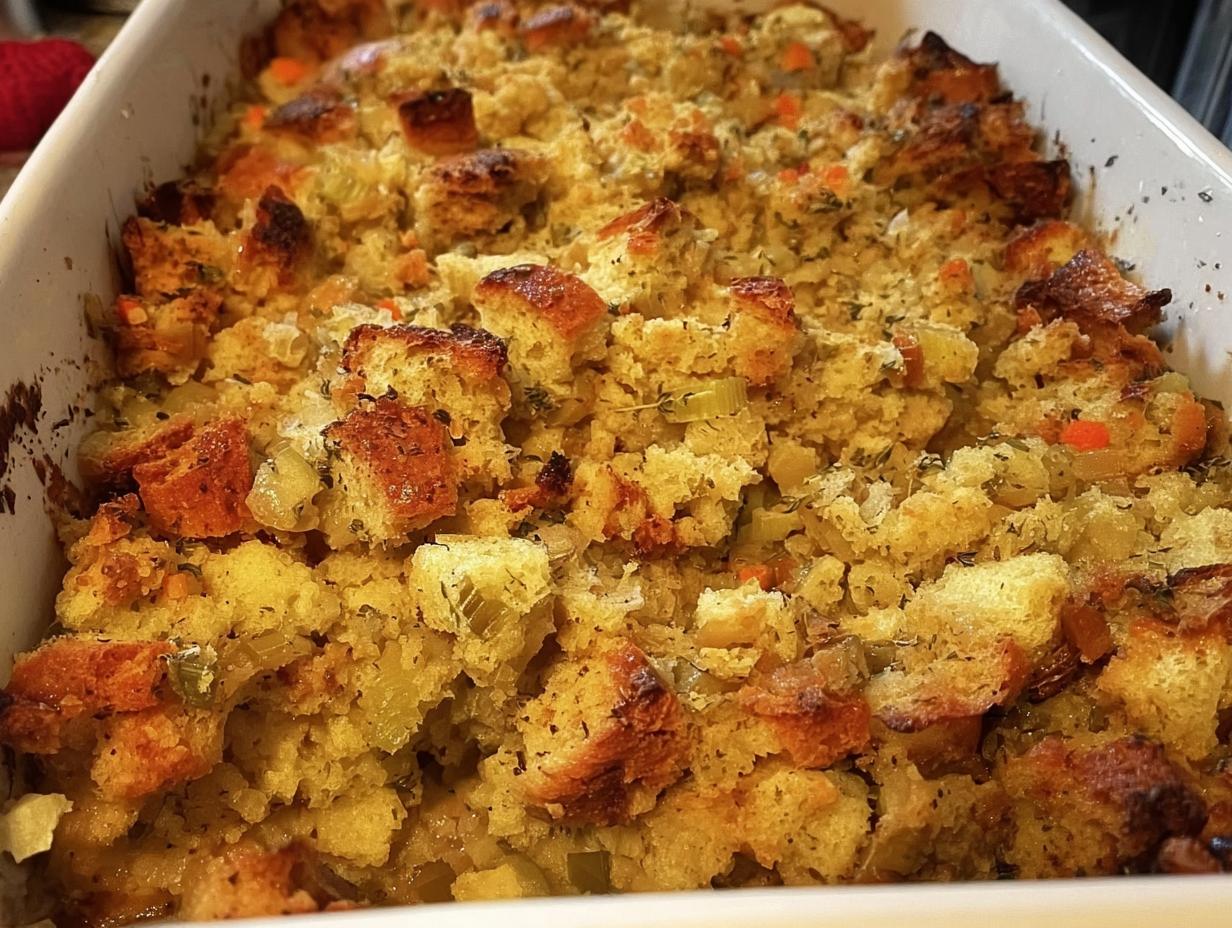
Alright, let’s get this stuffing party started! Following these steps is your ticket to stuffing so good it’ll make your holidays sparkle. First things first, spread out those toasted bread slices on baking sheets and just let them chill at room temperature. You want them to get totally hard, like, rock-hard, which usually takes about 24 hours. This is the absolute secret to avoiding that mushy stuffing disaster! Once they’re good and dry, preheat your oven to 325 degrees F (165 degrees C). While it’s heating up, give your 9×13-inch baking dish a nice little grease-up, just so nothing sticks. I always use butter for greasing, but you could also try a bit of bacon fat if you’re feeling adventurous!
Preparing the Bread Base
This is where the magic starts! Take those rock-hard bread slices and get them nice and crumbly. I usually just toss them into a big bowl and go at them with a rolling pin – it’s kind of therapeutic, honestly! You don’t need a fine powder, just good-sized crumbs that will soak up all that yummy flavor. Once you’ve got your bread crumbs ready, set them aside. Remember, the drier the bread, the better the texture!
Sautéing Aromatics for Depth of Flavor
Now, let’s build some serious flavor! Grab a medium saucepan and melt your butter over medium heat. Toss in that finely chopped onion and celery. Cook ‘em, stirring occasionally, until they’re nice and soft – usually about 5 to 7 minutes. You don’t want them browned, just tender and sweet. Once they’re ready, take the pan off the heat and give them a good drain to get rid of any extra moisture. This is key for a balanced stuffing and super important for that restaurant feel!
Combining and Seasoning the Stuffing Mixture
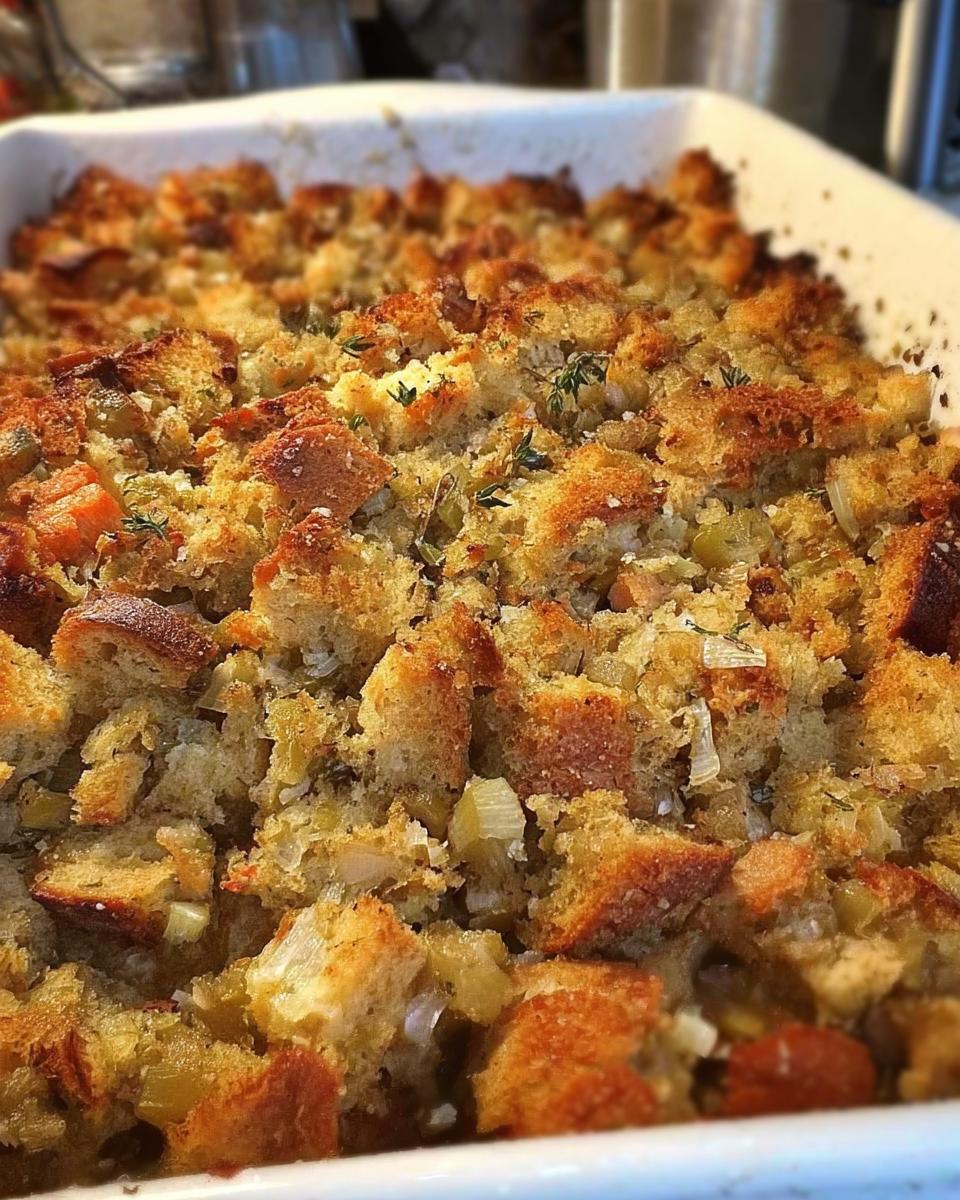
This is where it all comes together! Pour your bread crumbs into that big bowl you used earlier. Now, stir in the chicken broth and those lightly beaten eggs. Mix it all up until the crumbs are evenly moistened, but seriously, don’t make it soggy! If it seems a little too dry and crumbly, you can add a tablespoon or two of water, but go easy. Next, stir in those softened onion and celery bits you cooked up. And for the flavor boost? Add in your rubbed sage, garlic powder, and season generously with salt and pepper to your liking. This is also where you’d mix in any optional goodies like chopped apples or sausage if you’re using them. You can check out some fun waffle recipes for inspiration on flavor combos, even though they’re not stuffing!
Baking to Perfection
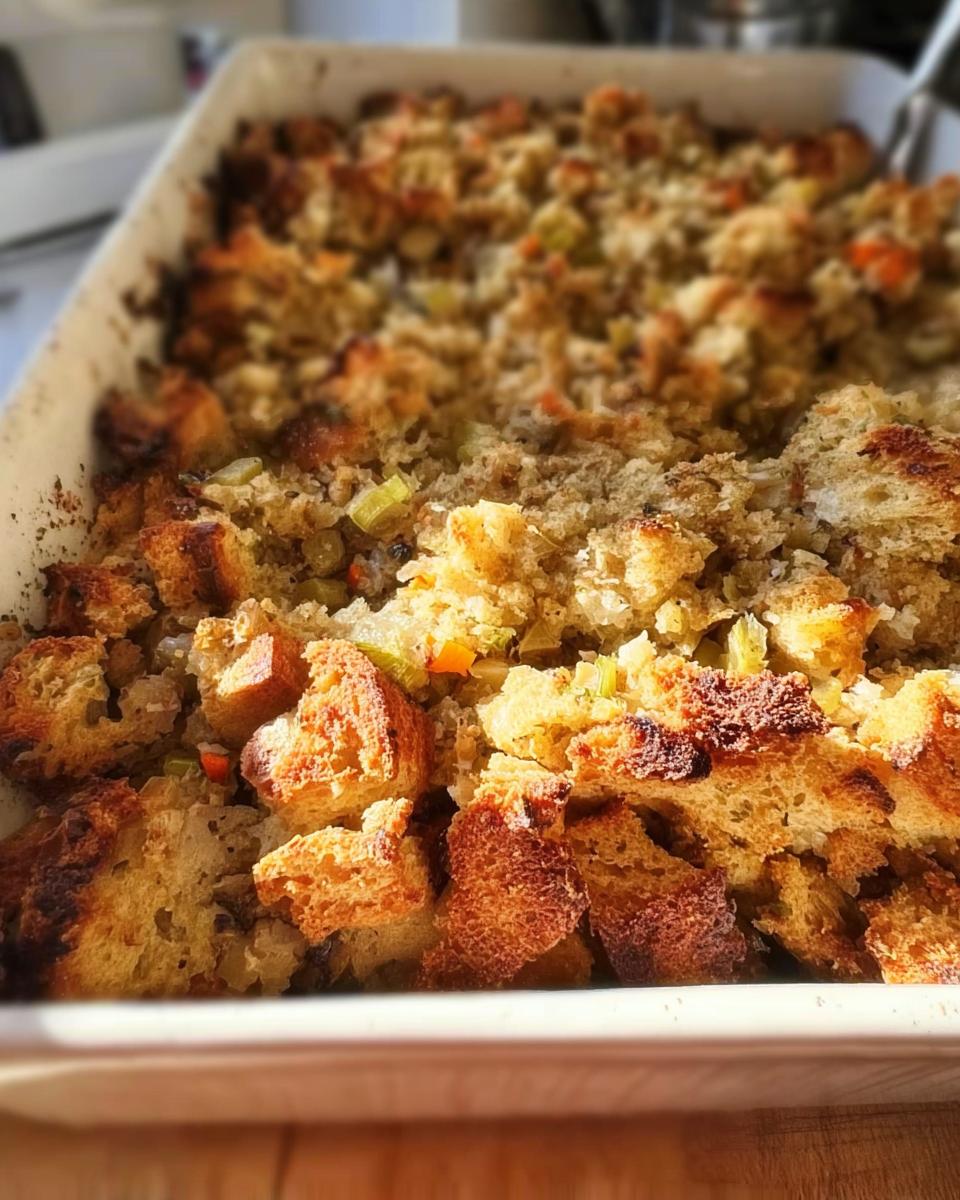
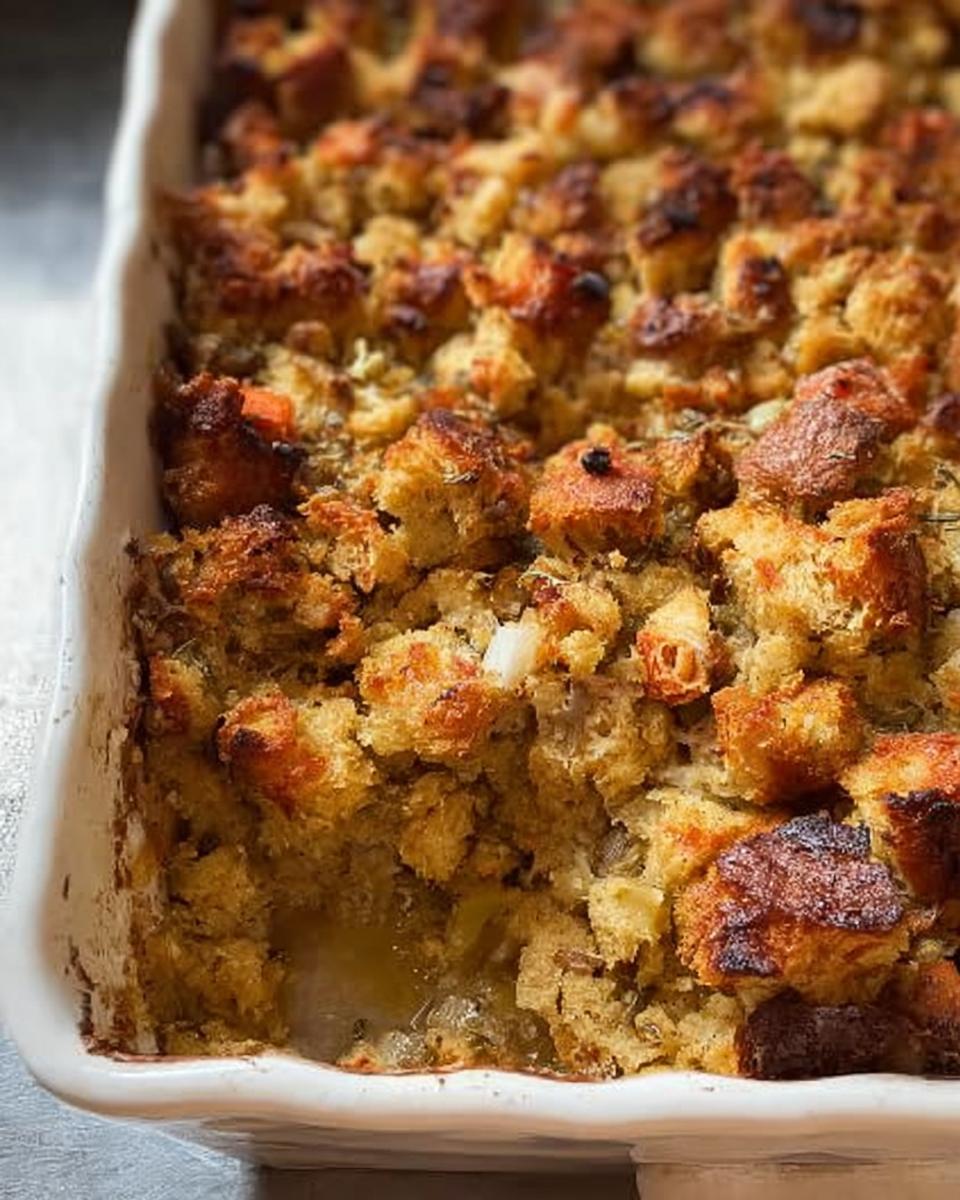
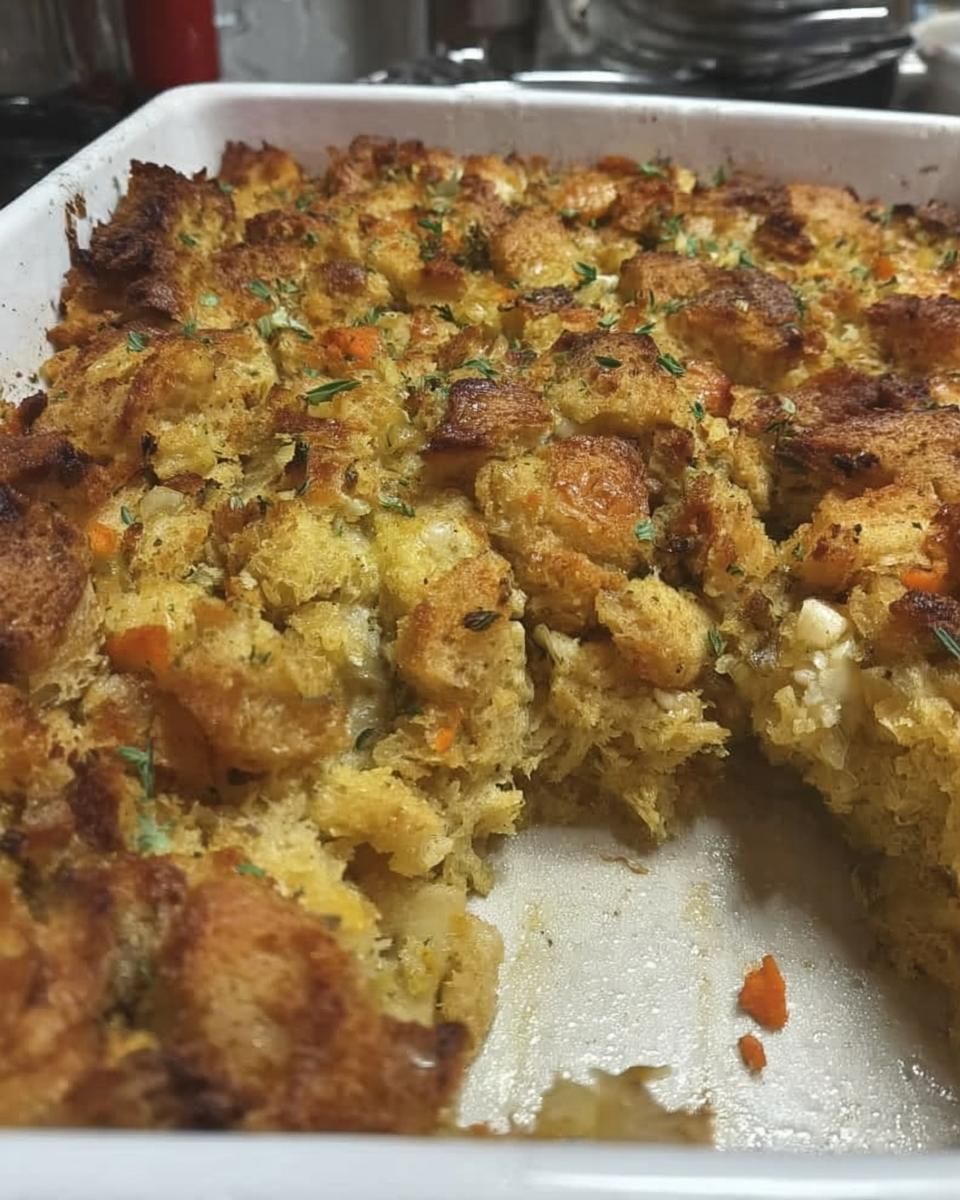
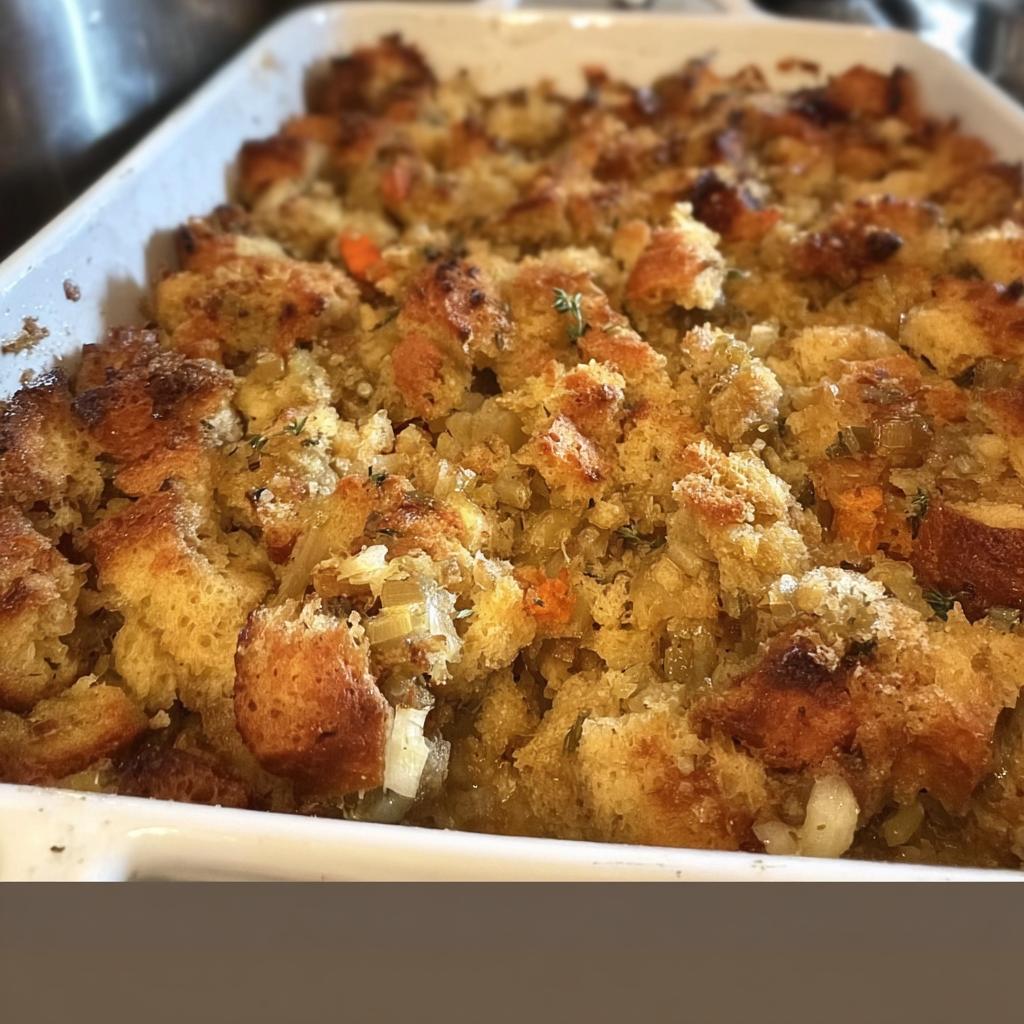
Time to bake! Gently press that stuffing mixture evenly into your prepared baking dish. Pop it into that preheated oven. You’ll want to bake it for about an hour, or until the top is beautifully brown and wonderfully crisp. That crusty top is what really makes it feel restaurant-worthy! If it’s browning too fast, you can always loosely tent a piece of foil over it.
Tips for the Best Restaurant-Style Stuffing at Home
Alright, let’s spill some secrets to making your homemade stuffing taste like it came straight from a fancy eatery! My biggest tip? Don’t skimp on drying that bread. Seriously, leaving it out for a good 24 hours until it’s super hard is your golden ticket to that perfect, non-mushy texture. If you’re short on time, you can pop it in a low oven (around 200°F or 95°C) for about 30 minutes, but honestly, air-drying is best. Also, I always opt for fresh herbs if I can get them – they just pack way more flavor than dried. Just chop them up really fine and toss them in with the rest of the mixture. And hey, if you’re feeling fancy, check out this fun sugar cookie latte recipe for some holiday vibes, though it’s a totally different ballgame! For more traditional stuffing ideas, you can always peek at this classic recipe for inspiration.
Ingredient Notes and Substitutions
Let’s get a little chatty about the ingredients here, because sometimes you gotta make little tweaks, right? For this Restaurant-Style Stuffing Recipes at Home (2025), I really prefer using standard white bread. It dries out perfectly and soaks up those amazing flavors without getting too dense. But hey, if you’re feeling adventurous, a day-old challah or brioche could be interesting, though they might be a bit richer. For the broth, chicken broth is my go-to, but turkey broth is fantastic if you have it, especially after a big turkey dinner! Vegetable broth works too if you want to keep it vegetarian. And about those herbs – if you can get your hands on fresh sage and parsley, definitely use them! Just use a bit more, maybe 3 tablespoons chopped fresh sage and half a cup of fresh parsley, and stir them in towards the end of mixing. Dried is perfectly fine, though; just make sure to rub it between your fingers to release all its aromatic goodness before adding it!
Frequently Asked Questions About Restaurant-Style Stuffing
Got questions about making your stuffing totally amazing? I’ve got answers! It’s all about getting that perfect texture and flavor, and honestly, it’s easier than you think. Check out some tips for trying out a fun pumpkin cream cold brew if you’re looking for other holiday-inspired recipes, though it’s a bit different from stuffing!
Can I make this stuffing ahead of time?
Totally! You can actually prepare the stuffing mixture (up to the point of baking) a day in advance. Just cover it tightly and keep it in the fridge. When you’re ready to bake, let it sit out for about 30 minutes to come closer to room temp, then bake as directed, you might need to add a few extra minutes to the baking time. It’s a lifesaver during busy holidays!
What kind of bread is best for stuffing?
For that classic restaurant style, a good sturdy white bread is usually the way to go. Think sandwich bread that’s a day or two old. It dries out perfectly without getting too dense or falling apart. You want bread that can hold its shape and soak up all those delicious flavors without turning into mush. Avoid anything too soft or sweet unless you’re going for a specific flavor profile!
How do I make my stuffing extra crispy?
Ah, the crispy bits! That’s where drying your bread properly comes in. Seriously, letting it air dry for a full 24 hours makes a HUGE difference. Also, when you’re baking it in the dish, don’t pack it down too tightly. A looser mixture allows more surface area to get directly to the heat, creating those coveted crispy edges. If your top isn’t crispy enough by the end of the bake time, you can always pop it under the broiler for a minute or two – just watch it super carefully so it doesn’t burn!
Can I add other ingredients to my stuffing?
Absolutely! This recipe is a fantastic base. Feel free to stir in some chopped pecans or walnuts for crunch, some dried cranberries for a touch of tart sweetness, or even some cooked sausage or bacon for extra savory goodness. Some people love adding fresh parsley or other herbs too. It’s your stuffing, make it yours!
Serving and Storing Your Delicious Stuffing
Now that you’ve made this incredible Restaurant-Style Stuffing Recipes at Home (2025), it’s time to serve it up! This stuffing is a perfect sidekick to your roasted turkey, ham, or really any holiday main dish. I love serving it nice and hot, right out of that golden-brown dish. If you happen to have any leftovers (which is rare in my house!), just pop them into an airtight container and keep them in the fridge for up to three days. Reheating is super easy – just pop it back in a moderate oven (around 350°F or 175°C) until it’s heated through and the top is crispy again. No one will even know it wasn’t fresh from the oven!
Nutritional Information
Just so you know, the numbers below are estimates, and they can totally change depending on the exact brands and ingredients you use. But roughly, each serving of this amazing stuffing has about 101 calories, 17g of carbs, 3g of protein, and 2g of fat. Deliciousness with pretty reasonable numbers!
Restaurant-Style Stuffing Recipes at Home (2025)
Ingredients
Equipment
Method
- Spread toasted bread slices on baking sheets and let sit out at room temperature until hard, about 24 hours.
- Once bread slices are ready, gather all ingredients. Preheat the oven to 325 degrees F (165 degrees C). Lightly grease a 9×13-inch baking dish.
- Crush bread slices into crumbs with a rolling pin. Transfer crumbs to a large bowl.
- Melt butter in a medium saucepan over medium heat. Stir in onion and celery; cook and stir until soft, 5 to 7 minutes. Remove from heat and drain.
- Stir chicken broth and eggs into bread crumbs; mix until evenly moistened, but not soggy. Add water, if needed. Mix in cooked onion and celery, sage, garlic powder; season with salt and pepper.
- Press dressing mixture into the prepared baking dish.
- Bake in the preheated oven until the top is brown and crisp, about 1 hour.
- Serve hot and enjoy!
Nutrition
Notes
Tried this recipe?
Let us know how it was!
Dual-Restriction Recipe Engineer & Cross-Contamination Specialist
Everything changed when my teenage son got hit with celiac disease and Type 1 diabetes diagnoses within six months of each other. Suddenly, pizza and pasta were off the table, and most “diabetic-friendly” foods contained gluten. I went from regular mom cooking to navigating what I call “compound restriction cooking”—and I had a kid’s appetite and taste buds to satisfy.
Lucky for us, my background in pharmaceutical quality control gave me the systematic mindset this level of precision requires. My kitchen now operates under pharmaceutical-grade protocols adapted for home use: dedicated prep surfaces, separate storage systems, and testing procedures that verify both carb counts and gluten absence before any recipe gets published.
I’ve developed over 220 recipes that clear multiple dietary hurdles simultaneously—finding gluten-free thickeners that don’t spike blood sugar, creating bread alternatives that meet both keto ratios and celiac safety, and developing desserts that actually taste good to a teenager despite impossible restrictions.
Through my “Safe Kitchen Certification” program, I teach other parents that managing multiple dietary restrictions isn’t about multiplying limitations—it’s about systematic thinking that reveals unexpected possibilities. When you engineer solutions instead of making compromises, restriction becomes innovation rather than deprivation.