

Oh, Thanksgiving stuffing! It’s the heart of the holiday meal, right? But if you’re juggling dietary needs like gluten-free or low-carb, or just trying to get ahead of the game with some meal prep, finding a stuffing recipe that’s both super tasty *and* works for your life can feel like a scavenger hunt. That’s where my passion comes in! As a Dual-Restriction Recipe Engineer & Cross-Contamination Specialist, I know firsthand how much joy a good stuffing can bring, even after a diagnosis. That’s why I poured everything into creating these Stuffing Recipes Meal Prep That Actually Tastes Great. Seriously, this one is a game-changer. It’s foolproof, fits all sorts of needs (yes, even yours!), and tastes just like you remember – maybe even better! It all started after my son’s celiac and Type 1 diabetes diagnosis. I refused to let that steal our holiday magic, and after a whirlwind of experimenting, this recipe was born. It’s my hope that it brings that same joy and deliciousness to your table.
Why This Stuffing Recipes Meal Prep That Actually Tastes Great is a Game-Changer
Okay, so why am I SO excited about *this* stuffing? Honestly, it’s because it just works. You get all those comforting, delicious flavors you dream of, but with none of the stress.
- Meal Prep Magic: This stuffing is built for making ahead! You can whip it up a day or two in advance, store it, and just reheat it when you’re ready. So much less scrambling on the big day!
- Flavor Explosion: We’re talking savory herbs, garlic, sweet onions – all the good stuff that makes stuffing amazing. It tastes like it simmered forever, even when it hasn’t.
- Dietary Dream: This is a dream for those of us navigating gluten-free or low-carb needs. It’s designed to be super adaptable so everyone at the table can dig in without worry. That’s why my Stuffing Recipes Meal Prep That Actually Tastes Great tagline is so spot-on!
- Endless Options: What’s awesome is that you can totally tweak it. Add different veggies, swap out the herbs, or even toss in some cooked protein. It’s a blank canvas for deliciousness!
Gather Your Ingredients for Delicious Stuffing
Alright, let’s get down to business and gather everything we need for this amazing stuffing. It’s pretty straightforward, but having all your bits and bobs ready makes the whole process a breeze. Trust me, prepping ahead is half the battle won for great meal prep!
First up, our bread base. You’ll want about 18 to 24 ounces of bread cubes. The best kind are stale or toasted – think of them as little sponges ready to soak up all that yummy flavor. That usually works out to about 1.5 loaves of bread, or roughly 12 to 14 cups if you’re measuring by volume.
Then we’ve got our flavor makers:
- 1 cup unsalted butter
- 3 cups diced sweet onion (that’s about 2 large ones!)
- 2 cups diced celery
- 6 cloves garlic, all minced up nice and fine
- 1 teaspoon kosher salt (or more, to your taste!)
- 1 teaspoon black pepper (give it a good grind!)
- 3 tablespoons chopped fresh sage
- 3 tablespoons chopped fresh parsley
- 3 tablespoons chopped fresh rosemary
- 2 1/2 cups chicken or vegetable stock
- And for that rich texture, 2 large eggs
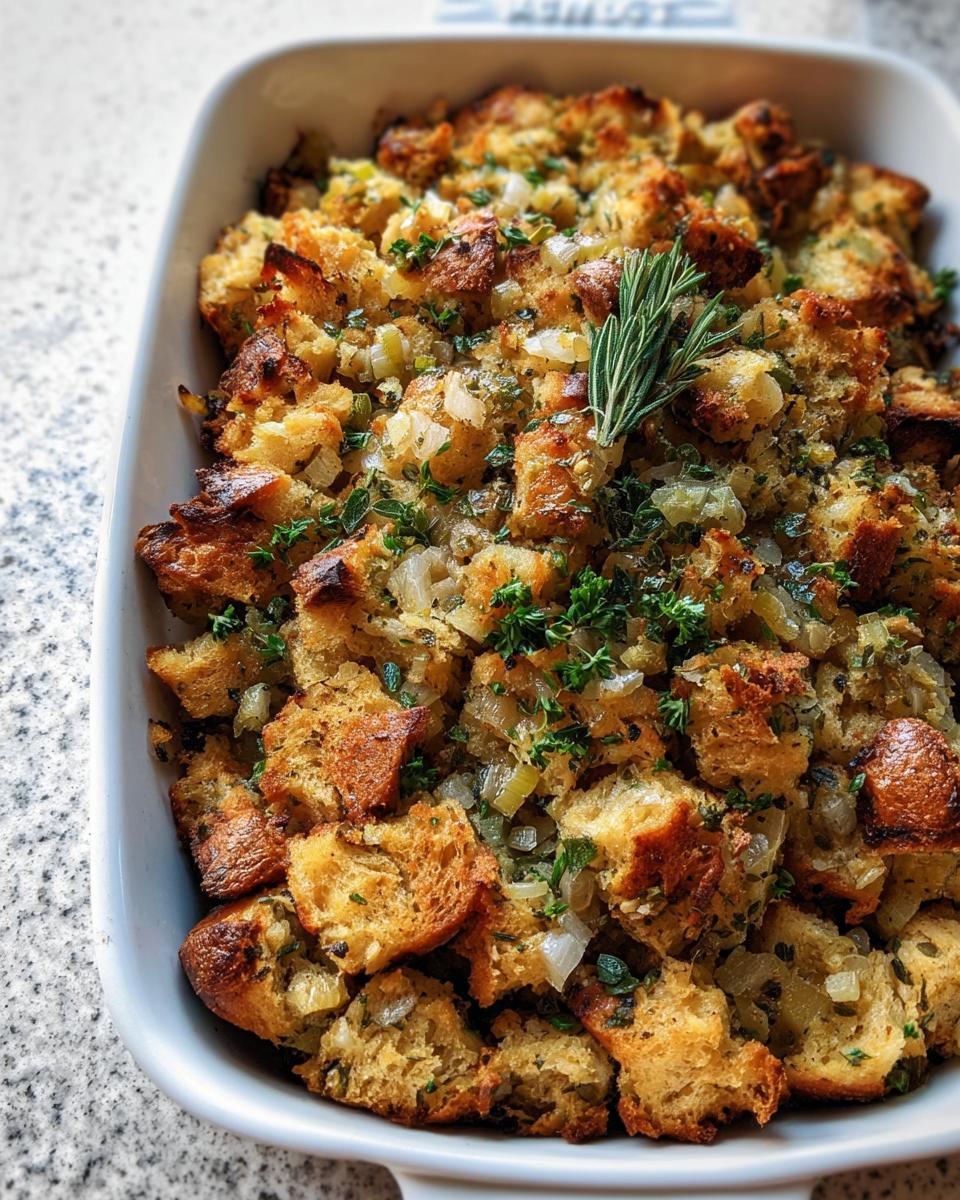
And for a little something extra when it’s time to serve, grab some fresh herbs for sprinkling just as a garnish. Easy peasy!
Step-by-Step Guide to Perfect Stuffing
Alright, let’s get this delicious stuffing made! It’s pretty straightforward, and honestly, half the fun is in the process. We’re going to break it down so you can nail it every single time, whether it’s for Thanksgiving or just because you deserve something yummy.
-
Get Your Bread Ready: First things first, let’s talk bread cubes. The key here is using bread that’s a little stale or toasted. This helps it absorb all those amazing flavors without turning into mush. If you don’t have bread that’s a few days old, just cut your loaf into bite-sized cubes, spread them on a baking sheet, tent it loosely with foil, and let it sit on the counter overnight. Or, for a quicker fix, toast them in the oven at 350°F (175°C) for about 15 minutes until they look like little croutons. Store-bought toasted cubes are totally fine too! You can go for smaller cubes if you like a finer texture, or bigger, rustic chunks for more of a bite.
-
Preheat and Prep Your Pan: Get your oven fired up to 350°F (175°C). Now, grab your 9×13 inch baking dish – or if you’re making a bigger batch, a larger roasting pan or even a foil pan will work. Give it a good grease-up with a little melted butter, olive oil, or your favorite nonstick spray. This is super important to keep our delicious stuffing from sticking. Go ahead and plop your nicely prepped bread cubes into a big mixing bowl, or if you’re feeling efficient, right into the baking dish you just prepped!
-
Sauté Those Veggies: Time to build some flavor! Melt that 1 cup of butter in a big skillet or a Dutch oven over medium heat. Toss in your diced sweet onion, celery, and all that minced garlic. Don’t forget to season with at least 1 teaspoon each of kosher salt and black pepper – and you can always add more later, of course! Cook everything until those veggies start to get nice and tender, which usually takes about 8 to 10 minutes. Then, stir in your chopped fresh sage, parsley, and rosemary. Let that cook for another minute until you can really smell the fragrant herbs. Pour in 1 cup of your chicken or vegetable stock and give it a good stir. This is where all those delicious savory notes start to come together!
-
Combine and Coat: Now, pour that glorious vegetable and stock mixture right over the bread cubes you’ve got waiting. Grab a big spoon or spatula and gently toss everything together. You want to make sure every single bread cube gets coated in that flavorful goodness. It’s like giving them a little hug of deliciousness!
-
Whip Up the Binder: In a small bowl – or even just a measuring cup – whisk together the remaining 1 1/2 cups of stock and your 2 large eggs. This is going to help bind everything together and give your stuffing that lovely, satisfying texture.
-
Bring It All Together: Pour that egg and stock mixture over the bread cubes you’ve already tossed with the veggies. Now, gently stir and fold everything together. Be careful not to mash the bread too much! You still want those distinct cubes. Just mix until everything is nicely combined and looks well-integrated.
-
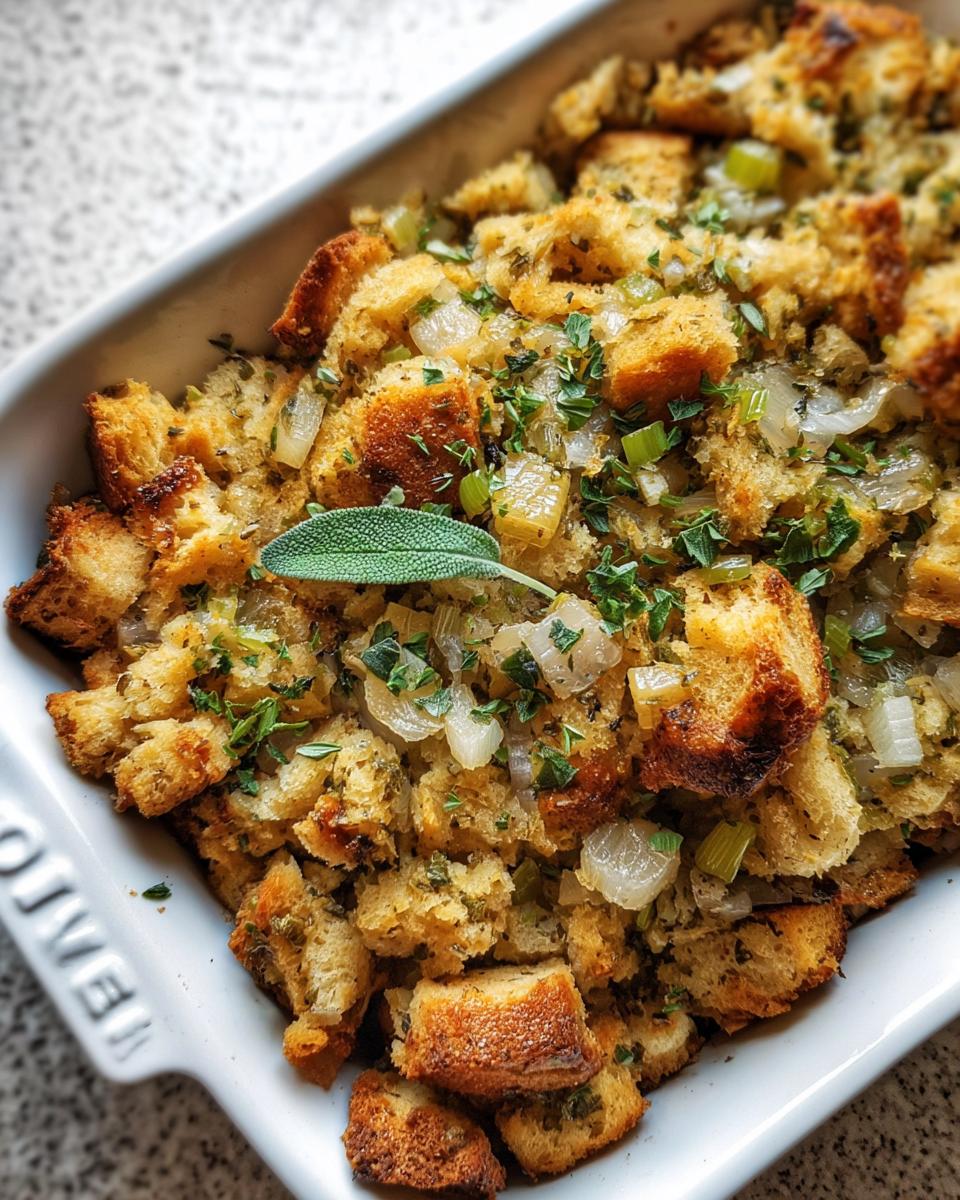
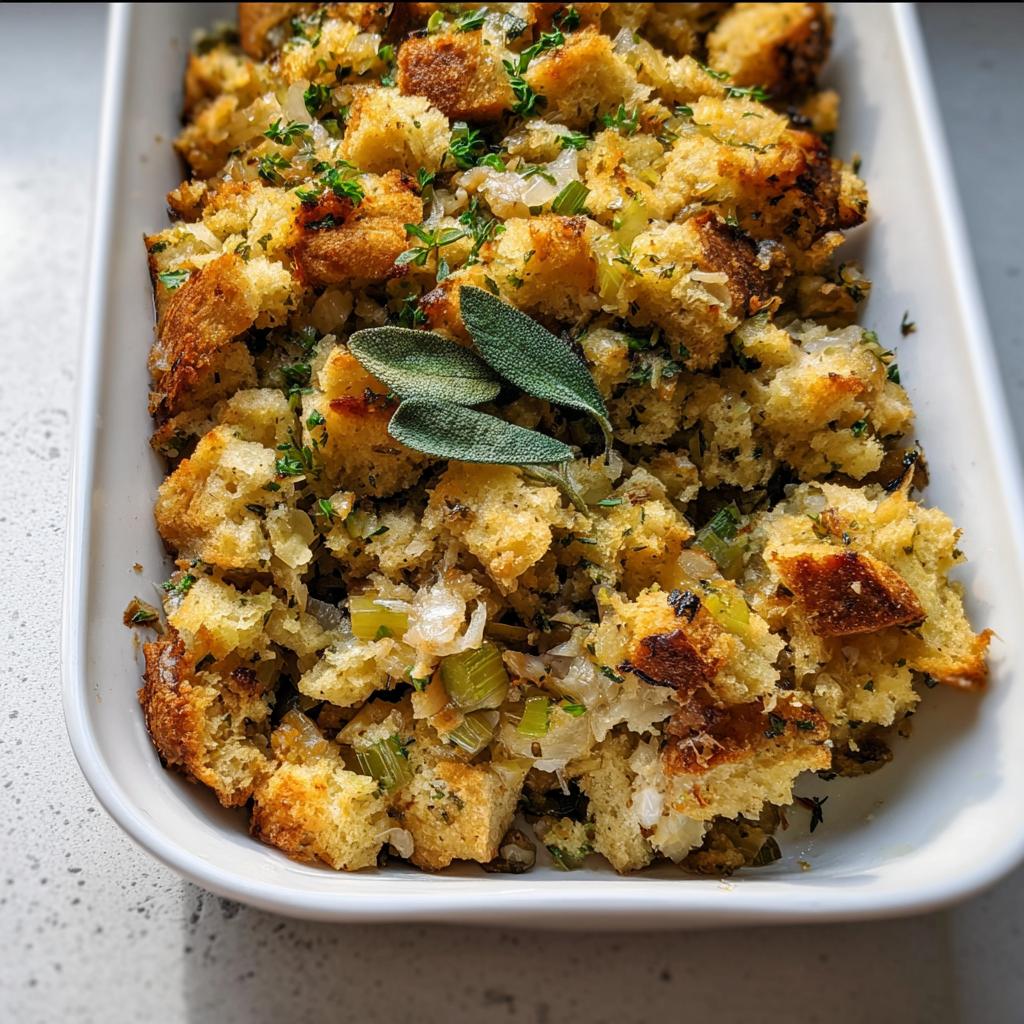
Time to Bake! Carefully spread your stuffing into the prepared baking dish. Pop it into your preheated oven and bake for about 45 to 50 minutes. You’re looking for that magical moment when the internal temperature reaches 160°F (71°C) and the top is beautifully golden brown. If you notice it browning a little too quickly before it’s heated through, don’t panic! Just loosely tent the dish with some aluminum foil, and it’ll finish baking perfectly.
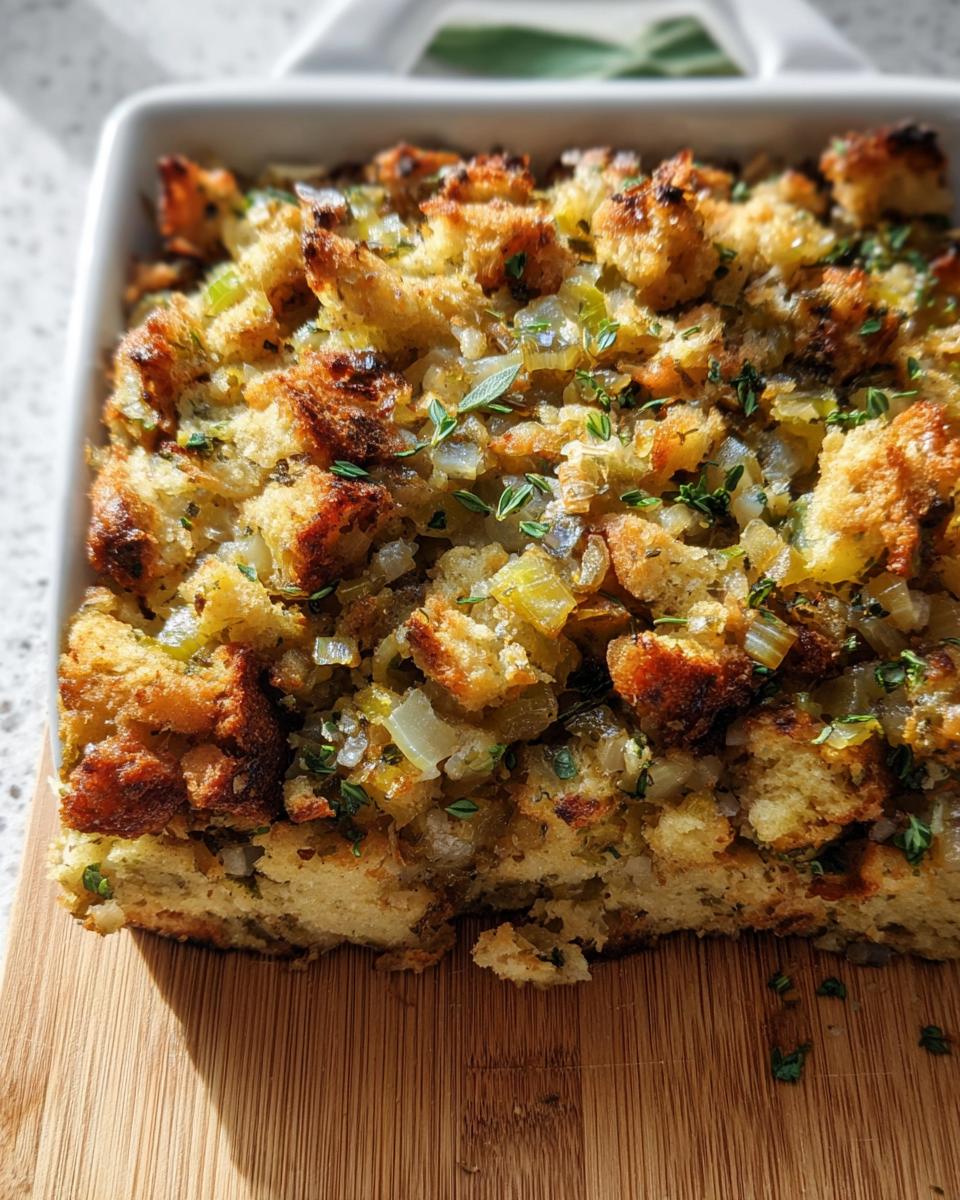
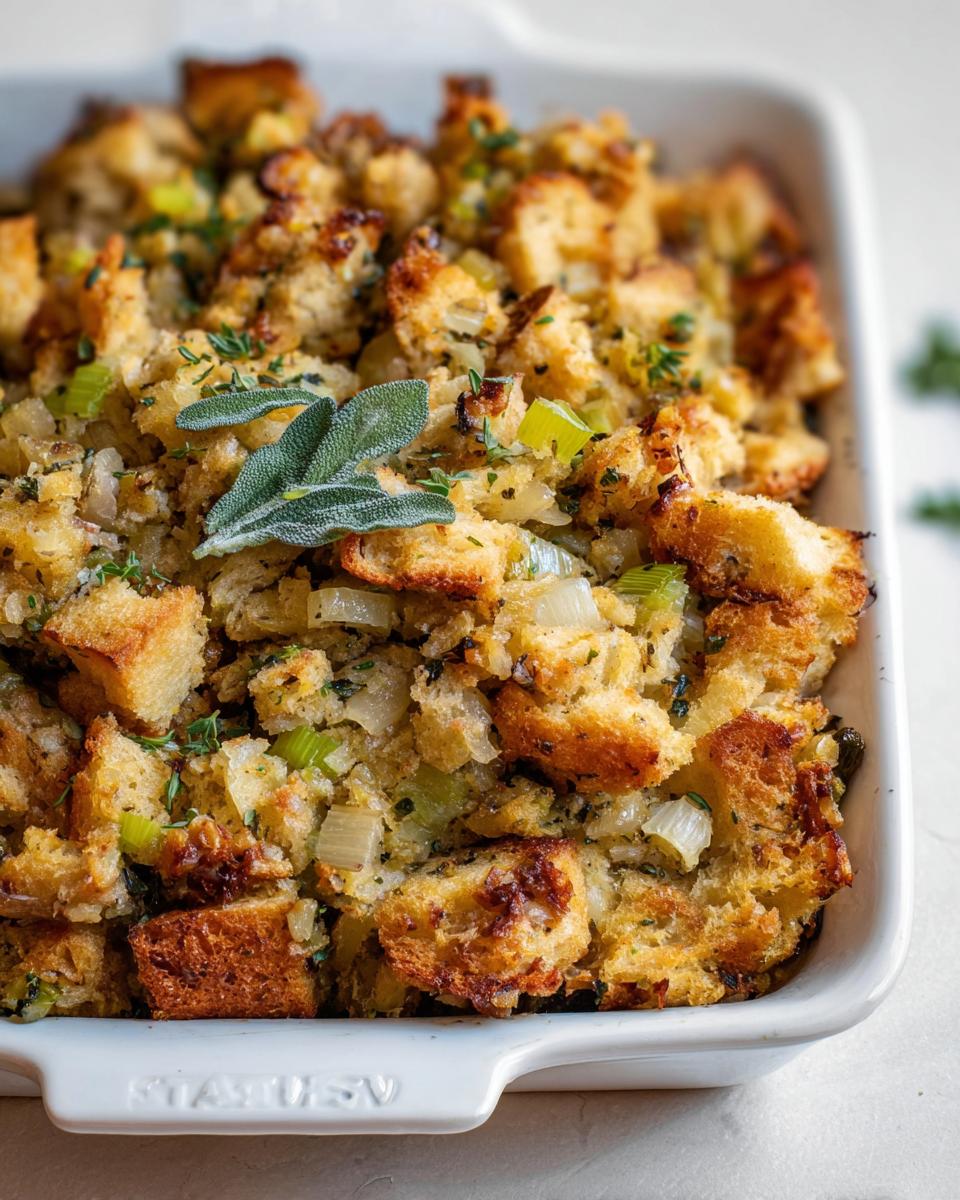
Rest and Serve: Once it’s done, carefully take the stuffing out of the oven. And this is important: let it rest for about 60 minutes before serving. This resting time lets all those flavors meld together beautifully and ensures it’s the perfect temperature. If you’re making it ahead, this is the point where you’d cover it once it’s cooled and pop it in the fridge. For reheating, just take it out of the fridge about an hour before you want to warm it up in a 350°F oven, covered with foil initially if it looks dry. This stuffing is also fantastic for stuffing a bird, just make sure to follow safe stuffing procedures if you’re doing that!
This technique ensures your stuffing is moist on the inside with a lovely crisp on top, just how it should be. And hey, if you want to see another amazing stuffing, you can always check out this great recipe for inspiration!
Tips for Stuffing Success
You know, even with the best recipe, a few little tricks can make your stuffing absolutely sing. It’s all about those small things that build reader trust, right? First off, bread choice is HUGE. That stale or toasted bread? It’s non-negotiable for that perfect texture. If it’s too fresh, you’ll get… well, soggy bread pudding, and nobody wants that!
Moisture balance is another biggie. You want it moist enough to be tender, but not sopping wet. That’s why we add the egg and stock mixture gradually. If it feels a little dry, a splash more broth is your friend. Too wet? A few more toasted bread cubes can fix it right up.
And don’t be afraid to play with it! For more ideas on making your low-carb dishes shine, check out these fantastic low-carb Thanksgiving sides. They’re full of inspo that pairs perfectly with a great stuffing!
Making Your Stuffing Recipes Meal Prep That Actually Tastes Great Ahead of Time
Okay, this is where the real magic of meal prep shines through! The beauty of this stuffing is that you can totally make it a day or even two in advance. Honestly, I think it tastes even better after the flavors have had a chance to really meld together overnight. Once it’s baked and cooled, just pop it into an airtight container in the fridge. It’s perfect for those busy holiday weeks when you just need one less thing to worry about on the big day!
When it’s time to serve, just pull it out of the fridge about 60 minutes before you plan to reheat it. This helps it come to room temperature a bit, so it heats more evenly. Then, you can warm it up in a moderate oven (around 350°F or 175°C). I usually cover it with foil for the first 20-30 minutes to keep it from drying out, then uncover it for the last 10-15 minutes to get that lovely crisp-top texture back. It’s like a little bit of kitchen wizardry that saves you so much time!
If you’re looking for other make-ahead wonders, you should totally peek at this overnight French toast bake – it’s another one of my favorites for getting ahead!
Variations for Your Stuffing
You know, the beauty of this recipe is just how adaptable it is! I love that my Stuffing Recipes Meal Prep That Actually Tastes Great can be a total chameleon. It’s already perfect for gluten-free and low-carb folks, but we can jazz it up even more.
Feeling adventurous? Toss in some cooked, crumbled sausage or bacon for a savory kick. Love veggies? Sautéed mushrooms, leeks, or even some roasted butternut squash would be amazing additions. You can totally amp up the herb game too – maybe a pinch more thyme or a hint of marjoram?
If you’re even more adventurous, you could try a veggie-forward twist. Think of something like this veggie-packed fried rice – you could adapt some of those concepts with cauliflower rice or even finely chopped broccoli florets swapped in! The possibilities are endless, making this stuffing your own personal masterpiece.
Serving Suggestions
This delicious stuffing is a superstar on any plate! It’s, of course, amazing with your classic Thanksgiving turkey, but it’s also fantastic alongside roast chicken, pork tenderloin, or even a hearty vegetarian main dish. For a special touch, imagine it as part of a festive spread, like the ones you find on these elegant New Year’s Eve menus. It truly elevates any meal!
Frequently Asked Questions About Stuffing Recipes Meal Prep That Actually Tastes Great
Got questions about making this awesome stuffing? I totally get it! It’s always good to have those little clarifications. Here are some things people often ask me:
Can I use different types of bread for this stuffing?
Absolutely! While I love using a good gluten-free or low-carb bread for that texture, you can totally use other kinds. Sourdough adds a nice tang, and cornbread cubes make it super rich! Just make sure whatever bread you choose is stale or toasted so it doesn’t get mushy. It’s all about getting that perfect bite.
How do I make this stuffing vegetarian?
This is an easy switch! The only animal product is the chicken stock. Just swap it out for a good quality vegetable stock, and you’re golden! You might want to add a little extra salt and pepper if the veggie stock is a bit milder. It’s one of the simplest ways to adapt this recipe, and it’s so worth it for delicious vegetarian stuffing!
Can I freeze cooked stuffing?
Yes, you absolutely can! Once the stuffing is completely cooled after baking, pack it into an airtight container or wrap it really well. It should last in the freezer for about 2-3 months. When you’re ready to reheat, thaw it overnight in the fridge and then warm it up as directed in the make-ahead section. It’s perfect for planning ahead!
What if I don’t have fresh herbs?
Don’t sweat it! If you can’t find fresh herbs, you can definitely use dried ones. Just use about 1/3 of the amount called for fresh. So, for example, use about 1 tablespoon total of dried sage, parsley, and rosemary. Make sure to add them when you’re sautéing the veggies so they have time to rehydrate and release their flavor. Dried herbs are a lifesaver, and they still make this stuffing taste fantastic!
For even more recipe ideas and inspiration, definitely check out all the goodies over at my recipe page!
Nutritional Information
Just a heads-up, the nutritional info here is an estimate, folks! It can change depending on the exact brands of ingredients you use and even how you measure things. But generally, for one serving of this delicious stuffing, you’re looking at approximately 350-400 calories, about 20-25g of fat, 6-8g of protein, and 30-35g of carbs. Remember, that’s for a standard recipe – modifications for low-carb will obviously change those numbers drastically!
Stuffing Recipes Meal Prep That Actually Tastes Great
Ingredients
Equipment
Method
- Prepare your bread cubes. You can use stale or toasted bread. To toast, cut bread into cubes, place in a baking dish, tent with foil, and let sit overnight. Alternatively, toast cubes in the oven at 350 degrees F for about 15 minutes until crouton-like. Store-bought toasted cubes also work. You can choose small or larger cubes for a rustic texture.
- Preheat your oven to 350 degrees F. Prepare a 9×13 baking dish (or a larger dish/foil roasting pan) by brushing it with melted butter, olive oil, or nonstick spray. Place the bread cubes in a large mixing bowl or the prepared baking dish.
- Melt the butter in a large skillet or Dutch oven over medium heat. Add the diced onion, celery, and minced garlic. Season with salt and pepper (at least 1/2 to 1 teaspoon each). Cook until the vegetables soften, about 8 to 10 minutes. Stir in the chopped sage, parsley, and rosemary, and cook for another minute. Add 1 cup of stock and stir.
- Pour the vegetable and stock mixture over the bread cubes and toss to coat evenly.
- In a small bowl or measuring cup, whisk together the remaining 1 1/2 cups of stock and the 2 eggs.
- Pour the egg and stock mixture over the bread cubes. Stir and fold until the bread cubes are thoroughly combined.
- Bake the stuffing for 45 to 50 minutes, or until the internal temperature reaches 160 degrees F. If the stuffing begins to brown too quickly, you can tent it with foil.
- This stuffing can be made a day ahead and reheated. Remove the pan from the refrigerator 60 minutes before reheating. You can also use this mixture to stuff a bird.
Notes
Tried this recipe?
Let us know how it was!
Mindfulness & Emotional Wellness Specialist
I never thought I’d leave my career as a corporate litigation attorney, but a panic attack in a courthouse bathroom changed everything. After struggling with emotional eating for over a decade—starting in college and getting worse through the stress of law school—I realized that no diet could fix what was really going on inside me.
My breakthrough came through mindfulness meditation training. Working with Jon Kabat-Zinn’s protocols, I discovered that my relationship with food reflected deeper patterns of anxiety and perfectionism that I’d been avoiding for years. That’s when I understood that sustainable eating changes require internal transformation, not just external rules.
Now I treat meal preparation as meditation practice. My “Mindful Kitchen” workshops help people transform ordinary cooking into opportunities for self-awareness and emotional healing. I’ve developed over 180 recipes designed for slow, mindful preparation—complex enough to keep you present, simple enough not to overwhelm your nervous system.
I believe food becomes medicine when we approach it with presence rather than reactivity. The kitchen can be our monastery if we choose to enter it with reverence.