
There’s just something about pizza night, isn’t there? It’s more than just a meal; it’s an event! It’s that cozy feeling when everyone gathers, not to mention the sheer deliciousness that unfolds. If you’ve ever wondered Why Everyone Loves This Pizza Night Recipes (+ Make-Ahead Tips), well, you’ve come to the right place! I remember during the pandemic, when things felt so uncertain, I decided to host a little pizza night for a few close friends. We rolled up our sleeves, tossed dough, smeared sauce, and piled on the cheese – it was like our own little culinary art class! The best part? I’d prepped some of the dough and sauce beforehand, which made the whole evening super relaxed and spontaneous. Seeing everyone’s happy faces with their homemade creations just melted my heart and reminded me how cooking can really bring people together, pure and simple.
Why Everyone Loves This Pizza Night Recipes (+ Make-Ahead Tips)
Okay, so this is the part where we really dive into what makes this pizza recipe a total winner for your next get-together. Forget those boring weeknight dinners; this is about pure, unadulterated pizza night joy! What I love most about this recipe is how it just *works*. It’s not complicated, but it delivers that amazing homemade taste that just makes everyone smile. It’s perfect for those moments when you want to create some real family fun without spending hours stressed in the kitchen. Trust me, this one’s a keeper!
The Magic of Homemade Pizza Night
There’s something so special about a homemade pizza night. It’s not just about the fantastic food, though that’s a huge part of it! It’s about the whole experience. When you’re all gathered around, maybe getting a little flour on your nose, stretching out the dough, and deciding just how much cheese is *enough* cheese (spoiler: it’s always more!), you’re making memories. This recipe is designed to bring that effortless fun and deliciousness right to your table, making every pizza night a guaranteed hit for everyone, from the littlest ones to the grown-ups.
Gather Your Ingredients for the Perfect Pizza
Alright, let’s get down to the delicious details! To make truly amazing pizza right in your own kitchen, you’ll want to gather these goodies. Don’t worry, most of this is probably already in your pantry or a quick trip to the store away. We’ll start with the foundation – the dough – and then move on to the saucy, cheesy goodness that makes it all sing.
For the Dough:
- 500 grams all-purpose flour, plus more for dusting
- 1 gram active dry yeast (that’s about 1/4 teaspoon, so tiny!)
- 16 grams fine sea salt (around 2 teaspoons)
- 350 grams water (about 1 1/2 cups)
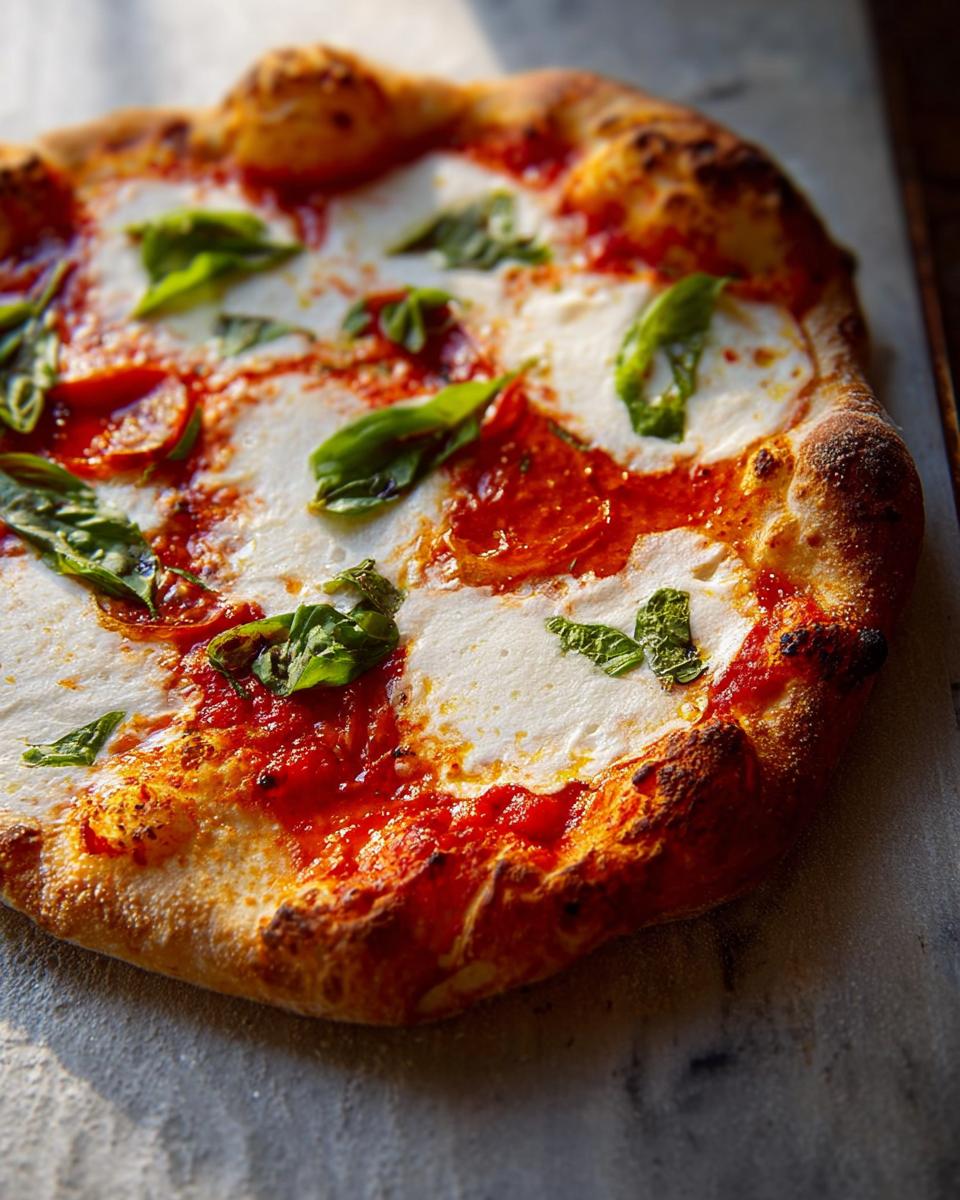
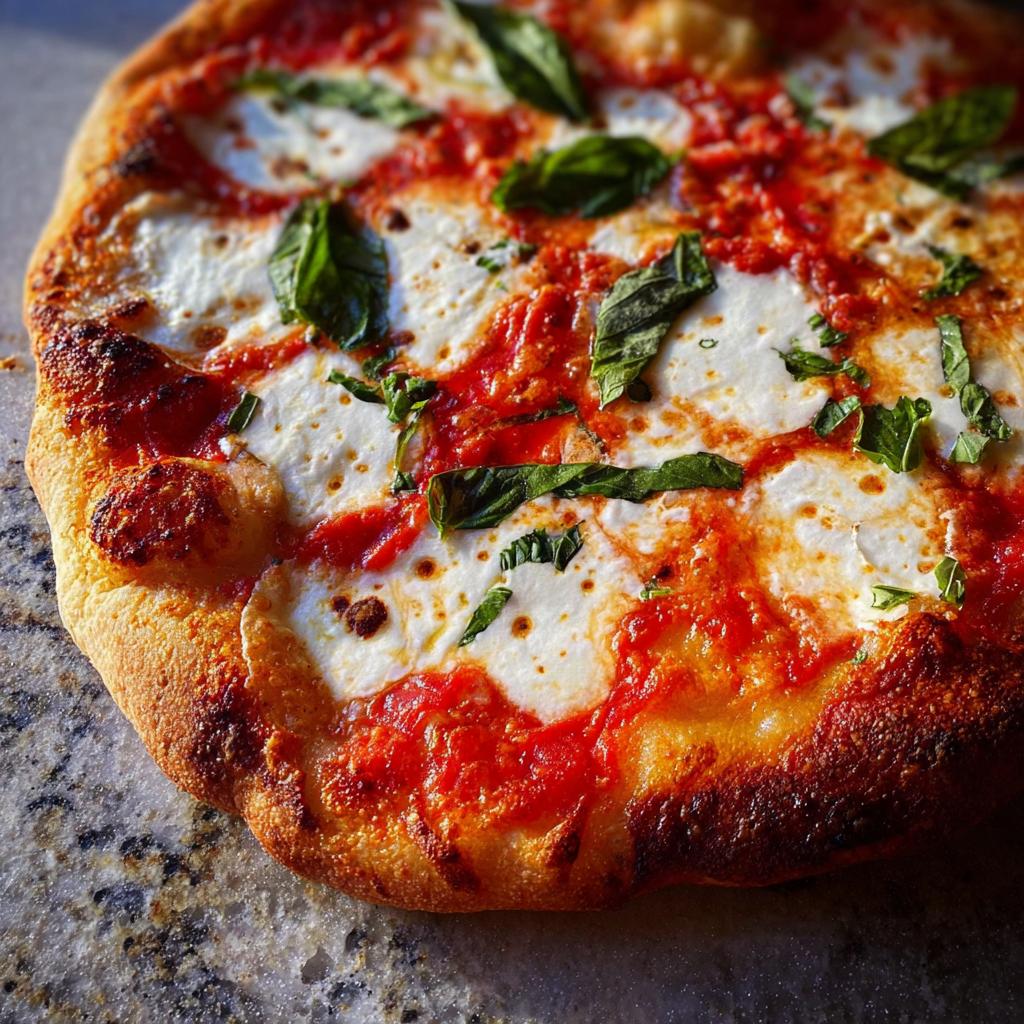
For Assembling and Baking the Margherita Pie:
- 4 pizza dough balls (from the dough we just made!)
- 1 (28-ounce can) peeled Italian tomatoes (or about 8-10 fresh Roma tomatoes, peeled)
- 2 tablespoons extra-virgin olive oil
- 1 teaspoon fine sea salt
- 2 pounds fresh mozzarella cheese, torn into generous chunks
- 20 fresh basil leaves (or as many as your heart desires!)
- 3/4 cup Parmigiano-Reggiano cheese, finely grated
Ingredient Notes and Substitutions
A few notes on these ingredients to make sure your pizza is just perfect! For the flour, all-purpose is my go-to because it’s easy to find and works beautifully. If you’re feeling adventurous, you could try a mix with some bread flour for a chewier crust, but regular all-purpose is fantastic. That tiny bit of yeast? It’s all you need for a lovely rise. And for the tomatoes, good quality canned San Marzano tomatoes are a dream, but if you have super ripe Romas from the farmer’s market, go for it! Just make sure they’re peeled. As for the mozzarella, fresh is key here. Avoid the pre-shredded stuff; it just doesn’t melt the same way. Torn chunks give you those lovely gooey pockets of cheese.
Crafting Your Delicious Pizza: Step-by-Step Instructions
Okay, let’s get this pizza party started! Making your own pizza is seriously one of the most rewarding things you can do in the kitchen. It’s all about taking a little time, letting the dough do its thing, and then watching pure magic happen in the oven. So, grab your apron, and let’s make some pizza! For more amazing recipes like this, you can always check out our recipe collection.
- First things first, let’s get that dough ready for its second rise (or get it out of the fridge if you prepped ahead!). Punch it down gently and divide it into your four pizza beauties. On a lightly floured surface, coax each piece into a nice, round pizza shape. Don’t fuss too much if it’s not perfect; rustic is charming!
- Now for the sauce. If you’re using canned tomatoes, give them a good squish with your hands or a fork right in a bowl. Stir in that lovely olive oil and a pinch of salt. Spread this deliciousness thinly over each pizza base, leaving about an inch or so for that crispy crust edge.
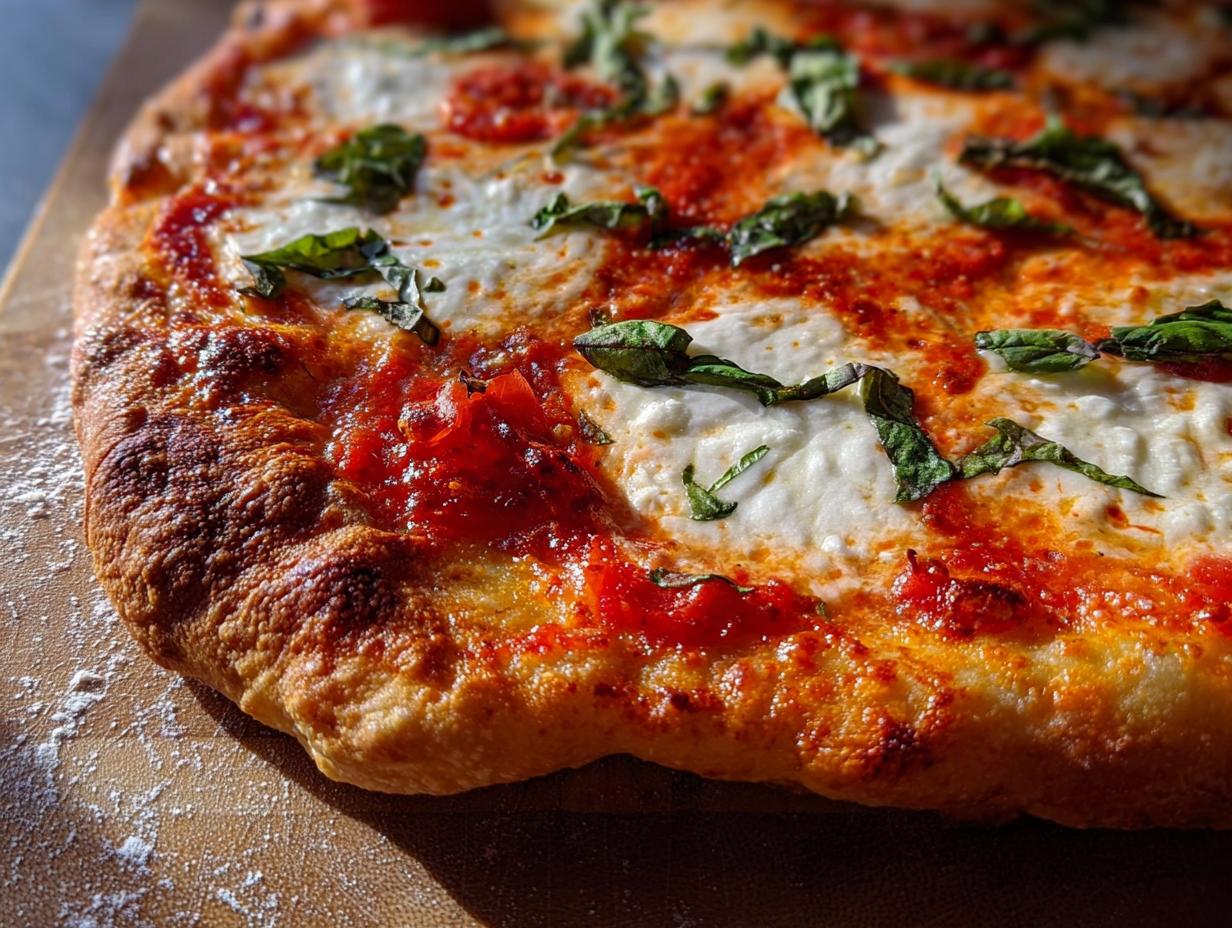
- Time for the best part: cheese! Tear up that fresh mozzarella and scatter it like a dream all over the sauce. Then, tuck in those fresh basil leaves – they’ll wilt and get fragrant in the oven, oh so good!
-
Carefully slide your pizzas onto your super-hot baking sheet or pizza stone. Pop ’em in the oven and watch them transform for about 10-15 minutes. You’re looking for a gorgeously golden-brown crust and that bubbly, melted cheese bliss. For more inspiration on killer pizza, you might want to peek at some other pizza recipes too!
-
Once they’re out, give them a final flourish with that grated Parmigiano-Reggiano cheese. Slice ’em up and dig in! It’s honestly that simple to get a taste of Italy right in your home.
Tips for Perfect Pizza Dough
When you’re working with pizza dough, a little patience goes a long, long way. After your dough has rested and doubled in size, handle it gently. Think of it like a fluffy cloud! When you’re shaping it, try not to overwork it, or it’ll get tough. Sticking it in the fridge for a day or two is my secret weapon for flavor development – it really makes a difference. If it’s a bit stubborn to stretch, just let it sit for 5 minutes; it’ll relax and cooperate. And remember, a little flour on your hands and surface helps prevent sticking without making the dough dry.
Achieving the Perfect Bake
Oven temperature is your best friend here! Crank it up as high as it will go, usually around 500°F (260°C) or even higher if your oven allows. A super hot oven is key for that crispy, slightly charred crust that makes pizza perfection. Make sure your baking sheet or pizza stone is preheated for at least 20-30 minutes before the pizza goes on. You’ll know it’s done when the crust is puffed up and golden, and the cheese is molten and bubbly, maybe even with a few lovely browned spots. Keep an eye on it; ovens can be tricky!
Make-Ahead Magic for Stress-Free Pizza Nights
You know what makes pizza night *even better*? Knowing that most of the work is already done! This is where the make-ahead magic really shines. It means you can have amazing homemade pizza without the last-minute rush. It’s perfect for those busy weeknights or when unexpected guests pop over, and you want to whip up something special without breaking a sweat. Trust me, having your dough and sauce ready to go turns a good pizza night into an absolutely *great* one. It’s all about smart prep! For more make-ahead ideas, check out this overnight french toast bake or these stuffed mushrooms!
Storing Your Prepared Pizza Components
So, how do we pull off this make-ahead wizardry? For the dough, once it’s risen, punch it down gently, divide it into your four balls, and pop each one into a separate lightly oiled container or zip-top bag. You can keep these in the fridge for up to 3 days – the flavor actually gets even better! The sauce is just as easy. Just store it in an airtight container in the fridge for a day or two. Easy peasy!
Frequently Asked Questions About This Pizza Recipe
Got questions about making our amazing pizza? I’ve got you covered! Here are some things people often ask, and I’m happy to share the answers to make your pizza night absolutely perfect.
Can I use store-bought pizza dough?
Oh, absolutely! If you’re short on time or just want a shortcut, store-bought dough totally works. Just let it come to room temperature before shaping, and follow the rest of the recipe for the sauce and toppings. It’s a great way to still get that delicious homemade pizza feel on a busy night!
What are some other tasty topping ideas?
The beauty of homemade pizza is you can put *anything* on it! Beyond the classic Margherita, try adding some spicy pepperoni (a kid favorite!), sautéed mushrooms and onions, or even some caramelized onions with goat cheese. A sprinkle of red pepper flakes before baking adds a nice little kick too. Get creative and have fun with it!
How do I reheat leftover pizza?
Leftovers? Amazing! For the crispiest crust, I actually avoid the microwave. Instead, pop a slice on a baking sheet in a preheated oven (around 375°F or 190°C) for about 5-10 minutes until it’s hot and the cheese is melty again. A skillet on the stovetop works wonders too!
Can I freeze the pizza dough?
Yes, you can! Once you’ve made the dough balls, you can freeze them. Wrap them tightly in plastic wrap, then pop them into a freezer-safe bag. When you’re ready to use them, just transfer the dough ball to the fridge to thaw overnight. It’s like having pizza-ready magic waiting for you!
Serving and Enjoying Your Homemade Pizza
Alright, your masterpiece is out of the oven! Now, how do we make this pizza night even more epic? For a perfect pairing, you can’t go wrong with a light, zesty side. Might I suggest a fresh green salad with a simple vinaigrette, or perhaps some crispy roasted vegetables? For more ideas, you can check out my lemon herb chicken orzo skillet or browse through these healthy dinner ideas! Don’t forget a nice, cool drink, and let the feasting begin!
Estimated Nutritional Information
So, you’re curious about the stats, huh? While it’s tricky to nail down exact numbers since everyone’s pizza creation will be a little different, here’s a ballpark for one serving (assuming 4 servings per pizza): expect around 600-700 calories, 25-30g of fat, 30-35g of protein, and 60-70g of carbohydrates. Remember, this is just a guide – your toppings and portion sizes can totally change things!
Share Your Pizza Night Creations!
Alright, pizza lovers! Now that you’ve (hopefully!) tried this recipe, I *really* want to hear all about it! Did you add a crazy topping combo? Did the kids help out? Snap a pic and share it with me! Don’t forget to leave a comment below or rate the recipe – your feedback makes my day and helps other cooks too. You can also reach out through my contact page!
Why Everyone Loves This Pizza Night Recipes (+ Make-Ahead Tips)
Ingredients
Equipment
Method
- To make the dough, combine flour, yeast, and salt in a large bowl. Gradually add water and mix until a shaggy dough forms. Turn the dough out onto a lightly floured surface and knead for about 10 minutes until smooth and elastic. Place the dough in a lightly oiled bowl, cover, and let it rest in a warm place for about 1 hour, or until doubled in size. For make-ahead, you can refrigerate the dough for up to 3 days.
- When ready to bake, preheat your oven to its highest setting, ideally with a pizza stone or baking sheet inside. If using canned tomatoes, crush them by hand or with a fork. Stir in the olive oil and salt.
- Divide the rested dough into 4 equal portions. On a lightly floured surface, shape each portion into a pizza crust. Spread a thin layer of the tomato sauce over each crust, leaving a small border for the edge.
- Distribute the torn mozzarella cheese evenly over the sauce. Add fresh basil leaves.
- Carefully transfer the pizzas to the preheated oven. Bake for 10-15 minutes, or until the crust is golden brown and the cheese is bubbly and melted.
- Remove the pizzas from the oven. Sprinkle with grated Parmigiano-Reggiano cheese before slicing and serving.
Notes
Tried this recipe?
Let us know how it was!
Dual-Restriction Recipe Engineer & Cross-Contamination Specialist
Everything changed when my teenage son got hit with celiac disease and Type 1 diabetes diagnoses within six months of each other. Suddenly, pizza and pasta were off the table, and most “diabetic-friendly” foods contained gluten. I went from regular mom cooking to navigating what I call “compound restriction cooking”—and I had a kid’s appetite and taste buds to satisfy.
Lucky for us, my background in pharmaceutical quality control gave me the systematic mindset this level of precision requires. My kitchen now operates under pharmaceutical-grade protocols adapted for home use: dedicated prep surfaces, separate storage systems, and testing procedures that verify both carb counts and gluten absence before any recipe gets published.
I’ve developed over 220 recipes that clear multiple dietary hurdles simultaneously—finding gluten-free thickeners that don’t spike blood sugar, creating bread alternatives that meet both keto ratios and celiac safety, and developing desserts that actually taste good to a teenager despite impossible restrictions.
Through my “Safe Kitchen Certification” program, I teach other parents that managing multiple dietary restrictions isn’t about multiplying limitations—it’s about systematic thinking that reveals unexpected possibilities. When you engineer solutions instead of making compromises, restriction becomes innovation rather than deprivation.