
You know those days when only pure comfort food will do? The kind where you just want something warm, gooey, and utterly satisfying? Well, forget your basic sandwich because today, we’re diving headfirst into the glorious, transformative world of a Garlic Bread Grilled Cheese! Trust me, this isn’t your grandma’s grilled cheese (though bless her for the original!). One chilly afternoon, staring down a simple craving, I looked at a leftover loaf of my homemade garlic bread, and BAM! It hit me. Why not marry the best of both worlds? The result? A sandwich so ridiculously delicious, so packed with buttery, garlicky goodness and perfectly melted cheese, it’ll have you feeling that sweet, nostalgic comfort in every single bite. It’s proof that sometimes, the most magical creations happen when you just play around in the kitchen!
Why You’ll Love This Garlic Bread Grilled Cheese
Seriously, who wouldn’t love this sandwich? It’s a total game-changer, and here’s why:
- Super Easy to Make: You probably have most of the ingredients already! It comes together in a flash for a speedy meal.
- Flavor Explosion: That yummy garlic butter coating? It makes the bread unbelievably crispy and flavorful. Plus, melty cheese! Yes, please.
- Ultimate Comfort Food: This is like a warm hug in sandwich form. Perfect for cozy nights in or when you need a little pick-me-up.
- Quick Cooking Time: Done in about 15 minutes total – from start to finish. Perfect for when hunger strikes fast!
Gather Your Ingredients for the Ultimate Garlic Bread Grilled Cheese
Okay, so to whip up this magic, you’ll need a few simple things. First up, let’s get that amazing garlic butter ready. You’ll need about 4 tablespoons of butter that’s softened up – not melted, just nice and easy to spread. Then, we’ll add 1 tablespoon of mayonnaise for extra creaminess and tang, about 3 fat cloves of garlic that you’ll mince up super fine, and 1 tablespoon of fresh Italian parsley, chopped up tiny. A little salt and pepper to taste, of course!
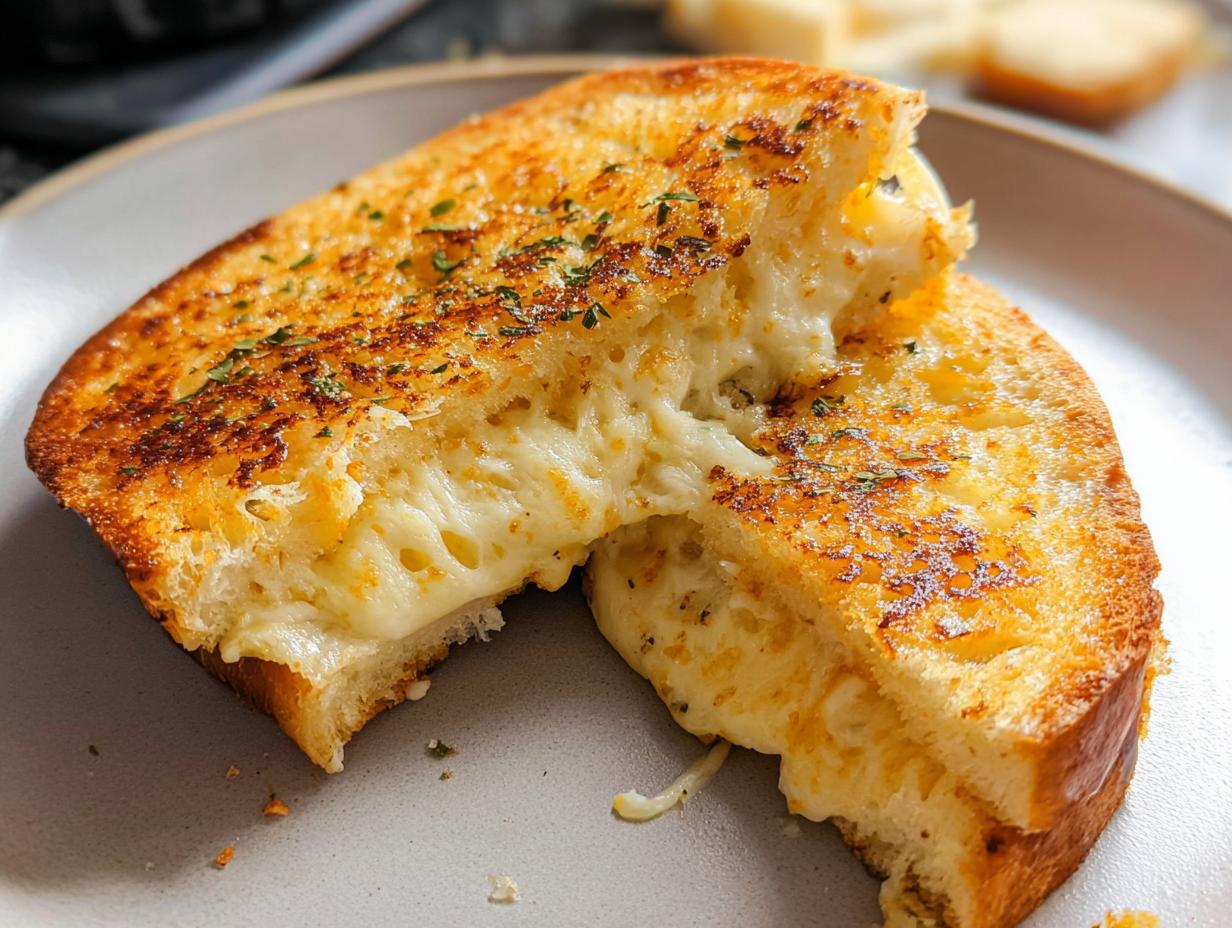
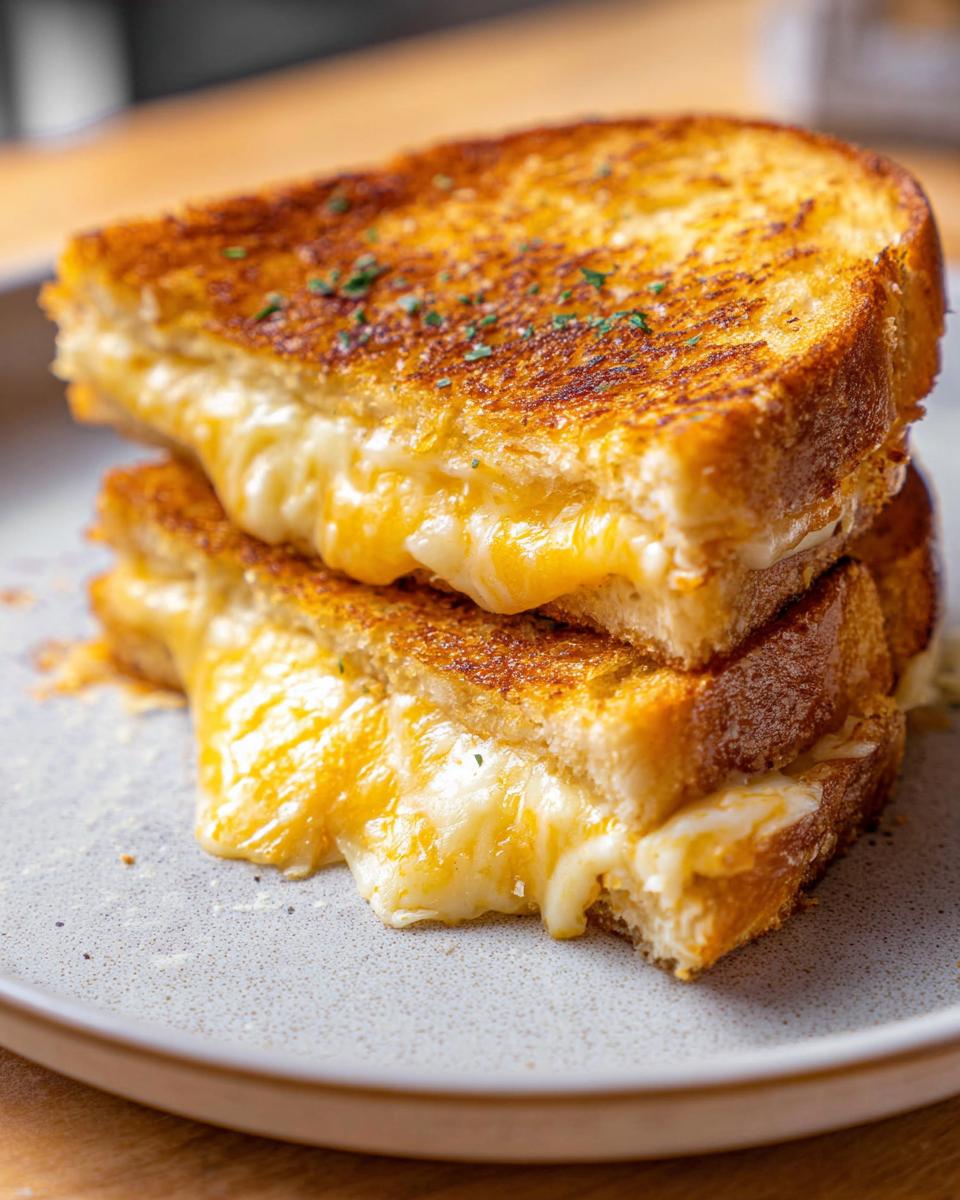
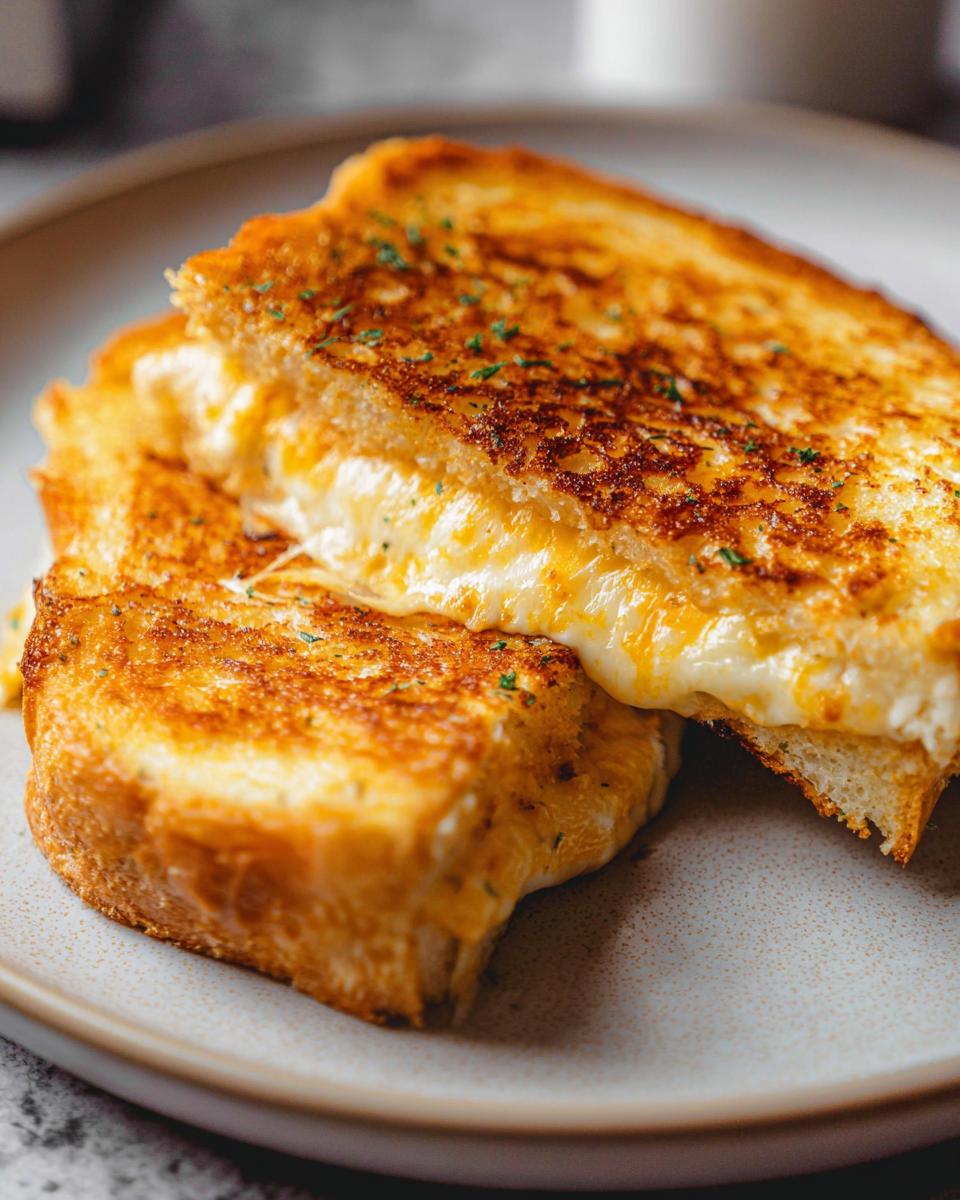
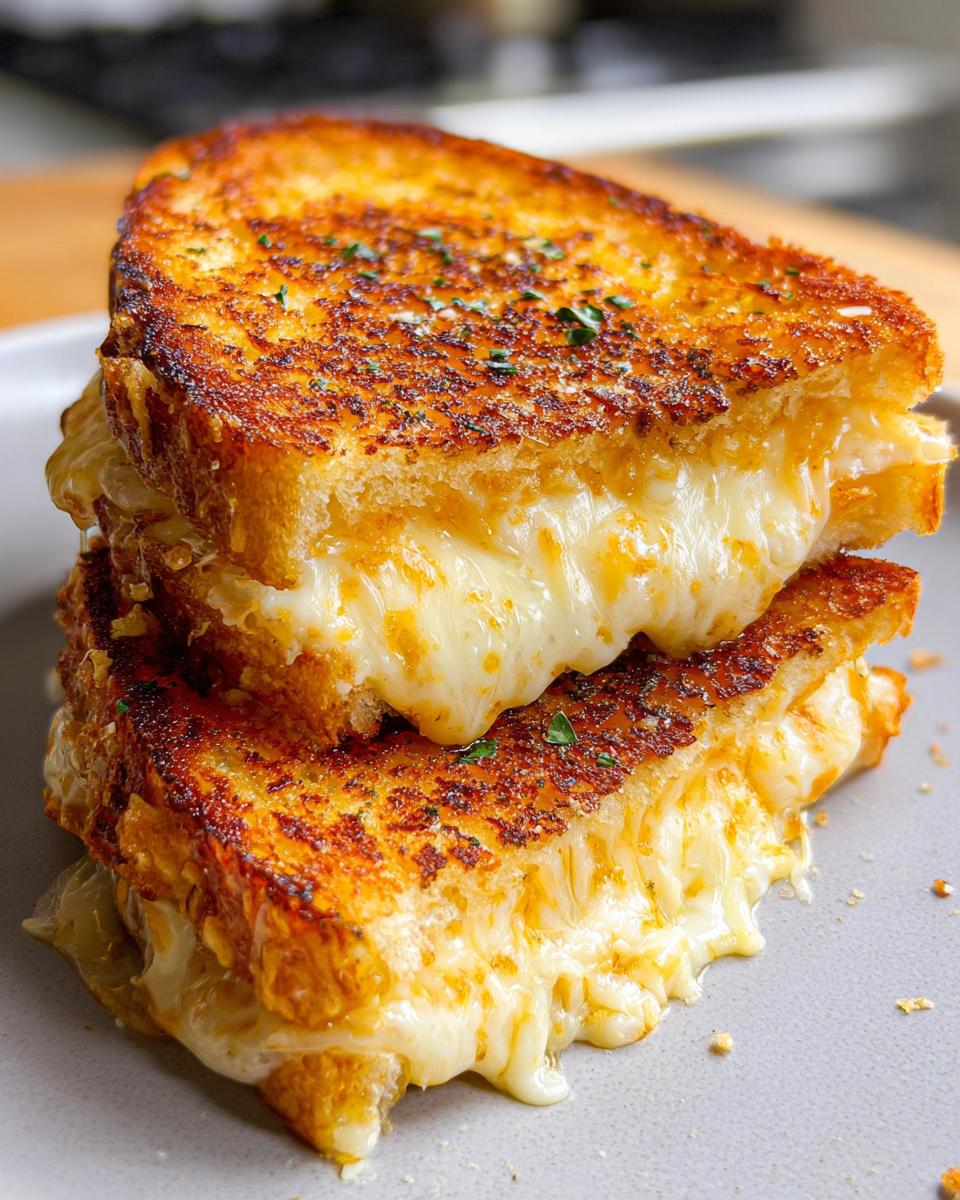
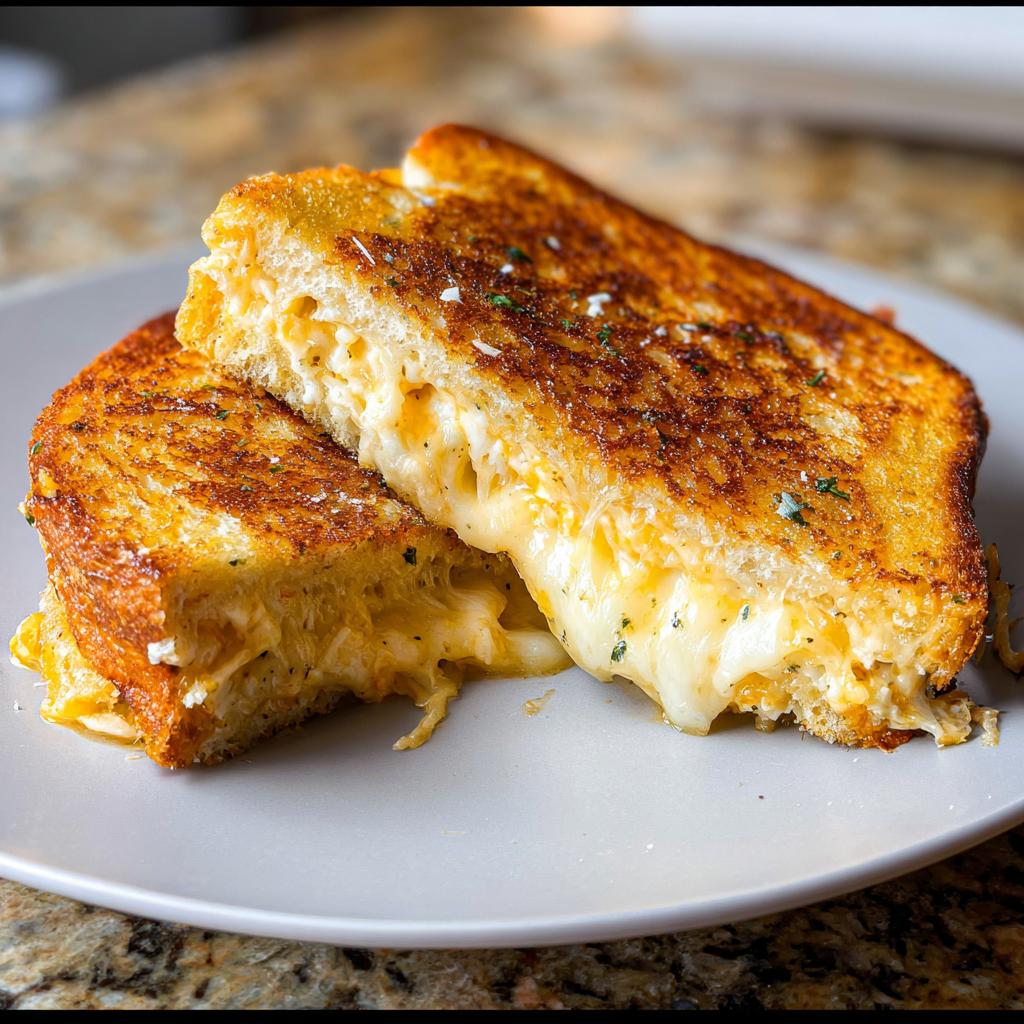
For the star of the show, the sandwich itself, grab 4 slices of your favorite bread. I’m a big fan of sourdough with a soft crust for this, but anything that holds up well will be great. And for the gooey, cheesy heart of it all? You’ll want about 1 cup of freshly shredded cheese. I absolutely love a mix of Gruyere, Colby Jack, and smoked Cheddar, but feel free to play around!
Crafting Your Perfect Garlic Bread Grilled Cheese: Step-by-Step
Alright, culinary adventurers, let’s get down to business! Making this incredible Garlic Bread Grilled Cheese is super simple, but paying attention to a few little things makes all the difference. First up, let’s get that glorious garlic butter mixture ready. In a small bowl, just toss together your softened butter, that little bit of mayo for extra silkiness, your finely minced garlic (use fresh, okay?), and that bright Italian parsley. Give it all a good stir until it’s perfectly combined and smells heavenly. Don’t forget to season it with a little salt and pepper – taste as you go!
Now for the sandwich assembly! Take your bread slices and generously slather that homemade garlic butter on ONE side of EACH slice. You want good coverage here for maximum flavor and crispiness. Next, take two of those buttered slices and pile on your shredded cheese. Get it nice and cheesy! Then, place the other two buttered bread slices on top, buttered side facing UP. This is key!
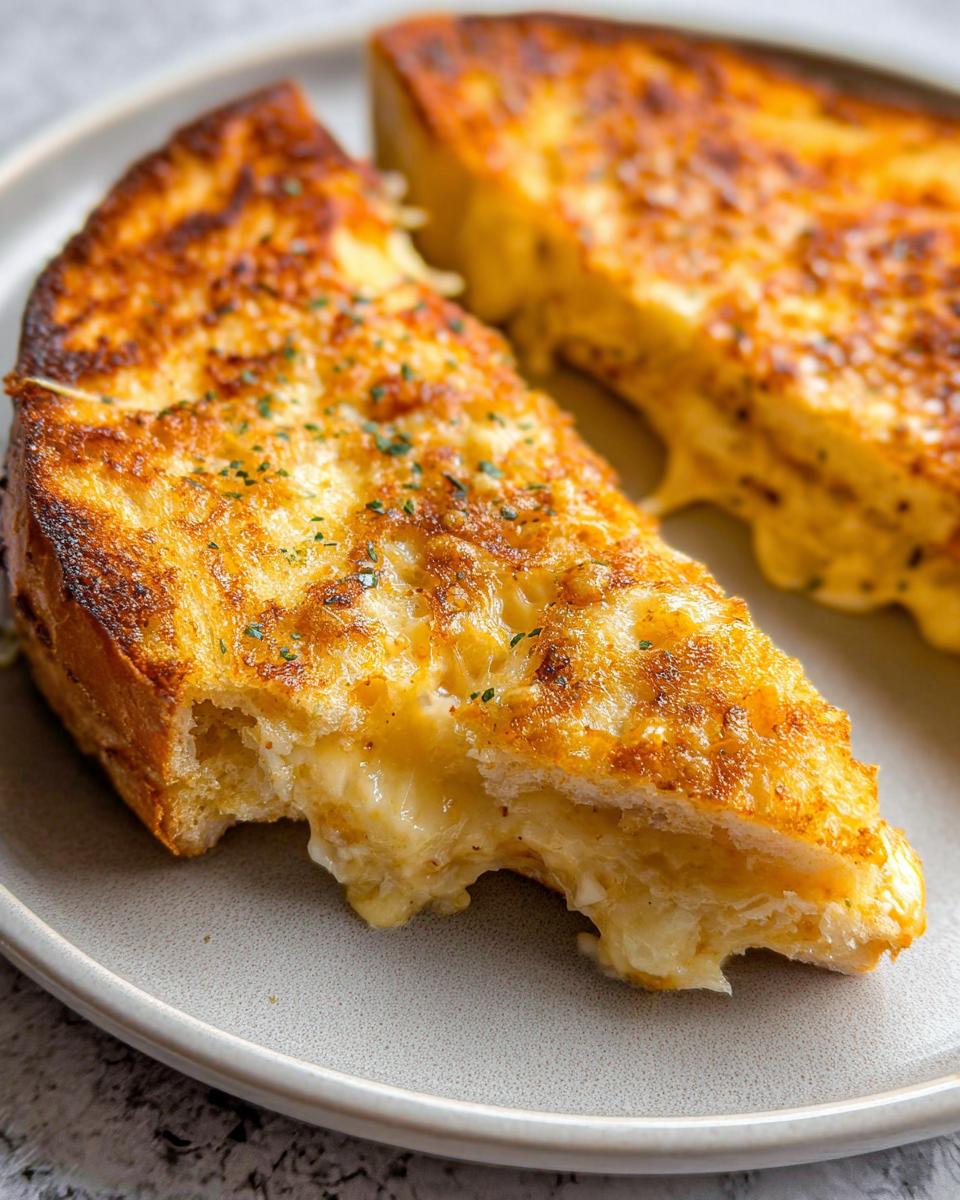
Time to cook! Heat up your non-stick skillet or griddle over medium-low heat. Seriously, don’t rush this! Cooking on medium-low is our secret weapon here. It lets the cheese melt into a glorious, gooey pool without burning the beautiful garlic butter crust. Once the pan is nice and warm, carefully place your assembled sandwiches in. Let them cook for about 5 minutes per side. You’re looking for that perfect golden-brown color and that tell-tale sign of a happy cheese pull!
Don’t be afraid to gently flip them a couple of times and give them a little press with your spatula. This helps ensure everything heats evenly and that the cheese melts all the way through. Once they’re beautifully golden and the cheese is doing its melty dance, slide them out of the pan.
And just like that, your masterpiece is ready! Slice them right down the middle and serve them up immediately. There’s nothing quite like that first warm, gooey, garlicky bite. Enjoy every moment!
Tips for the Best Garlic Bread Grilled Cheese
Okay, so you want to make the *absolute best* Garlic Bread Grilled Cheese? I’ve got you covered! It’s all about a few little tricks that make a huge difference. First things first, and this is super important: use freshly grated cheese! Pre-shredded stuff has anti-caking agents that can make it melt weirdly. Grating it yourself means you get that super smooth, stretchy cheese pull. And remember what I said about the heat? Medium-low is your best friend. It gives the cheese ages to melt beautifully without turning your gorgeous garlic bread into charcoal. Trust me, patience here pays off big time!
Also, don’t be shy with flipping and pressing. A gentle press with your spatula helps the sandwich heat through evenly, making sure that cheese gets fully gooey in the middle. And if you’re wondering about sticking, a good non-stick skillet is a lifesaver. It makes the whole process so much smoother. These little tips might seem small, but they’re what take your grilled cheese from ‘good’ to ‘OMG, I need another one right now!’ You can learn more easy cooking tips that are just as game-changing for other recipes too!
Variations and Substitutions for Your Garlic Bread Grilled Cheese
You know, the beauty of a great recipe is that it’s just a starting point! For our Garlic Bread Grilled Cheese, you can totally play around. Don’t love the cheese combo I suggested? No worries! Try Swiss for a nutty flavor, Monterey Jack for extra meltiness, Havarti for creamy goodness, Gouda for a bit of smoky depth, or even Muenster. And while I adore sourdough, a soft brioche or even a hearty whole wheat bread works wonders too. Feeling fancy? Toss in some roasted garlic cloves with your cheese, pile on some deli meat, a little bit of caramelized onion, or even some thinly sliced apples for a surprising sweet crunch. The possibilities are endless, so have fun and make it your own! You can even find easy recipes like this cowboy butter chicken linguine that are super versatile too!
Serving Suggestions for Garlic Bread Grilled Cheese
Now that you’ve got this amazing Garlic Bread Grilled Cheese, what do you serve it with? Honestly, it’s perfect all on its own, but if you want to make it a full meal, a classic bowl of creamy tomato soup is *divine* for dipping. A light side salad with a zesty vinaigrette offers a nice fresh contrast too. Or, if you’re feeling super casual, just grab some crunchy potato chips! For more cozy ideas, check out this creamy potato soup recipe.
Storage and Reheating Instructions
Got leftovers? Lucky you! To store your Garlic Bread Grilled Cheese, make sure to let it cool completely first. Then, wrap it up tightly in plastic wrap or pop it into an airtight container. It’s best eaten within a day or two. For reheating, I find the best way is back in a skillet over medium-low heat – it gets that crust nice and crispy again! You can also pop it in a toaster oven or regular oven at around 350°F (175°C) for a few minutes until warmed through and melty.
Frequently Asked Questions about Garlic Bread Grilled Cheese
Got questions about making the ultimate Garlic Bread Grilled Cheese? I’ve got answers!
What kind of bread is best for this recipe?
While I absolutely adore sourdough with a soft crust for this sandwich, you can really use any good quality sandwich bread. Just make sure it’s sturdy enough to hold all that delicious garlic butter and gooey cheese without falling apart. A hearty white bread or even a country loaf works great too!
Why do you recommend cooking it on medium-low heat?
This is super important, trust me! Cooking on medium-low heat gives the cheese inside plenty of time to melt into a gooey, luscious pool before the outside gets too dark or burns. If the heat’s too high, you’ll end up with burnt bread and unmelted cheese, and nobody wants that! Patience here is key for that perfect melt.
Can I use different kinds of cheese?
Absolutely! The suggested combo of Gruyere, Colby Jack, and smoked Cheddar is fantastic, but feel free to experiment. Swiss, Monterey Jack, Havarti, Gouda, or even a good old Muenster would be delicious. You can even do a blend of your favorites. The goal is a cheese that melts well and adds lots of flavor!
What if I don’t have fresh parsley?
No fresh parsley? No problem! You can skip it, or if you have dried parsley, use about a teaspoon of that. It won’t be quite as bright, but it’ll still add a nice touch. You could also try other fresh herbs like chives or even a tiny bit of fresh thyme if you have them on hand.
Can I add meat or other things to my Garlic Bread Grilled Cheese?
You bet! This is where you can really get creative. Toss in some thin slices of ham or turkey, maybe some leftover cooked chicken. Caramelized onions are amazing in this, or even some roasted garlic cloves mixed with the cheese. For something sweet and savory, a few thin slices of apple can be a surprising treat! For more easy recipe ideas that are perfect for busy nights, check out this sloppy joes recipe!
Nutritional Information
Here’s a general idea of what you’re getting in one delicious serving of our Garlic Bread Grilled Cheese. Keep in mind these are estimates and can change a bit depending on the exact ingredients you use!
- Calories: 621
- Carbohydrates: 28g
- Protein: 19g
- Fat: 49g
- Saturated Fat: 26g
- Cholesterol: 120mg
- Sodium: 834mg
- Potassium: 139mg
- Fiber: 1g
- Sugar: 3g
- Vitamin A: 1440 IU
- Vitamin C: 4mg
- Calcium: 523mg
- Iron: 2mg
Garlic Bread Grilled Cheese
Ingredients
Equipment
Method
- In a bowl, mix the softened butter, mayonnaise, garlic, and parsley until evenly combined. Season with a pinch of salt and pepper to taste.
- Spread the garlic butter mixture on one side of each bread slice. Top two slices with shredded cheese and cover with the remaining two slices, buttered side up.
- Heat a nonstick skillet over medium-low heat. Cooking on medium-low heat allows the cheese to fully melt before the crust browns too much.
- Once the skillet is warm, cook the sandwiches for about 5 minutes per side, until golden brown and the cheese is melted. You may need to flip them a few times and gently press them down to ensure the cheese melts evenly.
- Slice and serve immediately. Enjoy while warm and melty.
Nutrition
Notes
Tried this recipe?
Let us know how it was!
Visual Culinary Artist & Aesthetic Designer
When the pandemic killed my career as a luxury hotel photographer overnight, I was stuck in my studio apartment with nothing but time and vegetables. That’s when I started treating meal prep like photography projects—and discovered that the same principles that made five-star dishes camera-ready could turn humble zucchini noodles into social media gold.
My fine arts degree from Parsons taught me that people eat with their eyes first. After years behind the lens capturing haute cuisine, I realized that successful dieting often depends more on visual satisfaction than pure nutrition. When your food looks amazing, you actually want to stick with your eating plan.
My recipe development feels more like an art studio than a test kitchen. I use color theory to guide ingredient selections—purple cabbage with golden cauliflower, emerald herbs against ivory cheese. My “Edible Landscapes” series transforms standard low-carb ingredients into miniature scenic compositions that make vegetables feel aspirational rather than obligatory.
I spend evenings exploring art galleries and practicing watercolor painting, always looking for inspiration. My philosophy is simple: make low-carb food visually irresistible, and dietary compliance becomes an aesthetic choice rather than a health sacrifice.