
Oh, let’s be honest, who *doesn’t* love a good dessert? But for so many of us, especially those navigating dietary restrictions, that joy can come with a hefty side of complication. I remember the first time I really dove into making treats for my son after his diagnoses – it felt like climbing Mount Everest in flip-flops! So many “no’s,” so much worry. But then, after a few kitchen adventures (and a few mishaps, ha!), I landed on something truly special: my Healthy No-Bake Oreo Cheesecake Bites. They’re this amazing, wholesome twist on a classic treat that even my pickiest eaters devour. As a Dual-Restriction Recipe Engineer and Cross-Contamination Specialist, I’ve learned that with a little ingenuity, you can turn those challenges into delicious victories, and these bites are proof of that!
Why You’ll Love These Healthy No-Bake Oreo Cheesecake Bites
Oh, these little bites are total game-changers! Seriously, they’re ridiculously easy to whip up with no oven involved, making them perfect for when you’re short on time or want to get the kids involved. Plus, they taste just like the decadent, creamy, Oreo-filled dream you’re hoping for, but with a much friendlier ingredient list. Whether you’re dealing with dietary restrictions or just trying to make a slightly healthier choice, these are a winner. And trust me, the kids absolutely adore them – they disappear in a flash!

Ingredients for Your Healthy No-Bake Oreo Cheesecake Bites
Okay, gathering your ingredients is the easiest part! For the crust, you’ll want 12 Oreos, popped into the food processor until they’re nicely chopped, plus 3 tablespoons of melted butter. For that dreamy filling, grab 7 Oreos (roughly chopped this time!), 8 ounces of softened cream cheese – make sure it’s nice and soft, trust me on this! – ½ cup of powdered sugar, 1 teaspoon of vanilla extract, and 1 cup of heavy whipping cream. And for the perfect crunchy topping, we just need 5 more Oreos, also roughly chopped. Keep in mind, if you can find gluten-free or lower-sugar Oreos, they’d work wonderfully here to make these bites even more “healthy”!
Crafting Your Healthy No-Bake Oreo Cheesecake Bites: Step-by-Step
Alright, let’s get down to the fun part – making these amazing little cheesecake bites! It’s so straightforward, you’ll wonder why you ever bought them from a store. Watching my son’s face light up when he helped me sprinkle the final toppings was just priceless. Seriously, this is the kind of thing that makes cooking for dietary needs feel less like a chore and more like an adventure. We’re going to build these beauties layer by delicious layer! You can find some other fun dessert ideas here, too!
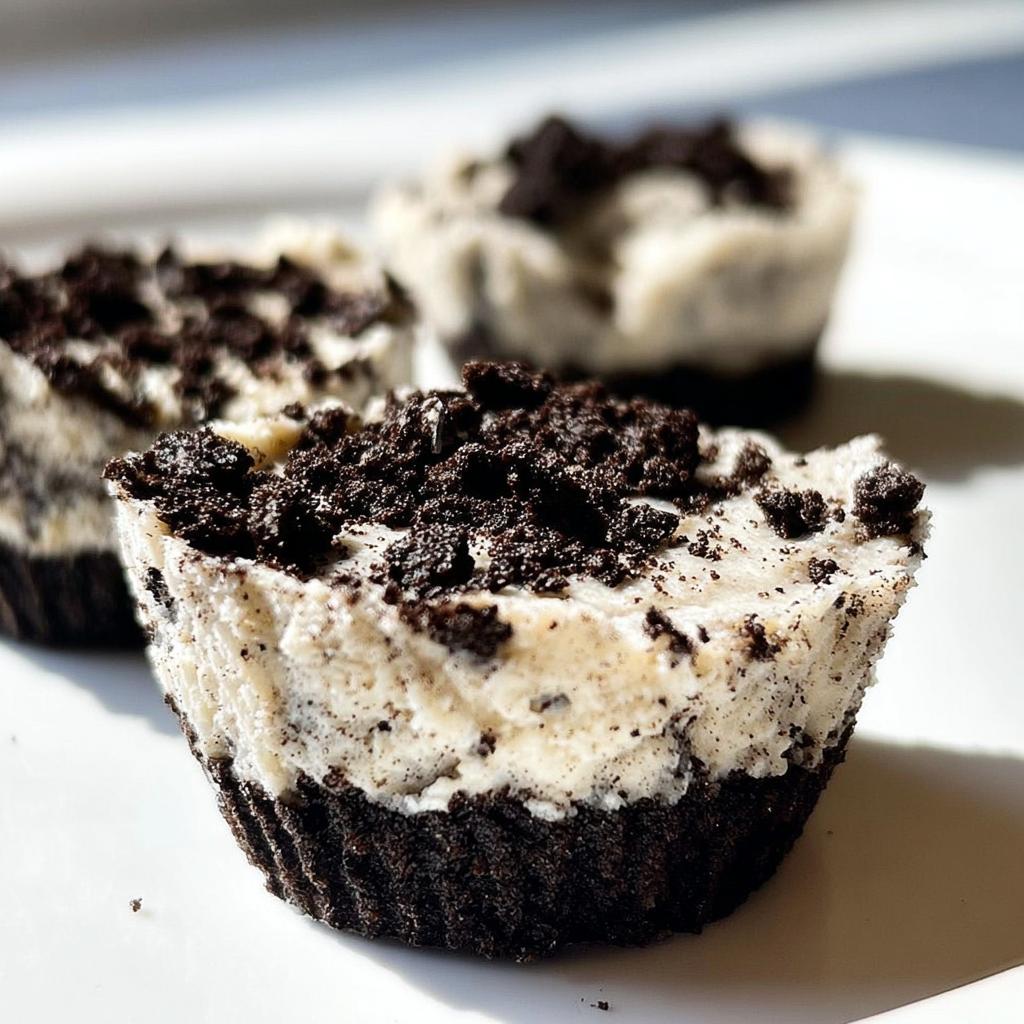
Preparing the Oreo Crust
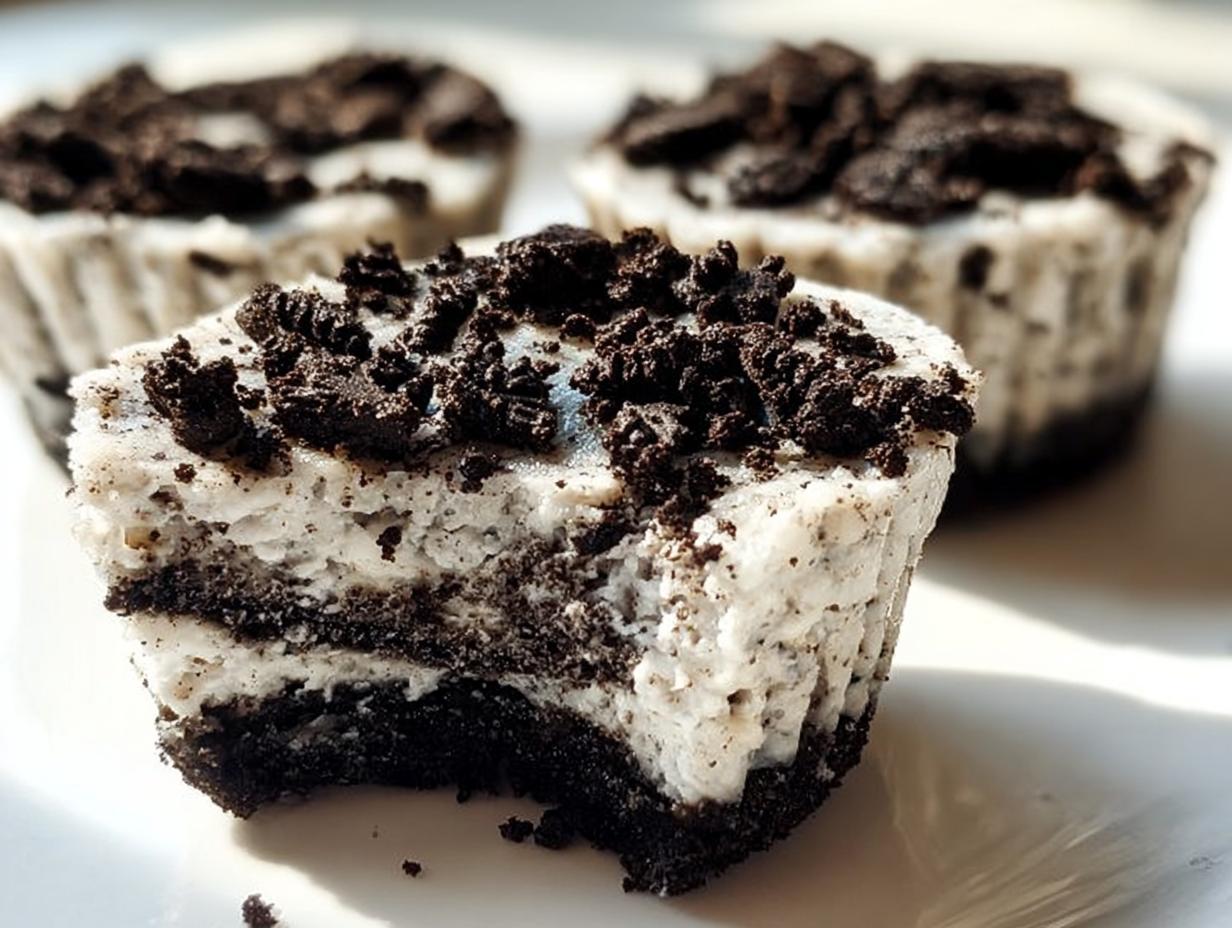
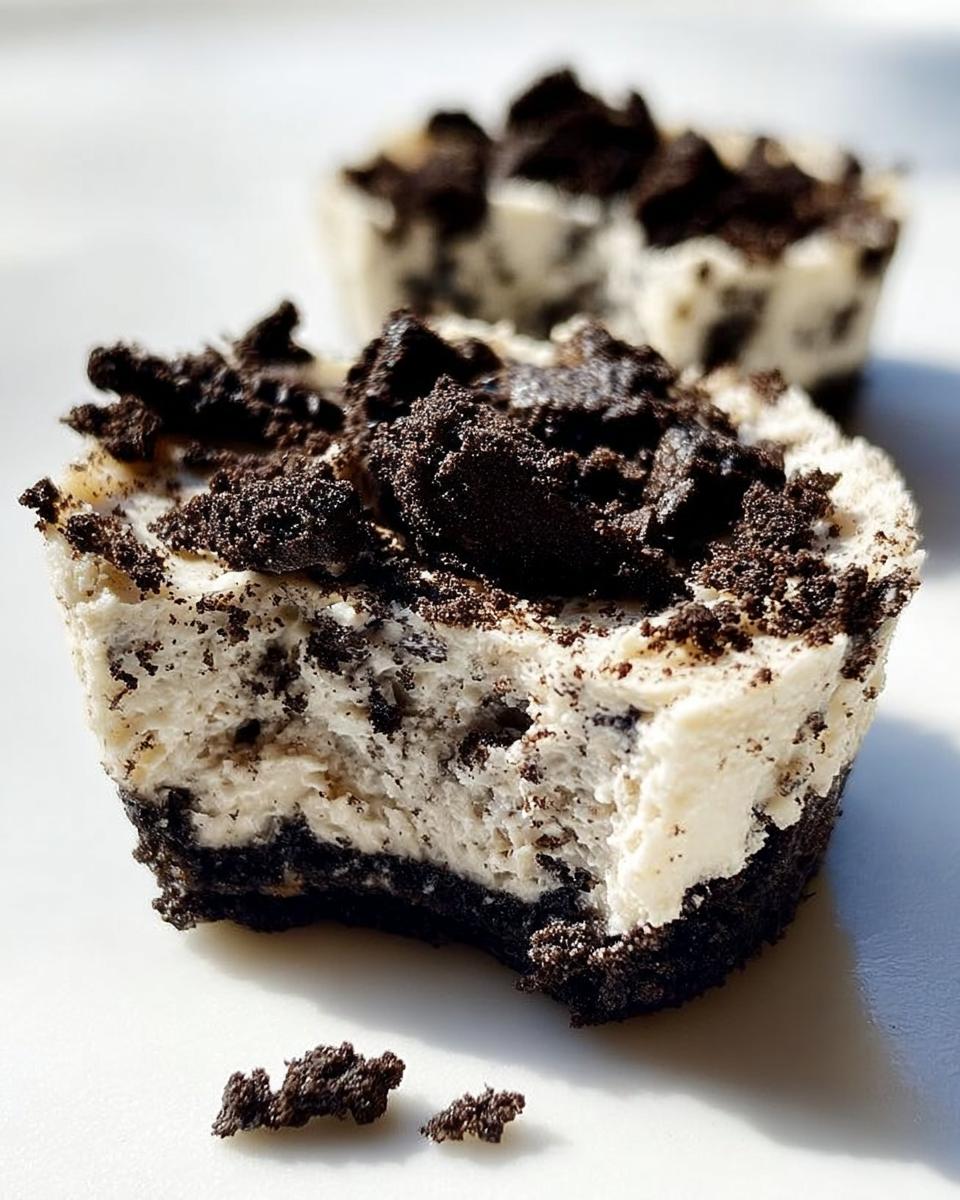
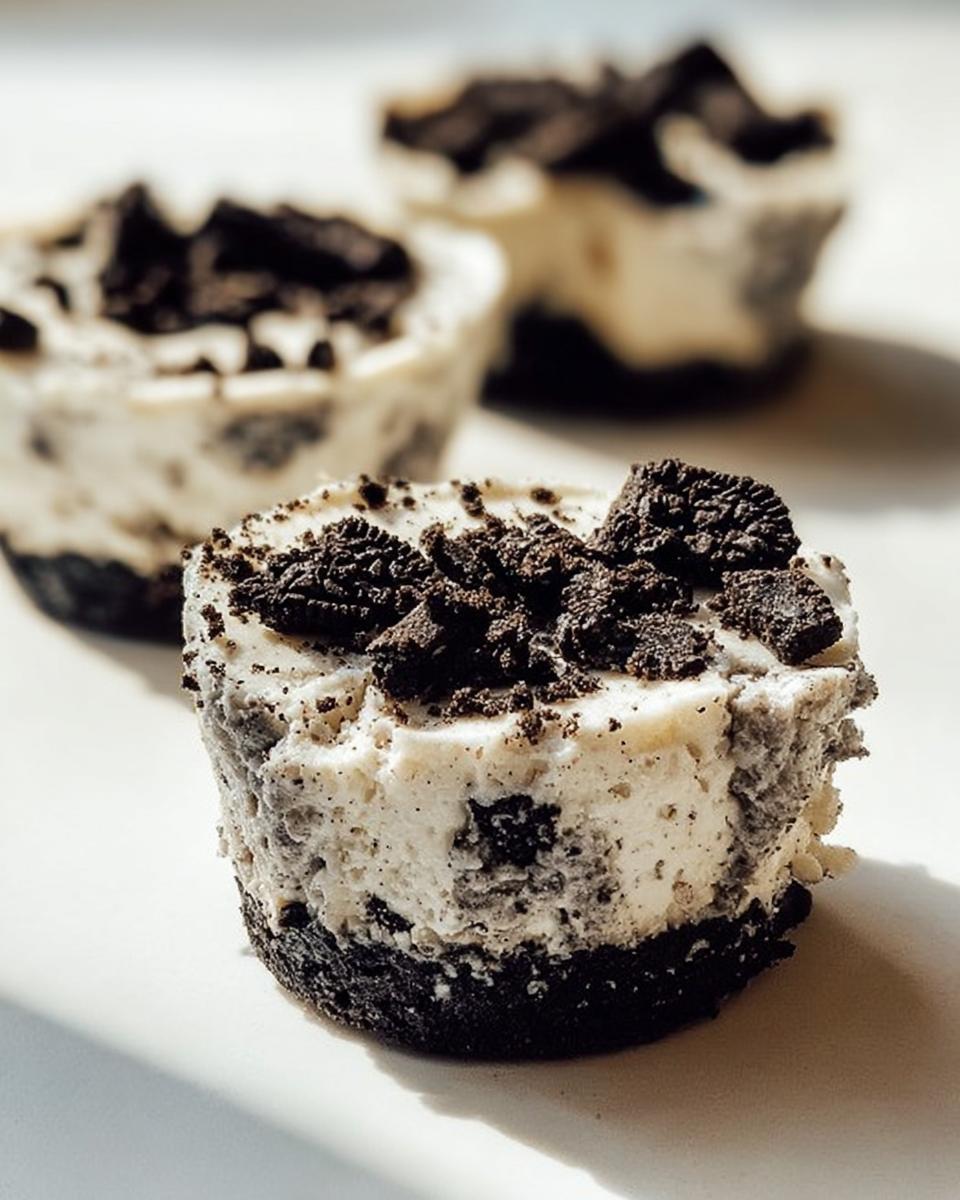
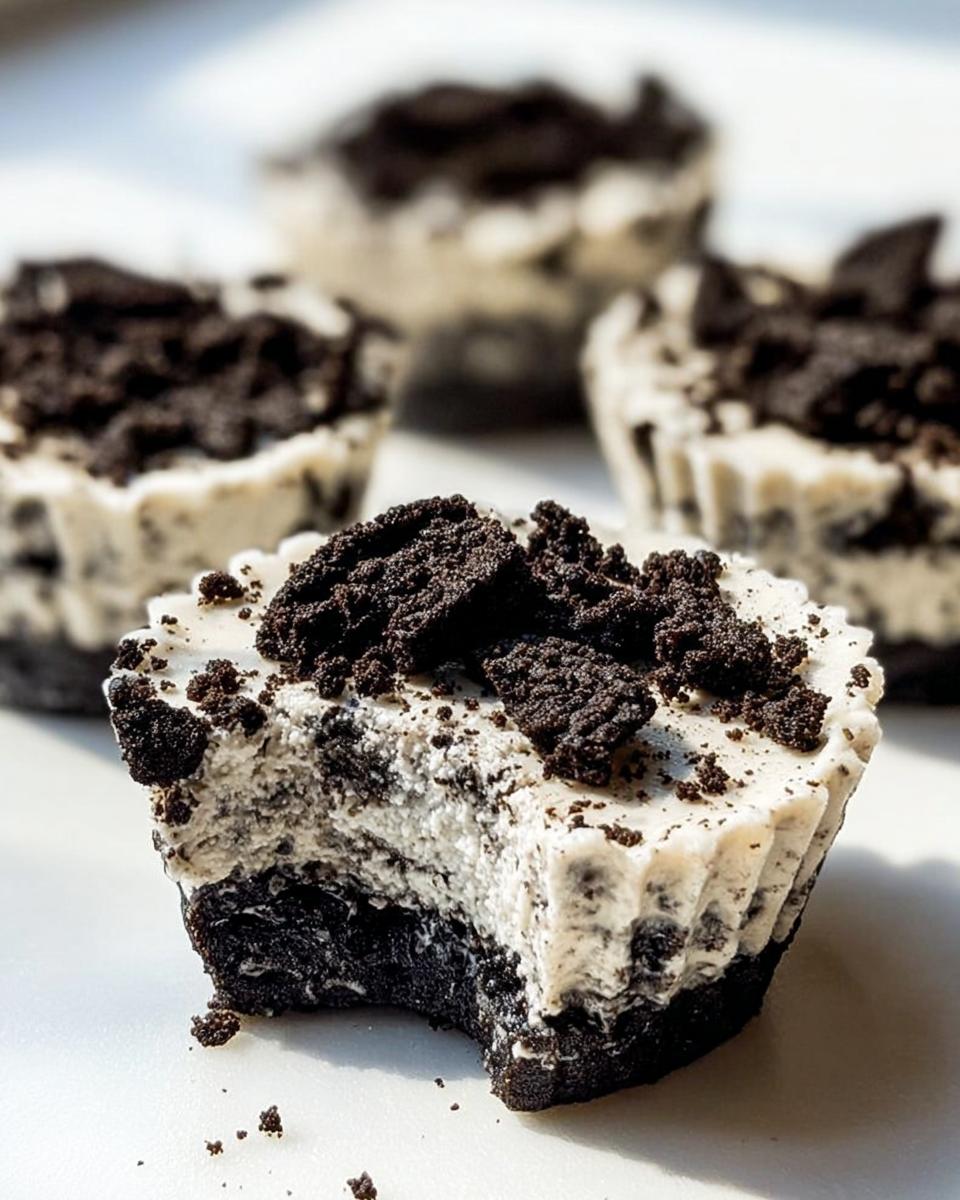
First things first, we need a solid base! Take those 12 finely chopped Oreos – the ones you put in the food processor earlier – and dump them into a bowl. Pour in your 3 tablespoons of melted butter and give it a good stir with a spoon until it all looks like damp sand. Now, grab your cupcake tray, pop in those liners, and spoon about a tablespoon of this mixture into each one. Just press it down firmly with the bottom of a spoon or a small measuring cup to create a nice, even crust. This step is crucial for that perfect little base!
Creating the Creamy Cheesecake Filling
Now for the star of the show – the filling! In your food processor (no need to wash it if you’re feeling quick!), combine the softened cream cheese, powdered sugar, and vanilla extract. If you have a *really* good food processor, you can add the heavy cream in now and blend until it’s super smooth and creamy. If yours is more like mine, just pulse until it’s all combined and then transfer it to a bowl. Whisk in the heavy cream until it’s light and fluffy, then gently fold in those roughly chopped 7 Oreos. You want to see bits of cookie in there, not a uniform grey color!
Assembling and Chilling Your Bites
Okay, we’re almost there! Grab your prepared crusts. Spoon that luscious, creamy Oreo filling right on top of each crust, filling them up nicely – don’t be shy! Then, sprinkle the remaining 5 roughly chopped Oreos over the top of each cheesecake bite. It adds such a nice texture and visual appeal. Now, the hardest part: letting them chill! Carefully place the whole tray into the refrigerator for at least 1 hour. This is where all the magic happens, letting those flavors meld and the cheesecake set. It’s worth the wait, I promise!
Tips for Perfect Healthy No-Bake Oreo Cheesecake Bites
Want to make sure your Healthy No-Bake Oreo Cheesecake Bites turn out absolutely perfect every single time? Trust me, a few little tricks can make all the difference! My biggest tip? Make sure your cream cheese is *truly* softened. I usually leave mine on the counter for at least an hour before I start. If it’s not soft enough, you’ll end up with a lumpy filling, and nobody wants that! Also, don’t over-process your Oreo crust mixture; you want it to hold together when you press it down, not turn into dust. And when you’re chopping your Oreos for the filling and topping, little chunks are good! They give you those delightful surprise bites of cookie in every spoonful. You can find some other great tips for foolproof recipes here!
Ingredient Notes and Substitutions for No-Bake Oreo Cheesecake
Let’s chat about these ingredients for a sec! Oreos are the star here, obviously! If you’re looking to make these Healthy No-Bake Oreo Cheesecake Bites even more health-conscious, definitely give gluten-free Oreos or reduced-sugar versions a whirl. They totally work! For the crust, if you’re craving a little extra goodness, you could even mix in a tablespoon of chia seeds. And for the filling, make sure that cream cheese is *super* soft – seriously, it makes all the difference for a smooth, luscious texture. Don’t be afraid to experiment with different cookie types if Oreos aren’t your jam, though you’ll lose that classic Oreo flavor! You can find tons of other easy, healthy recipes here. For more cheesecake ideas, check out this Oreo cheesecake bite recipe too!
Frequently Asked Questions About Healthy No-Bake Oreo Cheesecake Bites
Got some burning questions about these delightful little Healthy No-Bake Oreo Cheesecake Bites? I get it! It’s always good to have a little extra info. Here are a few things people often ask:
Can I use different cookies for the crust or filling?
Absolutely! While Oreos give these their signature deliciousness, you can totally swap them out. For a gluten-free crust, try crushing up your favorite gluten-free chocolate cookies or even some graham crackers. If you’re not a huge Oreo fan (gasp!), you could even use other sandwich cookies, or for a less sweet option, some crushed digestive biscuits or even vanilla wafers. Just keep in mind that swapping cookies will change the flavor profile a bit, but that’s part of the fun of experimenting!
How long do these cheesecake bites last?
These little gems are pretty sturdy in the fridge! Stored in an airtight container, they should stay delicious for about 3-4 days. The cream cheese and chilling process help them maintain their shape and texture. Honestly though, they usually disappear much faster than that in my house!
Are these truly healthy?
That’s a great question! While we’re using wholesome ingredients like cream cheese and heavy cream, we’re also incorporating Oreos and powdered sugar, so they’re definitely more of a *healthier indulgence* than a diet food. The “healthy” aspect comes from them being no-bake, avoiding the need for extra fats or sugars sometimes found in baked goods, and the fact that you have complete control over the ingredients. Plus, making them yourself means you can opt for lighter versions of ingredients if you want to go even further!
Can I freeze these cheesecake bites?
Yes, you sure can! They freeze surprisingly well. Just make sure they’re completely chilled first, then place them in an airtight freezer-safe container. You can likely freeze them for up to a month. Thaw them in the refrigerator overnight before you plan to enjoy them. They might be a *tiny* bit softer, but still totally delicious!
Storage and Make-Ahead Tips
Got leftovers of these yummy Healthy No-Bake Oreo Cheesecake Bites? Lucky you! Just pop them into an airtight container and they’ll be happy in the fridge for about 3 to 4 days. They’re honestly pretty amazing even a few days later! And guess what? They freeze like a dream! Pop them in a freezer-safe container once they’re fully chilled, and you can stash them away for up to a month. They’re perfect to have on hand for those sudden sweet cravings or unexpected guests. You can find some other quick dessert ideas here if you need more make-ahead magic!
Nutritional Information
Just a heads-up, the nutritional info for these Healthy No-Bake Oreo Cheesecake Bites is just an estimate, since everyone’s ingredients can vary a bit! On average, you’re looking at about 240 calories per bite. Think around 15g of fat, 20g of carbs, and about 3g of protein. This can change a little depending on the exact brand of Oreos or the richness of your cream cheese and whipping cream. But honestly, for a homemade treat like this, it’s a pretty sweet deal!
Healthy No-Bake Oreo Cheesecake Bites
Ingredients
Equipment
Method
- In a food processor, roughly chop 5 Oreos and set aside for topping.
- In a food processor, roughly chop 7 Oreos and set aside for the filling.
- In a food processor, finely chop 12 Oreos and set aside for the crust.
- Melt the butter. Mix the melted butter with the 12 finely chopped Oreos.
- Line a cupcake tray with 12 cupcake liners.
- Fill the 12 cupcake liners with equal amounts of the butter and Oreo mixture. Press down to flatten. Use a ⅓ measuring cup or a spoon to flatten.
- In a food processor, combine the cream cheese, powdered sugar, vanilla extract, and heavy cream. Mix thoroughly.
- Hand mix in the 7 chopped Oreos.
- On top of the Oreo crust, fill the 12 cupcake liners with equal amounts of the creamy Oreo mixture.
- Top with the remaining 5 chopped Oreos.
- Refrigerate for 1 hour. These also freeze well.
Nutrition
Notes
Tried this recipe?
Let us know how it was!
Mindfulness & Emotional Wellness Specialist
I never thought I’d leave my career as a corporate litigation attorney, but a panic attack in a courthouse bathroom changed everything. After struggling with emotional eating for over a decade—starting in college and getting worse through the stress of law school—I realized that no diet could fix what was really going on inside me.
My breakthrough came through mindfulness meditation training. Working with Jon Kabat-Zinn’s protocols, I discovered that my relationship with food reflected deeper patterns of anxiety and perfectionism that I’d been avoiding for years. That’s when I understood that sustainable eating changes require internal transformation, not just external rules.
Now I treat meal preparation as meditation practice. My “Mindful Kitchen” workshops help people transform ordinary cooking into opportunities for self-awareness and emotional healing. I’ve developed over 180 recipes designed for slow, mindful preparation—complex enough to keep you present, simple enough not to overwhelm your nervous system.
I believe food becomes medicine when we approach it with presence rather than reactivity. The kitchen can be our monastery if we choose to enter it with reverence.