
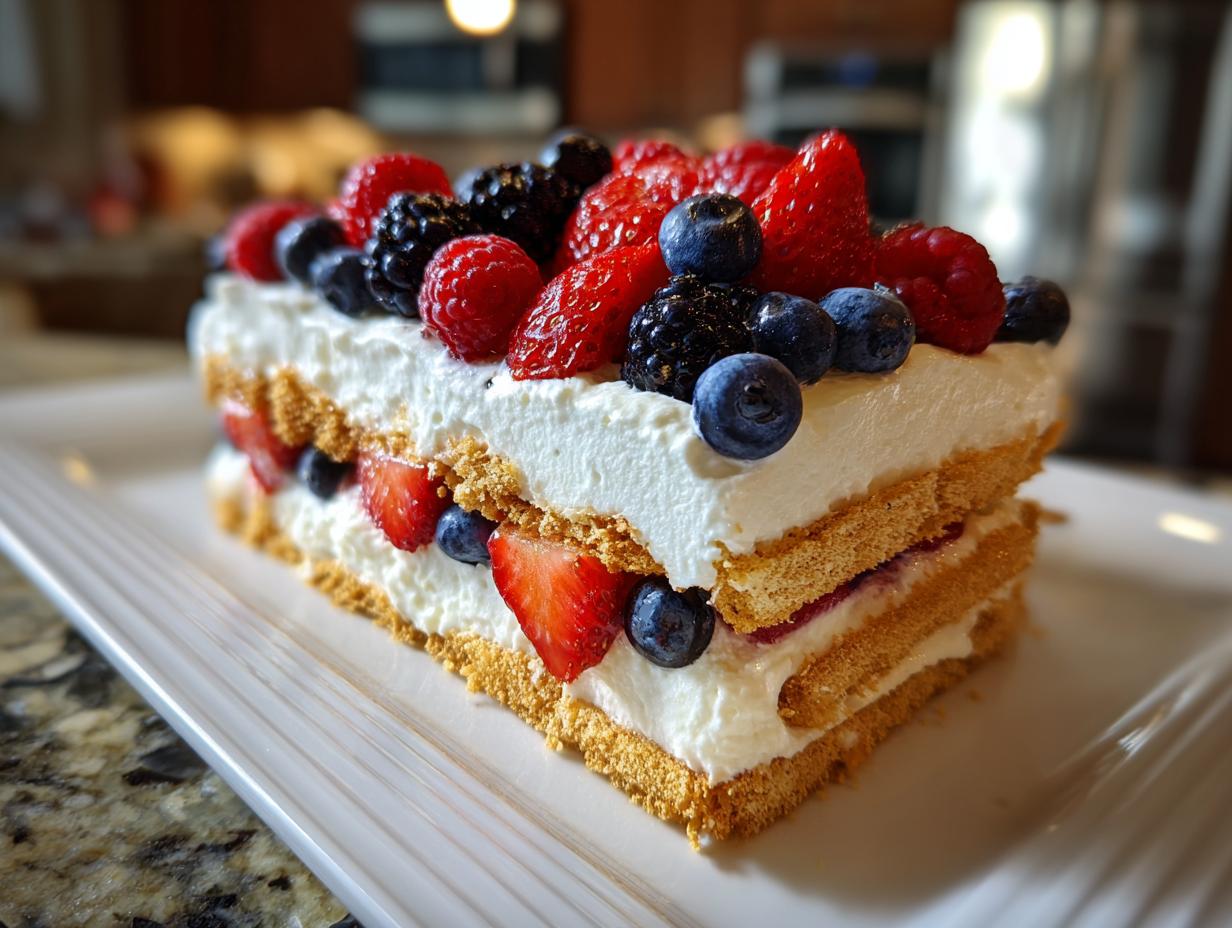
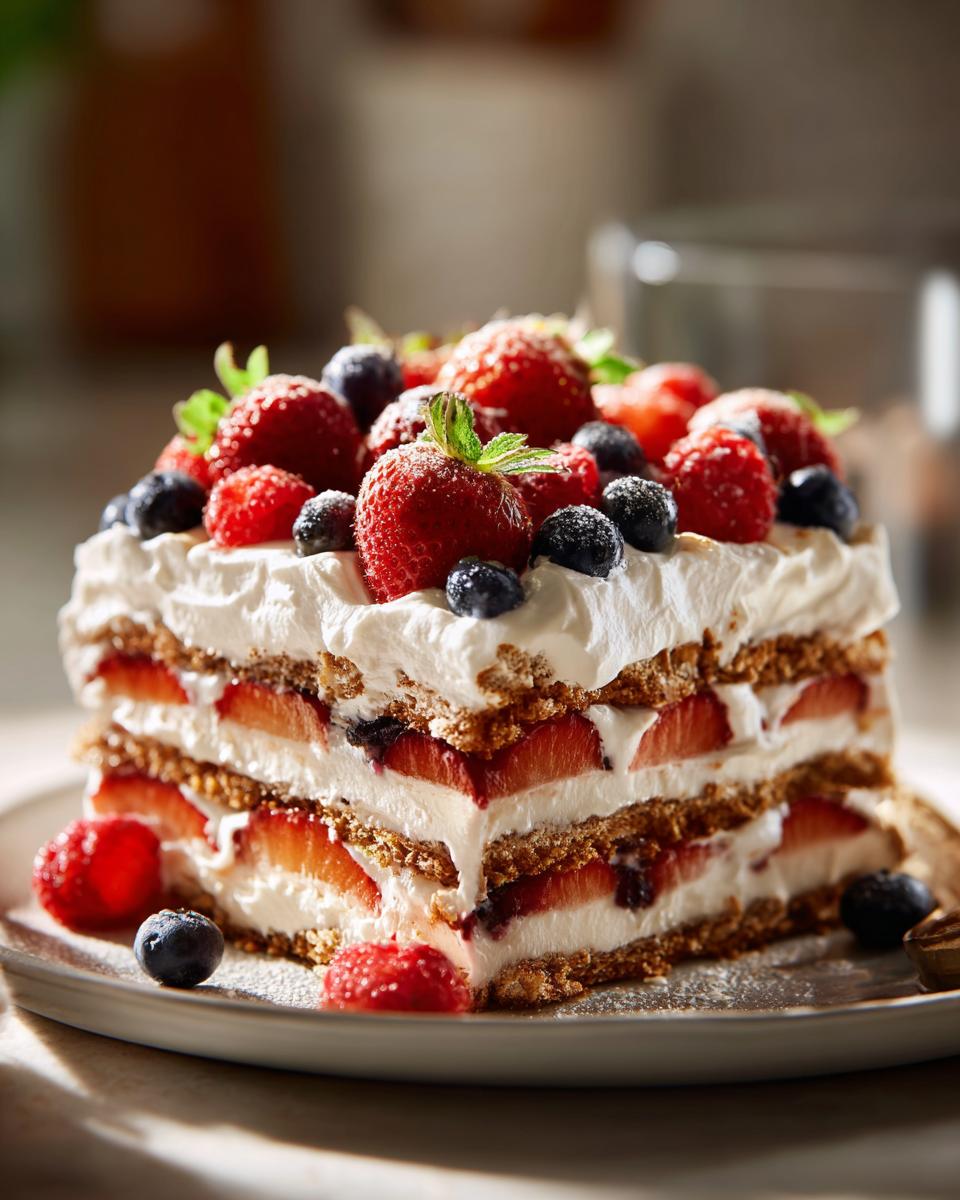
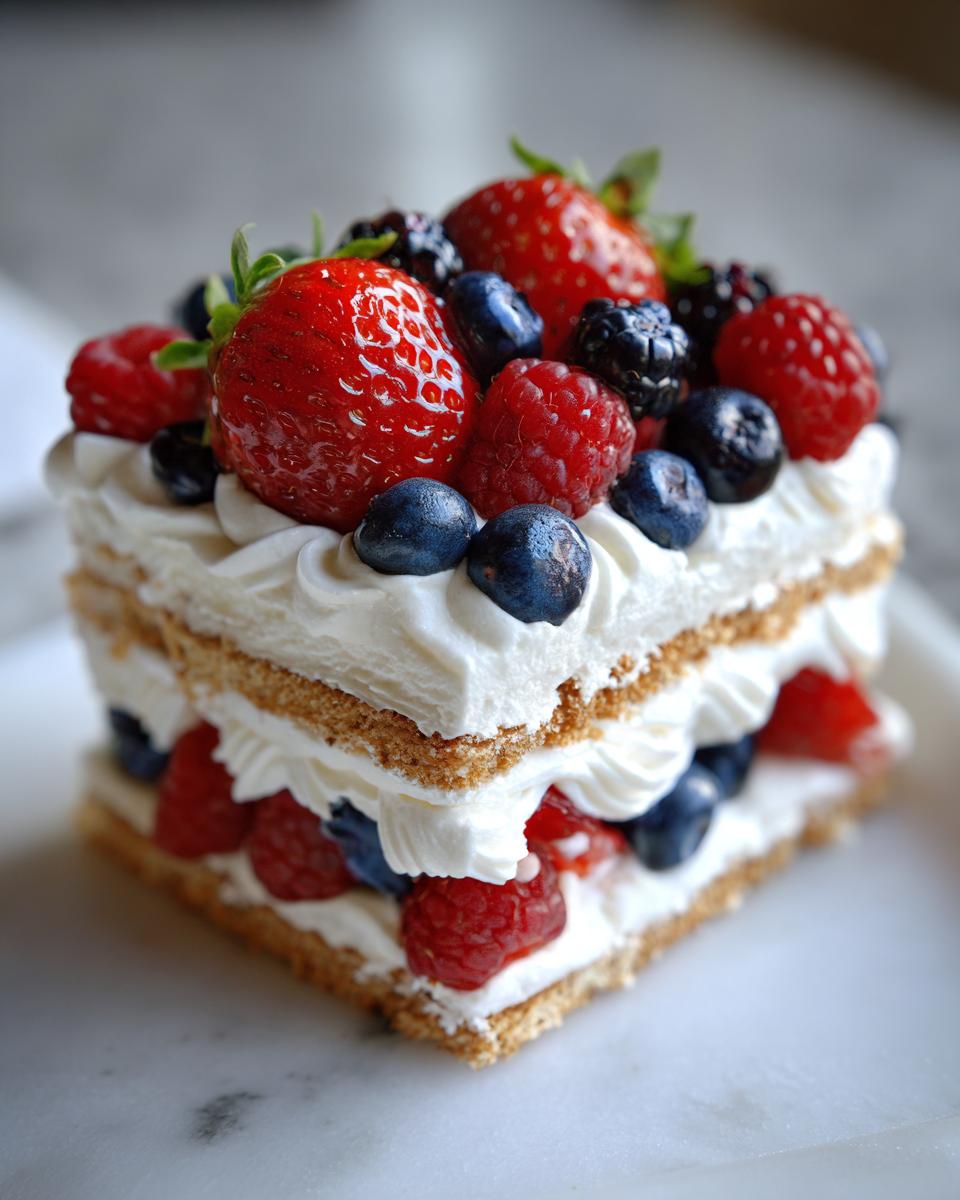
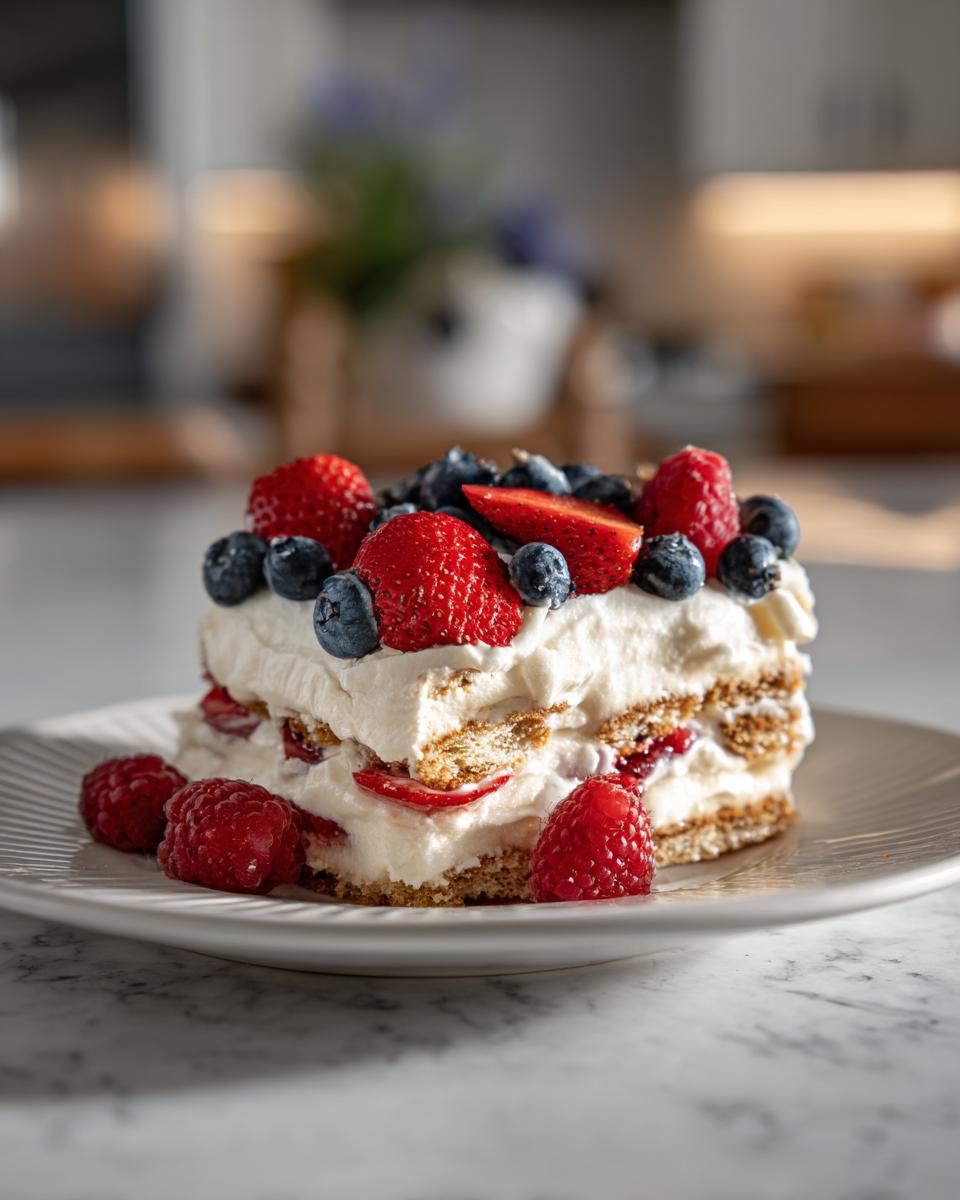
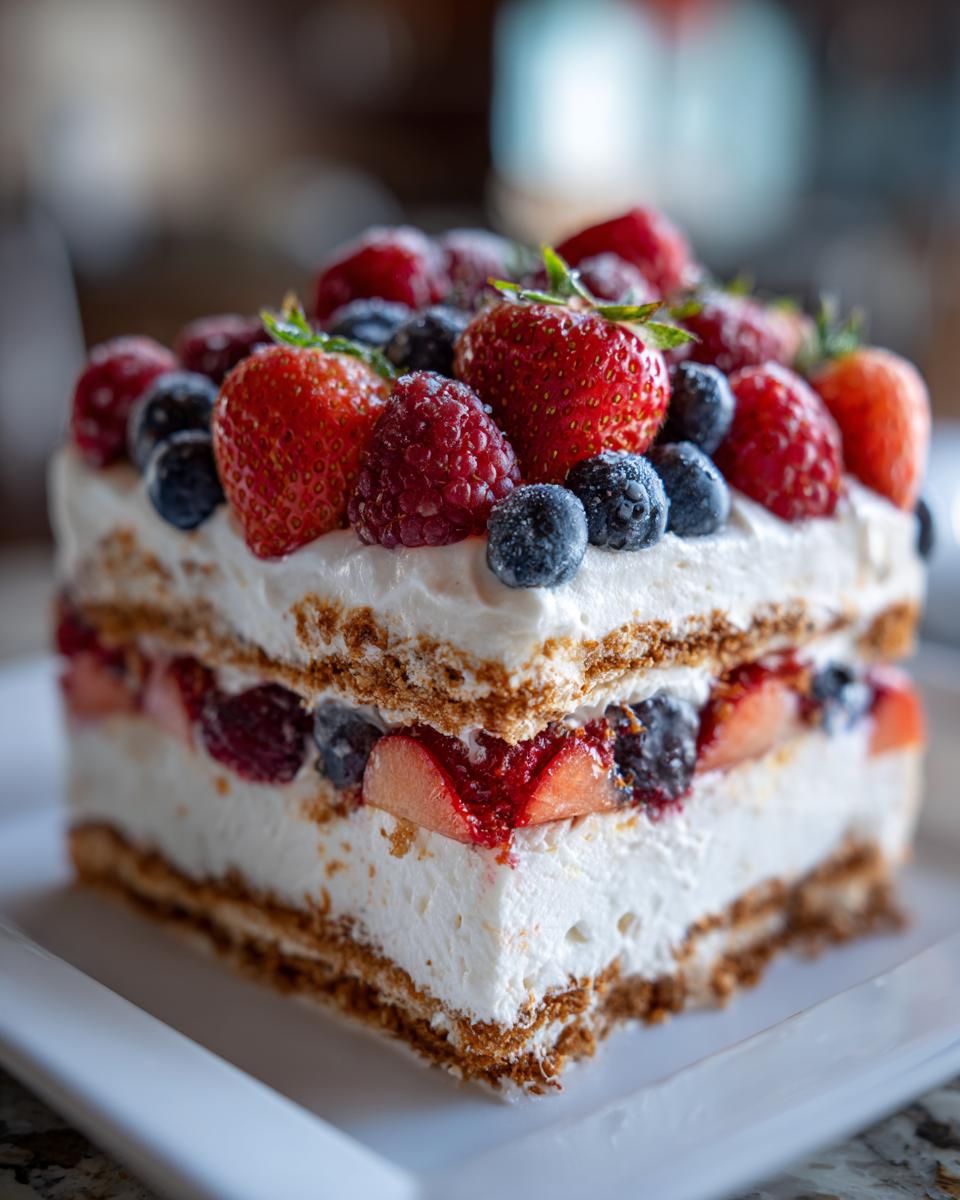
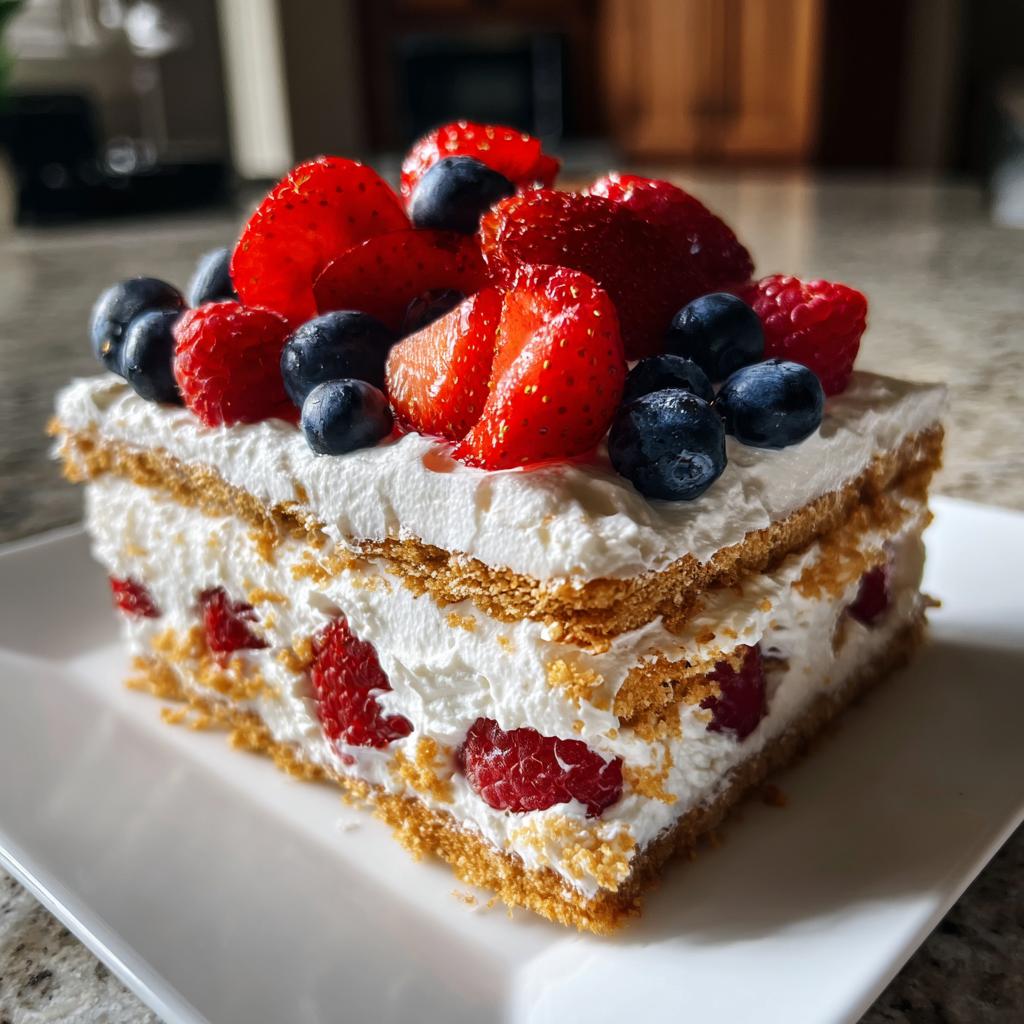
Oh, Fourth of July! The smell of barbecue, the sound of fireworks… and the desperate hunt for a dessert that’s as festive as it is easy to whip up, right? Trust me, I’ve been there! My family always expects something special, and when the summer heat is blazing, the last thing I want to do is turn on the oven. That’s where this Red, White, and Blue Icebox Cake comes in. It’s seriously my go-to! It just tastes like pure summer magic, and the best part? It takes practically no effort. Just layers of creamy goodness and crisp cookies that magically soften in the fridge. It’s always a huge hit, and it looks so darn pretty on the dessert table!
Why You’ll Love These Fourth of July Desserts With Red White Blue Icebox Cake
Seriously, this Red, White, and Blue Icebox Cake is a total lifesaver for any summer celebration! Here’s why it’s become my absolute favorite:
- No-Bake Bliss: Forget the oven! This cake chills together in the fridge, keeping your kitchen cool.
- Super Simple: We’re talking basic ingredients and easy steps. Anyone can make this!
- Festive & Fun: The red, white, and blue berries make it look like a firework show on a plate. Perfect for the Fourth of July!
- Crowd-Pleaser: Kids and adults alike go crazy for the creamy, cookie layers. It disappears fast!
Gather Your Ingredients for Fourth of July Desserts With Red White Blue Icebox Cake
Getting this festive Fourth of July dessert put together is a breeze when you’ve got all your goodies ready to go. Here’s what you’ll need:
For the Cake Layers:
- Graham Crackers: 2 packages (grab the ones that have about 14-16 crackers in each, that’s usually the standard size my grandma used!)
- Heavy Cream: 3 cups, and make sure it’s cold! Seriously, cold cream whips up so much better.
- Powdered Sugar: 1 cup. It dissolves easily and makes that whipped cream perfectly sweet.
- Vanilla Extract: 2 teaspoons. For that classic, cozy flavor.
For the Festive Topping:
- Fresh Blueberries: 1 cup.
- Fresh Strawberries: 1 cup, sliced up nice.
- Fresh Raspberries: 1/2 cup. These little bursts of flavor are the best!
Essential Equipment for Your Red White Blue Icebox Cake
Alright, to get this easy-peasy, no-bake beauty made, you don’t need a fancy setup. Just a few basics from your kitchen will do the trick:
- A good old 9×13 inch baking dish – this is what we’ll build our masterpiece in!
- An electric mixer (handheld or stand mixer) – it’s a lifesaver for getting that whipped cream perfectly fluffy.
- A couple of trusty mixing bowls – one for whipping cream, and maybe another for prepping ingredients.
Step-by-Step Guide to Making Fourth of July Desserts With Red White Blue Icebox Cake
Alright, let’s get this show on the road! Making this Fourth of July treat is surprisingly simple. It’s all about layering and letting the magic happen in the fridge. Trust me, you’ll be amazed at how something this easy looks so impressive! Think of it like a quick culinary hug for your taste buds. For more ideas on light and healthy no-bake desserts, you can check out this inspiration.
Layering the Icebox Cake
First things first, grab your 9×13 inch dish and line the bottom with a single layer of graham crackers. Don’t stress if you have little gaps – just break some crackers to fill them in. Think of it as building your delicious foundation!
Creating the Whipped Cream Filling
Now for the creamy goodness. Pour that nice, cold heavy cream into a big bowl. Get your electric mixer going on medium-high speed. You want to see soft peaks forming – that’s your cue that it’s ready for the next step. Then, slowly sprinkle in the powdered sugar and vanilla extract. Keep beating until you’ve got stiff peaks that stand right up. This is the secret to a dreamy, not-too-runny filling!
Adding the Festive Topping
Time to make it pretty! Spread about half of that glorious whipped cream mixture over your graham cracker base. Then, add another layer of crackers. Top that off with the rest of the whipped cream, making sure it’s nice and smooth. Now for the fun part – arrange your blueberries, sliced strawberries, and raspberries on top. I like to make little stripes or a star shape, but honestly, a colorful jumble looks great too!
The Crucial Chilling Time
This is the hardest part – waiting! Cover your dish up tightly with plastic wrap. You absolutely need to let this chill in the refrigerator for at least 8 hours, but overnight is truly the sweet spot. This gives the graham crackers time to soften up into a cake-like texture and lets all those lovely flavors meld together beautifully. It’s worth the wait, I promise!
Tips for the Best Red White Blue Icebox Cake
You know, the beauty of this Red, White, and Blue Icebox Cake is how forgiving it is, but a few little tricks really take it from good to *amazing*. First off, make sure everything for the whipped cream is super cold – the heavy cream, the bowl, even the beaters if you can manage it! This helps it whip up thick and fluffy instead of turning into a sad puddle. Also, don’t skimp on that chilling time! It’s like magic happening in the fridge, letting those graham crackers soften just right so they’re not crunchy at all. For decorating, you can get creative! Making little fruit flags or swirls is fun, or you can even just scatter them on top. For more fun recipe ideas, especially if you love waffles, check out my cinnamon roll waffles!
Ingredient Notes and Substitutions
So, a few little things about this recipe that make it extra special! The graham crackers are key here; they’re what give us that cake-like texture after chilling. If you needed a gluten-free version (though this recipe isn’t designed for it specifically), you *might* try a gluten-free graham cracker, but be aware they might not soften the same way. For the berries, feel free to swap them out! Mixed berries work great, or if you find some yummy blackberries, toss those in too. The main thing is that pop of red and blue for the festive look! And please, please, please use cold heavy cream. It makes all the difference in getting that fluffy, stable whipped cream. Trust me on this one!
Serving and Storing Your Festive Icebox Cake
Alright, the hardest part is over – it’s chilled and it looks GORGEOUS! When you’re ready to serve your magnificent Red, White, and Blue Icebox Cake, just slice it up into nice generous portions. It’s best served nice and cold, straight from the fridge. If you happen to have any leftovers (which is rare in my house!), just pop it right back into its covered dish and keep it in the refrigerator. It’ll stay yummy for about 2 to 3 days. Honestly, it tastes almost as good the next day, if not better as those flavors meld even more!
Frequently Asked Questions About Fourth of July Desserts With Red White Blue Icebox Cake
Got questions about making the ultimate Fourth of July dessert? You’re in the right place! Let’s get you all set for a stress-free, delicious celebration. Thinking about other refreshing drinks? You might like my Strawberry Acai Refresher!
Can I use different berries for this Red White Blue Icebox Cake?
Absolutely! While blueberries, strawberries, and raspberries give us that perfect red, white, and blue look, feel free to get creative. Blackberries work wonderfully for a touch of deep blue/purple, or even some sliced kiwi for a pop of green if you’re feeling adventurous! Just make sure they’re fresh and ripe for the best flavor.
How long does the Red White Blue Icebox Cake really need to chill?
This is super important for that perfect icebox cake texture! You need to chill it for at least 8 hours, but honestly, letting it chill overnight in the fridge is the absolute best. This gives the graham crackers enough time to soften up and mingle with the cream, turning them into a cake-like layer. Nobody wants crunchy crackers in their icebox cake!
Can I make this Fourth of July Desserts With Red White Blue Icebox Cake ahead of time?
Yes, you totally can! In fact, making it ahead is the *best* way to ensure those flavors meld and the crackers soften perfectly. You can assemble the whole cake the day before your celebration. Just keep it covered tightly in the refrigerator. It’s one less thing to worry about on a busy holiday! If you’re a fan of coffee-inspired treats, you might also like this Mocha Frappuccino recipe.
What makes the whipped cream so stable?
The magic here is using super cold heavy cream and beating it until stiff peaks form. Make sure you add the powdered sugar and vanilla gradually while beating. For an even sturdier whipped cream, especially if it’s really warm out, you can add a touch of cream cheese (about 4 oz, softened) to the cream *before* you start whipping, or stir it into the finished whipped cream. It gives it a lovely tang too!
Estimated Nutritional Information
Okay, so estimating the nutrition for this glorious Red, White, and Blue Icebox Cake can be a little tricky since it depends on the exact brands you use and how those graham crackers measure up. But, as a rough idea, a generous slice usually comes in around 350-400 calories. You’re looking at about 15-20g of fat, maybe 4-6g of protein, and a good chunk of carbs coming in around 50-60g, mostly from the crackers and sugar. Remember, this is just your friendly ballpark figure!
Red, White, and Blue Icebox Cake
Ingredients
Equipment
Method
- Line the bottom of a 9×13 inch baking dish with a single layer of graham crackers. Break crackers as needed to fill gaps.
- In a large bowl, beat the cold heavy cream with an electric mixer on medium-high speed until soft peaks form.
- Gradually add the powdered sugar and vanilla extract to the whipped cream. Continue beating until stiff peaks form.
- Spread half of the whipped cream mixture evenly over the graham crackers.
- Add another layer of graham crackers over the whipped cream.
- Spread the remaining whipped cream mixture evenly over the second layer of graham crackers.
- Arrange the fresh blueberries, strawberries, and raspberries on top of the whipped cream in a decorative pattern.
- Cover the dish with plastic wrap and refrigerate for at least 8 hours, or preferably overnight, to allow the crackers to soften and the flavors to meld.
- Slice and serve chilled.