
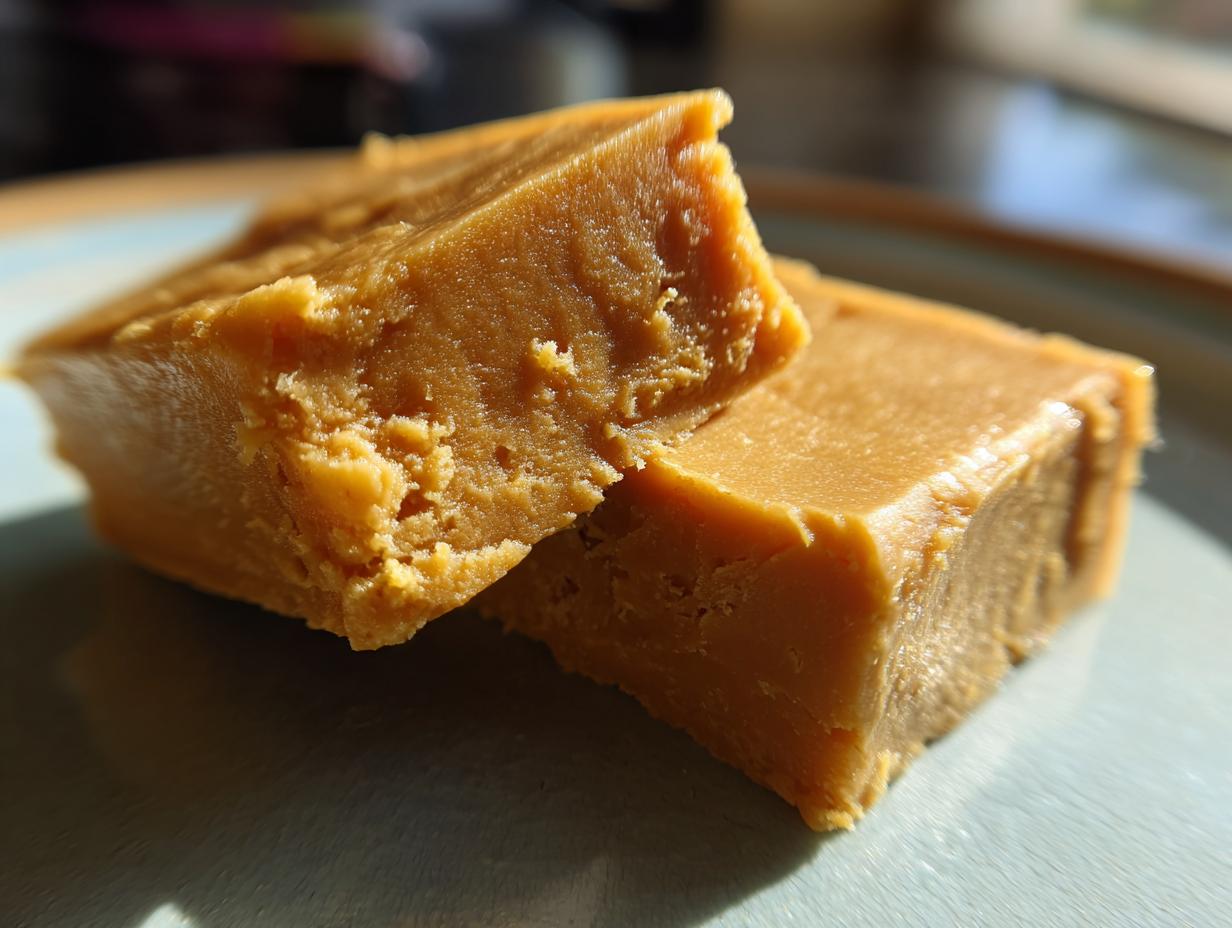
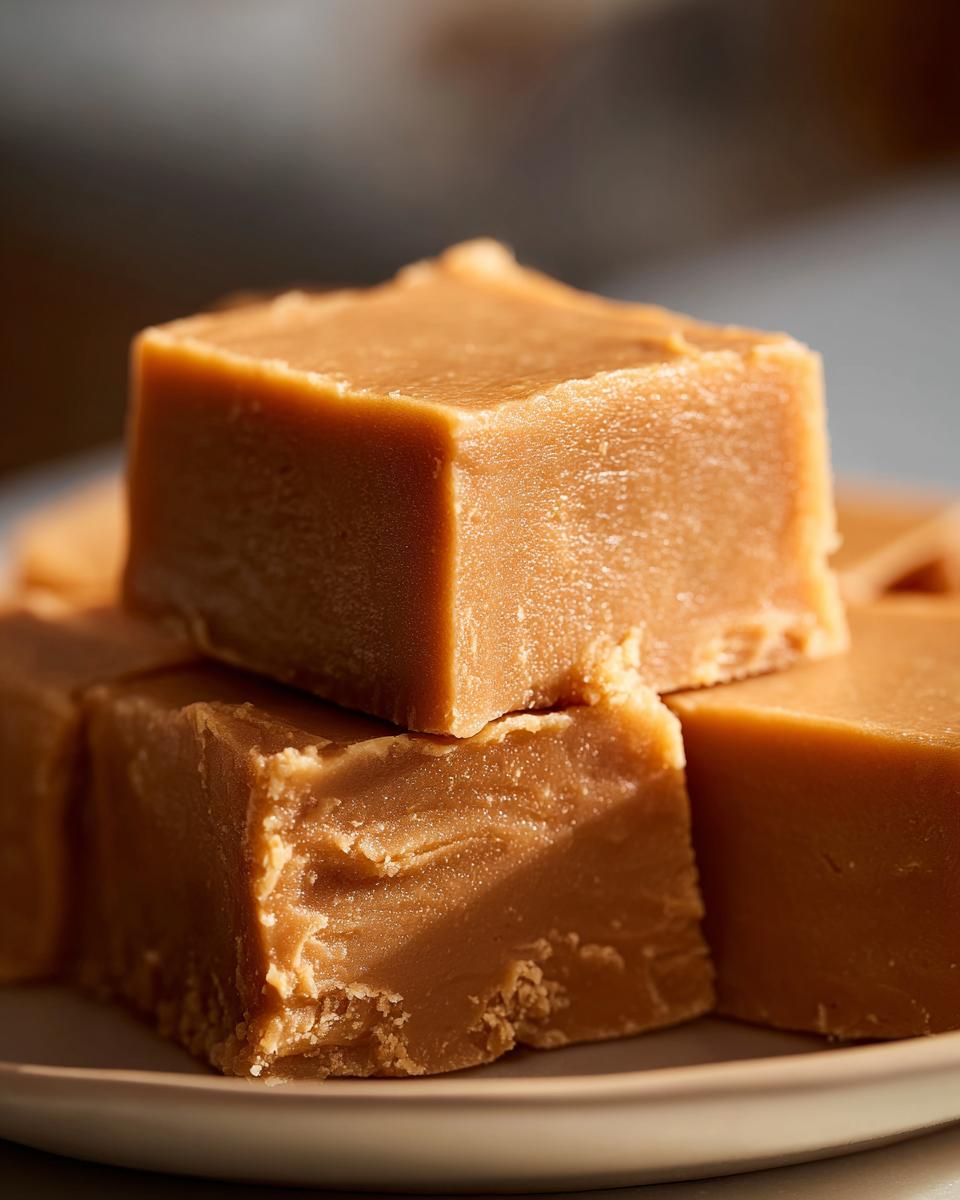
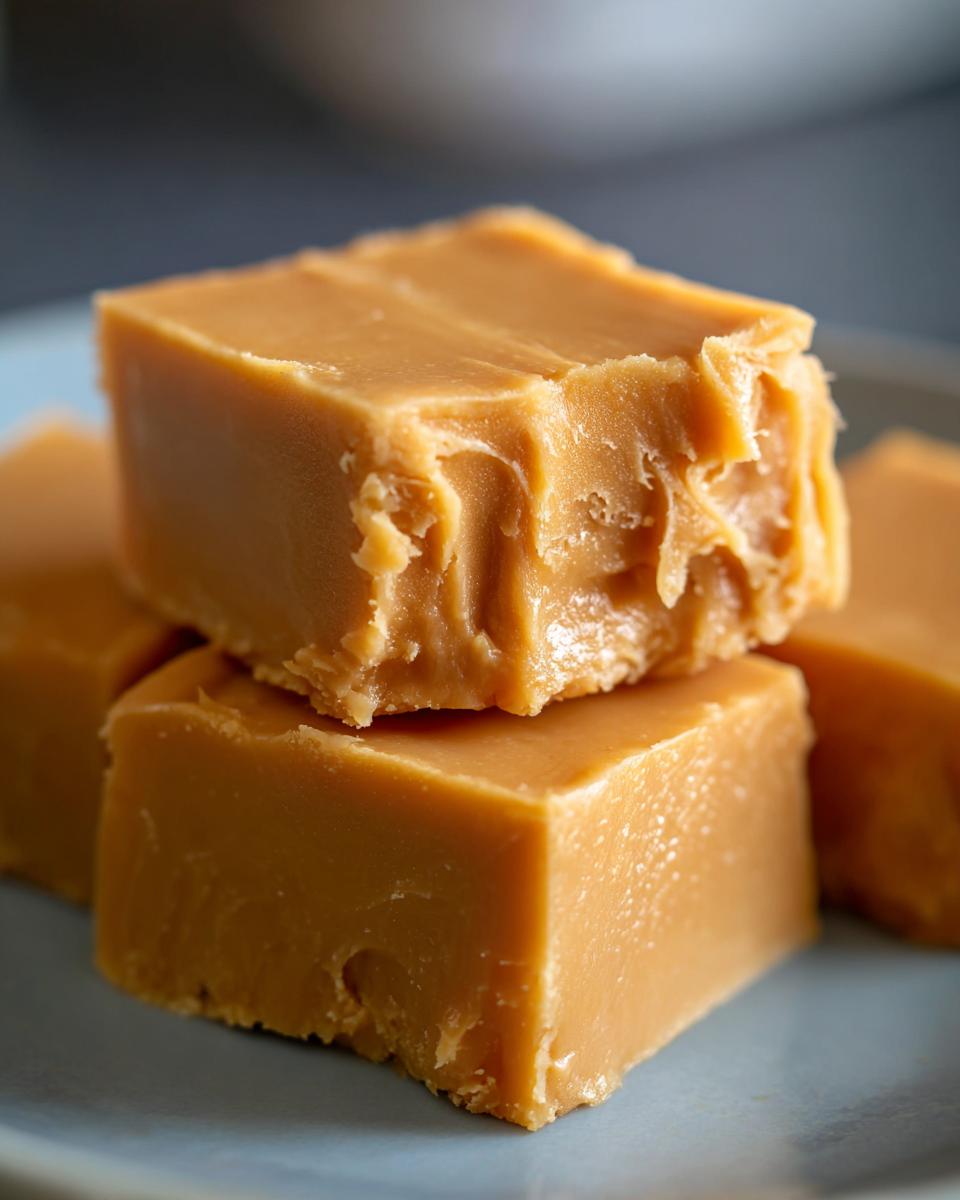
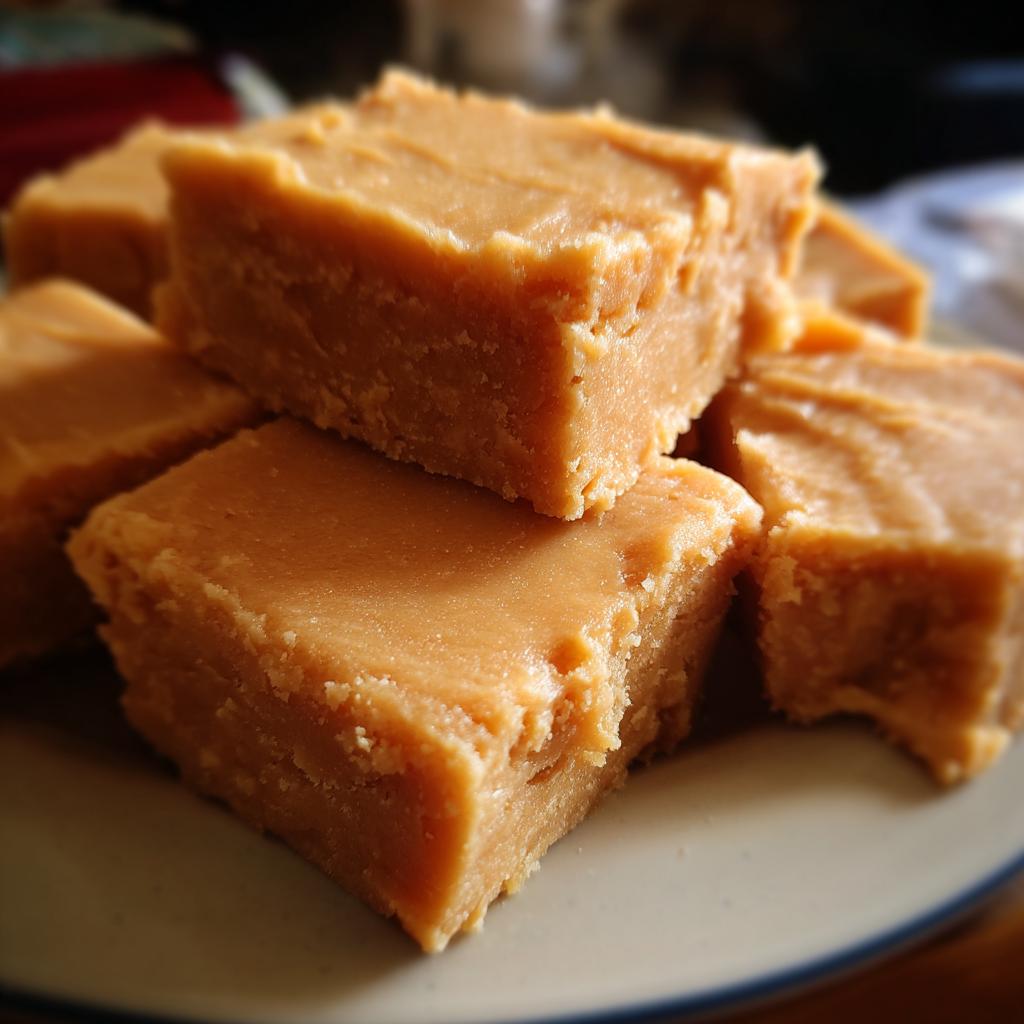
Oh, peanut butter fudge! Just the thought of it makes my kitchen feel instantly cozier and my sweet tooth start singing. Seriously, is there anything better when a craving hits than a rich, melt-in-your-mouth square of peanut butter goodness? I’ve whipped up batches of this for parties, for comforting friends, and honestly, just for myself on a Tuesday night. This recipe for Dessert Recipes With Peanut Butter Fudge for Sweet Cravings is the one I always go back to because it’s just so darn easy and always turns out perfectly. It’s the kind of dessert that feels a little bit special, but you can whip it up without even breaking a sweat. Trust me, you’re going to love it!
Why You’ll Love This Dessert Recipes With Peanut Butter Fudge for Sweet Cravings
Seriously, this peanut butter fudge recipe is a keeper! It’s one of those “wow, that was easy!” recipes that delivers big time on flavor and texture. If you’ve got a sweet tooth that just won’t quit, this is your answer. It’s so creamy and rich, and the peanut butter flavor is just out of this world. Plus, it comes together so quickly – you’ll be enjoying a perfect square of deliciousness before you know it. It’s truly the best for satisfying those sweet cravings!
Gather Your Ingredients for Peanut Butter Fudge
Alrighty, let’s get our ducks in a row ingredient-wise! To make this dreamy peanut butter fudge, you’ll need just a handful of simple things. Grab 1.5 cups of granulated sugar – the regular kind works perfectly. Then, you’ll need 3/4 cup of milk. I like to use whole milk for a richer flavor, but any kind will do in a pinch! Don’t forget 1/2 cup of unsalted butter; cutting in that salt a bit helps control the sweetness. And, of course, a full 1 cup of creamy peanut butter is essential for that classic taste. For that smooth finish and extra flavor boost, we’ll add 1 teaspoon of vanilla extract. The real magic comes from 1 cup of mini marshmallows – they’re our secret weapon for making this fudge super creamy and easy to stir!
Essential Equipment for Making Peanut Butter Fudge
Okay, so you don’t need a whole bakery setup for this, thankfully! Just a few basics will do the trick. You’ll want a good old medium saucepan for cooking up the fudge base. Make sure you have an 8×8 inch baking pan ready to go – this is the perfect size for our fudge! Lining it with parchment paper is a total lifesaver for easy lifting later. And, of course, have your trusty measuring cups and spoons and a good spatula for stirring and spreading. That’s pretty much it!
Step-by-Step Instructions for Your Peanut Butter Fudge Recipe
Alright, home cooks, this is where the magic really happens! Making this peanut butter fudge is honestly a breeze, and once you get the hang of these steps, you’ll be whipping it up whenever a craving strikes. Just follow along, and we’ll create some seriously delicious fudge together!
Preparing Your Pan for Perfect Peanut Butter Fudge
First things first, let’s get our pan ready. Grab your 8×8 inch baking pan and give it a good greasing – I like to use a little butter or cooking spray. Then, line it with parchment paper. Make sure you leave a little overhang on the sides; this is going to be your handle to lift the fudge right out later. Seriously, don’t skip this part, it makes life so much easier!
Cooking the Fudge Base for Sweet Cravings
Now, grab your medium saucepan. We’re going to combine the granulated sugar, milk, and butter. Pop it over medium heat and stir constantly. You want to keep stirring until that butter is completely melted and you can’t see any sugar granules anymore – it should look nice and dissolved. This is important for a smooth texture! Once it’s all mixed and dissolved, bring the whole mixture to a gentle boil. Let it bubble away for about 5 minutes, giving it a stir every now and then so it doesn’t scorch. Keep an eye on it; we want a happy simmer, not a raging boil! For more tips on perfect fudge, you might check out this recipe.
Achieving the Perfect Peanut Butter Fudge Texture
Okay, carefully remove the saucepan from the heat. Now for the flavor explosion! Stir in your vanilla extract and that beautiful creamy peanut butter. Keep stirring until everything is wonderfully smooth and melded together. If it looks a little separated at first, don’t worry, just keep mixing! Next, toss in your mini marshmallows. Stir, stir, stir until they’re completely melted. This is what gives our fudge that incredibly creamy, dreamy texture. It might take a minute for them to fully disappear, but when they do, your fudge base will be silky smooth and smell heavenly!
Cooling and Cutting Your Delicious Peanut Butter Fudge
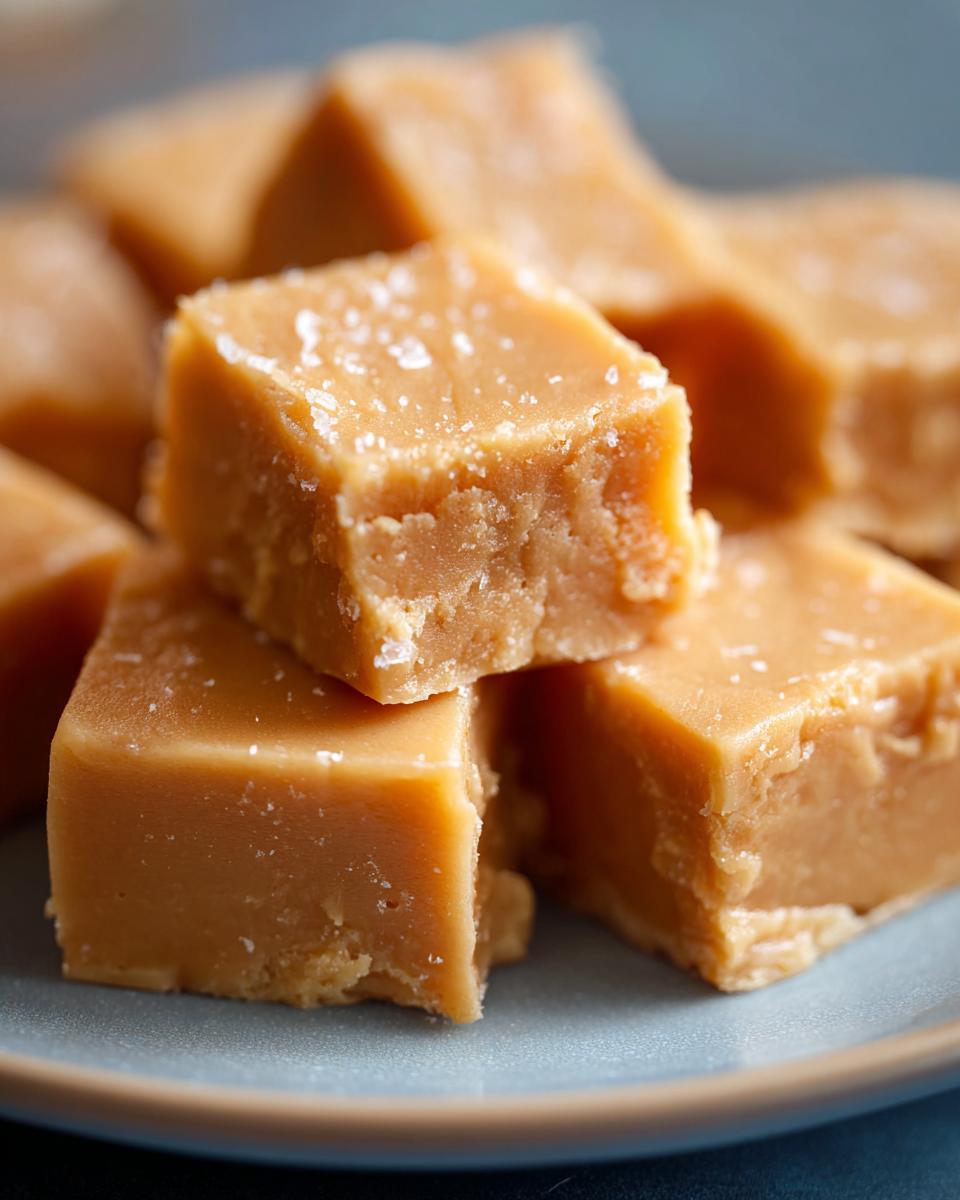
Now, pour that glorious, thick fudge mixture into your prepared pan. Use your spatula to spread it out evenly so you have nice, consistent layers. Resist the urge to dive in right away! The hardest part is waiting. You need to let the fudge cool completely at room temperature for at least 2 hours, maybe even a bit longer. You want it to be totally firm to the touch. Once it’s set, use those parchment paper overhangs to lift the whole slab out of the pan. Then, just grab a sharp knife and cut it into cute squares. Ta-da! Perfect peanut butter fudge, ready to tame any sweet craving!

Tips for the Best Peanut Butter Fudge
Making this peanut butter fudge is honestly pretty foolproof, but I’ve picked up a few tricks over the years that just make it *that* much better. First off, don’t rush the cooling process! I know it’s tempting, but letting it set completely is key to that perfect, slightly chewy but firm texture. If you cut it too soon, it can get messy. Also, make sure your peanut butter is at room temperature; it mixes in so much smoother that way. If you’re feeling adventurous, try sprinkling a little sea salt on top right after you spread it in the pan – it makes the peanut butter flavor pop! And if you love peanut butter treats, you might want to check out this amazing peanut butter mousse I make – it’s totally different but equally delicious!
Ingredient Notes and Substitutions for Dessert Recipes With Peanut Butter Fudge
Let’s chat ingredients for a sec! For this peanut butter fudge, using creamy peanut butter is key for that super smooth texture we’re going for. If you’re a crunch fan, you *can* use crunchy peanut butter, but just know it’ll give your fudge a bit of a grainy bite, which isn’t necessarily bad, just different! And about the milk, while whole milk gives it that extra richness, any kind of milk will technically work just fine if that’s what you’ve got. Sometimes I even use evaporated milk in a pinch, and it’s still delicious. The mini marshmallows are pretty essential for that melt-in-your-mouth, fudgy quality, so I wouldn’t swap those out if I were you!
Storing Your Homemade Peanut Butter Fudge
So, you’ve got this amazing, homemade peanut butter fudge! To keep it tasting just as delicious, store it in an airtight container at room temperature. Seriously, it stays wonderfully fresh like this for up to 3 days. I usually pack it away as soon as it’s cooled and cut. If you happen to have any left after a few days (which is unlikely in my house!), it can also go in the fridge, but I find it’s best to enjoy it at room temp so it doesn’t get too hard!
Frequently Asked Questions About Peanut Butter Fudge
Why isn’t my peanut butter fudge setting properly?
Oh, the dreaded soft fudge! Usually, this happens if the sugar mixture wasn’t boiled long enough. Boiling it to the right temperature is super important for the fudge to set up correctly. If you don’t boil it long enough, it just won’t set. Also, make sure you let it cool completely at room temperature for at least two hours! If you cut into it too soon, it’ll be too soft. Don’t worry though, even if it’s a little soft, it’s still absolutely delicious to eat with a spoon!
Can I use crunchy peanut butter instead of creamy for this recipe?
You absolutely can! I love using creamy peanut butter for that super smooth, melt-in-your-mouth texture, but crunchy peanut butter totally works too. It just means your fudge will have little bits of peanuts in every bite, which can be really fun! It doesn’t change the cooking process much, just adds a bit of texture. So go ahead, use the peanut butter you love!
My fudge looks grainy, what did I do wrong?
Grainy fudge usually happens because the sugar crystals didn’t fully dissolve or got agitated too much after boiling. When you’re cooking the sugar, milk, and butter mixture, make sure you stir until the sugar is *completely* dissolved before it comes to a boil. After you get it off the heat and add the peanut butter and marshmallows, try not to stir it too vigorously. Just gentle mixing until things are combined is best. Sometimes a little graininess is just part of the fudge charm, though!
Can I add chocolate chips or other mix-ins to my peanut butter fudge?
Yes, you totally can! If you’re feeling creative, try adding about half a cup of mini chocolate chips or even some crushed nuts into the fudge right after you stir in the marshmallows. Just make sure you stir them in quickly before pouring it into the pan. It adds another layer of flavor and yumminess! If you’re looking for more chocolate and peanut butter combos, you might like this chocolate peanut butter treat too!
Nutritional Information for This Dessert Recipes With Peanut Butter Fudge
Just so you know, the nutritional facts for homemade treats can be a little tricky since everyone’s ingredients might vary slightly. But, based on my recipe, each square of this peanut butter fudge is roughly around 180 calories, with about 8 grams of fat, 3 grams of protein, and 25 grams of carbohydrates. This includes around 20 grams of sugar. These are just estimates, but they give you a good idea of what you’re working with!
Peanut Butter Fudge
Ingredients
Equipment
Method
- Grease an 8×8 inch baking pan and line it with parchment paper, leaving an overhang on the sides.
- In a medium saucepan, combine the granulated sugar, milk, and butter. Cook over medium heat, stirring constantly, until the butter is melted and the sugar is dissolved.
- Bring the mixture to a boil and cook for 5 minutes, stirring occasionally.
- Remove the saucepan from the heat. Stir in the vanilla extract and peanut butter until smooth.
- Add the mini marshmallows and stir until they are completely melted and incorporated into the mixture.
- Pour the fudge mixture into the prepared baking pan and spread it evenly.
- Let the fudge cool completely at room temperature for at least 2 hours, or until firm.
- Once firm, lift the fudge out of the pan using the parchment paper overhang. Cut into squares and serve.