

Oh, banana pudding! Just saying the name brings back memories of my grandma’s kitchen, doesn’t it? There’s something so incredibly comforting about a classic dessert, and this Dessert Recipe for Classic Banana Pudding With Homemade Whipped Cream is pure, unadulterated joy in a bowl. It’s the kind of treat that just wraps you up in a warm hug. Forget those boxed mixes, because trust me, making it from scratch with that pillowy homemade whipped cream is an absolute game-changer. It’s creamy, it’s fruity, and it’s just… perfect.
Why You’ll Love This Classic Banana Pudding Recipe
Honestly, who can resist a good banana pudding? This isn’t just any dessert; it’s a hug in a bowl! Here’s why you’re going to be obsessed:
- Super Easy to Make: Seriously, you don’t need to be a pastry chef for this one. The steps are straightforward, and the results are always impressive.
- Incredible Flavor: That perfect balance of sweet, creamy pudding, ripe bananas, and crisp vanilla wafers is just *chef’s kiss*.
- Dreamy Texture: It’s lusciously smooth pudding with pops of fruity banana and a satisfying crunch from the wafers. Pure heaven!
- Homemade Whipped Cream Magic: Moving beyond store-bought? This homemade whipped cream takes it to a whole new level. It’s so light and airy, you’ll never go back!
- Pure Comfort: It’s the ultimate comfort dessert, perfect for family gatherings, potlucks, or just a cozy night in.
Gather Your Ingredients for Dessert Recipes for Classic Banana Pudding
Alright, let’s get our ducks in a row and gather everything we need to make this amazing classic banana pudding! It might look like a few steps, but trust me, having everything prepped makes the whole process a breeze. Think of it like a little cooking expedition in your own kitchen!
Here’s what we’re going to need:
For the Pudding:
- 1/2 cup granulated sugar
- 1/4 cup cornstarch (this is what makes it nice and thick!)
- 1/4 teaspoon salt (just a pinch to balance the sweetness)
- 3 cups milk – I really love using whole milk here; it gives the pudding such a rich, creamy texture that you just can’t get with skim. It’s a small thing, but it makes a big difference!
- 4 egg yolks, lightly beaten (make sure they’re not cooked!)
- 2 tablespoons unsalted butter
- 1 teaspoon vanilla extract (the good stuff!)
For the Homemade Whipped Cream:
- 2 cups heavy cream, nice and cold (this is super important for whipping!)
- 1/2 cup powdered sugar (for sweetness and that smooth texture)
- 1 teaspoon vanilla extract
For Assembly:
- 1 package vanilla wafers (these are the classic crunch!)
- 3-4 ripe bananas, sliced (you want them ripe but not mushy so they hold their shape)
Don’t you just love seeing all those ingredients lined up? It feels like we’re already halfway there! Remember, I’ve got a great banana bread recipe if you happen to have extra ripe bananas! And for more ideas, check out this budget-friendly banana pudding option.
How to Make Classic Banana Pudding With Homemade Whipped Cream
Alright, let’s get down to business and make this magic happen! Making this banana pudding from scratch is way more rewarding than you might think, and honestly, the homemade whipped cream? Total game-changer. I’ll walk you through every step, so don’t you worry! For more banana deliciousness, check out my best ever banana bread or these easy bakery-style banana muffins!
Preparing the Creamy Pudding Base
First things first, let’s make that luscious pudding. Grab a medium saucepan – this is where all the creamy goodness starts. Whisk together your granulated sugar, cornstarch, and salt. Give it a good swirl so it’s nice and blended. Now, slowly pour in your milk, whisking constantly until it’s all smooth like silk.
We’re going to cook this over medium heat. Keep stirring, and I mean *constantly*! You want it to thicken up and come to a gentle boil. Once it’s boiling, let it bubble for just one minute, still stirring like crazy. Take it off the heat and grab a small bowl. Whisk your egg yolks in that bowl, and then very slowly, add about a cup of that hot pudding mixture to the yolks, whisking the whole time. This is called tempering, and it stops your eggs from scrambling – super important for a smooth pudding! You can find more banana pudding recipes online if you want to compare notes, but trust me, this way is pure gold.
Pour that tempered egg mixture back into the saucepan and cook it over medium-low heat for another 2 minutes, stirring all the while. No boiling this time! Off the heat, stir in the butter and vanilla extract until it’s all smooth and melty. Pour this gorgeous pudding into a bowl. To stop a skin from forming (yuck!), lay a piece of plastic wrap right on the surface. Let it cool a bit, then pop it in the fridge for at least 30 minutes to chill. Easy peasy!
Whipping Up Light and Airy Homemade Whipped Cream
Now for the cloud-like topping! Get a big bowl and make sure your heavy cream is super cold – seriously, straight from the fridge. Using your electric mixer, beat it on medium-high speed. You’ll see it start to thicken up. Keep going until it forms soft peaks, which means when you lift the beater, a little peak forms but then flops over.
Next, add your powdered sugar and vanilla extract. Keep beating until it forms stiff peaks. This means when you lift the beater, the peak stands straight up without falling over. You’ve just made homemade whipped cream! So much better than anything from a can, right?
Assembling Your Classic Banana Pudding
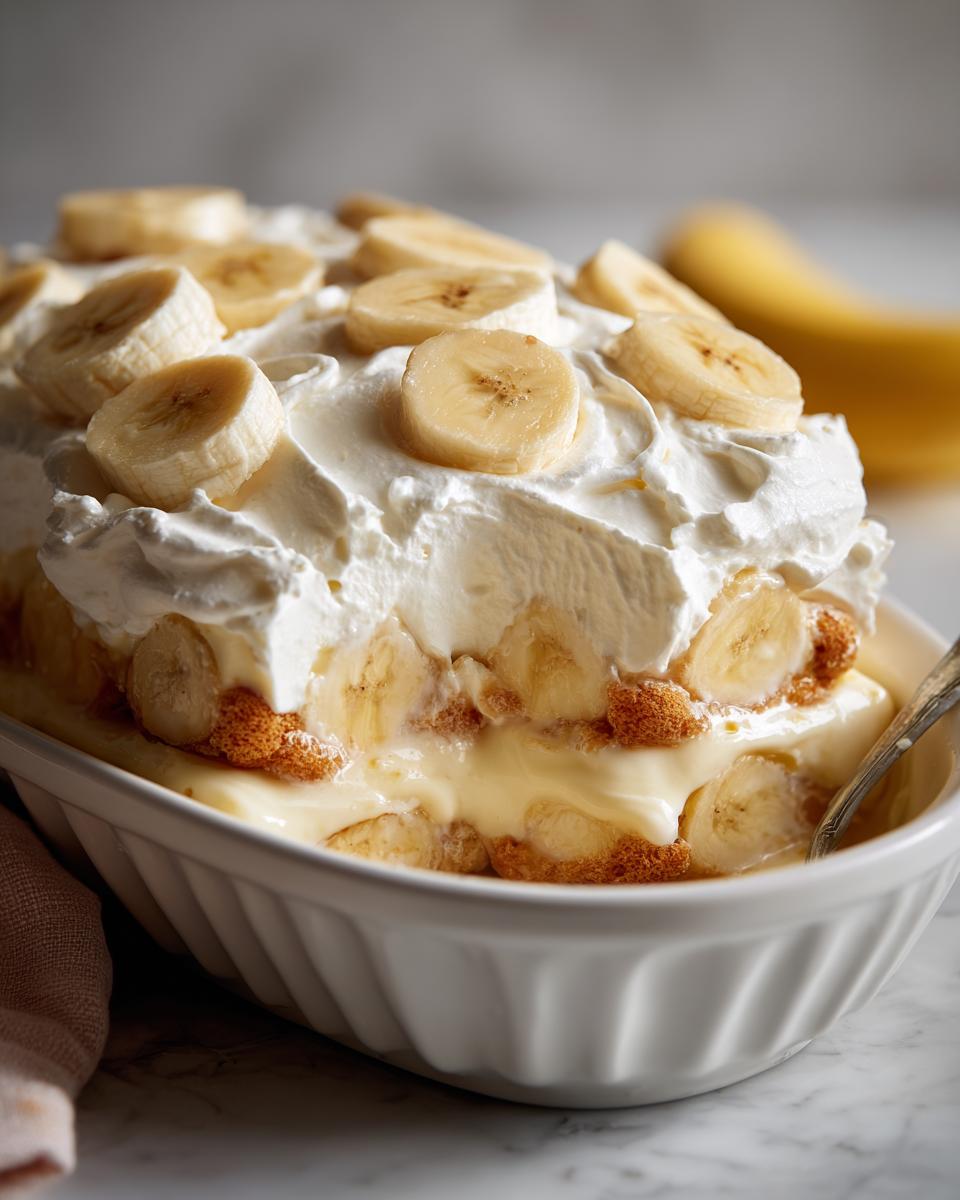
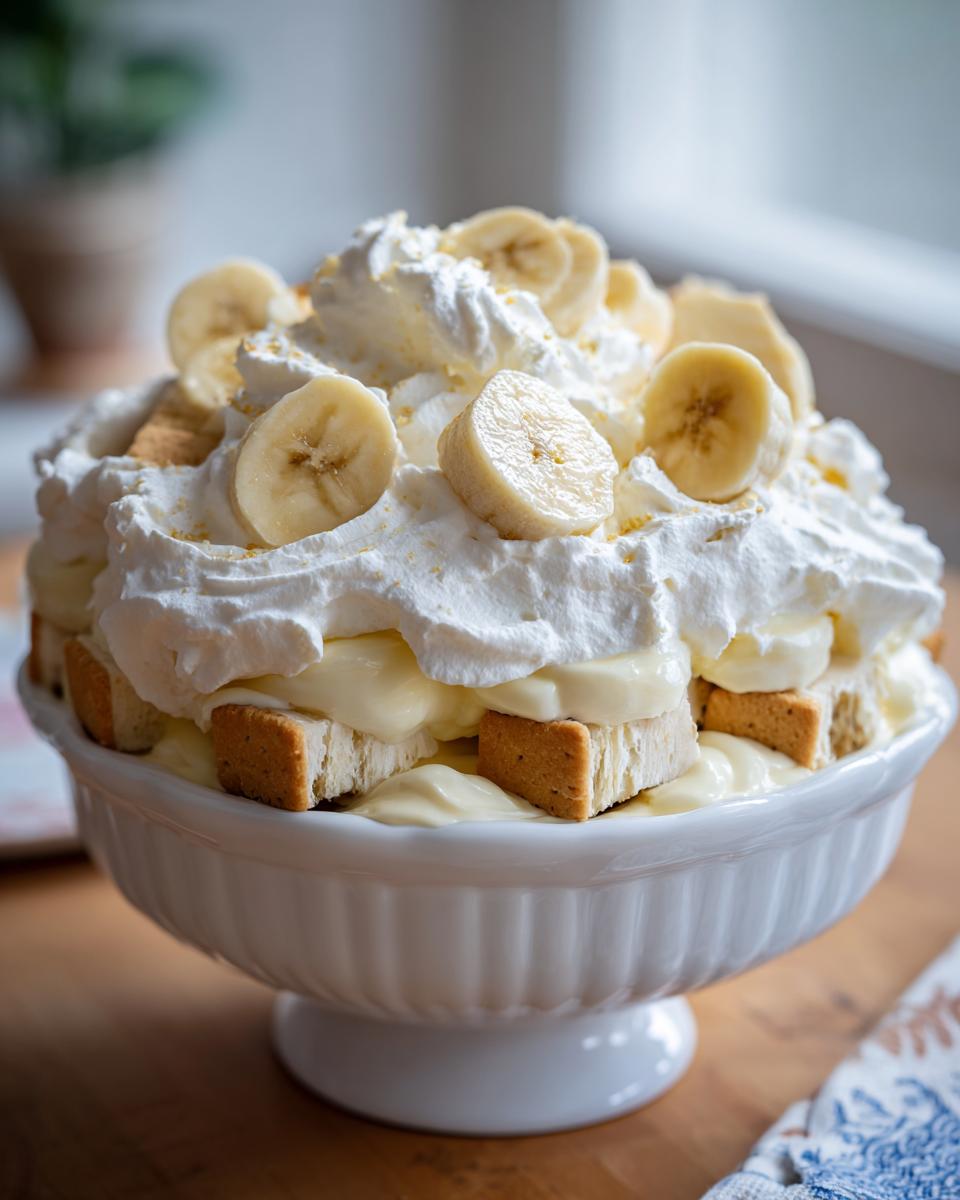
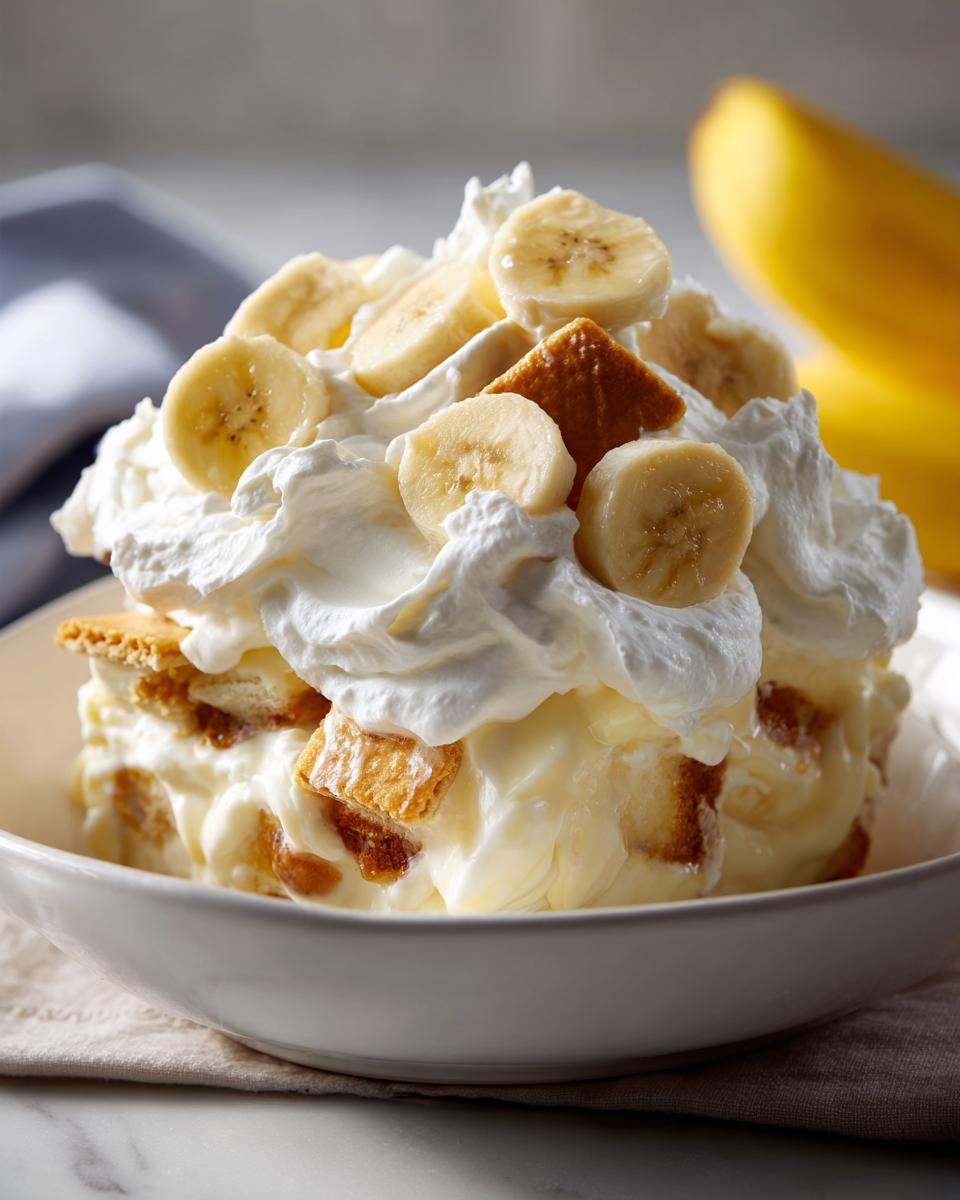
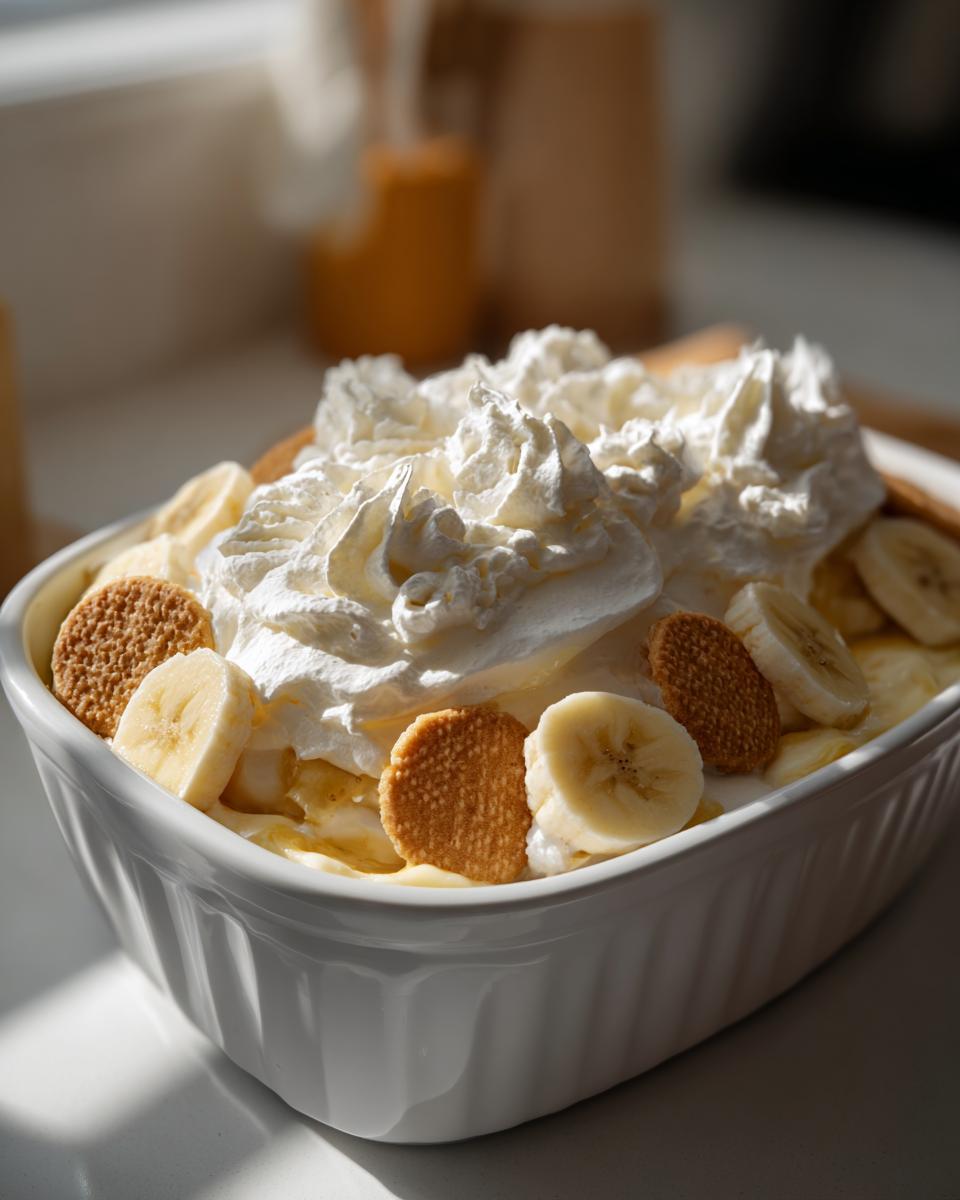
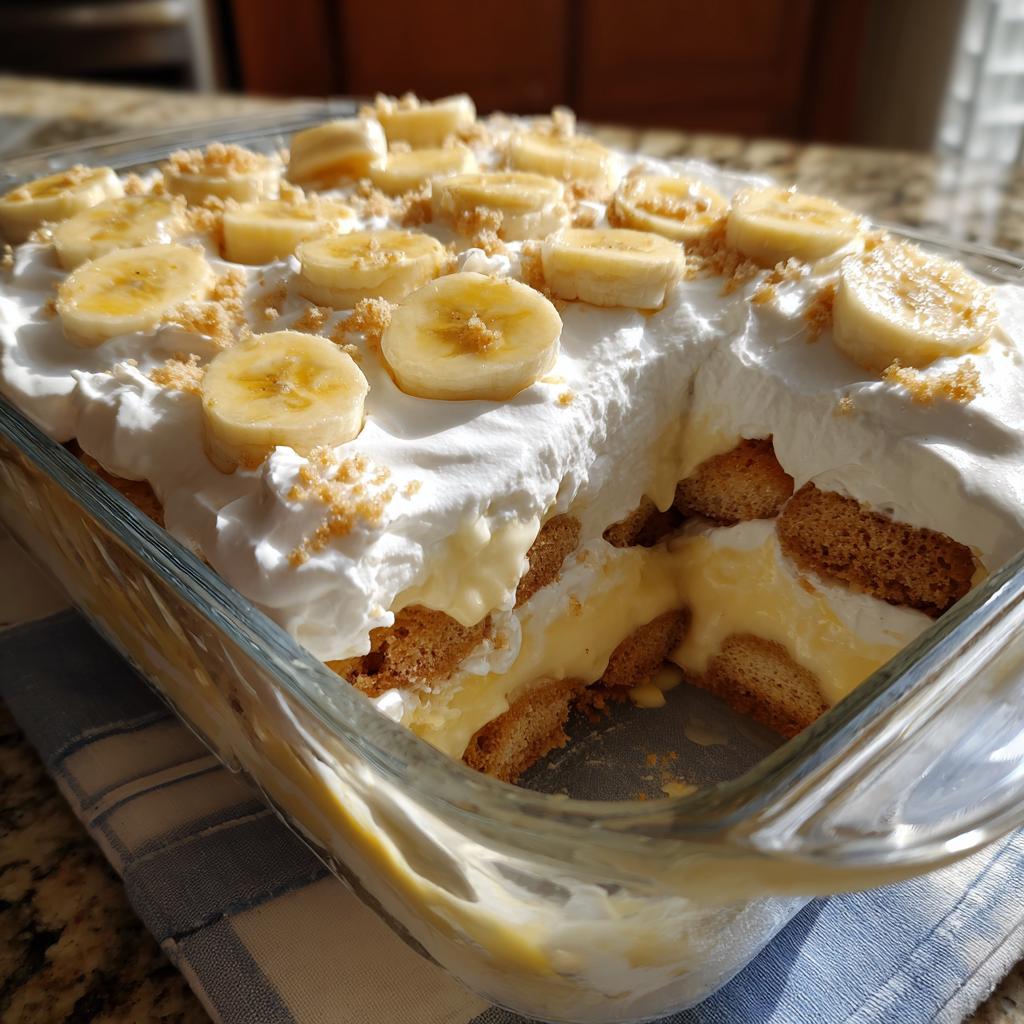
Okay, the grand finale! Grab your favorite serving dish. Start with a layer of vanilla wafers on the bottom. Don’t be shy, give it a nice, even bed. Then, arrange a layer of your sliced bananas right on top of the wafers. Now spoon about half of that lovely, chilled pudding over the bananas.
Repeat the layers: another layer of vanilla wafers, followed by more sliced bananas. Spoon the rest of the pudding evenly over the top. Cover the whole thing up and let it chill in the fridge for at least another 30 minutes. This lets all those flavors meld together beautifully. And remember, you can find loads of peanut butter banana bread recipes if you’re looking for more ways to use up those bananas!
Tips for the Best Dessert Recipes for Classic Banana Pudding
You know, making a truly amazing banana pudding is all about those little touches. It’s not just about following the recipe (though that’s a great start!), it’s about a few smart tricks that really elevate it. For instance, when it comes to the bananas, you want them ripe, but not *too* ripe. A banana that’s just starting to get those little brown spots is perfect – it’s sweet and soft, but it won’t turn into mush. And that skin on the pudding? Ugh, I hate that! Laying plastic wrap right on the surface while it cools is seriously my favorite hack to avoid it. It keeps that pudding silky smooth!
For more banana goodness, you’ve gotta check out my banana bread minis – they’re the perfect bite-sized treat!
Ingredient Notes and Substitutions
Let’s chat about some of these ingredients for our classic banana pudding because sometimes you need a little tweak, right? For the pudding itself, while I absolutely adore whole milk for that super-rich, creamy texture (it really makes a difference!), you could totally use 2% milk if that’s what you have on hand. It’ll still be delicious, just maybe a touch less decadent. And the vanilla extract? Go for the pure stuff if you can! It has such a richer flavor than imitation vanilla, but if imitation is all you’ve got, it’ll still work just fine.
For those of you keeping an eye on things, you could try a low-carb sweetener in place of some of the sugar in the pudding and whipped cream, but it might change the texture a bit. Just something to keep in mind!
Frequently Asked Questions About Classic Banana Pudding
Got questions about this delightful banana pudding? I’ve got you covered! Making it is pretty straightforward, but a few little things can make all the difference. Check out some common queries below. For more cooking tips, take a peek at my recipe for a dish everyone asks for!
Can I make banana pudding ahead of time?
You totally can! In fact, letting it chill for a bit really helps the flavors meld together. I recommend assembling it a few hours before serving, or even the night before. Just keep the homemade whipped cream separate and add it right before you serve it. It’s the best way to keep everything looking and tasting fresh!
What kind of bananas are best for banana pudding?
Ah, the banana situation! You want bananas that are ripe but not *too* ripe. Think of a banana that’s just starting to get those little brown speckles on the peel – it’s sweet and soft, but still firm enough to slice and hold its shape. Overly ripe bananas can get mushy and make the pudding texture a bit… well, mushy. So, aim for perfectly ripe!
How do I prevent a skin from forming on the pudding?
Nobody wants that weird skin on top of their pudding, right? My secret weapon is simple: plastic wrap! As soon as the pudding is done cooking and you’ve poured it into its bowl to cool, lay a piece of plastic wrap directly onto the *surface* of the pudding. Press it down gently so it touches all the pudding. This creates a barrier and stops that dreaded skin from forming. Easy peasy, and it keeps your pudding looking smooth and luscious!
Can I use store-bought whipped cream?
Okay, look, I’m all about saving time, but if there’s one thing I *highly* recommend making from scratch for this banana pudding, it’s the whipped cream. Homemade whipped cream is just SO much lighter, fluffier, and tastier. It truly transforms the dessert. That said, if you’re in a super pinch, store-bought will work, but trust me, give the homemade a try at least once!
Serving and Storing Your Dessert Recipes for Classic Banana Pudding
Okay, the moment we’ve all been waiting for – serving and storing this dreamy banana pudding! For the absolute best experience, you want to serve this glorious dessert chilled. It really lets those flavors meld and gives you that wonderfully cool, creamy texture. And that homemade whipped cream? Definitely add it right before you serve so it stays beautifully fluffy and airy. It’s like the cherry on top, but way better!
Now, what if you have leftovers (fat chance!)? Store any leftover banana pudding in an airtight container in the refrigerator. It’ll stay delicious for about 2-3 days. Just a heads-up, the wafers might soften up a bit over time, but it’s still yummy! Freezing isn’t usually my go-to for this one, as the texture can get a bit weird when thawing, but if you absolutely must, give it a try! And if you want another fantastic banana combo, check out my strawberry banana smoothie!
Nutritional Estimates for Classic Banana Pudding
Just a heads-up, the nutritional info for this amazing banana pudding can vary depending on the exact ingredients you use. But generally, you’re looking at roughly 350-450 calories per serving, with about 15-25g of fat, 40-50g of carbs, and around 5-7g of protein. It’s a treat, so enjoy every bite!
Classic Banana Pudding With Homemade Whipped Cream
Ingredients
Equipment
Method
- Make the pudding: In a medium saucepan, whisk together the granulated sugar, cornstarch, and salt.
- Gradually whisk in the milk until smooth.
- Cook over medium heat, stirring constantly, until the mixture thickens and comes to a boil. Boil for 1 minute, stirring constantly.
- Remove from heat. In a small bowl, whisk the egg yolks. Gradually whisk about 1 cup of the hot pudding mixture into the egg yolks to temper them. Pour the tempered egg yolk mixture back into the saucepan.
- Cook over medium-low heat, stirring constantly, for 2 more minutes. Do not boil. Remove from heat and stir in the butter and vanilla extract until the butter is melted and the pudding is smooth.
- Pour the pudding into a bowl. Cover the surface directly with plastic wrap to prevent a skin from forming. Let cool slightly, then refrigerate for at least 30 minutes.
- Make the whipped cream: In a large bowl, beat the cold heavy cream with an electric mixer on medium-high speed until soft peaks form.
- Add the powdered sugar and vanilla extract. Continue beating until stiff peaks form.
- Assemble the pudding: Spread a layer of vanilla wafers in the bottom of your serving dish. Top with a layer of sliced bananas.
- Spoon about half of the pudding over the bananas and wafers. Repeat with another layer of wafers and bananas.
- Spread the remaining pudding over the top layer. Cover and refrigerate for at least 30 minutes before serving.
- Just before serving, top the pudding with the homemade whipped cream.