
Are you tired of that same old boring cup of coffee every single morning? I know I certainly was until I figured out how to stop running to the drive-through every day! Making the legendary Vanilla Sweet Cream Cold Foam Cold Brew (Easy) right in your own kitchen is not only possible, but it’s so much better than you think. I’ll never forget the first warm afternoon when I decided to experiment with my cold brew. I had stumbled upon a recipe for vanilla sweet cream cold foam, and curiosity got the better of me. Armed with just a jar, a frother, and a couple of ingredients, I whipped up a batch that transformed my simple cold brew into a café-style treat. The moment I took my first sip, I was captivated by the rich, velvety texture and the gentle sweetness. It became a ritual to make it every weekend, turning ordinary coffee breaks into a little luxury that brightened my days and made working from home feel a whole lot more special.
Why This Vanilla Sweet Cream Cold Foam Cold Brew (Easy) Recipe Works
Look, who wants to spend six bucks five days a week on coffee? Not me! The biggest reason I keep coming back to this recipe is that it gives you that incredible café experience without the cost or the agonizing wait. Honestly, it’s a game-changer for your daily routine. We’re serious about flavor here, but we’re also serious about saving you time!
- Save money instantly by making your own Vanilla Sweet Cream Cold Foam Cold Brew (Easy)!
- You get to control the sweetness perfectly—no more drinks that taste like melted candy.
- The texture we achieve in the cold foam is just luxurious, truly decadent.
Quick Prep Time for Your Vanilla Sweet Cream Cold Foam Cold Brew (Easy)
We are talking about an incredibly fast process here. The total active time is only about 10 minutes, which is faster than waiting in the drive-through line! The syrup takes a tiny bit of cooking, but once that’s done, the rest is just assembly. Plus, since the vanilla syrup stores for three whole months, you save time all week long. It really is how you make an Easy Recipe feel gourmet.
Café Style Results at Home
That gorgeous, thick layer floating on top of well-brewed coffee? That’s the magic trick, and trust me, it’s simple to master. You don’t need fancy equipment or training to get that perfect Café Style texture. By using simple techniques mentioned later, you’ll achieve that velvety smooth, sweet cream layer that blends so perfectly into your cold brew. It tastes expensive, but it wasn’t!
Gathering Ingredients for Your Vanilla Sweet Cream Cold Foam Cold Brew (Easy)
Okay, now we get down to the fun part: gathering supplies! Before you start whipping anything, you need the right building blocks. This whole drink breaks down into two main parts: the fantastic vanilla syrup you’re going to make once and use forever, and the actual cold brew and sweet cream components. I always say, if you start with good ingredients, you’re halfway to coffee heaven, right? If you need more general kitchen ideas, you can always check out my other recipes over here for inspiration.
For the Homemade Vanilla Syrup
This is where the real magic starts! We’re skipping those store-bought, overly flavored syrups and making our own. It makes such a difference in the final taste of your Vanilla Sweet Cream Cold Foam Cold Brew (Easy).
- 1 cup of water
- 1/2 cup of maple syrup (Yes, maple! It adds a depth white sugar just can’t match.)
- 1 large vanilla bean, split open (or if you’re in an absolute rush, use 1 tablespoon of really good vanilla extract instead—Grandma would forgive you just this once!)
For the Vanilla Sweet Cream Cold Foam Cold Brew Assembly
Once you have your syrup ready, the rest comes together lightning fast for four beautiful glasses. Remember, the quality of your cold brew really shines through here, so use the best you can get!
- 1 cup of almond milk (or whatever milk you like best for creaminess!)
- 1/4 cup of that glorious vanilla syrup we just made
- 4 cups of homemade cold brew (or you can certainly use store bought if you kept yours for a rainy day)
- Ice for serving—don’t skimp on this!
Step-by-Step Instructions for Vanilla Sweet Cream Cold Foam Cold Brew (Easy)
Alright, this is where we go from ingredient prep to actual deliciousness! Don’t get intimidated by the steps; we’re just moving from making the flavor base to finally assembling your perfect drink. It’s all about timing and using the tools you already have. If you ever need a quick dinner idea while your syrup cools, check out my meal prep guide over at this link.
Making the Vanilla Syrup Base
First things first, we need that incredible homemade vanilla syrup. Grab a small saucepan and toss in your water and maple syrup. Heat this up until it just comes to a boil—you just want to ensure that maple syrup melts completely into the water. Once it’s dissolved, kill the heat right away! Toss in your split vanilla bean, put a lid on it, and just let it sit there. We need it to cool down completely to room temperature. Once it’s cool, pull that gorgeous vanilla bean out. You can store this syrup in a sealed mason jar in the fridge, and I’m telling you, it lasts for up to 3 months! That’s how you set yourself up for success.
Creating the Vanilla Sweet Cream Foam
Next up is the star of the show—the sweet cream foam! This is where you can choose your adventure based on what cleaning supplies you aren’t afraid of tackling afterward. You need your almond milk and about a quarter cup of that beautiful vanilla syrup.
If you want the thickest foam, pop those two things into a blender and blend it on medium speed until it looks genuinely whipped and airy. If you don’t want to drag out the blender, use your trusty mason jar! Pour everything in, seal it tight—and I mean *tight*—and shake like your life depends on it until it feels frothy. The third option, and my personal favorite for quick clean-up, is using a handheld milk frother directly in the jar until you get that lovely, thick cream foam.
Assembling Your Vanilla Sweet Cream Cold Brew
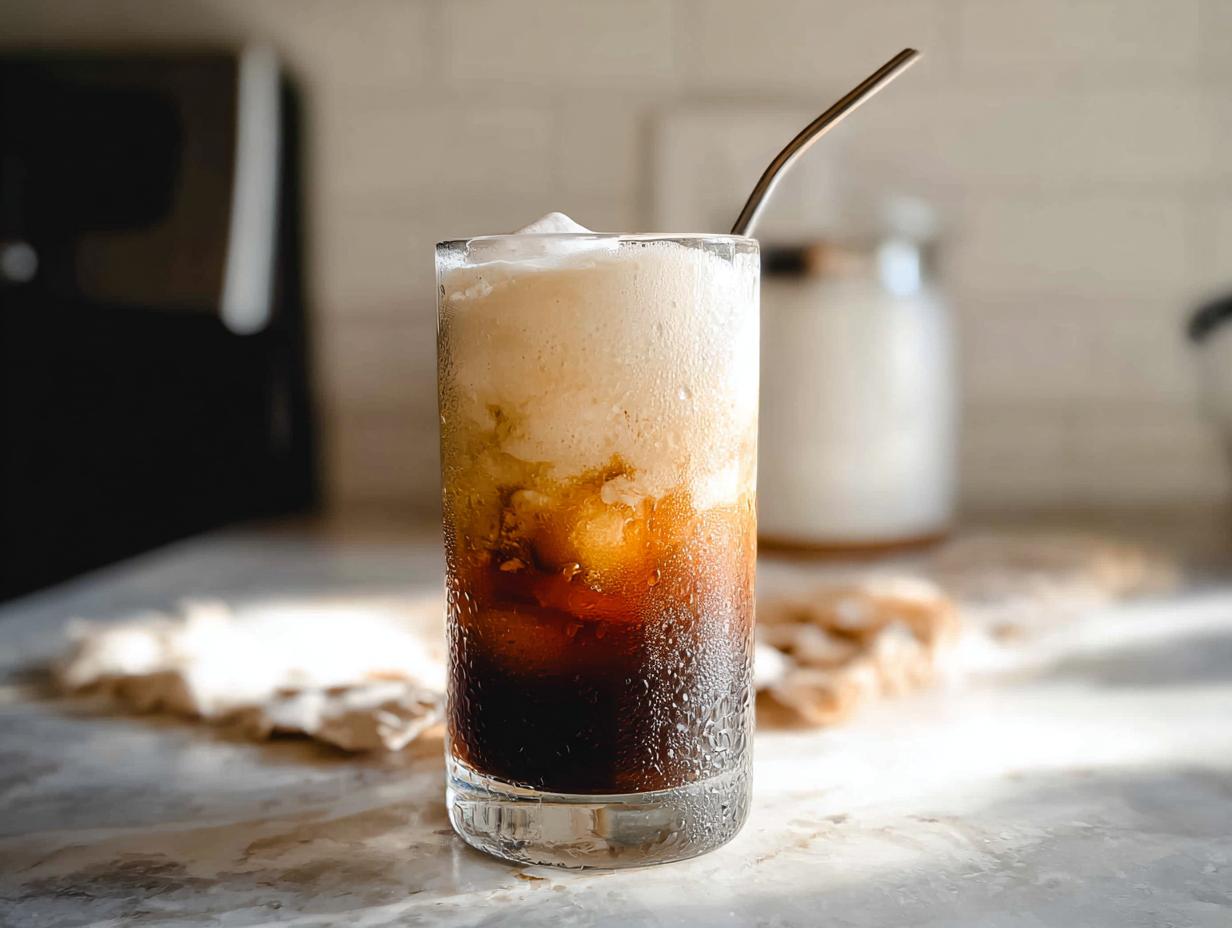
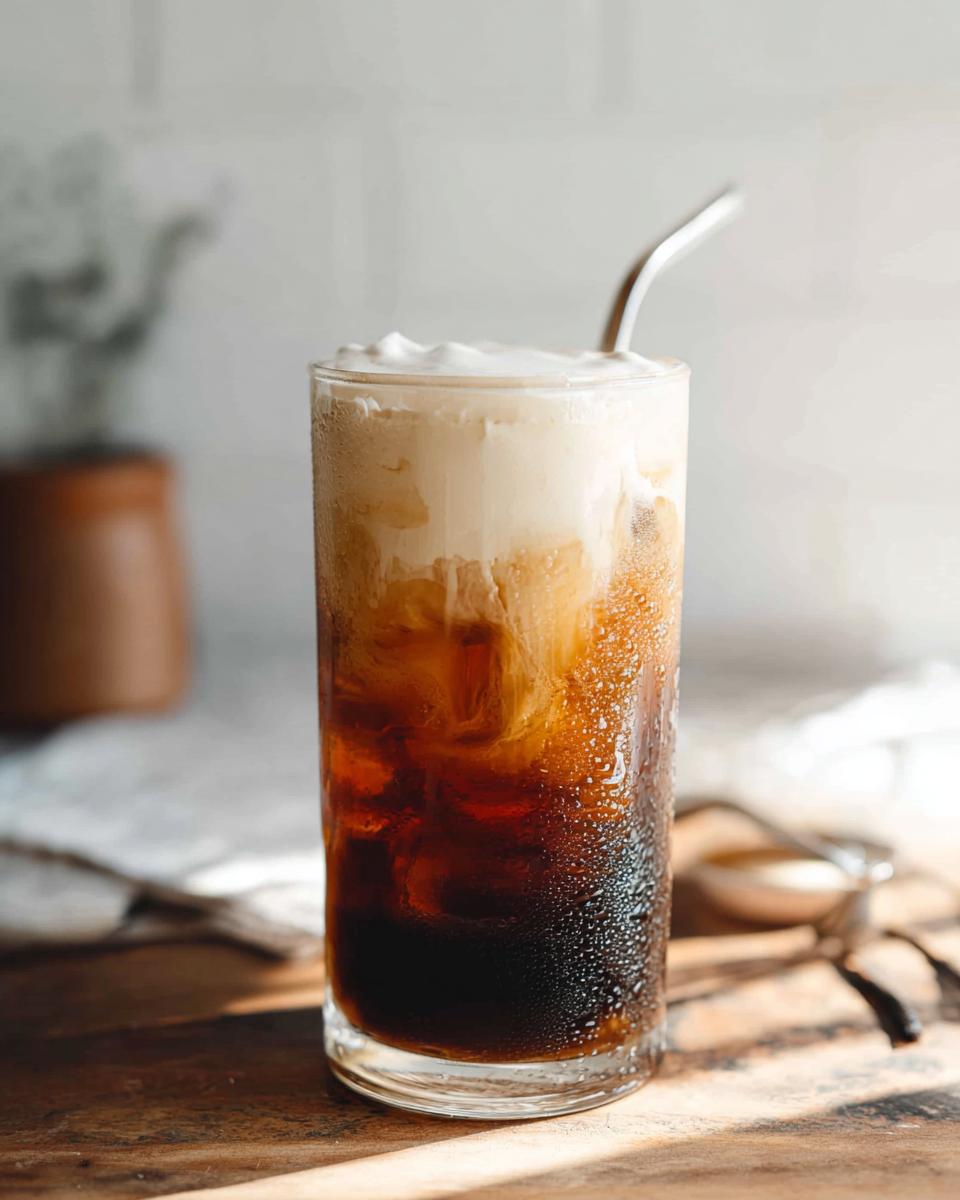
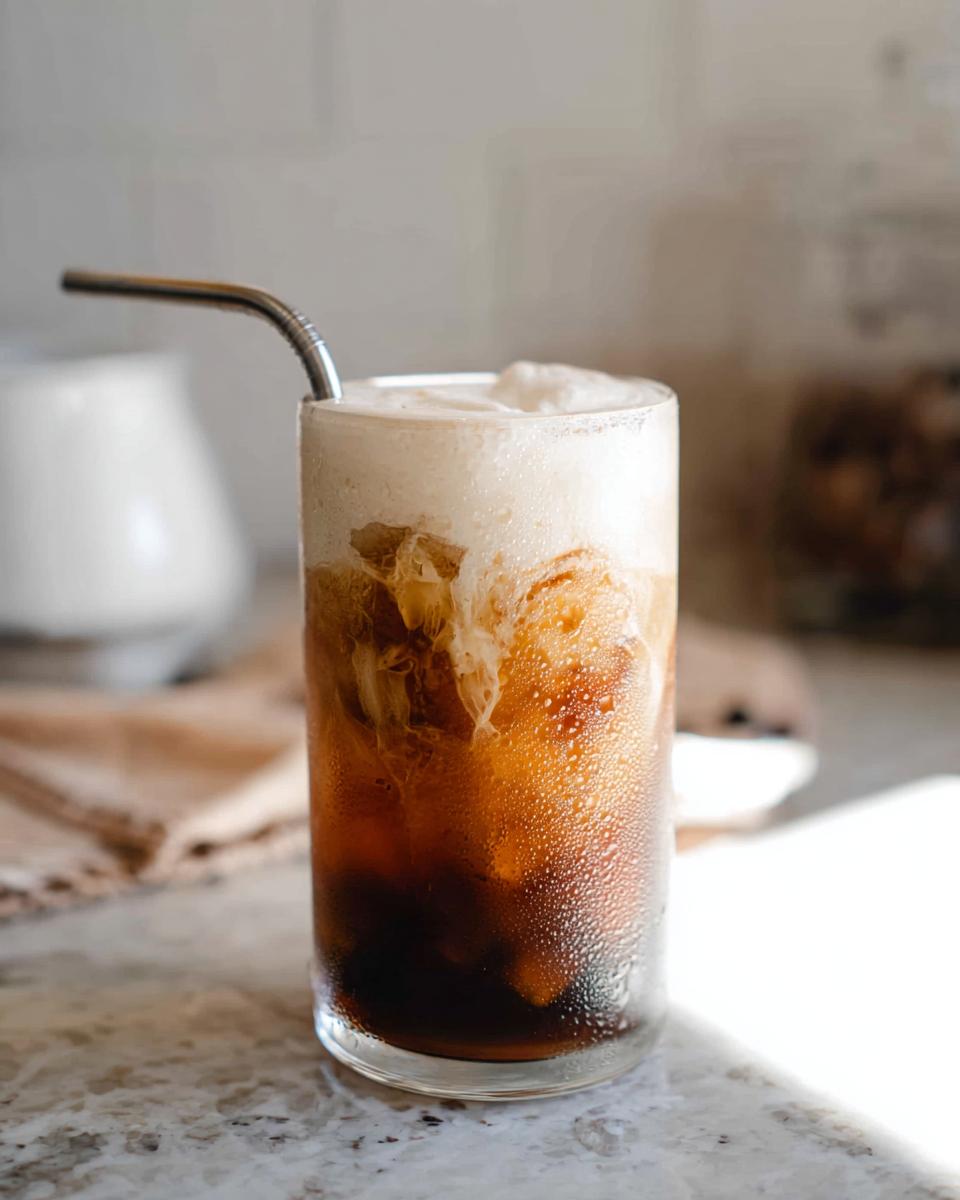
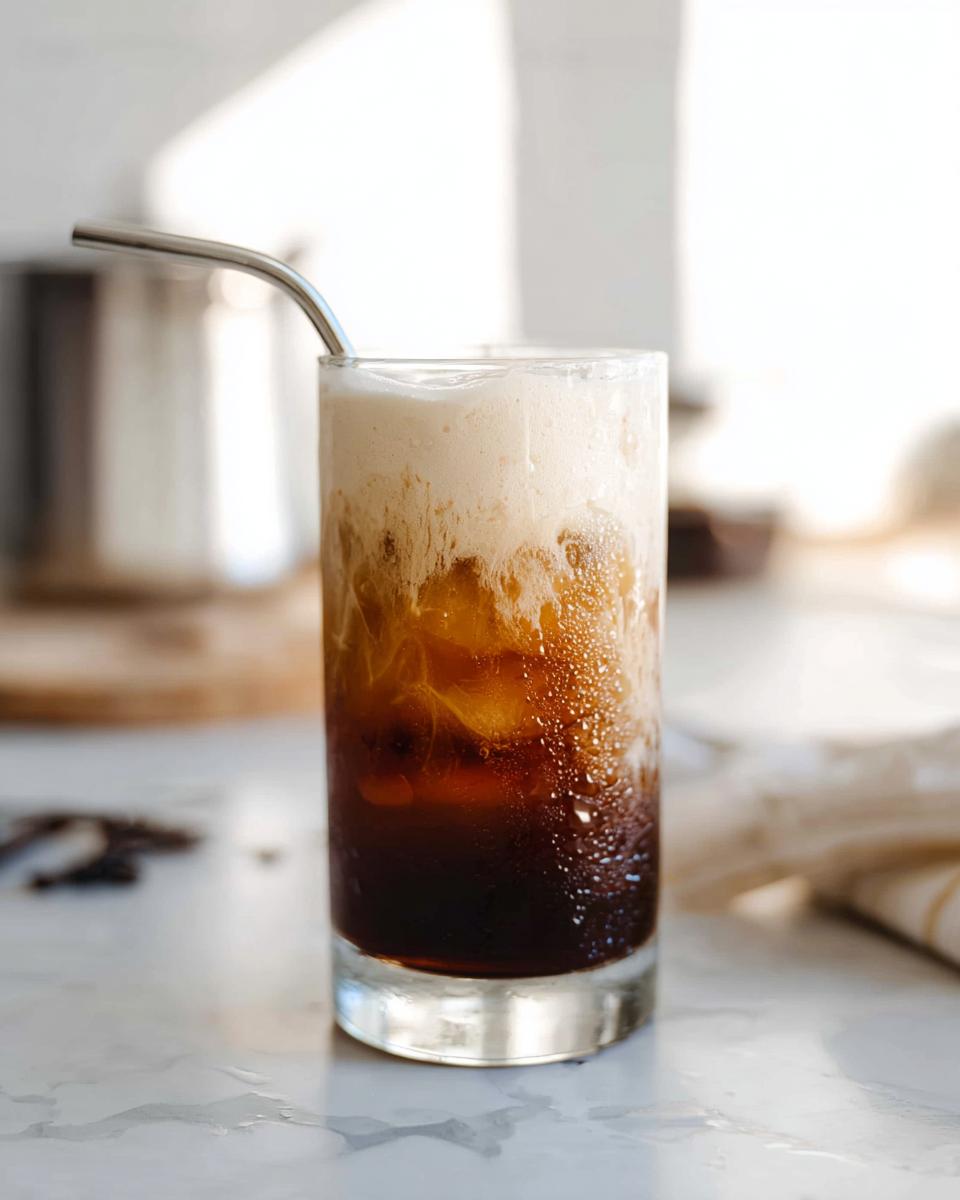
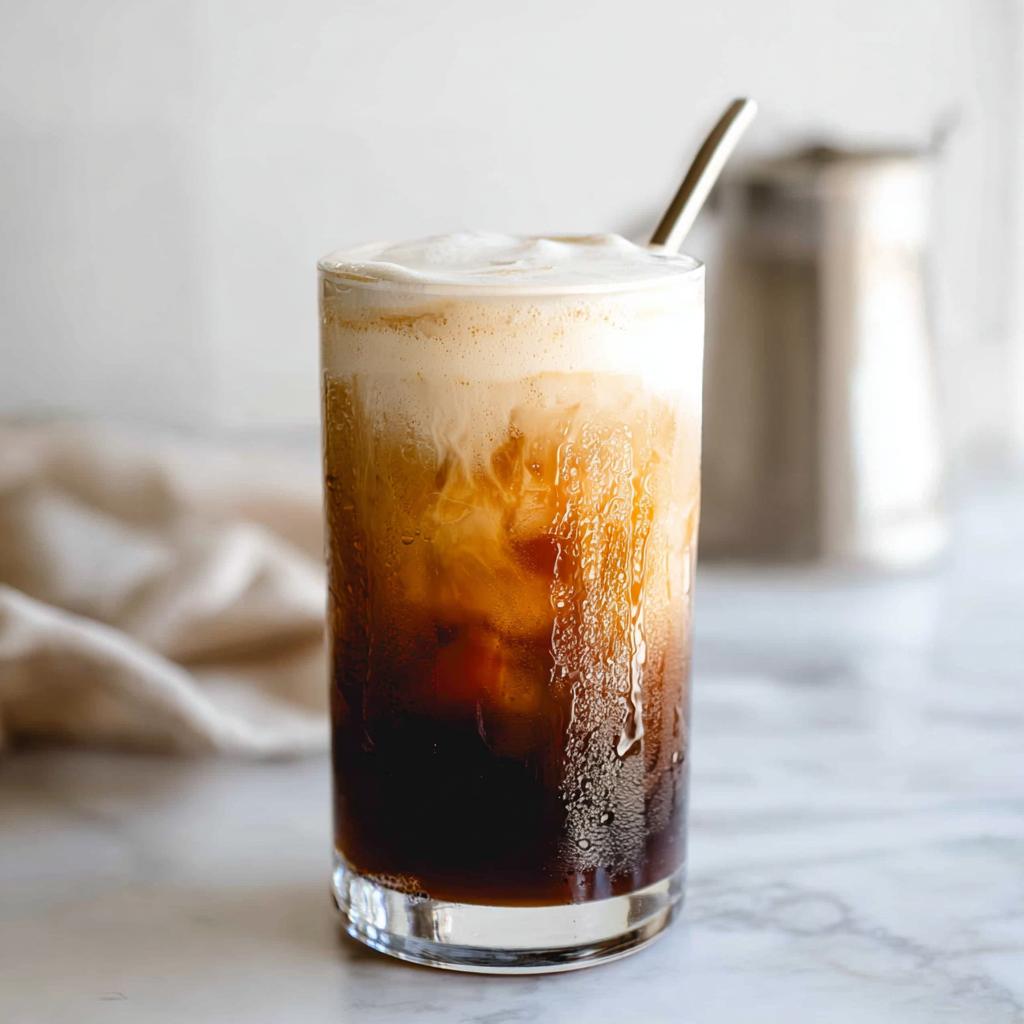
Time to put it all together in your largest glass! Start by filling that glass up with plenty of ice—seriously, more ice means colder coffee, which is always better. Pour in about one cup of your cold brew base over that ice.
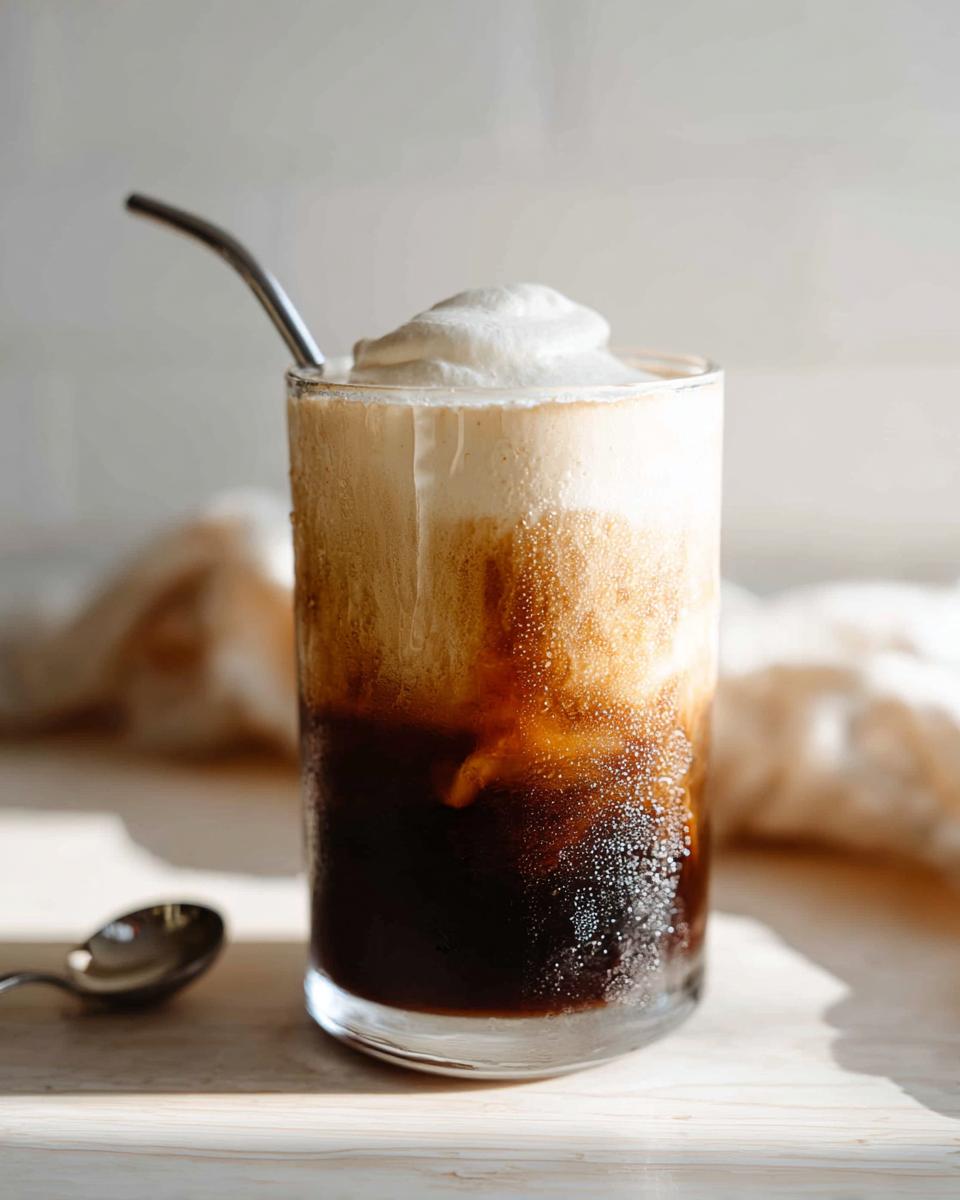
Now, take that sweet, airy foam you just made and gently spoon or pour it right on top. You want that beautiful, distinct layer floating on the cold brew. It’s tempting to leave it perfect right then, but trust me, you need to stir it all together gently to combine the sweet cream into the coffee. That first sip after you stir is pure bliss!
Ingredient Notes and Substitutions for Your Cold Brew
I get so many questions about switching things up, and I totally get it—sometimes you have to work with what’s in the pantry! Don’t panic if you don’t have every single item listed for this Vanilla Sweet Cream Cold Foam Cold Brew (Easy). The biggest game-changer you control here is the sweetener. I adore maple syrup, but if you want zero maple flavor, use plain white sugar when making the syrup. Just make sure it dissolves completely in your water!
Also, feel free to swap the almond milk. Oat milk makes an unbelievably thick foam, but whole milk is a classic choice too. For more coffee inspiration, check out the tips others have shared over at this helpful resource!
Cold Brew Options: Store-Bought vs. Homemade Coffee
Now, let’s talk about that Cold Brew base. The recipe calls for homemade because you control the strength, which is huge. If you use homemade, you can make it super concentrated so the flavor doesn’t get washed out by the sweet cream.
If you’re using store-bought, which is perfectly fine for a quick morning fix, just make sure it’s a high-quality, strong concentrate. If it tastes a little weak on its own, you might want to reduce the amount of ice you use when you assemble the drink so the final Homemade Coffee isn’t watered down.
Tips for Perfect Vanilla Sweet Cream Cold Foam Cold Brew (Easy)
If you want that stellar drink every single time, there are just a couple of pointers I always stress to my friends. Don’t worry if your first attempt at the sweet cream isn’t perfectly stiff; it just means you need to adjust one or two things!
The first tip is all about texture control. If your foam isn’t holding its shape after shaking or blending, try chilling your almond milk and your syrup mixture *before* you whip them. Cold ingredients foam up way more dramatically than room temperature ones. It’s like whipping cream, you know? Cold magic happens! If you need a refresher on getting mixtures perfectly smooth before you start, check out some foundational tips I covered in my foolproof chicken guide over at this link.
Next up, sweetness. Since we used maple syrup in the base, the flavor is already rich, but everyone’s palate is different. My best advice for making this Vanilla Sweet Cream Cold Foam Cold Brew (Easy) better than the café version is to taste your foam *before* pouring it over the cold brew. If it needs a little more oomph, drizzle in maybe half a teaspoon more of pure vanilla extract right into the foam mixture and give it one last quick blend or shake. It really lets that vanilla shine through.
Storage and Make-Ahead for Your Vanilla Sweet Cream Cold Foam Cold Brew (Easy)
This is such a great thing about making your own Vanilla Sweet Cream Cold Foam Cold Brew (Easy): we set ourselves up for success! The vanilla syrup is the real hero here. Remember how I mentioned it lasts three months? Keep it tightly sealed in the fridge in that airtight glass container or mason jar. It’s ready whenever you are!
Now, the sweet cream foam itself? That’s a different story. It’s full of air from whipping, so it deflates fast, usually within an hour or two. For that amazing café texture, you absolutely must make the foam fresh right before you drink it. It just doesn’t keep its structure once chilled or stored. So, always have your syrup and cold brew ready to go, and only whip up the foam when you’re ready to pour that first perfect glass for yourself or your guests. It’s worth those extra two minutes! When I need other things prepped ahead of time, I usually turn to my favorite make-ahead ideas right here.
Serving Suggestions for Your Homemade Coffee Creation
Now that you’ve mastered the Vanilla Sweet Cream Cold Foam Cold Brew (Easy), it’s time to make it Instagram-worthy! Presentation really does make this Homemade Coffee feel like a special occasion. I always serve mine in tall, clear glasses so you can see those gorgeous layers of dark cold brew topped with that cloud of sweet cream.
If you want an extra layer of warmth, try adding a tiny, tiny pinch of ground cinnamon or even nutmeg right on top of the foam before you stir it in. It complements the vanilla beautifully! For more ways to elevate your home meals—because why stop at coffee?—check out some fun inspiration for restaurant-style dining at home right here!
Frequently Asked Questions About Vanilla Sweet Cream Cold Foam Cold Brew (Easy)
I know you probably have a few lingering questions, especially when you’re trying to copy a café favorite at home! That’s totally normal. I’ve gathered the ones I get the most about making this Vanilla Sweet Cream Cold Foam Cold Brew (Easy). It’s all about getting that perfect, balanced sweetness and texture, and I’m here to help you nail it every time.
How much caffeine is in this Vanilla Sweet Cream Cold Foam Cold Brew (Easy)?
That’s the million-dollar question, isn’t it? The caffeine level isn’t set in stone because the real kicker here is the Cold Brew base! Since we are using four cups for four servings, the caffeine content usually comes from that base. If you use a very strong, concentrated homemade Cold Brew, your drink will be quite potent. If you use a milder store-bought version, it’ll be lighter. You control the strength by choosing your coffee concentrate and how much ice you use to dilute it before adding that sweet foam!
Can I make this recipe without a blender to create the Vanilla Sweet Cream Cold Foam?
Absolutely! You don’t need a fancy blender to achieve that luxurious, thick Vanilla Sweet Cream Cold Foam. Honestly, sometimes the blender is just too much cleanup for a single drink, right? If you don’t have one, your best friends are a sturdy sealable mason jar or a handheld milk frother. Pour your almond milk and vanilla syrup into the jar, seal it super tight, and shake it like you mean it until it gets thick and bubbly. If you have a frother, just stick that right into the mixture until you get that lovely, pillowy cream foam. This Easy Recipe is truly adaptable!
For more foundational kitchen advice—like how to handle proteins without a fuss—you can check out some of my favorite guides over at this resource.
Share Your Vanilla Sweet Cream Cold Foam Cold Brew (Easy) Experience
Okay, now that you’ve mastered making your own Vanilla Sweet Cream Cold Foam Cold Brew (Easy), I really want to see what you came up with! Did you use oat milk? Did you add cinnamon? Please drop a comment below and let me know how it turned out. Don’t forget to rate the recipe if you loved that sweet, creamy kick! If you have any questions or want to share a picture, you can reach out to me through my contact page. Happy sipping!
Vanilla Sweet Cream Cold Foam Cold Brew (Easy)
Ingredients
Equipment
Method
- For the vanilla syrup: Add water and maple syrup to a small saucepan and bring to a boil.
- Once maple syrup has dissolved turn off heat, add vanilla bean and let cool to room temperature.
- Remove vanilla bean and store in a mason jar or glass container in the fridge for up to 3 months.
- For the Vanilla Sweet Cream Cold Brew: Add almond milk and a 1/4 cup of vanilla syrup to your blender and blend until it reaches a whipped consistency. Alternatively add to a mason jar and shake vigorously and/or use a milk frother to froth into a cream foam.
- Add ice to a large glass and top with 1 cup of cold brew. Pour in your vanilla sweet cream to taste. Stir to combine.
Notes
Tried this recipe?
Let us know how it was!
Visual Culinary Artist & Aesthetic Designer
When the pandemic killed my career as a luxury hotel photographer overnight, I was stuck in my studio apartment with nothing but time and vegetables. That’s when I started treating meal prep like photography projects—and discovered that the same principles that made five-star dishes camera-ready could turn humble zucchini noodles into social media gold.
My fine arts degree from Parsons taught me that people eat with their eyes first. After years behind the lens capturing haute cuisine, I realized that successful dieting often depends more on visual satisfaction than pure nutrition. When your food looks amazing, you actually want to stick with your eating plan.
My recipe development feels more like an art studio than a test kitchen. I use color theory to guide ingredient selections—purple cabbage with golden cauliflower, emerald herbs against ivory cheese. My “Edible Landscapes” series transforms standard low-carb ingredients into miniature scenic compositions that make vegetables feel aspirational rather than obligatory.
I spend evenings exploring art galleries and practicing watercolor painting, always looking for inspiration. My philosophy is simple: make low-carb food visually irresistible, and dietary compliance becomes an aesthetic choice rather than a health sacrifice.