

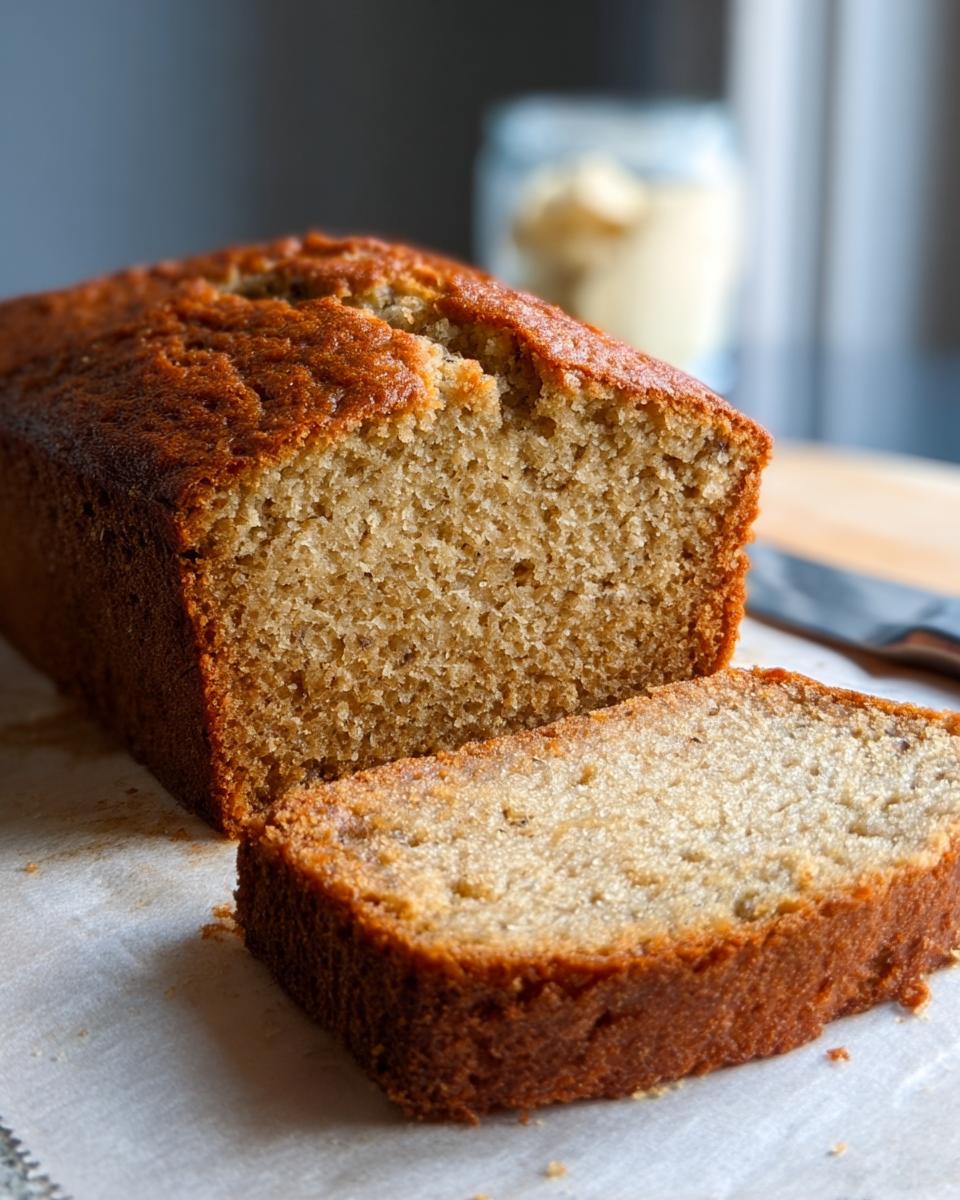
Oh, banana bread! There’s just something so comforting about that homey, sweet smell filling the kitchen, isn’t there? I still remember the first time I baked banana bread. It was a rainy Saturday afternoon, and I found myself with a bunch of overly ripe bananas—too mushy for my usual breakfast. I coveted my grandmother’s recipe, which I had seen scribbled on a notecard, and I decided to give it a whirl. The smell that filled my kitchen as it baked was a nostalgic blend of sweetness and warmth, evoking memories of family gatherings and cozy moments. That first slice, warm and slathered in butter, felt like a hug on a chilly day. From that moment on, baking banana bread became both a comfort and a challenge, as I tinkered with ingredients and techniques to make it truly my own. If you’re looking to nail that perfect loaf every single time, this Ultimate Banana Bread Guide: Ingredients, Temps, Tips is for you. We’re talking a super straightforward recipe for the moistest banana bread, perfect for home bakers, covering all the essential ingredients, baking temperatures, and my best tips for success. Trust me, it’s a game-changer! You can learn a bit more about why I love baking so much over here.
Why This Ultimate Banana Bread Guide: Ingredients, Temps, Tips Stands Out
Okay, so what makes this banana bread recipe the one you’ll come back to again and again? First off, it’s seriously foolproof! You don’t need any fancy equipment – not even a mixer! We’re all about getting that perfectly moist texture that makes banana bread so divine, and this recipe makes it super easy, even if you’re just starting out. My goal with this Ultimate Banana Bread Guide: Ingredients, Temps, Tips is to give you that consistently delicious, tender loaf without any fuss. It’s all about simple steps and great results!
Gathering Your Ingredients for Moist Banana Bread
Alright, let’s talk about what you’ll need to make this fantastic banana bread! The secret to a truly moist loaf is pretty simple: just grab those bananas that are looking a little *too* ripe. You know, the ones with all the brown spots? Those are gold! They bring tons of natural sweetness and moisture, which is exactly what we want. Don’t stress if you haven’t got a stand mixer; this recipe is totally doable by hand, which I actually prefer sometimes because you can really feel when things are just right.
Dry Ingredients for Banana Bread
First up, let’s get our dry stuff together. You’ll need 1 ¾ cups of all-purpose flour, and make sure to spoon it into your measuring cup and level it off – don’t scoop directly from the bag! Then, grab 1 teaspoon of baking soda, 1 teaspoon of baking powder, and ½ teaspoon of salt. Just give ’em a nice whisk in a medium bowl to combine everything evenly.
Wet Ingredients for Banana Bread
Now for the magic! We need ½ cup of softened unsalted butter and ¾ cup of sugar. Beat those together until they’re nice and fluffy. Then, crack in 2 large eggs, one at a time, making sure each is well mixed before adding the next. The star of the show is 1 cup of mashed very ripe bananas (that’s usually 2 to 3 big ones!), plus 2 tablespoons of fresh lemon juice – it adds a little zing and helps keep things moist – and 1 ½ teaspoons of vanilla extract. Mix it all up until it’s well combined. Don’t worry if it looks a *little* curdled; that’s totally normal!
Essential Baking Temperatures and Oven Settings
Okay, let’s chat about temperature, because this is actually a bigger deal than you might think when it comes to getting that perfect bake! For this banana bread, we’re preheating our oven to 350°F (that’s 175°C). It might seem like a simple step, but getting that oven nice and hot *before* the batter goes in is crucial for making sure your banana bread bakes evenly all the way through. If your oven’s not hot enough, the inside might turn out kinda gummy or dense, and nobody wants that! A correctly heated oven means your bread will rise beautifully and get that lovely golden-brown crust we all love. Plus, it helps ensure your baking time is pretty consistent, usually around 40 to 45 minutes, give or take.
Step-by-Step Instructions for Ultimate Banana Bread
Alright, ready to bring it all together? Follow these simple steps and you’ll have a fantastic loaf of banana bread in no time. It’s really quite straightforward and doesn’t require any fancy equipment, just a whisk, a bowl, and your lovely enthusiasm! This method ensures we get that perfect, gooey center every time. For more baking tips, you might find this guide to gluten-free roux helpful!
Preparing the Pan and Oven
First things first, let’s get that oven preheated to 350°F (175°C). While it’s warming up, grab your 9 x 5-inch loaf pan and give it a good buttering and flouring. This is super important to make sure your beautiful bread doesn’t stick! You can find a great example of a banana bread recipe over here for comparison.
Combining Dry Ingredients
In a medium bowl, whisk together your flour, baking soda, baking powder, and salt. Just a gentle whisk is perfect – we don’t want to go crazy and get too much air in there right now. Just want to make sure everything’s nicely combined before we add it to the wet stuff.
Mixing Wet Ingredients
Now, grab your mixer (or a good old-fashioned whisk and some arm power!) and beat that softened butter and sugar together until it’s light and looks wonderfully fluffy – about 2 minutes usually does the trick. Then, add your eggs, one at a time, beating well after each addition. Next, toss in your mashed bananas, that fresh lemon juice, and your vanilla extract. Give it a good mix until everything’s happy and combined. Remember, don’t freak out if it looks a *little* curdled; that’s totally normal and just means the fats and liquids are doing their thing!
Combining Wet and Dry Mixtures
Here comes the crucial part: adding the dry ingredients to your wet mixture. It’s best to do this on low speed, just until everything is *barely* incorporated. Seriously, stop as soon as you don’t see any more dry flour streaks. Overmixing at this stage is the enemy of tender banana bread, so be gentle!
Baking Your Banana Bread
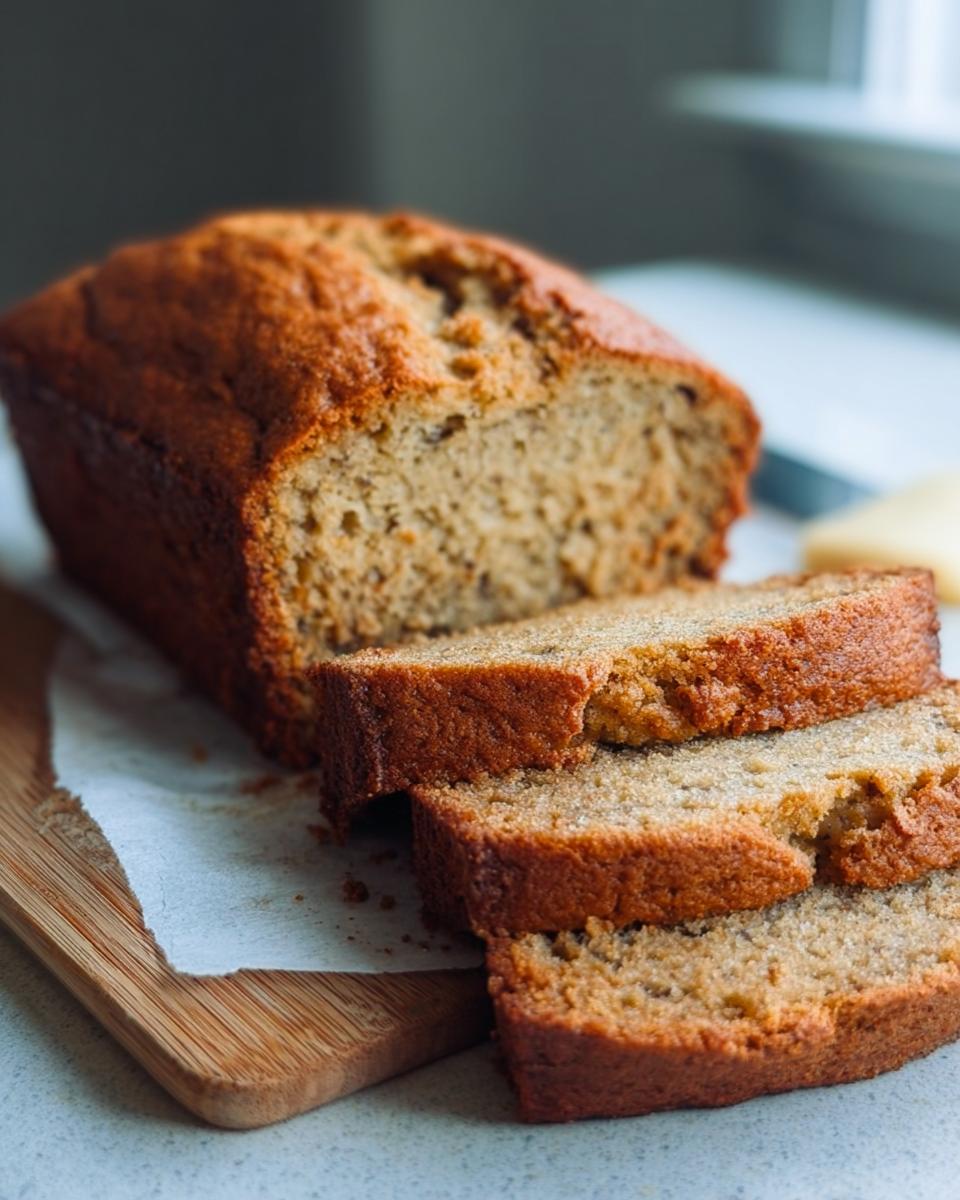
Pour that glorious batter into your prepared loaf pan and spread it out evenly. Slide it into your preheated oven and let it bake for about 40 to 45 minutes. The best way to know it’s done is to stick a thin tester (like a skewer or a paring knife) right into the center. If it comes out clean, or with just a few moist crumbs clinging to it, it’s ready!
Cooling the Loaf
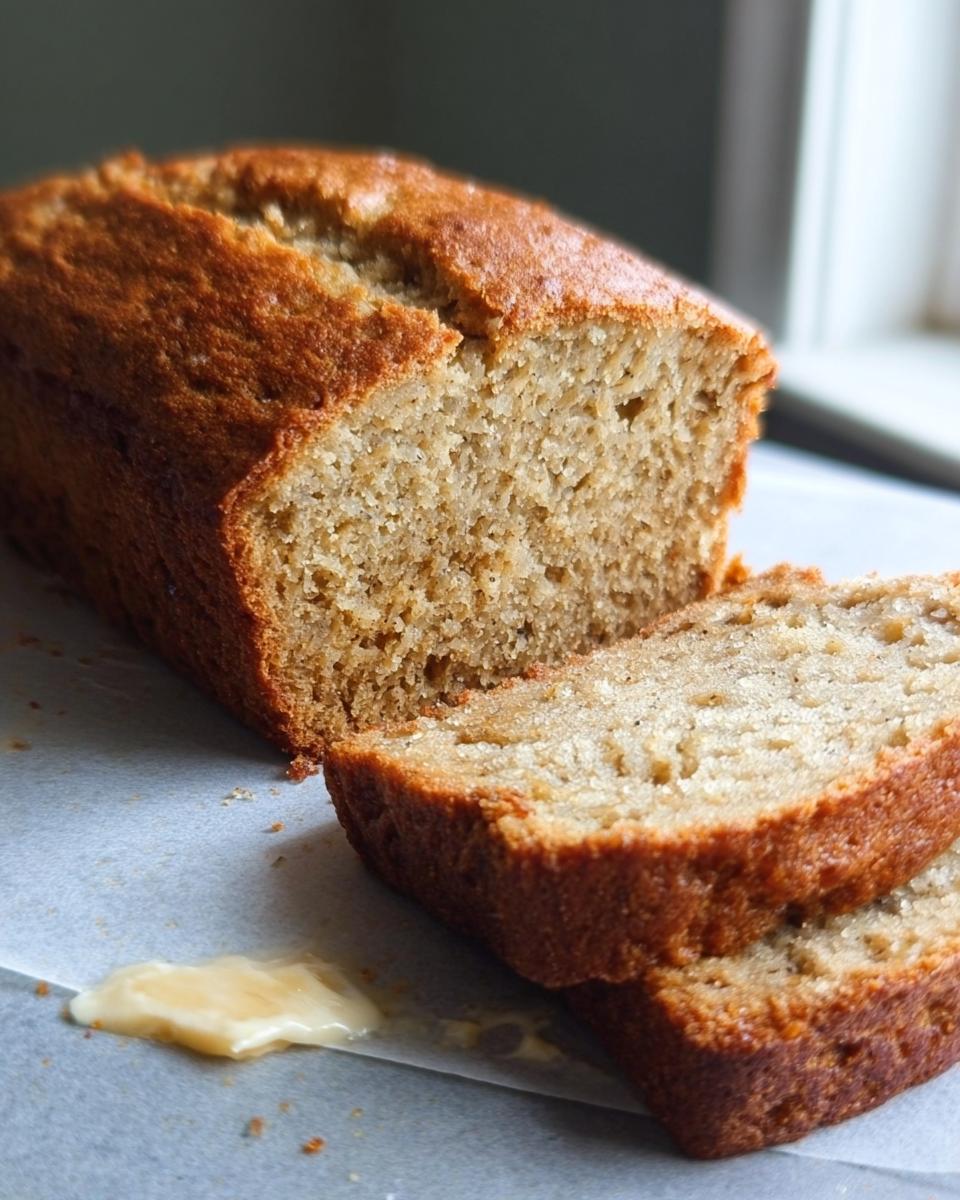
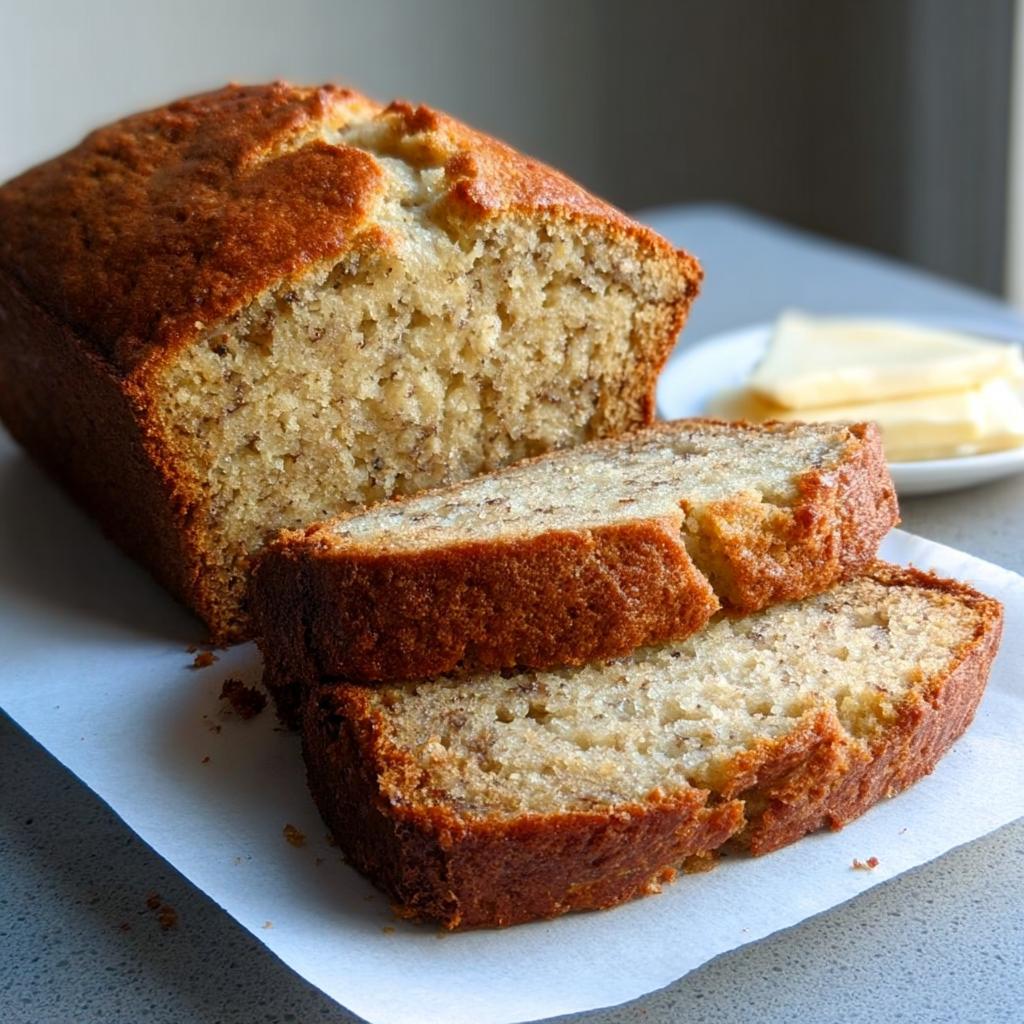
Once it’s baked to perfection, let the banana bread hang out in the pan for about 10 minutes. This little bit of cooling time in the pan helps it firm up. Then, carefully turn it out onto a wire rack to cool completely. Resist the urge to cut into it while it’s piping hot; letting it cool fully really makes a difference in the texture!
Expert Tips for the Ultimate Banana Bread
You know, baking is such a fun journey, and a few little tricks up your sleeve can really make a difference! I’ve learned a few things over the years that help ensure this banana bread turns out just perfectly every single time. It really is all about those little details that elevate a good loaf to a great one! For more easy ideas, you can check out these 23 easy recipes.
Choosing the Best Ripe Bananas
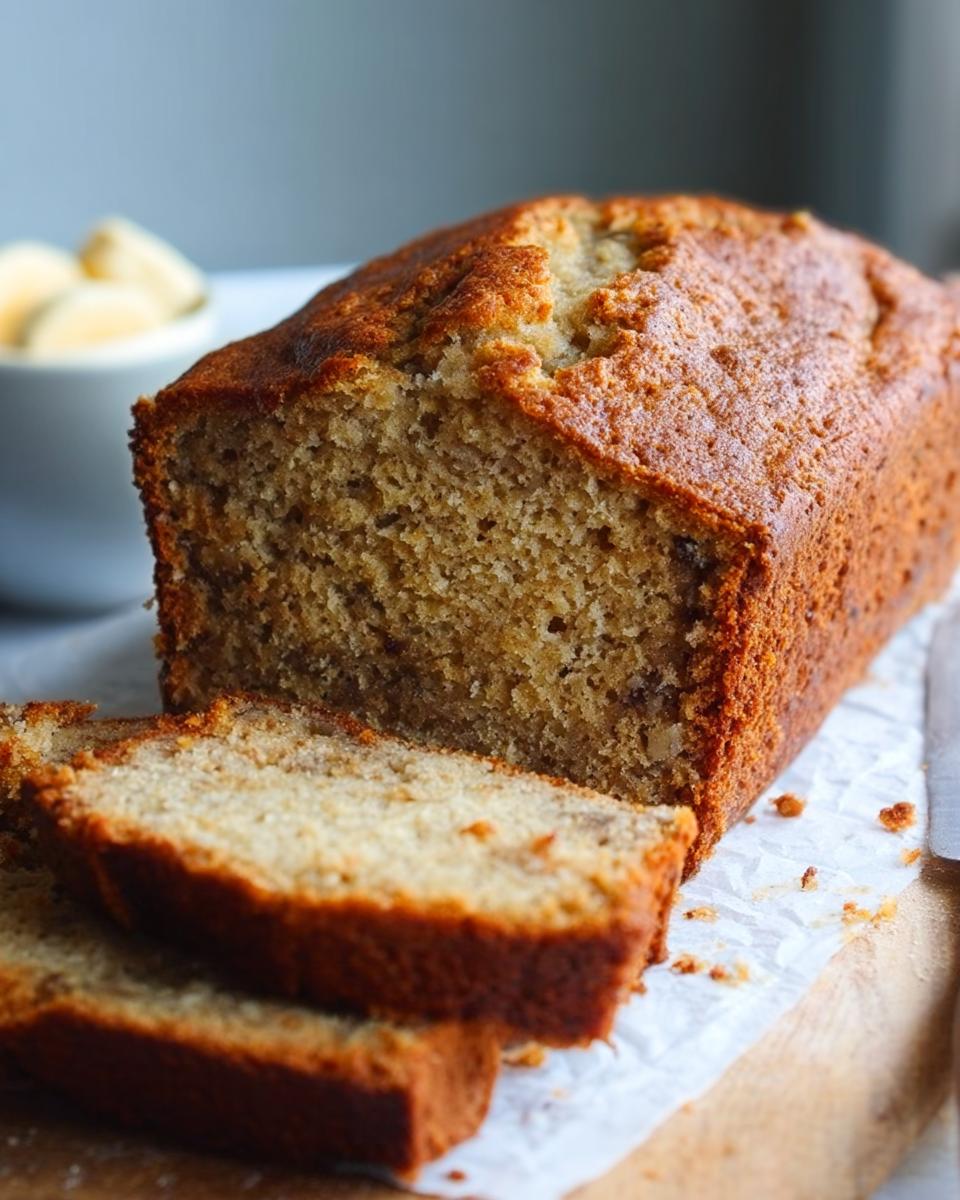
This is HUGE! Seriously, don’t even think about using green or barely yellow bananas. You want them *really* spotty, almost black. The browner they are, the sweeter and more flavorful they’ll be, plus they bring so much natural moisture. It’s like magic for your banana bread!
Achieving a Moist Banana Bread Texture
The keys here are definitely those super ripe bananas and *not* overmixing. When you mix the flour in too much, you can make the bread tough. Also, the butter and sugar combo creates this lovely tender crumb, and the lemon juice adds a little something extra to keep it from feeling dry. It’s a delicate balance!
Variations: Adding Chocolate Chips and More
Oh, the fun additions! My absolute favorite is tossing in about ½ cup of chocolate chips – semi-sweet or dark chocolate is divine! You can also add chopped nuts like walnuts or pecans, or even a pinch of cinnamon or nutmeg for extra spice. Just gently fold them in after you combine the wet and dry ingredients.
Making Your Banana Bread Freezer-Friendly
So, what if you bake a whole loaf (or maybe you just made too much, oops!) and want to save some for later? Don’t even worry about it! This banana bread freezes like a dream. The trick to keeping it super fresh is to make sure it’s completely cooled down first. Seriously, don’t skip this part! Once it’s totally cool, wrap the loaf really well. I like to use a layer of aluminum foil, then maybe a layer of plastic wrap or freezer paper on top. You could also pop the wrapped loaf into a freezer-safe bag. It’ll happily hang out in your freezer for up to 3 months! When you’re ready for a slice, just unwrap it and let it thaw on the counter overnight. Easy peasy!
Frequently Asked Questions About Banana Bread
Got questions? I’ve got answers! Baking is all about learning and experimenting, so don’t hesitate to ask if something’s on your mind. You can always reach out to me if you have more!
Why is my banana bread dense?
Usually, a dense banana bread happens if you overmix the batter after adding the flour, or if your leavening agents (baking soda and powder) are old. Overmixing develops the gluten too much, making it tough. Make sure those bananas are nice and ripe for the best texture!
Can I make this banana bread without a mixer?
Absolutely! This recipe is totally designed to be made without an electric mixer. Just use a sturdy whisk or a spatula to cream your butter and sugar, then mix in the rest of the wet ingredients. When it’s time for the dry stuff, stir it in gently until *just* combined. It works beautifully!
How do I know when my banana bread is fully baked?
The best way is the classic toothpick test! Insert a wooden skewer or a thin knife into the center of the loaf. If it comes out clean, or with just a few moist crumbs stuck to it, it’s done. If there’s wet batter, give it a few more minutes and check again.
Nutritional Information for This Banana Bread Recipe
Here’s an estimated breakdown of what you’re getting in each slice of this delicious banana bread. Keep in mind these numbers can bounce around a bit depending on the exact brands you use and how ripe your bananas were. It’s just a ballpark figure to give you an idea!
Share Your Ultimate Banana Bread Creations!
I really hope you give this recipe a try! Making banana bread is such a joy, and I can’t wait to hear how yours turns out. If you make it, please consider leaving a comment below or rating the recipe – it really helps out other bakers! And if you snap a picture, tag me on social media! I’d absolutely love to see your amazing bakes. You can check out more of my adventures here!
Ultimate Banana Bread Guide: Ingredients, Temps, Tips
Ingredients
Equipment
Method
- Preheat your oven to 350°F (175°C). Butter and flour a 9 x 5-inch loaf pan.
- In a medium bowl, whisk together the flour, baking soda, baking powder, and salt.
- In the bowl of an electric mixer, beat the butter and sugar until light and fluffy, about 2 minutes. Add the eggs one at a time, beating well after each addition. Add the mashed bananas, lemon juice, and vanilla extract and mix well. The mixture may look a little curdled; this is normal.
- Add the flour mixture and beat on low speed until just incorporated. Do not overmix.
- Pour the batter into the prepared loaf pan. Bake until a tester inserted into the center comes out clean, about 40 to 45 minutes.
- Let the bread cool in the pan for about 10 minutes, then turn it out onto a wire rack to cool completely.
Nutrition
Notes
Tried this recipe?
Let us know how it was!
Mindfulness & Emotional Wellness Specialist
I never thought I’d leave my career as a corporate litigation attorney, but a panic attack in a courthouse bathroom changed everything. After struggling with emotional eating for over a decade—starting in college and getting worse through the stress of law school—I realized that no diet could fix what was really going on inside me.
My breakthrough came through mindfulness meditation training. Working with Jon Kabat-Zinn’s protocols, I discovered that my relationship with food reflected deeper patterns of anxiety and perfectionism that I’d been avoiding for years. That’s when I understood that sustainable eating changes require internal transformation, not just external rules.
Now I treat meal preparation as meditation practice. My “Mindful Kitchen” workshops help people transform ordinary cooking into opportunities for self-awareness and emotional healing. I’ve developed over 180 recipes designed for slow, mindful preparation—complex enough to keep you present, simple enough not to overwhelm your nervous system.
I believe food becomes medicine when we approach it with presence rather than reactivity. The kitchen can be our monastery if we choose to enter it with reverence.