
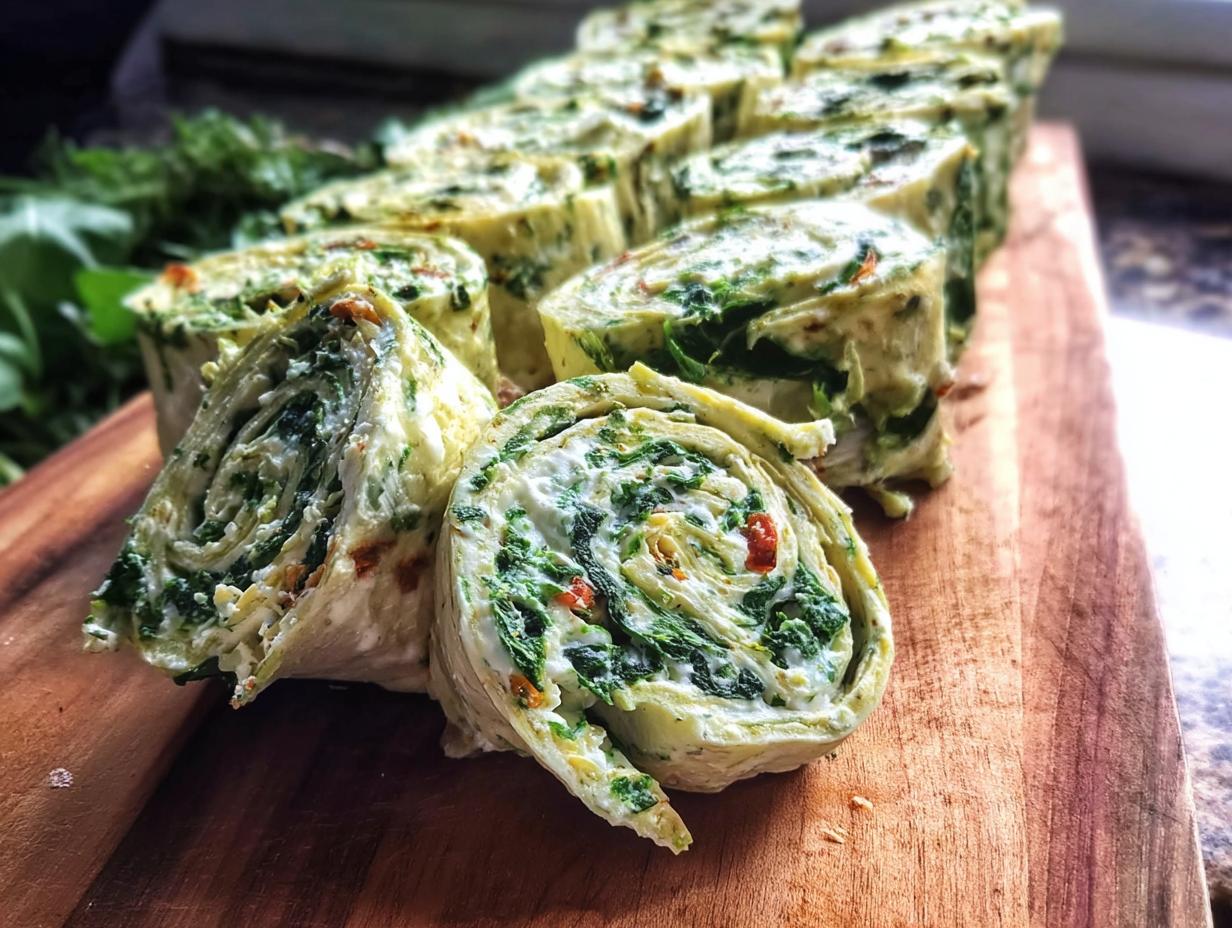
Are you tired of spending hours fussing over complex appetizers when all you really want is to enjoy your guests? Trust me, I get it! As someone who focuses on mindfulness and emotional wellness, I know that sharing food should feel joyful, not stressful. That’s why I’m obsessed with recipes like these incredible Spinach Dip Pinwheels. They are flavorful, incredibly simple, and they always disappear first at any party I host. I’ll never forget the first time I introduced them at a family gathering. Nervous about my culinary skills, I stumbled upon the idea, and as I rolled those creamy, herby tortillas, I felt a spark of creativity ignite. When my family took their first bite, their smiles lit up the table, and I realized how food can bring people together in such a beautiful way. Since then, these pinwheels have become a staple, reminding me that sharing food is truly sharing love. If you want a guaranteed crowd-pleaser that barely takes any time, you’ve come to the right place! For more simple inspiration, check out my collection of favorite easy recipes, or see an alternative take on the dip at this great resource.
Why You Will Love These Spinach Dip Pinwheels
Listen, when you’re hosting, you want food that does the heavy lifting so you can actually enjoy your own party, right? That’s why this recipe is genius. I rely on these things every time I have people over. They are just so reliable and everyone devours them!
- Super Quick Prep Time: Seriously, the filling comes together faster than you can brew a pot of coffee. You’re looking at maybe 15 minutes, tops!
- Perfect Party Snack: These are bite-sized jewels that look impressive but require zero cutlery. Guests can easily grab and mingle.
- Make Ahead Magic: You can roll and freeze these babies days before your event. Just slice and bake when company arrives!
- Fantastic Flavor Balance: That creamy, slightly tangy filling packed with savory artichoke and spinach is just utterly moreish. Everyone always asks for the recipe!
- No-Fuss Baking: While we call these Easy Bake pinwheels, really, they just need a quick warm-up in the oven till they are golden and flaky. Nothing complicated here!
Honestly, there’s no downside. They are the perfect little flavor bomb to kick off any gathering or even just for an afternoon snack when you need something fun!
Essential Ingredients for Perfect Spinach Dip Pinwheels
Every great appetizer starts with dependable ingredients. This recipe relies on just a few staples, but the way we treat them is what makes these Spinach Dip Pinwheels truly shine. Forget those complicated grocery lists; we’re keeping this streamlined so you can focus on the fun part—eating them!
Here is what you need to grab. Pay close attention to those crucial notes—they are the difference between a decent snack and the star of the show!
- Cream Cheese: You need 8 ounces, and please make sure it’s fully softened. Leaving it on the counter for an hour helps immensely. Cold cream cheese will just tear up your tortillas when you try to spread it.
- Spinach: We’re using 1 cup of frozen chopped spinach. The key here is thawed AND drained. I mean really wring that moisture out. Soggy spinach equals a runny filling, and nobody wants a sloppy roll!
- Artichoke Hearts: Grab 1/2 cup of these little gems, but they must be diced. If they are whole, take a minute to chop them down.
- Sour Cream: Need 1/4 cup. I sometimes use plain Greek yogurt if I’m having dairy on hand, but sour cream gives the essential tang.
- Parmesan Cheese: Freshly grated is a must—1/4 cup. Skip the shaker stuff if you can; fresh Parmesan melts better into the mixture.
- Spices: A little kick with 1/2 teaspoon of red pepper flakes, 1/4 teaspoon of garlic powder, and a pinch of salt. These really wake up the creamy base.
- The Wrapper: Finally, you need 2 large flour tortillas. These act as the perfect vessel for holding all that creamy goodness together before we slice them up.
That’s it! Simple, right? Just focus on making sure that spinach is dry, and you’re already halfway to perfect pinwheels.
Equipment Needed for Making Spinach Dip Pinwheels
Okay, this is the easiest part—you probably have everything sitting in your kitchen right now! Since these don’t actually bake in the oven as part of the initial prep, we don’t need fancy mixers or specialized pans. It’s truly minimal cleanup, which I absolutely adore.
For assembly, you’ll only need a few basics. This keeps the barrier to entry super low if you are thinking about whipping these up right before guests arrive.
Mixing the Filling
First, grab a sturdy small bowl. This is where all the magic happens when combining the cheeses, spices, and veggies. You’ll just need a good spoon or a small rubber spatula for mixing everything until it’s smooth and uniform.
Rolling and Cutting
Next, you’ll need something to spread the goodness onto those tortillas. A butter knife or a small offset spatula works perfectly for spreading the mixture evenly right to the edges. You need that full coverage for a great roll!
When it comes time to slice those logs, a sharp, non-serrated bread knife is surprisingly the best tool. It glides through the chilled tortilla without squishing the filling out the sides. If you’re freezing them for a bit, make sure they are firm enough so the knife doesn’t drag.
Final Touches
You’ll need a good cutting board for slicing up those rolls. And once they are cut, just grab a simple serving platter! See? I told you it was easy prep. No stands, no specialized whisks—just kitchen essentials.
Step-by-Step Instructions for Easy Bake Spinach Dip Pinwheels
Alright, let’s get into the actual making of these beauties! Even though they don’t require much time in the oven, we call these our Easy Bake favorites because they come out hot, slightly crispy, and perfectly delicious. The key here is patience during the mixing and chilling stages. Don’t rush that part!
- Make the Filling First: Grab your small bowl and toss in the softened cream cheese, the super-drained spinach, diced artichoke hearts, sour cream, Parmesan, and all those lovely spices—red pepper flakes, garlic powder, and salt. Now, mix it really well until everything is creamy and looks totally uniform. You don’t want any pockets of plain cream cheese left!
- Spread the Love: Take your two flour tortillas and lay them flat on a clean surface. Use your butter knife or spatula to spread that creamy spinach mixture evenly over both tortillas. Try to get it right to the edges—this ensures every single slice has that perfect filling-to-tortilla ratio.
- Roll Them Tight: This is important for presentation! Starting from one end, roll up each tortilla really tightly, like you’re making a jelly roll. Squeeze gently as you go to keep it compact.
- The Crucial Chill: Now, wrap those tight logs gently in plastic wrap, or even just lay them on a plate uncovered if you are rushing. Pop them into the freezer for exactly 10 minutes. Trust me, this little freeze firms up the dip inside which makes slicing way less messy. You want them chilled firm but not rock solid!
- Slice and Prepare: Take those chilled logs out and use a sharp knife to cut them into about 1/2 inch thick slices. Aim for consistency so they all bake evenly when the time comes. If you’re freezing them for later, this is where you’d wrap them individually for the freezer, but if you’re baking now, place them cut-side up on your baking sheet.
- Serve Immediately: If you’re serving right away, they are technically ready! But most people like to give them a quick warm-up in the oven until they are golden brown and the cheese is gooey. If you want oven directions, check out my one-pan roundup for general heating tips!
See? That’s it! We went from ingredients to ready-to-serve in under 25 minutes total. Easy peasy entertaining!
Expert Tips for Success with Your Spinach Dip Pinwheels
I’ve made this recipe so many times now—for hurried weeknights and huge holiday buffets—that I’ve picked up a few tricks to make sure every batch is absolutely perfect. You want maximum flavor and minimum mess, right? Here are my top tips for elevating these simple pinwheels.
Getting Rid of the Watery Filling
This is my number one piece of advice! That spinach holds onto water like it’s going out of style. If you are skipping the step where you thaw and drain the frozen spinach, stop right now! I put the thawed spinach into a fine-mesh sieve, but the real secret is to use a clean kitchen towel or a couple of layers of cheesecloth. Gather the edges of the cloth around the spinach and literally twist and squeeze over the sink until you can’t get another drop out. You’ll be shocked by how much water comes out. If you leave that water in there, your filling will be sloppy, and your tortilla will get soggy fast.
Achieving That Perfect Roll
When you spread the dip mixture onto the tortilla, leave about a half-inch border clear along the two long edges. Think of it like sealing a sandwich bag. When you roll it up tight, those empty edges help the filling meld together internally without immediately squeezing out the ends. Roll it firmly, but don’t stretch the tortilla itself. If you roll it too loosely, the pinwheels will separate when they bake, which messes up the pretty swirl pattern.
Considering Puff Pastry Pinwheels
While this recipe nails it with soft flour tortillas—which give us that wonderful, softer, “Make Ahead” flexibility—I know some of you out there love that flaky texture! If you swap out the tortillas for thawed puff pastry, you instantly elevate this into something richer. If you go that route, you won’t need to chill them for 10 minutes before slicing; they should be firm enough right out of the fridge to cut cleanly. The baking time will also change dramatically, usually requiring about 15-20 minutes at 400°F until beautifully golden, so be sure to adjust your plans if you try this variation!
Handling Make Ahead Freezing
If you’ve made the logs and are preparing them for a party next week, make sure they are wrapped tightly in plastic wrap before going into the freezer. This prevents freezer burn, which tastes terrible, and keeps them nice and compact. When you are ready to bake, you don’t even need to thaw them completely. Just transfer the log to the cutting board, slice quickly while still partially frozen, and bake straight from frozen—you might just need 3 or 4 extra minutes in the oven. For more on foolproof make-ahead cooking, check out my ideas on making things ahead of time.
Make Ahead and Storage Instructions for Spinach Dip Pinwheels
Planning a party can be stressful enough without having to make everything the day of! That’s why I love recipes that let me get ahead of the game, and these Spinach Dip Pinwheels especially shine when you prepare them in advance. Knowing you have a fantastic appetizer ready to go saves so much stress on party day. This is truly the ultimate Make Ahead snack!
Preparing the Rolls in Advance
You have two great options here, depending on when you plan to serve them. If you are making these the day before, you can simply roll up the filling tightly in the tortillas, wrap those logs securely in plastic wrap, and place them right into the refrigerator. They hold up beautifully overnight! Remember how we talked about chilling them for 10 minutes before slicing? If they are refrigerated, they will be a little softer than that 10-minute freeze, so give yourself an extra 5 minutes in the freezer right before you slice them if you want those super clean cuts.
Now, if you’re heading into a really busy week or planning a huge event, freezing is your best friend. Wrap those tightly rolled logs individually in plastic wrap, and then maybe slide them into a large freezer bag. They freeze perfectly for up to three months! Honestly, the texture stays fantastic. For more tips on organizing yourself for busy weeks, check out my guide on meal prep friendly dinners.
Baking from Frozen vs. Refrigerated
When it comes time to serve, slicing is easiest when the roll is very firm. If they were refrigerated, slice them now, and bake according to the usual directions, maybe adding just three or four extra minutes since they are starting cold.
If you are baking straight from the freezer—which I often do—you still need to slice them first! That’s where that quick 10-minute freeze in combination with the added time in the oven comes in handy. Just place the frozen slices directly onto your baking sheet and add about 4 to 6 extra minutes to your usual baking time until they are hot all the way through and beautifully golden brown. They don’t dry out at all, which is amazing considering they were frozen! For more simple dinner preparations, take a look at my 5-ingredient dinner ideas for general low-effort cooking inspiration.
Storing Leftovers
If, by some miracle, you have any Spinach Dip Pinwheels left over after the party, storing them is easy! Once cooled, place any leftovers into an airtight container. They keep really well in the fridge for about 3 days. They taste great cold right out of the fridge, or you can quickly warm up a few in the toaster oven for about 4 minutes if you prefer them melty again. No reason to let those tasty little spirals go to waste!
Serving Suggestions for Your Party Snack Spinach Dip Pinwheels
Okay, so you’ve successfully made the absolute best bite-sized appetizers—congratulations! But now, how do you serve these amazing Spinach Dip Pinwheels to make them look as good as they taste? Presentation is everything when you are putting out a spread, even if they are just the ultimate casual Party Snack.
My philosophy is that easy food deserves a slightly elevated presentation. People notice the small details, and it makes hosting feel special without adding any extra work for you. Trust me; you want these to look stacked and tempting!
Arranging the Pinwheels for Maximum Impact
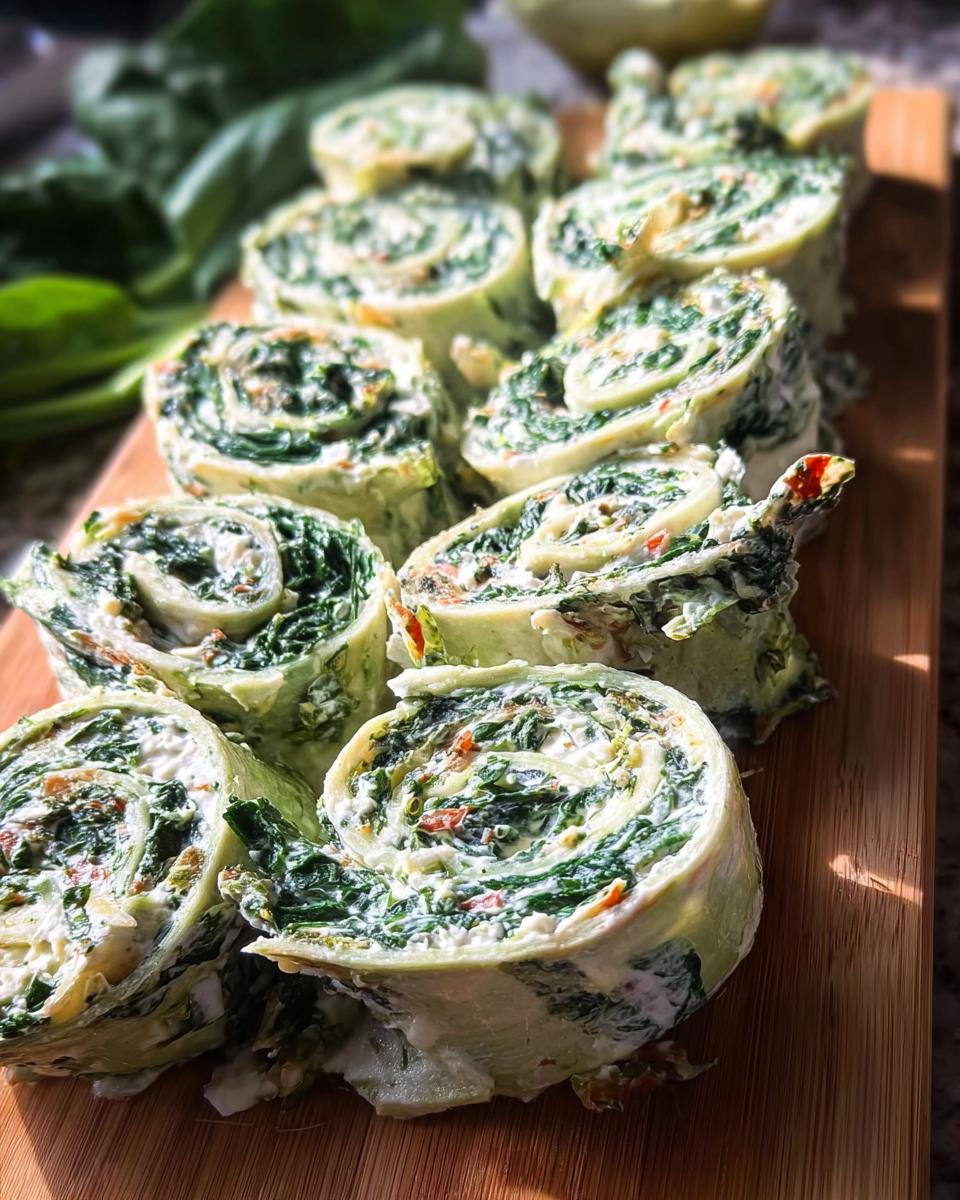
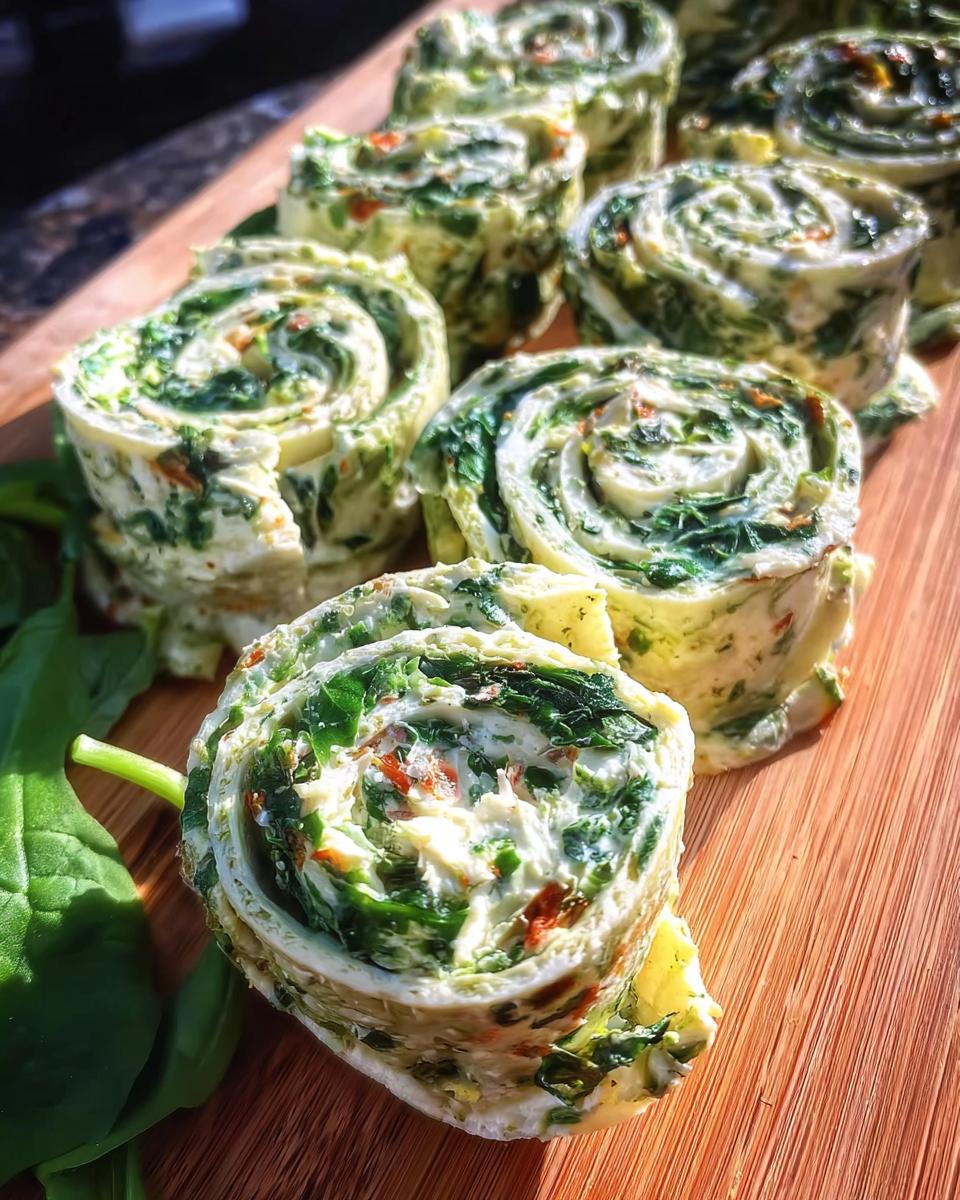
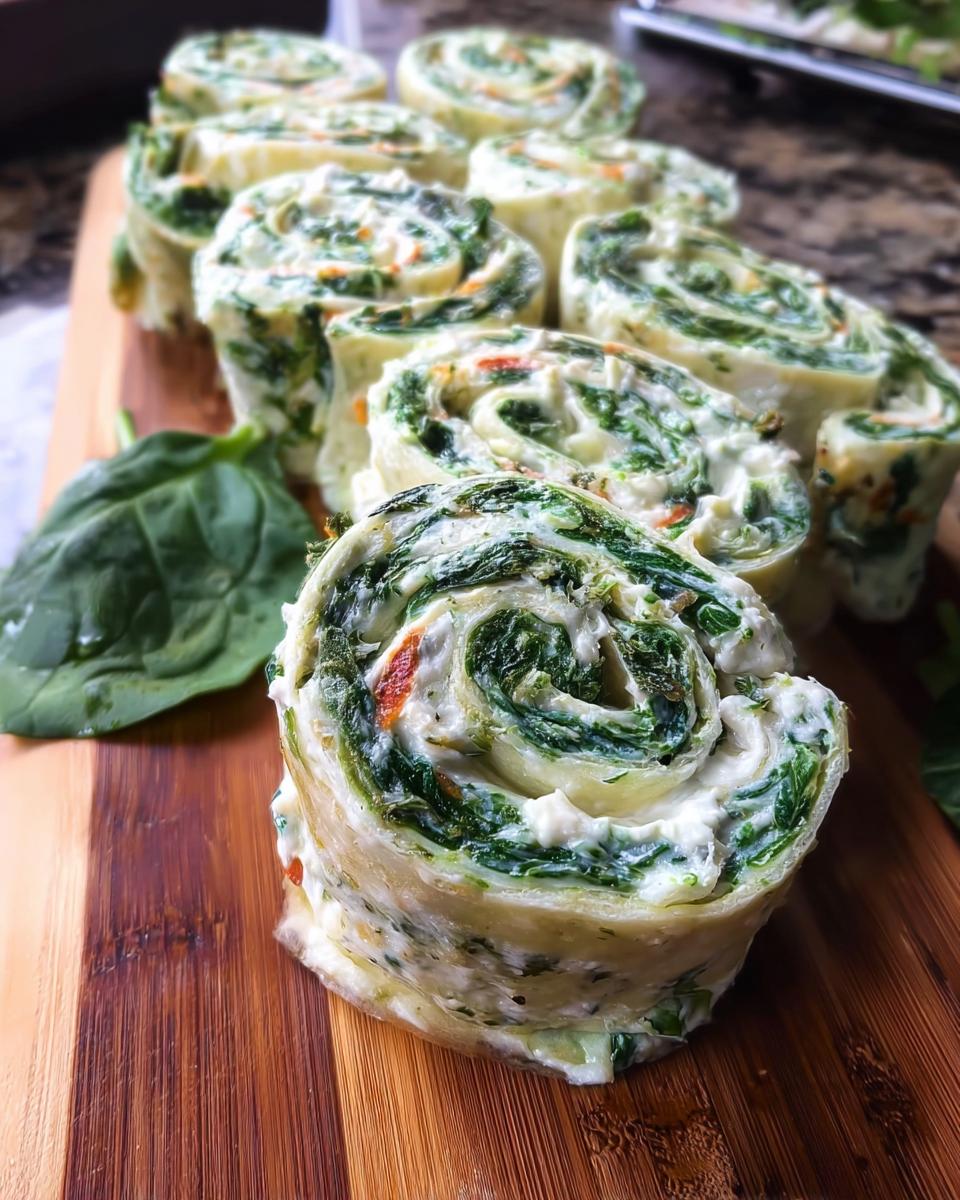
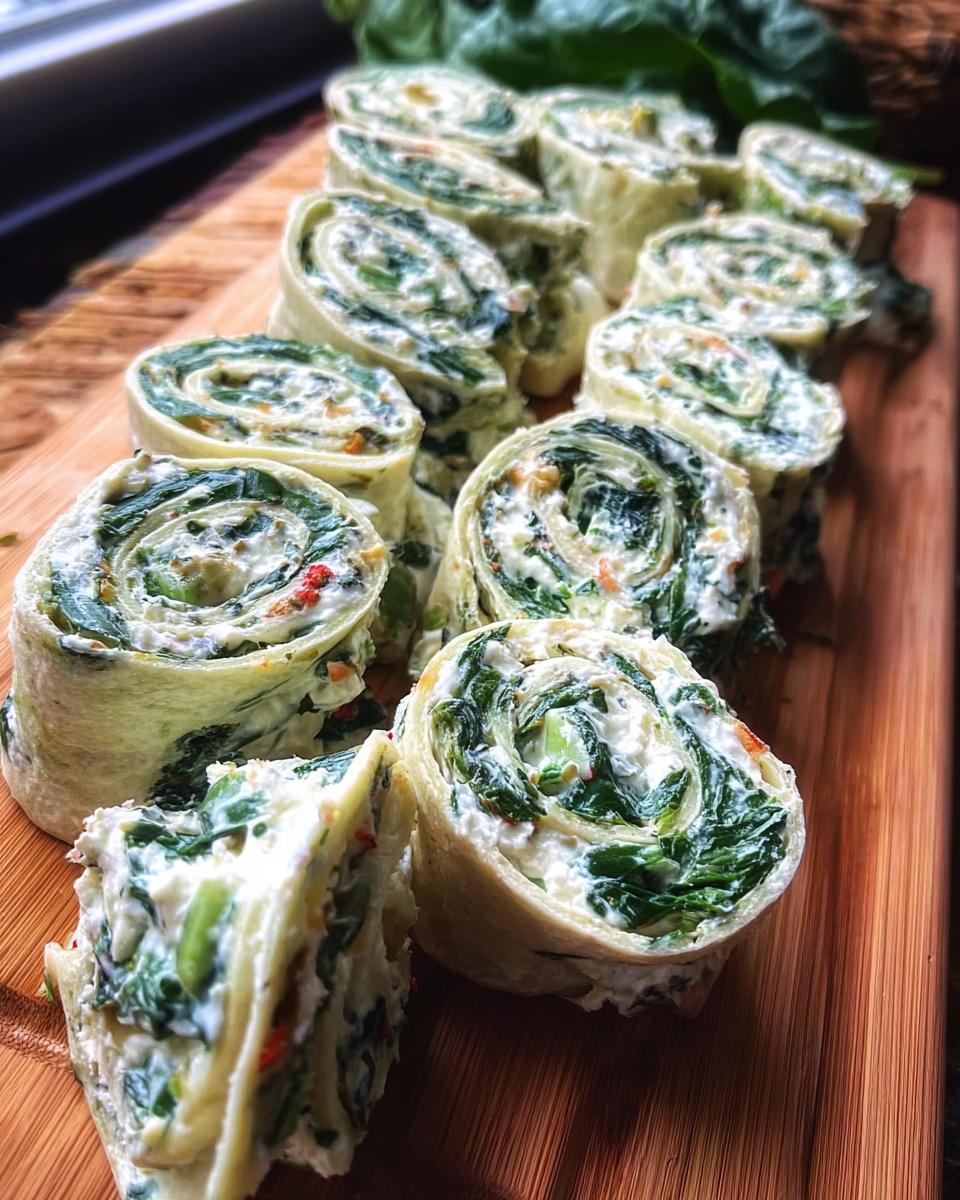
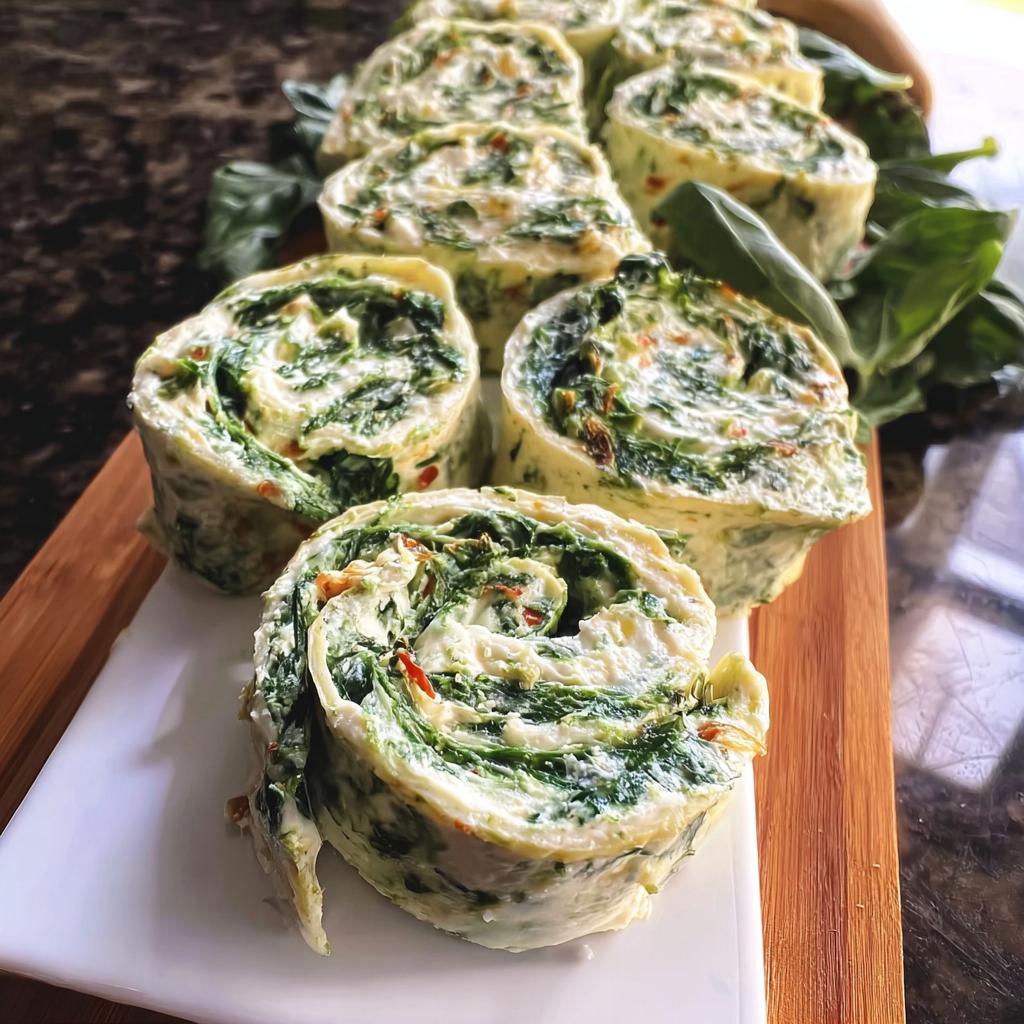
Forget just dumping them onto a flat plate! The key to making these look incredible is height and color contrast. Since the pinwheels are green and white/tan, we want to play with that. I always arrange mine in circular patterns on a simple white platter. Overlap them slightly, standing them up on their edge if you can!
If you’re serving a huge crowd, use a tiered serving tray. Stacking them vertically makes the platter look full and enticing, and your guests don’t have to dig through a pile to get a fresh one. This little change makes them look professionally catered!
The Magic of Pairing Dips
While the filling inside is robust and creamy, sometimes a little extra moisture or flavor on the side just takes things up a notch! These pinwheels are fantastic on their own, but they pair beautifully with just one or two simple sides for dipping. This enhances that “party” feel.
- Marinara Sauce: A warm, slightly chunky marinara dipping sauce placed right in the center of the platter works wonders. The acidity of the tomatoes cuts through the richness of the cream cheese so nicely.
- Extra Yogurt Dip: If you used Greek yogurt in your mix, have a small bowl of plain yogurt mixed with a sprinkle of dried dill nearby. It offers a cool, herby contrast for those who like their snacks creamy.
- Fresh Veggie Sticks: Balance out the richness! Have some crisp carrot sticks, celery, or bell pepper strips nestled around the pinwheels. People love having something crunchy dipped in that creamy filling if a few come apart during assembly.
What to Drink Alongside Them
When I’m serving these, it’s usually for a casual get-together, so I keep the drinks simple. For non-alcoholic options, a crisp sparkling water with lemon or lime is perfect—it cleanses the palate between bites. If you are serving wine, skip the heavy reds. A crisp, cold Sauvignon Blanc or even a dry Rosé stands up beautifully to the spinach and Parmesan flavors.
If you’re looking to impress with minimal effort, try setting up a simple station showcasing these appetizers alongside a great wine pairing. You can find some fantastic ideas for elevated home hosting in my guide to restaurant-style dinners at home, which often translates well to appetizer spreads!
Frequently Asked Questions About Spinach Dip Pinwheels
I know when I first tried rolling up tortillas filled with delicious dips, I had a million questions! It seems so simple, but detail really matters for the best texture. Don’t worry, I’ve gathered the most common things people ask about these snacks to make sure your experience is flawless.
Can I use Puff Pastry Pinwheels instead of tortillas?
Yes, you absolutely can! As I mentioned before, replacing the flour tortillas with thawed puff pastry makes them richer and flakier, turning them into a totally different, but equally delicious, appetizer. Just remember that puff pastry needs a much shorter baking time and usually cooks at a higher temperature until golden brown. It changes the texture profile completely!
How long can I freeze the rolled logs before slicing?
This is where the Make Ahead magic happens! You can freeze the logs for up to three months if they are wrapped tightly. For the best slicing experience, I recommend pulling them out of the freezer and letting them sit just long enough to become firm but not rock solid—usually about 20 minutes on the counter, or just slice them while slightly frosty. If the filling is too soft, the slices look messy!
Can I add more cheese to the Spinach Dip Pinwheels?
You certainly can layer on the flavor! If you want more cheesiness in your Spinach Dip Pinwheels, you can probably push the Parmesan up to 1/3 cup, and maybe even add a tablespoon or two of mozzarella or cream cheese. My only warning is this: too much pure cheese volume can make the filling bulky and prone to squeezing out the sides when you roll or bake. Stick to the recipe amounts first, and then feel free to experiment next time!
What’s the best way to ensure the dip is not watery?
I stress this all the time, but it’s crucial! The best way to ensure your filling isn’t watery is to aggressively squeeze out every last bit of moisture from the thawed spinach. Use cheesecloth or a sturdy kitchen towel and physically wring it out until almost nothing drips anymore. Also, make sure your sour cream isn’t the thinnest variety you can find; a thicker base helps hold everything together.
Can I make these ahead and serve them cold?
You can absolutely make and slice these ahead of time and serve them cold straight from the fridge! They are delicious uncooked, but they won’t have that lovely warm, slightly gooey texture. If you serve them cold, make sure you’ve refrigerated the sliced pinwheels for at least an hour so they are chilled through. If you prefer a warm snack, just bake them right from the fridge—they’ll just take slightly less time than if they were frozen. For more simple dinner preparations, take a look at my 5-ingredient dinner ideas for general low-effort cooking inspiration.
Estimated Nutritional Snapshot of Spinach Dip Pinwheels
When we talk about party food, we usually aren’t focused on counting macros, but it’s nice to know generally what you are serving, especially if you are hosting friends or family who have restrictions. These pinwheels are surprisingly light for how rich they taste!
Based on the recipe ingredients for the whole batch yielding 24 pieces, here is the estimated nutritional breakdown per serving. Please remember these are estimates and will vary based on the specific brands of cream cheese or the exact amount of oil left in your tortillas!
- Calories: Approximately 63 per piece.
- Fat: About 5 grams.
- Carbohydrates: Roughly 4 grams.
- Protein: A nice punch of about 2 grams.
This makes them a fantastic, relatively balanced option for an appetizer spread. They offer a satisfying creamy texture without being overly heavy, allowing guests to enjoy them alongside other snacks and still leave room for the main event!
Frequently Asked Questions About Spinach Dip Pinwheels
I know when I first tried rolling up tortillas filled with delicious dips, I had a million questions! It seems so simple, but detail really matters for the best texture. Don’t worry, I’ve gathered the most common things people ask about these snacks to make sure your experience is flawless.
Can I use Puff Pastry Pinwheels instead of tortillas?
Yes, you absolutely can! As I mentioned before, replacing the flour tortillas with thawed puff pastry makes them richer and flakier, turning them into a totally different, but equally delicious, appetizer. Just remember that puff pastry needs a much shorter baking time and usually cooks at a higher temperature until golden brown. It changes the texture profile completely!
How long can I freeze the rolled logs before slicing?
This is where the Make Ahead magic happens! You can freeze the logs for up to three months if they are wrapped tightly. For the best slicing experience, I recommend pulling them out of the freezer and letting them sit just long enough to become firm but not rock solid—usually about 20 minutes on the counter, or just slice them while slightly frosty. If the filling is too soft, the slices look messy!
Can I add more cheese to the Spinach Dip Pinwheels?
You certainly can layer on the flavor! If you want more cheesiness in your Spinach Dip Pinwheels, you can probably push the Parmesan up to 1/3 cup, and maybe even add a tablespoon or two of mozzarella or cream cheese. My only warning is this: too much pure cheese volume can make the filling bulky and prone to squeezing out the sides when you roll or bake. Stick to the recipe amounts first, and then feel free to experiment next time! You can find some inspiration for simple flavor additions in my guide to 5-ingredient dinner ideas.
What’s the best way to ensure the dip is not watery?
I stress this all the time, but it’s crucial! The best way to ensure your filling isn’t watery is to aggressively squeeze out every last bit of moisture from the thawed spinach. Use cheesecloth or a sturdy kitchen towel and physically wring it out until almost nothing drips anymore. Also, make sure your sour cream isn’t the thinnest variety you can find; a thicker base helps hold everything together.
Can I make these ahead and serve them cold?
You can absolutely make and slice these ahead of time and serve them cold straight from the fridge! They are delicious uncooked, but they won’t have that lovely warm, slightly gooey texture. If you serve them cold, make sure you’ve refrigerated the sliced pinwheels for at least an hour so they are chilled through. If you prefer a warm snack, just bake them right from the fridge—they’ll just take slightly less time than if they were frozen. For more simple dinner preparations, take a look at my 5-ingredient dinner ideas for general low-effort cooking inspiration.
Estimated Nutritional Snapshot of Spinach Dip Pinwheels
When we talk about party food, we usually aren’t focused on counting macros, but it’s nice to know generally what you are serving, especially if you are hosting friends or family who have restrictions. These pinwheels are surprisingly light for how rich they taste!
Based on the recipe ingredients for the whole batch yielding 24 pieces, here is the estimated nutritional breakdown per serving. Please remember these are estimates and will vary based on the specific brands of cream cheese or the exact amount of oil left in your tortillas!
- Calories: Approximately 63 per piece.
- Fat: About 5 grams.
- Carbohydrates: Roughly 4 grams.
- Protein: A nice punch of about 2 grams.
This makes them a fantastic, relatively balanced option for an appetizer spread. They offer a satisfying creamy texture without being overly heavy, allowing guests to enjoy them alongside other snacks and still leave room for the main event!
Spinach Dip Pinwheels
Ingredients
Equipment
Method
- Mix the cream cheese, spinach, artichoke hearts, sour cream, Parmesan cheese, red pepper flakes, garlic powder, and salt in a small bowl until well combined.
- Spread the mixture evenly over the flour tortillas. You can make the dip layer as thick or thin as you prefer.
- Roll up each tortilla tightly.
- Place the rolled tortillas in the freezer for about 10 minutes. This will firm up the dip, making the pinwheels easier to cut.
- Cut the tortilla logs into 1/2 inch thick slices.
- Serve immediately.
Nutrition
Notes
Tried this recipe?
Let us know how it was!
Mindfulness & Emotional Wellness Specialist
I never thought I’d leave my career as a corporate litigation attorney, but a panic attack in a courthouse bathroom changed everything. After struggling with emotional eating for over a decade—starting in college and getting worse through the stress of law school—I realized that no diet could fix what was really going on inside me.
My breakthrough came through mindfulness meditation training. Working with Jon Kabat-Zinn’s protocols, I discovered that my relationship with food reflected deeper patterns of anxiety and perfectionism that I’d been avoiding for years. That’s when I understood that sustainable eating changes require internal transformation, not just external rules.
Now I treat meal preparation as meditation practice. My “Mindful Kitchen” workshops help people transform ordinary cooking into opportunities for self-awareness and emotional healing. I’ve developed over 180 recipes designed for slow, mindful preparation—complex enough to keep you present, simple enough not to overwhelm your nervous system.
I believe food becomes medicine when we approach it with presence rather than reactivity. The kitchen can be our monastery if we choose to enter it with reverence.