

Oh my gosh, do you ever just hit that wall where you are absolutely staring down the clock, needing that perfect, icy, sweet coffee fix, but the drive to the café feels impossible? Trust me, I know that feeling! That’s exactly why I dreamed up this recipe for the Iced Brown Sugar Oatmilk Shaken Espresso (Easy). It’s mind-blowingly simple, and that creamy texture? Unbeatable!
The first time I attempted to make an Iced Brown Sugar Oatmilk Shaken Espresso was on a lazy Saturday morning when I craved something refreshing yet indulgent. Equipped with a trusty espresso machine, I remembered how much joy a simple coffee drink could bring. As I shook the mix of espresso, oatmilk, and brown sugar over ice, I could hardly contain my excitement. The result was not only delicious but visually stunning—layers of creamy oat milk mingling with coffee, creating a blissful start to my day. That moment sparked my love for reinventing coffee classics, and now this drink is a staple in my home, reminding me that luxury can be simple and homemade.

Why You’ll Love This Easy Iced Brown Sugar Oatmilk Shaken Espresso (Easy)
Seriously, ditch the drive-thru line! This homemade version delivers that café experience right on your counter in minutes. You are going to be obsessed with how quickly this comes together, especially when you see the foam we create.
- So fast! It’s perfect for busy mornings when you need an energy boost—we’re talking under 15 minutes total.
- Incredibly creamy texture—the shaking really makes a difference!
- The brown sugar syrup base is so simple and way cheaper than buying it bottled.
It’s honestly the perfect, accessible treat. If you ever need a fast five-minute fix to save dinner, check out my recipe for a speedy chicken breakthrough too!
Essential Equipment for Your Iced Brown Sugar Oatmilk Shaken Espresso (Easy)
You don’t need a whole professional barista setup, which is the best part! We’re keeping the equipment list super manageable. You likely have most of this stuff gathering dust in a drawer already. Remember, the goal here is that beautiful texture, which means finding the right vessel for the shaking stage.
What You Need On Hand:
- You’ll definitely need your espresso machine, but don’t panic if you don’t have one—we’ll chat alternatives later!
- A small saucepan for whipping up that glorious syrup.
- Your preferred coffee measuring cups and measuring spoons. Precision matters when you’re aiming for copycat quality!
- The *MVP* for texture: a jar or cocktail shaker.
So, why the shaker business? I used to think just stirring worked, but trust me on this one. If you’re aiming for that iconic, light foam crown on your Shaken Drink, you absolutely have to shake it! Only vigorous shaking with ice forces air into the espresso and milk mixture. It’s what creates those tiny, stable bubbles that make the whole drink feel rich and luxurious. Using a jar with a tight-fitting lid works just as well as a fancy shaker if you’ve got strong arms!
Crafting the Perfect Brown Sugar Syrup for Your Iced Brown Sugar Oatmilk Shaken Espresso (Easy)
Okay, this brown sugar syrup is the secret sauce. Honestly, once you make this, you’ll want to stash it in the fridge because it makes every future coffee instantly better. This is where the real depth of flavor for your Brown Sugar Oatmilk Espresso comes from, so pay attention to the ratios!
If you’re looking for other ridiculously easy wins in the kitchen, I’ve got a guide on five-ingredient dinners that actually work. But back to the sweet stuff!
Ingredient Clarity for the Brown Sugar Syrup
Grab your saucepan! We are combining exactly 1 cup of wonderfully rich brown sugar with 1 full cup of water. Heat that up over medium heat and just stir, stir, stir until you see every last crystal disappear. It has to be totally clear, folks—no graininess allowed! Once it’s all liquid magic, pull it off the burner.
Now for the aromatic punch: stir in 1 tablespoon of pure vanilla extract while it’s still hot. That is it! Pour it into a clean jar. It needs to cool completely before you use it in your drink, but once chilled, I just keep the jar right in the fridge. It lasts for weeks, ready for any coffee craving!
For more great iced coffee ideas, check out this fantastic resource on iced brown sugar oat milk creation!
Step-by-Step Instructions for the Iced Brown Sugar Oatmilk Shaken Espresso (Easy)
Alright, this is the fun part where everything comes together! We need to be quick and efficient here to get that perfect chill factor and foam. If you skip shaking, you end up with basic Iced Coffee, and we are aiming for something way more exciting than that, right? Remember what I said about the strong arms? Now’s the time to use them!
If you are already planning your next batch, don’t forget you can always check out my index of tested recipes for inspiration.
Assembling the Iced Brown Sugar Oatmilk Shaken Espresso (Easy)
First things first, grab your glass and fill it completely with ice—we want this nice and cold right away. Now, add your liquids directly into your shaker or jar. That means pouring in your 2 to 3 glorious shots of espresso, the 2 tablespoons of that cooled brown sugar syrup we just made, and then pour in your oat milk, which should be between 1/4 to 1/2 cup depending on how milky you like it. Don’t add any extra ice to the shaker yet!

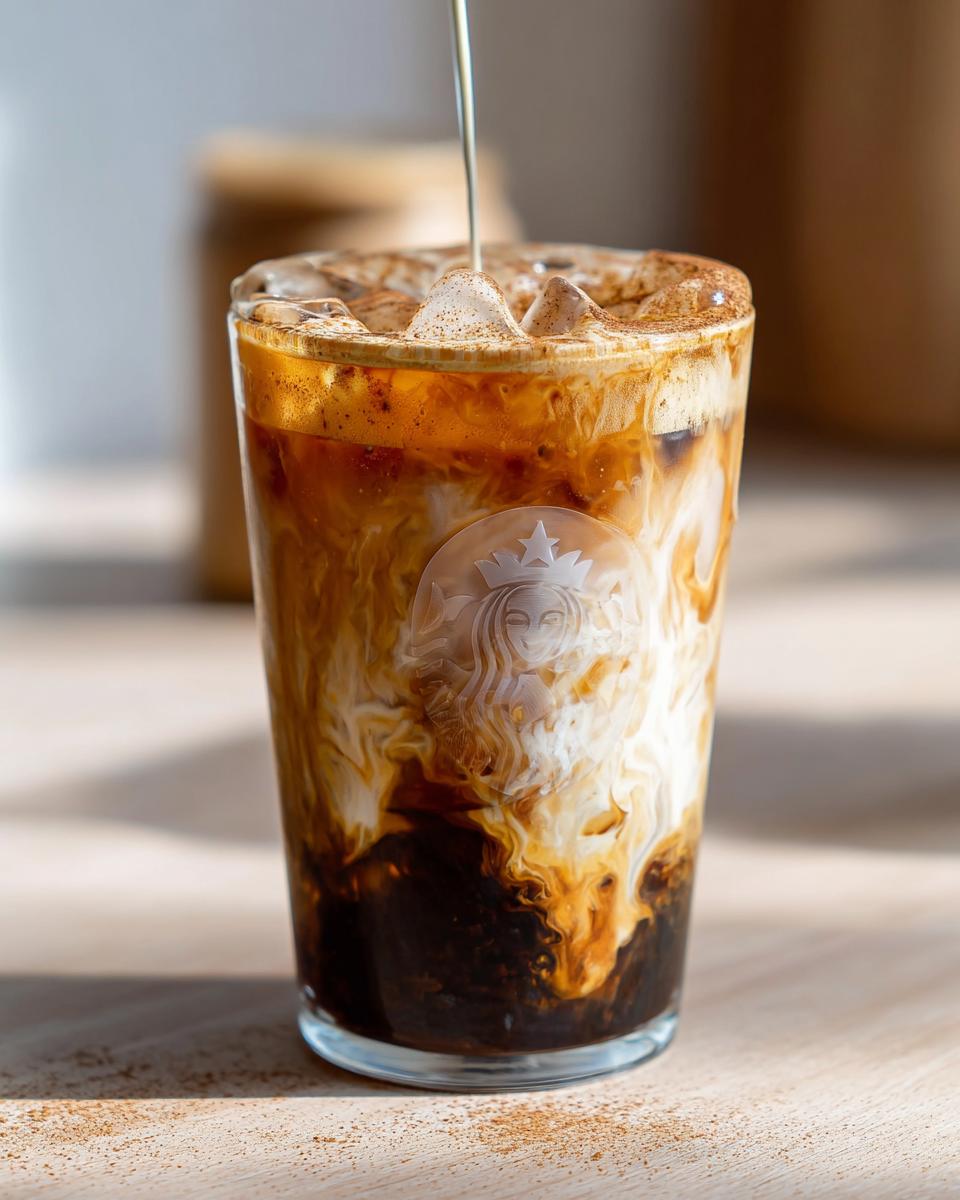
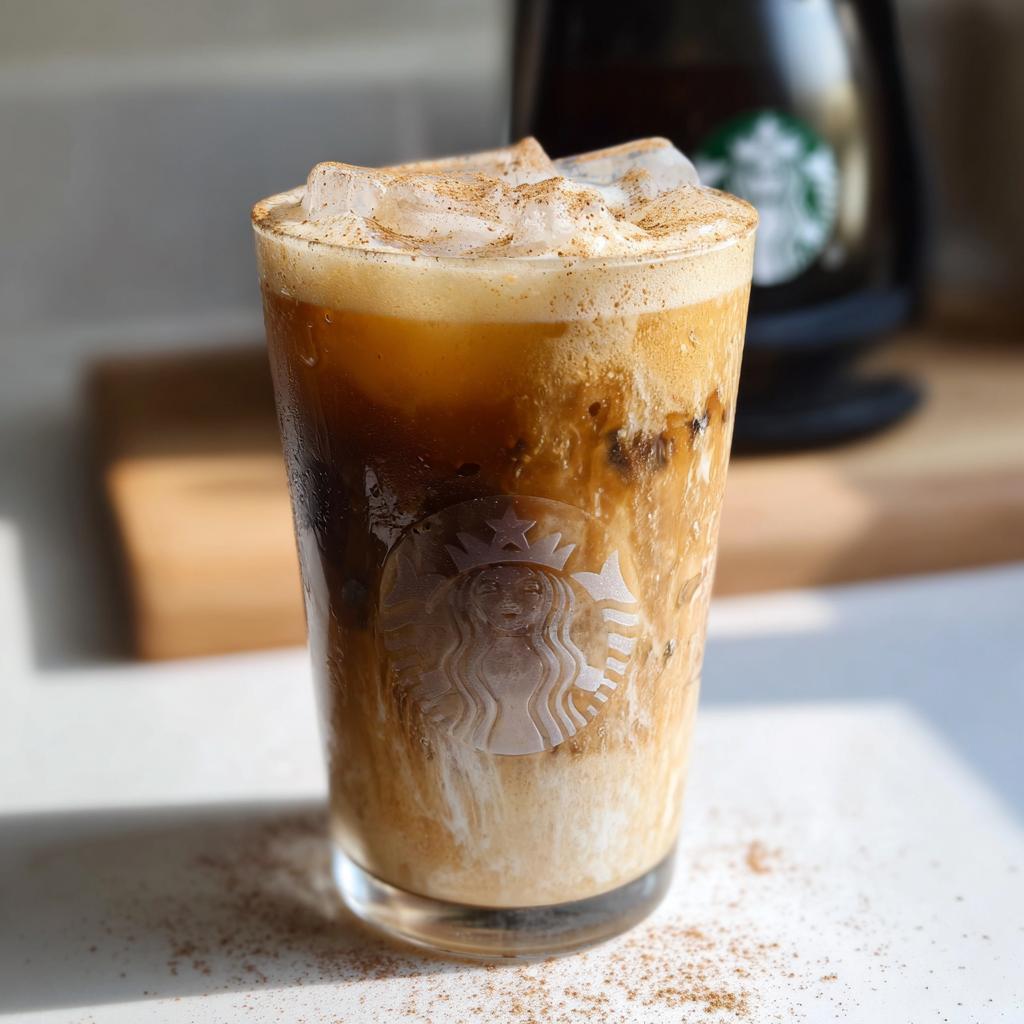
Seal that lid on tight—and I mean TIGHT! Now, shake it like you mean it for a solid 15 seconds. Shake until the outside of your container is genuinely frosty. This aeration is what gives us that signature, oh-so-Creamy layer! Pour everything—ice and all—directly into your serving glass. If you are feeling dramatic (and I hope you are!), sprinkle just a tiny pinch of cinnamon on top for that beautiful finish. Enjoy immediately!
Expert Tips for an Easy Copycat Iced Brown Sugar Oatmilk Shaken Espresso (Easy)
You’ve mastered the basic instructions, but if you want yours to taste *exactly* like the one from the coffee gods, we need to talk specifics. Achieving that perfect Easy Copycat status isn’t just about the ingredients; it’s about how you handle them! I’ve learned a few tricks over the months of testing that are non-negotiable for the best flavor and texture.
First up: the espresso. If you’re using a home machine, go for a slightly stronger pull than usual. Since we’re adding volume with ice, water, and milk, a double or triple shot that’s a bit more concentrated really lets that coffee flavor punch through. Don’t pull a weak shot or it will get lost!
Next, let’s talk about the milk for that amazing Creamy finish. Starbucks uses a specific blend, but the key is the fat content! If you can find a “Barista Blend” oat milk, grab it. These are formulated with more fat, which helps them hold that lovely foam we create when shaking. Regular oat milk is fine, but the Barista version gives you a scientifically better mouthfeel.

Finally, syrup consistency matters immensely. Make sure your syrup cools completely before using it. If you add hot syrup to cold espresso and ice, you risk melting the ice too fast and diluting your drink before you even get to the shaking stage. Warm syrup = watery espresso, no foam. Cool syrup = perfect temperature science!
If you want to dive deep into kitchen temperature control (I know, it sounds boring, but it matters!), check out my guide on temperatures and tips for cooking success!
Ingredient Notes and Substitutions for Brown Sugar Oatmilk Espresso
I always get asked, “Leo, what if I don’t have a fancy espresso maker?” Don’t you worry, that’s the beauty of an at-home coffee hack! We are making the Brown Sugar Oatmilk Espresso base flexible because life happens, and not every kitchen is equipped like a corner café.
The syrup we made earlier is the foundation, and that part is pretty non-negotiable—you must use the brown sugar and vanilla for that signature flavor. But when it comes to the coffee and milk, we have options!
If you are not an espresso owner, don’t sweat it. You can absolutely substitute 2-3 shots of espresso with an equal volume of very strong, high-quality cold brew concentrate. You want it potent! Think about it: you are trying to compete with pressurized espresso, so whatever you use needs to be intense. Just use slightly less water when you brew your concentrate, or let it steep longer.
Now, let’s talk dairy—or lack thereof! The recipe calls for oat milk because it really gives you that smooth, beautifully creamy texture that foams up nicely when shaken. However, you can swap it out.
- If you use regular almond milk, the drink will be lighter, less rich, and might not hold that foam as long.
- Whole milk works incredibly well! It’s close to oat milk in fat content, so you get a fantastic, classic texture.
- If you try soy milk, it can sometimes get a little thin or even curdle slightly when mixed with acidic espresso, so proceed with caution there!
The key takeaway is that oat milk or whole milk gives you the best chance at replicating that rich café mouthfeel. For beginners learning the ropes, I swear by my guide on making perfect bases—understanding how fats and liquids interact is just good kitchen sense, even when making a cold drink!
Serving Suggestions for Your Iced Brown Sugar Oatmilk Shaken Espresso (Easy)
Now that you’ve got this perfectly chilled, incredibly flavorful drink in hand, as a visual artist, I have to tell you—presentation counts! This drink is already halfway to being gorgeous because of the natural layers between the coffee and the oat milk, but we can absolutely up the ante. Think about how you want this masterpiece to look before that first sip!
First, let’s talk texture contrast. That ground cinnamon we mentioned in the instructions? Don’t skip it if you love a little warmth! A very light dusting right on top of the foam adds a beautiful, contrasting dark speckle that just screams “gourmet.” It’s subtle, but it looks amazing against the creamy white-ish foam layer.
For extra visual appeal, especially if you’re using a clear glass tumbler, try layering your ice strategically. Instead of just dumping it in, try to place taller, clearer ice cubes around the edges first. When you pour the shaken mix, the coffee layer is darker, and the lighter oat milk floats a bit higher—you get these gorgeous, smoky, layered visuals!
If you want to lean into the brown sugar vibe, you can easily create a garnish on the side of the glass rim, kind of like a sugar rim on a margarita, but sweeter. Just wet the very top edge with a damp paper towel, gently dip it into a shallow plate of brown sugar, and tap off the excess. It tastes incredible with that first taste of espresso!
And hey, if you’re planning a little coffee get-together and want to pair this perfect sip with something special, I have some amazing thoughts over on my guide for restaurant-style dinner ideas that would be perfect to serve after your morning coffee session!
Frequently Asked Questions About the Iced Brown Sugar Oatmilk Shaken Espresso (Easy)
I totally get it—when you find a recipe you love, you immediately start wondering how to tweak it or fit it into your busy life! It’s all about making it work for *you*. Here are some quick answers to the burning questions everyone asks about getting that perfect balance of speed and that incredible Creamy texture.
Can I make this Iced Brown Sugar Oatmilk Shaken Espresso (Easy) ahead of time?
This is a great question about efficiency! Look, the brown sugar syrup? Make a huge batch! Seriously, it’s perfect for storing in an airtight container in the fridge for couple of weeks. That saves you tons of time later. However, the actual drink—the espresso, the syrup, the oat milk, and the ice—that needs to be assembled and vigorously shaken right before you drink it. If you shake it and leave it sitting, you lose all that gorgeous foam and that chilled texture we worked so hard to achieve. It’s better to prep the basic ingredients, but finish the shaking step fresh.
How do I make this drink sweeter or less sweet?
Sweetness is so personal, right? The baseline of 2 tablespoons of syrup is what gets you that beautiful, balanced flavor when using standard brewed espresso. If you try my recipe and find yourself needing less sweetness, skip adding the syrup to the shaker and just add 1 tablespoon instead of 2. If you need it sweeter? Don’t just dump more syrup in the shaker, though you certainly can! A better trick is to go back and make the syrup base itself sweeter—say, use 1 1/4 cups of brown sugar instead of 1 cup when you make the batch. That keeps the flavor concentrated but ups the sugar power!
Does the type of oat milk really matter for the creamy texture?
Yes, trust me on this one! While any oat milk works, if you are chasing that ultimate café-quality feel, the fat content matters loads. Store-bought versions of the Brown Sugar Oatmilk Espresso often use a Barista Blend for a reason—they have more stabilizers and usually higher fat content. This helps the milk hold those tiny air bubbles you create when shaking, giving you that rich, thick cloud on top that feels so decadent. If you use a super watery, low-fat almond milk substitute, that beautiful foam just won’t hang around as long.
For any other curious questions about kitchen organization or general cooking theories, you can always check out my About Me page to see what else I’m cooking up!
Storage and Reheating Instructions for Leftover Brown Sugar Syrup
Okay, the best part of making this magic liquid is that you don’t have to use it all in one go! Truthfully, the only thing in this whole process that *should* be stored is that gorgeous brown sugar syrup we cooked up. If you made a double batch (and you absolutely should have!), you need to handle the leftovers right so they stay perfect for your next coffee fix.
First rule: Cooling is key! You must let the syrup come down to room temperature before you even think about sealing it up. Pouring hot syrup into a container just creates steam, which encourages all sorts of weird stuff you don’t want in your coffee later. Let it sit on the counter until it’s no longer warm to the touch.
Once cooled, find yourself an airtight container. Glass jars with tight metal lids are my absolute favorite—maybe it’s my visual artist side talking, but they just look cleaner to store things in! Pour that syrup in and seal it up tight. It goes straight into the refrigerator after that.
You are good to go for several weeks this way! If you notice the syrup looks a little thicker or almost cloudy after a few days in the fridge, don’t panic! That’s just the molasses catching a chill. Just scoop out what you need for your next drink, let it sit on the counter for about 15 minutes to loosen up, or give the jar a quick warm water bath for a minute or two until it pours easily again. It’s ready to go for your next great Brown Sugar Oatmilk Espresso!
For when you need a quick coffee fix but also want to make sure dinner isn’t a total disaster later, I wrote up some ideas for meal prep-friendly dinner ideas. A well-stocked syrup drawer helps fuel good planning!
Share Your Creamy Brown Sugar Oatmilk Espresso Creations
Okay, now that you’ve got the blueprint for this amazing, easy coffee, I want to see what you whip up! Honestly, seeing your beautiful, frothy creations is the highlight of my week. I put so much care into making sure this recipe is straightforward, but the truly satisfying part is seeing how you all bring it to life on your own counters.
Don’t keep that incredible Creamy texture a secret! Grab your phone, snap a picture of your perfect glass—maybe you added an extra swirl of oat milk, or perhaps you decorated the rim with that brown sugar I suggested earlier. Tag me! I absolutely love seeing the artistry you bring to your morning ritual.
If you made the Brown Sugar Oatmilk Espresso and it brought you a moment of Saturday morning joy or powered you through a tough afternoon, please, please leave a rating! Those little star clicks really help other coffee lovers find this game-changing recipe. It lets me know what’s working well in my kitchen, and what I should be testing next!
And if you ever have burning questions, need recipe clarification, or just want to chat about the perfect shade of brown sugar, head over to my contact page! I love hearing from you all. Thanks for joining my kitchen adventures!
Iced Brown Sugar Oatmilk Shaken Espresso (Easy)
Ingredients
Equipment
Method
- First, make the brown sugar syrup. Combine 1 cup brown sugar and 1 cup water in a saucepan. Heat over medium heat, stirring until the sugar is dissolved. Remove from heat and stir in 1 tablespoon of vanilla extract. Let it cool.
- Next, prepare your drink. Add 1 cup of ice to a jar or cocktail shaker.
- Pour in 2-3 shots of freshly brewed espresso, 2 tablespoons of the cooled brown sugar syrup, and your desired amount of oat milk (1/4 to 1/2 cup).
- Secure the lid and shake well for about 15 seconds until the outside of the shaker feels cold.
- Pour the shaken mixture into a glass. If desired, sprinkle a little cinnamon on top.
Notes
Tried this recipe?
Let us know how it was!
Visual Culinary Artist & Aesthetic Designer
When the pandemic killed my career as a luxury hotel photographer overnight, I was stuck in my studio apartment with nothing but time and vegetables. That’s when I started treating meal prep like photography projects—and discovered that the same principles that made five-star dishes camera-ready could turn humble zucchini noodles into social media gold.
My fine arts degree from Parsons taught me that people eat with their eyes first. After years behind the lens capturing haute cuisine, I realized that successful dieting often depends more on visual satisfaction than pure nutrition. When your food looks amazing, you actually want to stick with your eating plan.
My recipe development feels more like an art studio than a test kitchen. I use color theory to guide ingredient selections—purple cabbage with golden cauliflower, emerald herbs against ivory cheese. My “Edible Landscapes” series transforms standard low-carb ingredients into miniature scenic compositions that make vegetables feel aspirational rather than obligatory.
I spend evenings exploring art galleries and practicing watercolor painting, always looking for inspiration. My philosophy is simple: make low-carb food visually irresistible, and dietary compliance becomes an aesthetic choice rather than a health sacrifice.