
Are you tired of watching your grocery budget get absolutely demolished just because you craved a coffee shop slushie? Me too! That’s why I poured my heart (and pantry staples) into perfecting this incredibly rich and satisfying **Mocha Frappuccino (Budget-Friendly)** recipe right here in my own kitchen. It keeps that amazing café taste without the huge price tag.
I remember when my son was just looking longingly at those fancy blended drinks on the menu; we usually couldn’t justify the cost, especially with his dietary needs. Determined to bring that joy home, I started experimenting with what I had on hand. By using common, inexpensive ingredients, I crafted this chocolatey beverage that became an instant family hit. Seeing him enjoy that homemade mocha frappuccino was proof that creativity turns limitations into the best kind of fun. Trust me, this sweet treat is going to change your afternoons!
Why This Mocha Frappuccino (Budget-Friendly) is Your New Go-To Sweet Treat
Honestly, this blended coffee is a total game-changer for anyone trying to save a few bucks! We aren’t sacrificing flavor just because this is a budget recipe. This chocolate drink is so simple to whip up in minutes, and it tastes just like the expensive version you normally grab when you’re out. It’s pure, easy joy in a glass! I even found a great similar recipe over at Thrifty Frugal Mom that inspired some of my testing, but mine keeps the costs down even further.
- It keeps your wallet happy—seriously, the savings stack up!
- We use frozen coffee cubes, so you never water down that rich flavor.
- It’s ready faster than you can drive to the café!
If you want to see even more ways to save money in the kitchen, check out some of my other budget-friendly ideas right here. I’m always sharing tips on how to eat well for less.
Cost Comparison: Store vs. Homemade Mocha Frappuccino (Budget-Friendly)
When you look at the coffee shop menu, you’re easily dropping five or six dollars for one fancy drink. That adds up fast! With this Mocha Frappuccino (Budget-Friendly) recipe, using basic pantry items like cocoa powder and sugar, the cost per glass is usually under a dollar. I mean, wow! It’s such a small investment for such a big, satisfying sweet treat. You simply can’t beat that kind of savings!
Essential Ingredients for Your Mocha Frappuccino (Budget-Friendly)
Okay, gathering your ingredients is where the magic starts! Since this is a budget recipe, we are sticking to stuff you probably already have sitting around. The most important thing you need to remember is that your coffee can’t be fresh and hot; it has to be frozen! We are using two full cups of strong brewed coffee that you’ve already iced down into cubes. This stops your drink from getting watery, trust me on this one.
For the rest, grab your regular milk—I usually use 1% dairy, but use whatever you have on hand, even unsweetened almond or soy milk works great here. Then we mix in the chocolate flavor using cocoa powder and sugar, plus just a tiny drop of vanilla extract and a pinch of salt to make those chocolate notes really pop. Oh, and if you want an extra caffeine kick in this blended coffee, I toss in a teaspoon of instant coffee granules!
Ingredient Notes and Cheap Ingredient Swaps
This is where we maximize that budget! If you don’t have granulated sugar, you can certainly use a granular sugar substitute, just taste as you go because some zero-calorie sweeteners are way sweeter than real sugar. For the milk, if you’re skipping dairy, stick to unsweetened non-dairy options so you control the sweetness yourself. I always check the cocoa powder label, too; thankfully, standard cocoa powder is naturally gluten-free, making this chocolate drink safe for my family’s needs.
My biggest swap advice is using instant coffee if you ran out of strong brewed coffee. It dissolves beautifully and gives you that deep flavor, keeping this budget recipe intact. Don’t stress if you measure the cocoa powder slightly imperfectly; this isn’t baking, it’s forgiving blended coffee!
Equipment Needed for the Perfect Mocha Frappuccino (Budget-Friendly)
When it comes to making any fantastic blended coffee, you absolutely need the right tool for the job. For this Mocha Frappuccino (Budget-Friendly), the main star of the show is, without a doubt, your high-powered blender. Seriously, if you’ve been thinking about upgrading, making things like this sweet treat is the perfect excuse!
A powerful blender is what gets those hard, frozen coffee ice cubes totally crushed without leaving big chunks floating around. We want smooth, creamy perfection, not chunky ice shards, right? Make sure your blender jar is locked down tight before you start, because these frozen cubes can really make things vibrate!
Now, what if you only have a standard blender? Don’t panic! Remember that little tip I mentioned about the slight softening? If your blender struggles, you can absolutely take those frozen coffee cubes out for about 45 seconds. I often use the defrost setting on my microwave—just watch it like a hawk! You are aiming for slightly softened edges so the blades can grab them easily, but you do *not* want them turning into soup. A little patience here helps you skip buying new equipment and still get a great chocolate drink result.
Step-by-Step Instructions to Make Your Mocha Frappuccino (Budget-Friendly)
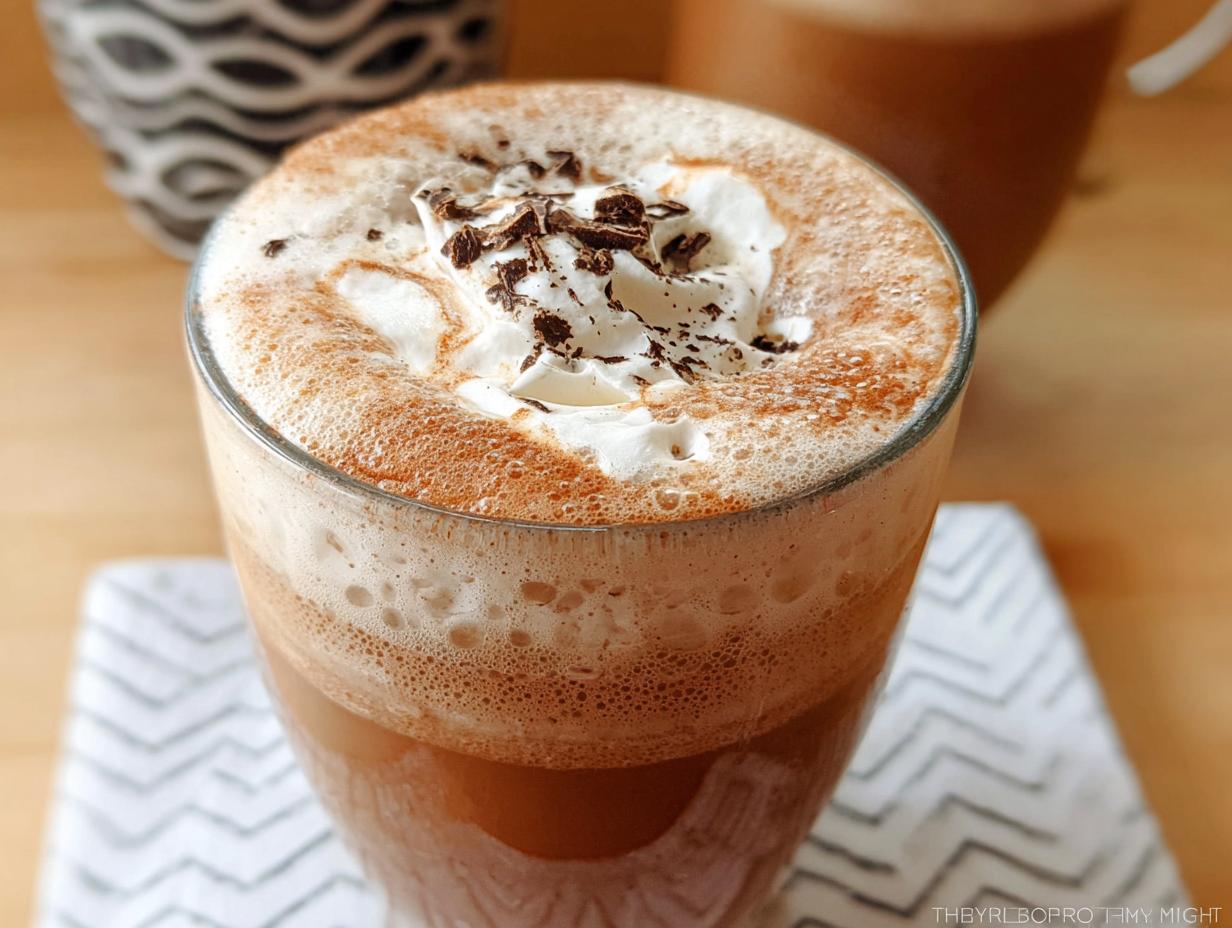
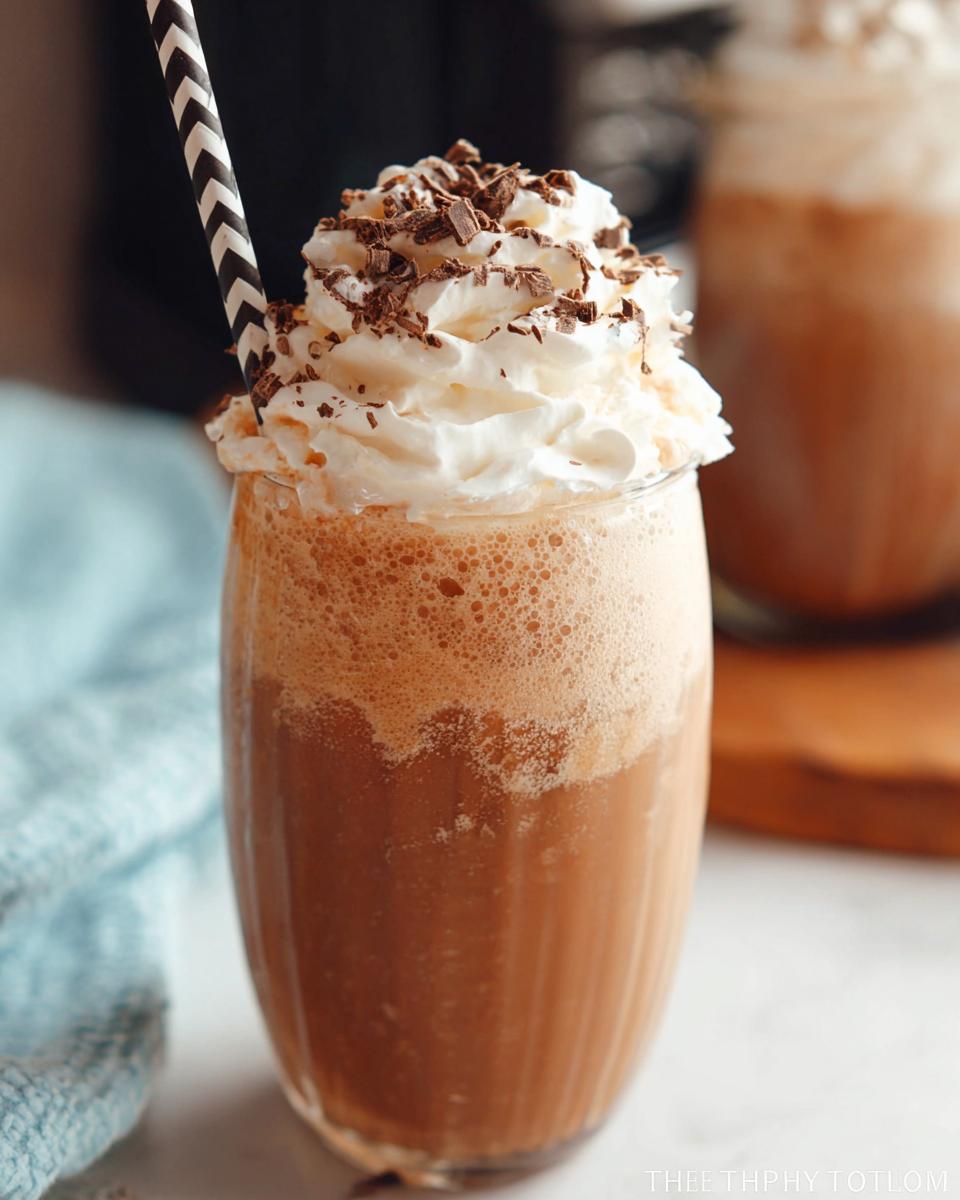
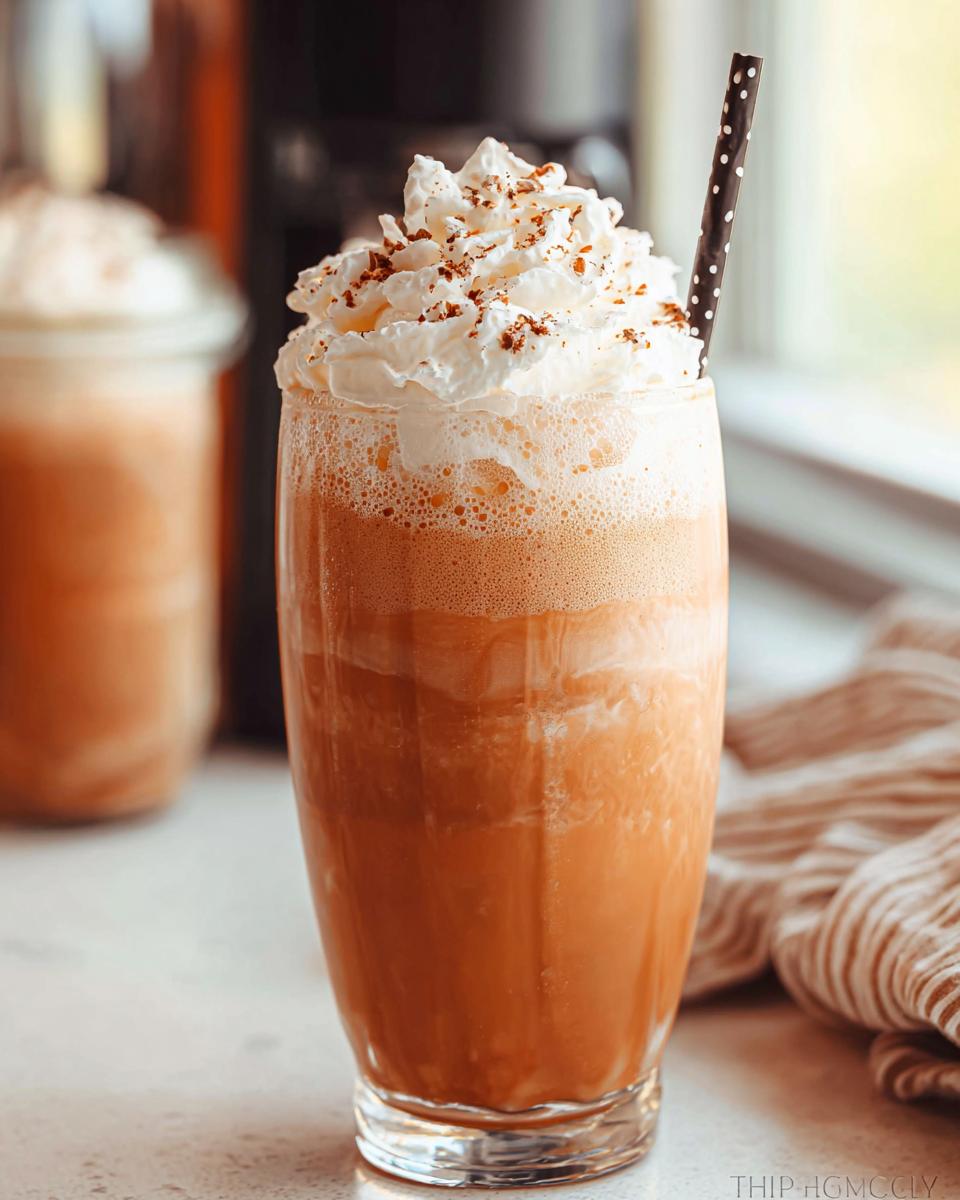
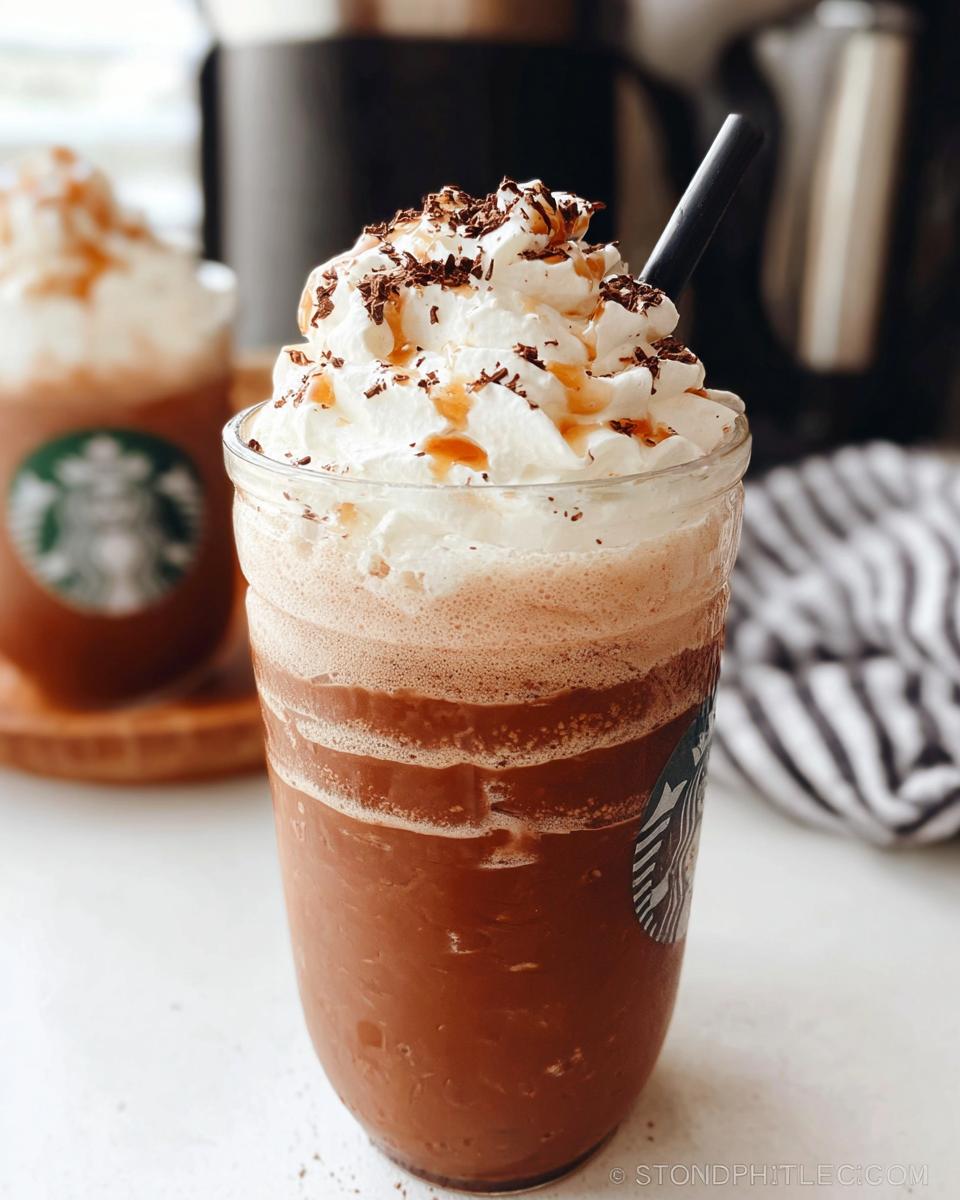
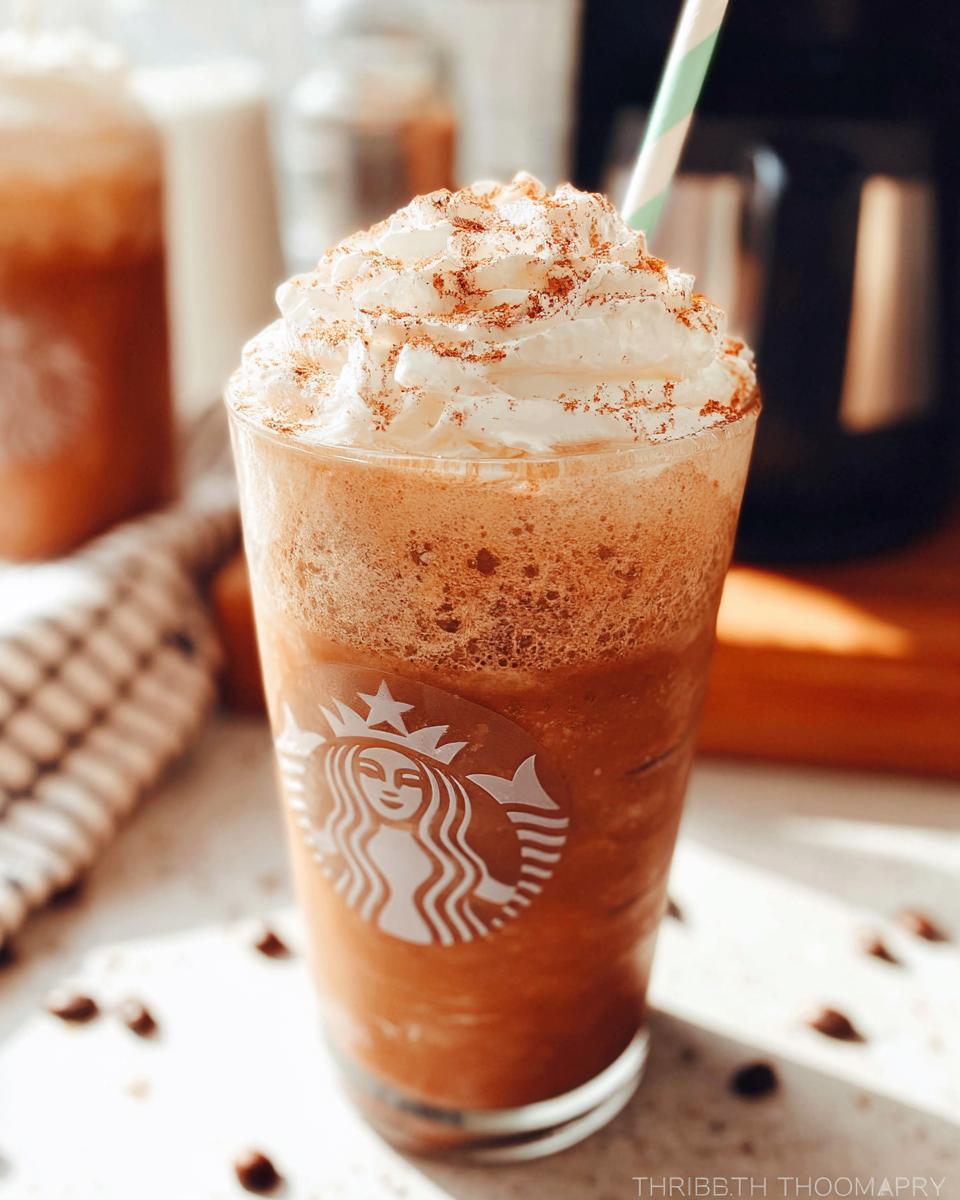
This is the fun part! Get your blender ready because we are making this sweet treat happen in under a minute once everything is loaded up. First things first: Dump all your ingredients into that high-powered blender. That means your frozen coffee ice cubes, the milk, the sugar, cocoa powder, vanilla, salt, and that optional instant coffee granule boost. Keep the whipped cream off to the side for now!
Start blending! You need to run that machine until those coffee cubes are totally destroyed and the mixture looks smooth and thick. This is where the texture check comes in. If it’s churning but still looks chunky, stop the blender. Here’s the secret step: let the mixture chill out for about five to ten minutes. This resting time lets the edges of those stubborn ice cubes soften just a touch, making it much easier for your blender to finish the job without overheating. It stops me from getting a runny result later on! If you need quick dinner ideas while you wait, I sometimes use that time to plan out one-pan meals.
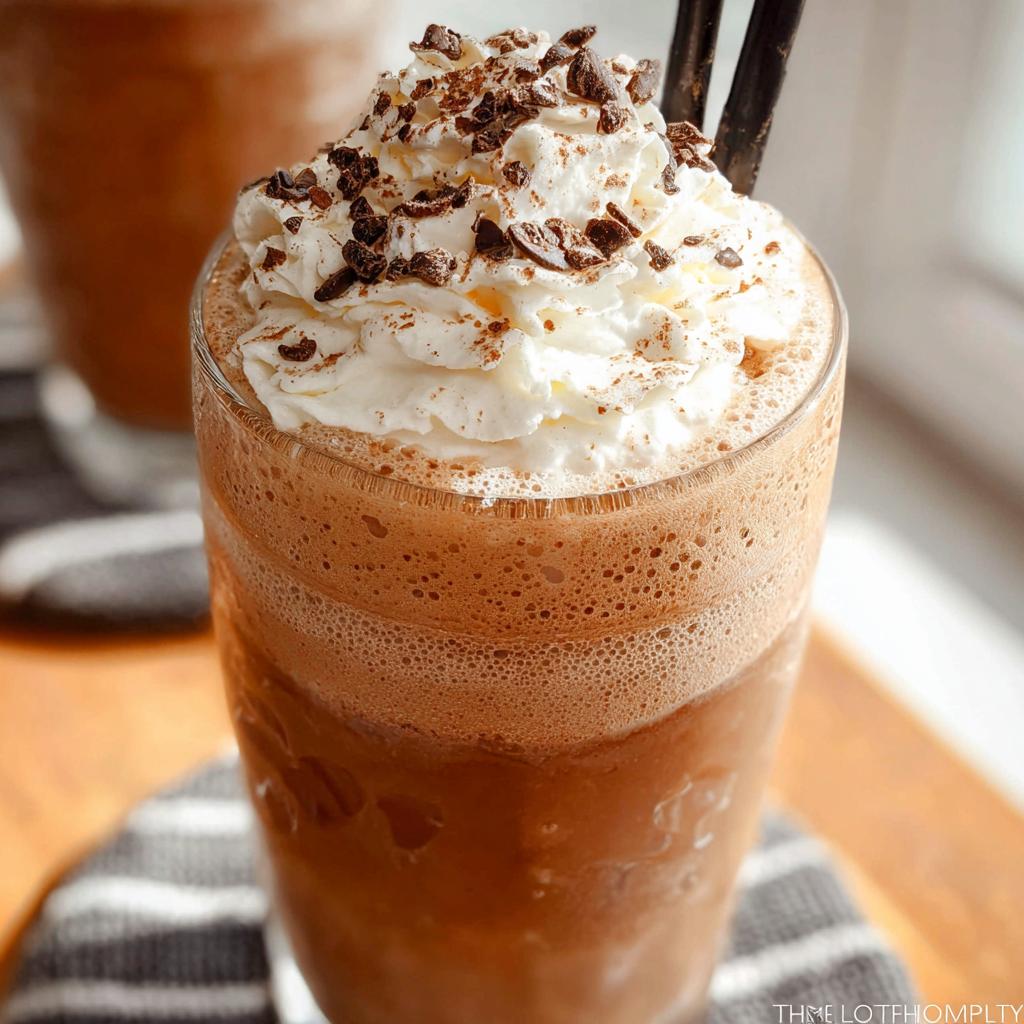
After that little break, blend it again until it’s perfectly creamy. Pour it right into your chilled glasses, top it high with that optional whipped cream, and enjoy your fantastic, budget-friendly Mocha Frappuccino (Budget-Friendly).
Tips for Success When Blending Your Chocolate Drink
Achieving that perfect, thick texture in your blended coffee is all about managing the ice. If your coffee cubes were frozen rock solid—almost like tiny stones—you definitely need that resting period I mentioned. Rushing it will just leave you with giant, half-crushed chunks.
When blending, start slow and gradually increase the speed. If you run it on high immediately, the sharp ice edges can sometimes stay separate from the liquid base. You want a vortex to form in the center; that shows everything is being properly incorporated. Also, be careful not to over-blend once it looks smooth. Over-blending generates friction and heat, which starts melting your beautiful ice right away, turning your thick chocolate drink into something closer to iced coffee flavor. A quick pulse at the end is usually all you need!
Ingredient Spotlight: The Power of Frozen Coffee in Your Mocha Frappuccino
You might be wondering why I insist on using coffee that’s already frozen into ice cubes instead of just fresh coffee and regular ice. Honestly, this is the cornerstone of nailing the texture in this budget recipe! When you use standard ice cubes—the kind made with water—they melt fast, right? And when they melt, they water down that beautiful, rich chocolate flavor we worked so hard to create.
But coffee ice cubes? Those are pure flavor boosters! You are layering coffee flavor upon coffee flavor. As they sit in the blender and start to finally break down, they keep the drink intensely coffee-forward without sacrificing the chocolate notes. It’s concentrated coffee power giving you that thick, non-watery shake consistency.
This technique is so smart because it means you don’t need a ton of extra ingredients—no gums or stabilizers required! It’s just smart cooking. It saves money, keeps the flavor strong, and prevents dilution. If you’re looking at cutting back on processed ingredients in general, understanding this simple trick will help you master all sorts of homemade blended treats. If you enjoyed learning about how to control textures in liquid bases, you’ll want to check out my tips on making a perfect gluten-free roux, which is all about controlling texture too!
Basically, planning ahead by freezing your brew guarantees that strong, café-quality blend every single time you make this sweet treat.
Variations for Your Homemade Mocha Frappuccino (Budget-Friendly)
Just because we are focused on keeping this **Mocha Frappuccino (Budget-Friendly)** cheap doesn’t mean we can’t have some fun with it! This recipe is a perfect blank canvas for whatever you have on hand. If you have a jar of cinnamon lying around, throw in a tiny dash with the cocoa powder—it adds such a cozy background flavor that coffee shops charge extra for.
For richness, if you happen to keep a little heavy cream stored for something else, substituting just a splash of that for some of the milk makes it taste incredibly decadent! If you’re trying to sneak in something healthier—and I always am—a tablespoon of pureed avocado (yes, really!) blends in completely unnoticed but adds fabulous creaminess without compromising the budget too much. If you love exploring easy, budget-conscious recipes that fit different lifestyle needs, you should definitely browse through my collection of other simple recipes. It shows how flexible good home cooking can be!
And hey, if you have caramel syrup that’s been forgotten in the back of the fridge? Drizzle that in! This sweet treat adapts beautifully.
Storage & Reheating Instructions for Leftover Blended Coffee
Let’s be honest: a homemade mocha frappuccino is at its absolute peak flavor and texture the second it comes out of that blender. Seriously, the ice is perfectly incorporated, the chocolate flavor is bright, and it’s icy cold. If you can drink it all right away, please do! That’s the happy path.
However, that’s not always realistic, is it? Life happens, and sometimes you make a double batch for the family, or you just can’t finish your giant glass. Don’t pour that leftover blended coffee down the drain! You need to treat this like a concentrated, meltable base.
Here’s my trick for storing the leftovers: pour the remaining mixture into a sealable container—like a small mason jar or even a sturdy freezer bag—and toss it in the fridge. Make sure you leave a little space at the top since liquids expand a bit when chilled. You want to store the liquid base, *not* the ice if it was already mostly melted.
When you’re ready for your second round, grab that container and pour it back into the blender. Since it’s no longer icy, you’ll need to re-introduce some coldness. I usually toss in 4 or 5 *new* coffee ice cubes, maybe a splash more milk if it looks dense, and blend it really quickly, maybe just 10 seconds, to bring the chill back. It won’t be quite as fluffy as the first batch, but it still hits the spot!
If you’re looking for ways to minimize cleanup altogether, you should definitely check out my list of one-pan dinner ideas—it’s a lifesaver on busy weeknights!
Frequently Asked Questions About the Mocha Frappuccino (Budget-Friendly)
I get so many questions whenever I post this recipe because everyone wants to know how we manage to keep this sweet treat so cheap and delicious! People always ask about making tweaks, which is wonderful—that’s what creativity in the kitchen is all about. Here are some of the most common things readers ask when they try this budget recipe.
Is this Mocha Frappuccino (Budget-Friendly) suitable for gluten-free diets?
This is one of my favorite things to confirm! Yes, absolutely! Based on the core ingredients—coffee, milk, sugar, cocoa powder, and vanilla—this Mocha Frappuccino (Budget-Friendly) is naturally gluten-free. When you’re engineering recipes, you’re always looking for those naturally compliant items right away, and this one fits the bill perfectly. Just make absolutely sure your instant coffee granules or any specialized milk substitute you use are certified gluten-free if you have severe sensitivities, but for most people, this is a safe and happy choice!
How can I make this Chocolate Drink thicker without adding more ice?
That’s a great question, because nobody wants a thin, watery chocolate drink! I covered the resting time, but if you want it thicker *immediately* without any risk of dilution from more ice, you have two main options, depending on what you have. First, try blending in half a frozen banana if you have one hiding in the freezer—it adds incredible, slick thickness without changing the taste much if you keep the coffee flavor strong. Second, if you’re using dairy milk, swapping maybe a quarter cup of that milk for a tablespoon of plain Greek yogurt works wonders. It emulsifies beautifully and gives you that luxurious, thick mouthfeel you get at the fancy shops. It’s a fantastic little trick for texture control!
If you have any other specific questions about ingredients or substitutions, please don’t hesitate to reach out to me through my contact page. I love hearing from you all!
Share Your Homemade Mocha Frappuccino (Budget-Friendly) Creations
Now it’s your turn! I’ve shown you all my secrets for crafting the perfect Mocha Frappuccino (Budget-Friendly) without emptying your wallet. I really hope you’ve got your blender warming up and those coffee ice cubes ready!
This recipe works best when people jump in and share their successes and even their funny little kitchen mishaps. Did you try adding a sprinkle of chili powder for a Mexican hot chocolate twist? Or maybe you found the ultimate low-cost milk substitute? I want to hear about it!
Take a picture of your icy, delicious creation—maybe even show off your budget setup! Drop a rating down below so other busy folks know just how good this sweet treat really is. Your feedback helps me keep the kitchen buzzing with reliable, affordable recipes.
If you want to peek behind the curtain and learn more about how I engineer these simple, amazing recipes or just want to say hello, you can always check out my About Me page! Happy blending, friends!
Mocha Frappuccino (Budget-Friendly)
Ingredients
Equipment
Method
- Place all ingredients except the whipped cream in a high-powered blender. Blend until the ice cubes are crushed.
- If the frappe is not thoroughly blended, let it sit for a couple of minutes and try blending again. Letting it sit for 5 to 10 minutes before blending can help.
- Pour into glasses and top with whipped cream, if desired.
Notes
Tried this recipe?
Let us know how it was!
Dual-Restriction Recipe Engineer & Cross-Contamination Specialist
Everything changed when my teenage son got hit with celiac disease and Type 1 diabetes diagnoses within six months of each other. Suddenly, pizza and pasta were off the table, and most “diabetic-friendly” foods contained gluten. I went from regular mom cooking to navigating what I call “compound restriction cooking”—and I had a kid’s appetite and taste buds to satisfy.
Lucky for us, my background in pharmaceutical quality control gave me the systematic mindset this level of precision requires. My kitchen now operates under pharmaceutical-grade protocols adapted for home use: dedicated prep surfaces, separate storage systems, and testing procedures that verify both carb counts and gluten absence before any recipe gets published.
I’ve developed over 220 recipes that clear multiple dietary hurdles simultaneously—finding gluten-free thickeners that don’t spike blood sugar, creating bread alternatives that meet both keto ratios and celiac safety, and developing desserts that actually taste good to a teenager despite impossible restrictions.
Through my “Safe Kitchen Certification” program, I teach other parents that managing multiple dietary restrictions isn’t about multiplying limitations—it’s about systematic thinking that reveals unexpected possibilities. When you engineer solutions instead of making compromises, restriction becomes innovation rather than deprivation.