
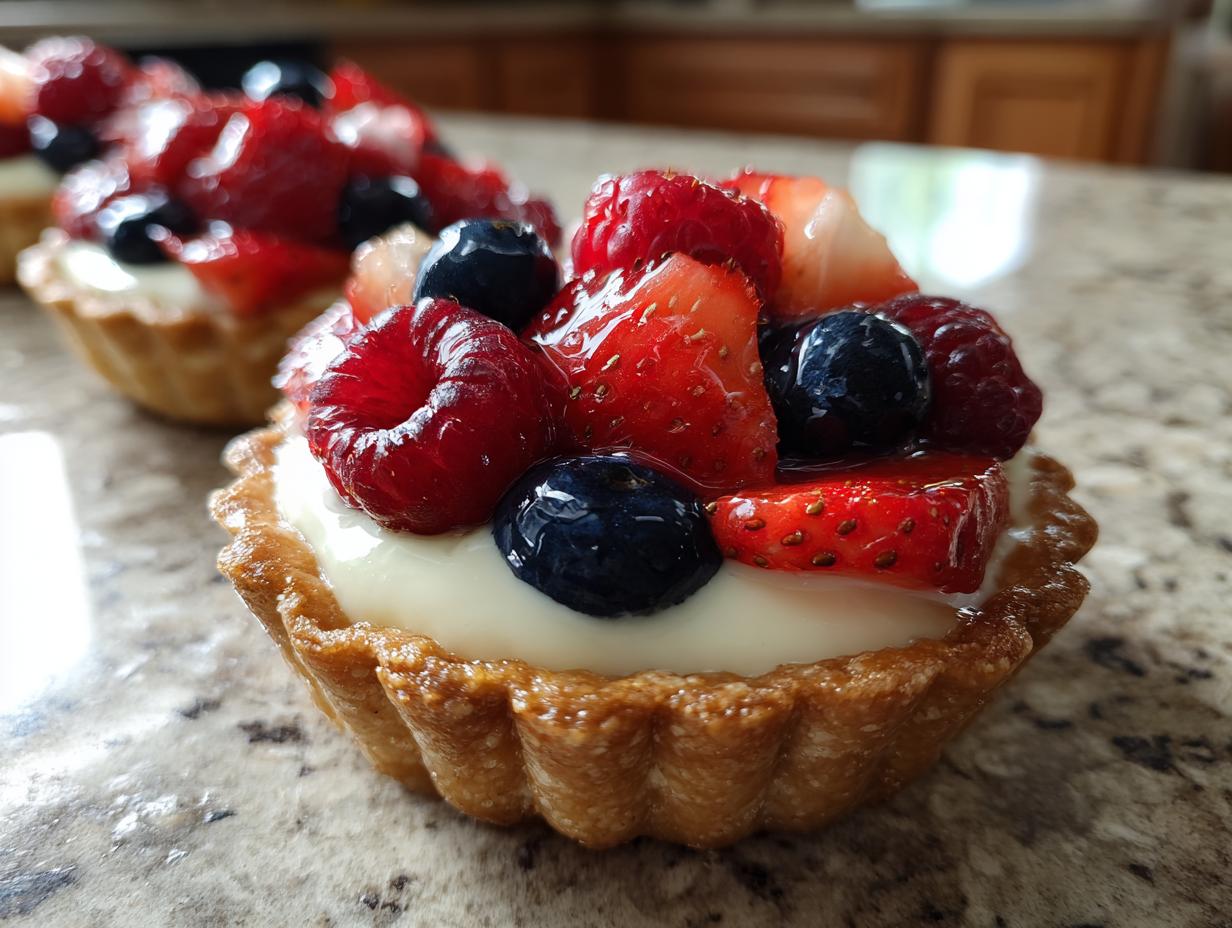
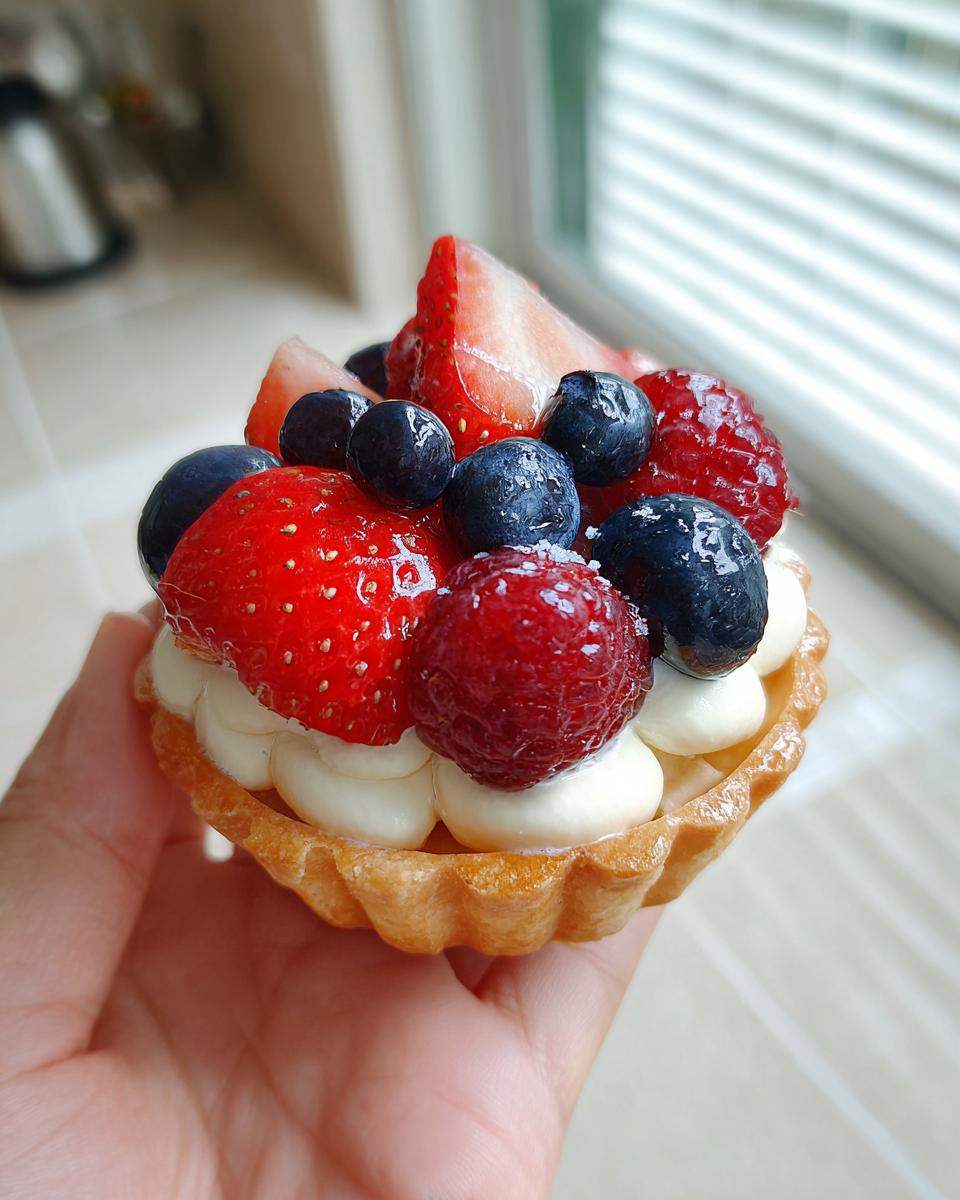
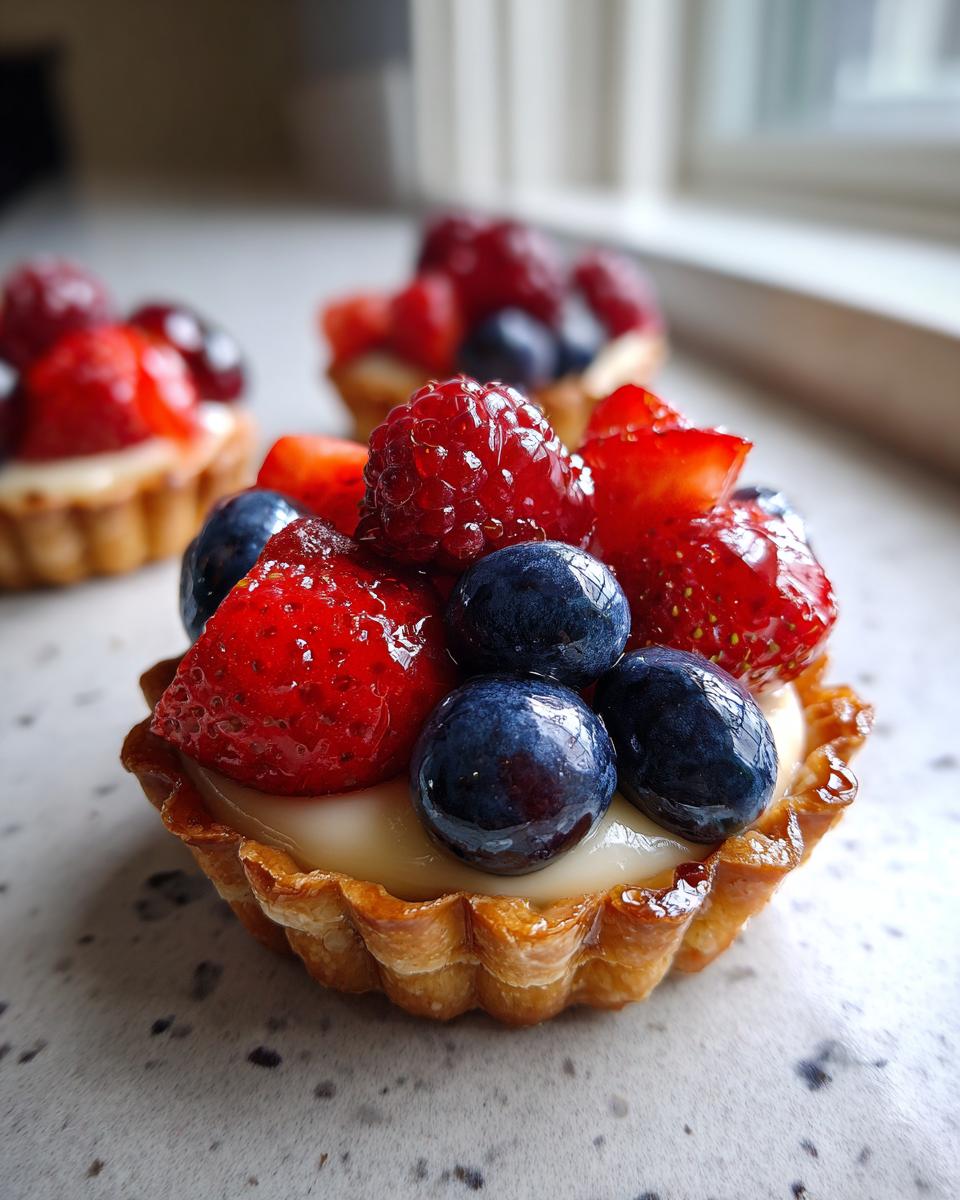
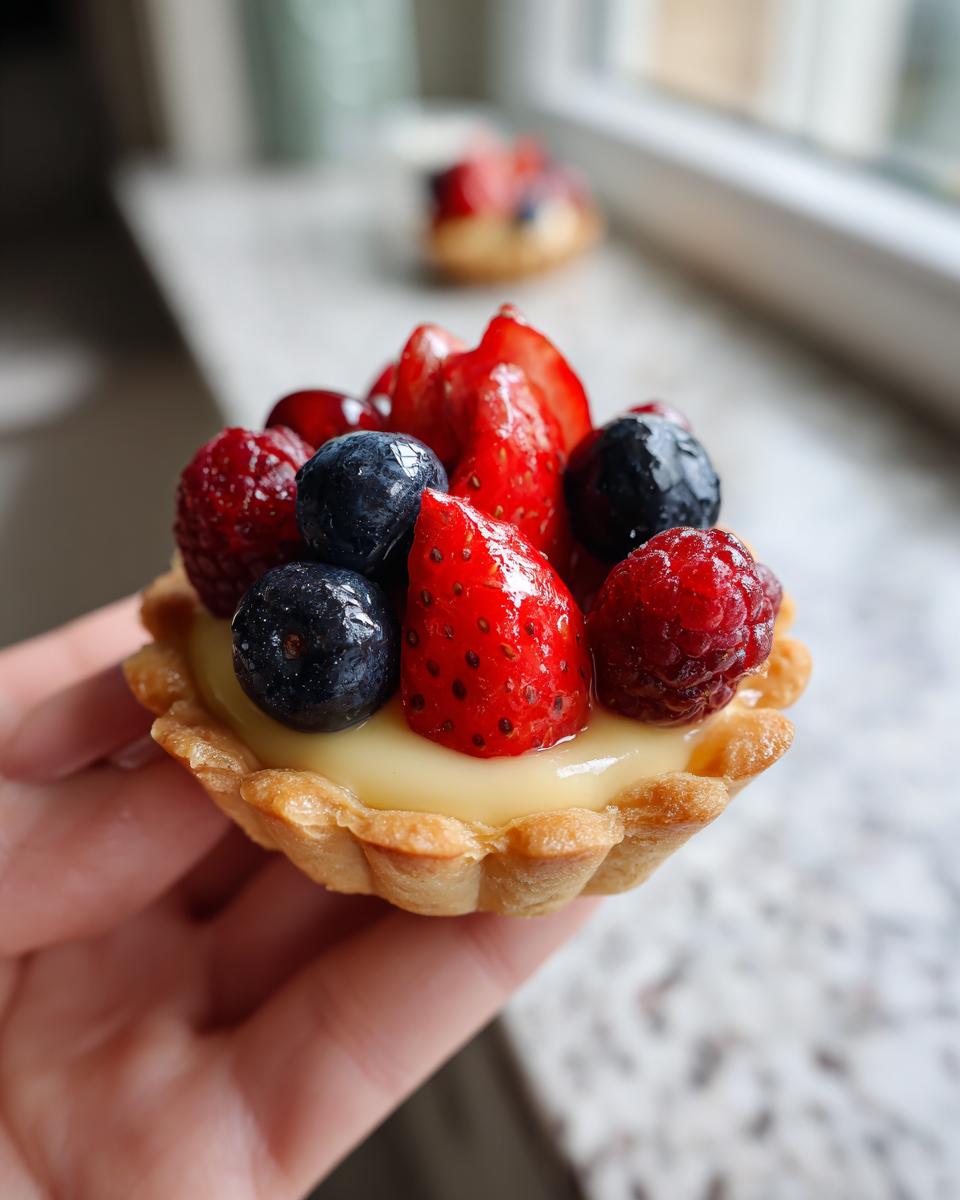
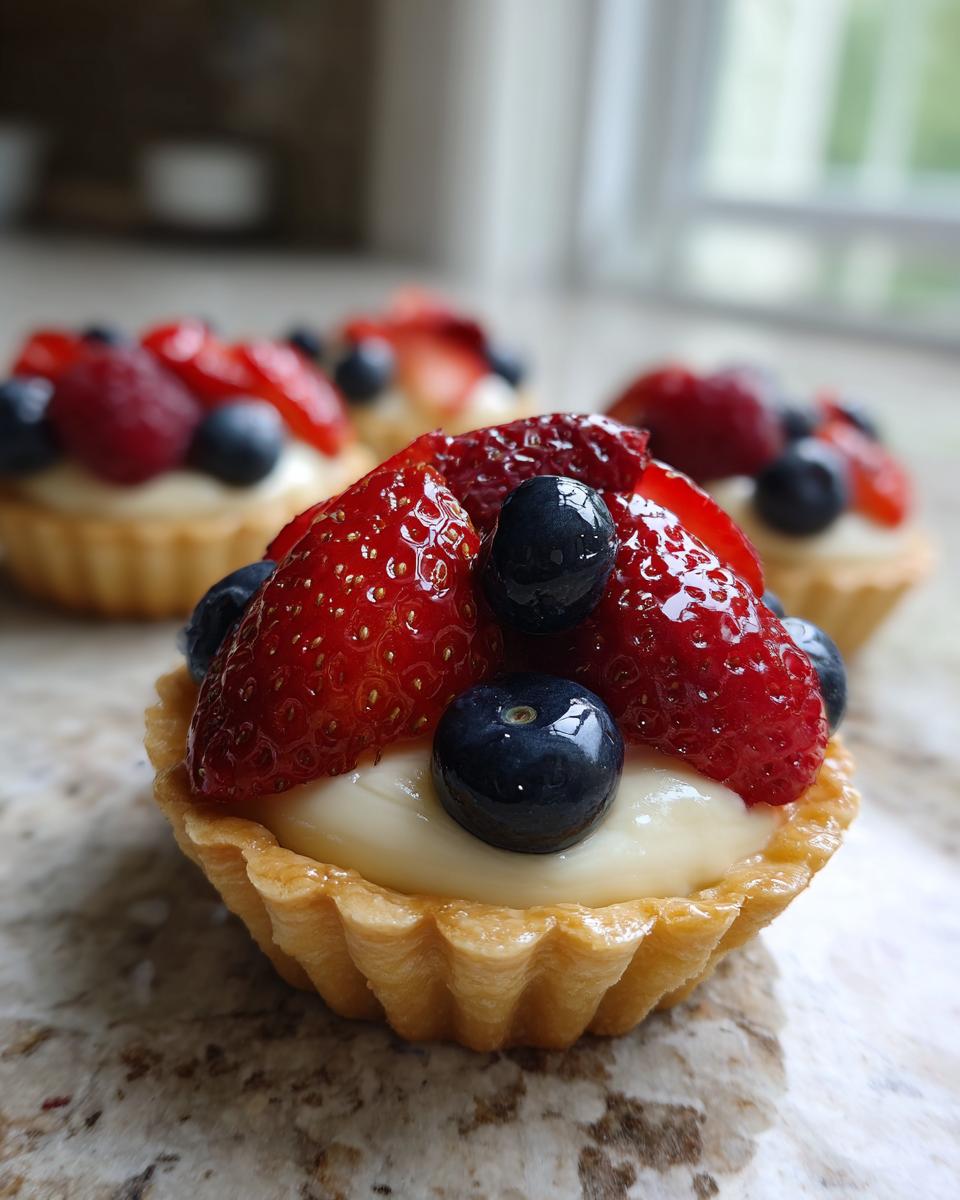
Oh my goodness, can you believe the Fourth of July is just around the corner? I absolutely *love* this holiday – all the fireworks, the backyard BBQs, and most importantly, the delicious food! This year, I wanted to make something extra special for our get-together, and these mini tartlets have officially stolen the show. They’re probably the prettiest Fourth of July Desserts for Mini Tartlets With Cream and Fruit you’ll ever see, with that crisp, buttery shell, a luscious creamy filling, and piled high with gorgeous fresh berries. I remember making these for the first time last year, and my family gobbled them up so fast I barely got one for myself! They just feel so festive and special, like little edible firecrackers.
Why You’ll Love These Fourth of July Desserts for Mini Tartlets
Seriously, these little guys are a home run for any celebration, especially the Fourth of July! Here’s why you’ll be obsessed:
- So Easy to Whip Up: Even with making the shells and cream, they come together surprisingly fast, leaving you more time to actually enjoy the party.
- Total Crowd-Pleasers: Who doesn’t love a mini dessert? They’re the perfect single serving, and everyone always raves about them.
- Super Versatile: You can totally swap out the berries for whatever looks best or is in season. Any fruit combo works!
- Festive & Gorgeous: Let’s be honest, they look amazing! The red, white, and blue berries just scream Fourth of July. They’re almost too pretty to eat… almost!
Ingredients for Your Fourth of July Desserts for Mini Tartlets
Alright, let’s get down to what you’ll need to make these little stars! Having everything prepped makes the whole process a breeze. Trust me on this!
For the Tartlet Shells
These are your little crispy foundations!
- 1.5 cups all-purpose flour
- 0.5 cup unsalted butter, cold and cubed (this makes them flaky!)
- 1 tablespoon granulated sugar
- 0.25 teaspoon salt
- 3-4 tablespoons ice water (just enough to bring it together, don’t go crazy!)
For the Pastry Cream
This is the luscious, creamy magic inside!
- 2 cups whole milk
- 4 large egg yolks (save those whites for meringues or something else!)
- 0.5 cup granulated sugar
- 3 tablespoons cornstarch
- 1 teaspoon vanilla extract
For the Topping
The colorful, fresh finish!
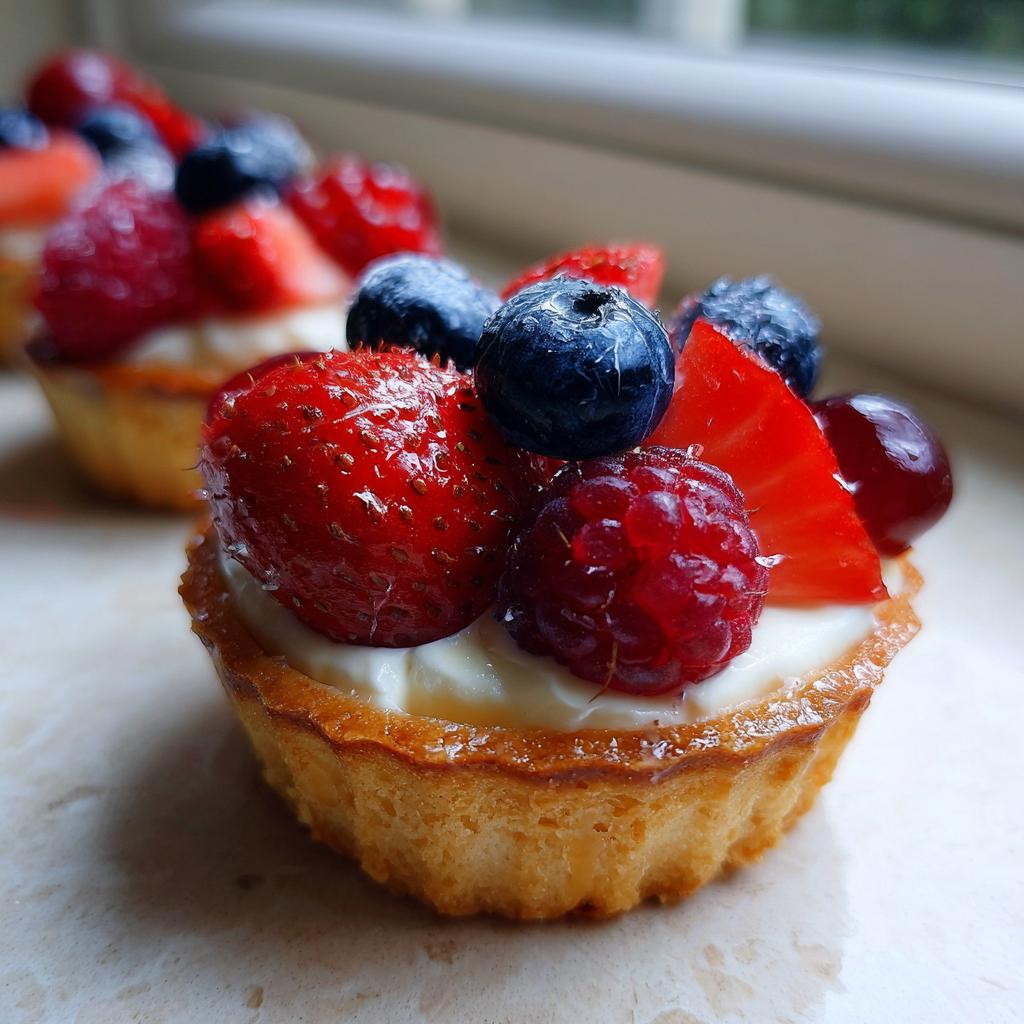
- 2 cups mixed berries (think strawberries, blueberries, raspberries – whatever looks good and screams festive!)
- 2 tablespoons apricot jam or glaze, warmed (this is optional, but it gives them such a pretty shine!)
Crafting the Perfect Mini Tartlet Shells
Alright, let’s get our hands a little floured and make these darling little tart shells! The secret to a perfectly flaky shell? Keeping everything super cold and not messing with the dough too much. It’s honestly simpler than it sounds, and the result is totally worth it. For more great baking tips, you might check out how to make healthy apple oat cookies!
Mixing the Tartlet Dough
First things first, grab a big bowl. Toss in your flour, sugar, and salt. Then, grab that cold, cubed butter and cut it into the flour mixture. You can use a pastry blender, two knives, or even just your fingertips – you want it to look like coarse crumbs, kinda like little peas. Now, add your ice water, just a tablespoon at a time, and gently mix until it *just* starts to come together. Seriously, don’t overdo it here; we want tender shells, not tough ones!
Chilling and Shaping the Dough
Once the dough is holding together, gently gather it into a disc, wrap it up tight in some plastic wrap, and pop it into the fridge for at least 30 minutes. This chilling step is crucial; it lets the gluten relax and makes the dough way easier to handle. When it’s chilled, roll it out on a lightly floured surface until it’s about 1/8-inch thick. Then, use a cookie cutter or glass that’s a bit bigger than your mini tartlet pans and cut out circles. Gently press these into your pans, lining them nicely. Trim off any extra dough hanging over the edges, and give the bottoms a little prick with a fork – this stops them from puffing up like balloons!
Baking the Tartlet Shells to Golden Perfection
Now for the magic! Preheat your oven to 375°F (190°C). Pop those prepared tartlet shells into the hot oven and bake for about 12-15 minutes. You’re looking for them to be beautifully golden brown all around. Once they’re done, let them cool completely in the pans before you even *think* about trying to pop them out. Patience here pays off big time!
Creating the Silky Smooth Pastry Cream
Now for the part that makes these tartlets truly dreamy: the pastry cream! This stuff is like velvet. The key is to be patient and keep things moving so you get that super smooth, luscious texture. We’re going for rich and creamy, not scrambled eggs, so pay attention to these steps! If you’re a cream lover, you might also like my lemon cream chia pudding.
Heating the Milk and Tempering Eggs
Grab a medium saucepan and pour in your whole milk. Heat it over medium heat until it’s steaming nicely – you’ll see little wisps of steam, but don’t let it come to a full boil! Meanwhile, in a separate bowl, whisk together those gorgeous egg yolks, sugar, and cornstarch until it’s all smooth and pale. Now for the tricky bit: tempering! Slowly, *slowly* drizzle about half of that hot milk into the egg yolk mixture while whisking like crazy. This gently warms up the eggs so they don’t cook when you put them back in the hot pan.
Thickening the Pastry Cream
Okay, pour that warmed-up egg mixture back into the saucepan with the rest of the milk. Keep whisking constantly over medium-low heat. You’ll feel it start to thicken up! Keep at it for about 5-7 minutes. It’s super important *not* to boil this, or your eggs could curdle. You want it thick enough to coat the back of a spoon beautifully. The cornstarch is our secret weapon here for getting that perfect creamy consistency!
Chilling the Pastry Cream Properly
Once it’s nice and thick, take it off the heat. Stir in that lovely vanilla extract. Then, pour the cream into a clean bowl. Here’s a pro tip: lay a piece of plastic wrap directly onto the surface of the cream. This stops that annoying skin from forming while it cools. Pop it in the fridge for at least an hour, or until it’s totally chilled and firm. Nobody likes warm pastry cream in their tartlet!
Assembling Your Festive Fourth of July Desserts for Mini Tartlets
Okay, the fun part! We’ve got our golden, crispy shells and our dreamy, smooth pastry cream all ready to go. Assembling these little beauties is super quick, and honestly, it’s where they really start to shine. It’s all about layering the goodness for that perfect bite!
Filling the Tartlet Shells
Grab your cooled tartlet shells and your chilled pastry cream. Spoon a generous dollop of that luscious cream into each shell. You want to fill them up nicely, but don’t overstuff them – leave a little room for those gorgeous berries!
Adding the Fresh Fruit Topping
Now for the colorful finale! Arrange your beautiful mixed berries right on top of the pastry cream. Pile them up high for that festive, abundant look! If you want that extra special gloss, gently brush the berries with a little warmed apricot jam or glaze. It makes them look so professional and adds a subtle sweetness.
Tips for the Best Fourth of July Desserts for Mini Tartlets
Alright, let’s make sure these little tartlets are absolutely perfect for your Fourth of July bash! A few little tricks can really make them shine. You know, when I make these, I always try to get my ingredients ready beforehand – it just makes the whole process so much smoother. And for a super helpful tip on making green beans foolproof, check out this handy guide!
- Prep Ahead is Your Friend: Seriously, bake those tartlet shells and make the pastry cream a day in advance. Store them separately in airtight containers in the fridge. Then, all you have to do on party day is assemble!
- Keep it Cool: Make sure your butter and water are super icy cold for the crust. This is what makes it flaky and delicious.
- Don’t Overwork the Dough: Gentle hands are key for tender tartlet shells! The less you handle it, the better it will turn out.
- Presentation Power: For that extra sparkle, warm up a little apricot jam or glaze and gently brush it over the berries right before serving. It makes them look so professional!
Ingredient Notes and Substitutions
Sometimes you might run out of something, or just want to try a little twist, and that’s totally okay! For the tartlet shells, if you don’t have unsalted butter, you can use salted, but just leave out the extra salt in the dough. And for the berries, while I love the classic red, white, and blue combo for the Fourth, feel free to use whatever fruit looks best! Sliced peaches or kiwi are also amazing here. If you find whole milk is a bit too rich for your pastry cream, you can use a mix of milk and half-and-half, though it might not be quite as luxuriously creamy.
Frequently Asked Questions About Mini Tartlets
Got questions about these little bursts of joy? I’ve got you covered! These often come up when I share them, and I’m happy to spill all the secrets. Here are a few things folks usually ask:
Can I make these mini tartlets ahead of time?
Yes, absolutely! You can totally make the tartlet shells and the pastry cream a day in advance. Just store the cooled shells in an airtight container at room temperature and the pastry cream covered directly with plastic wrap in the fridge. Assemble them on the day you plan to serve them for the best texture – nobody likes a soggy bottom!
What if I don’t have mini tartlet pans?
No worries! If you don’t have those cute little mini tartlet pans, you can totally make one larger tart (about a 9-inch pan) using the same dough and pastry cream. Just adjust the baking time for the crust, and remember to use the same blind baking method. Or, if you’re feeling ambitious, mini muffin tins work in a pinch, but you’ll need to be extra careful with the thin dough!
How do I store any leftover mini tartlets?
If, by some miracle, you have any leftovers, store them in an airtight container in the refrigerator. The pastry cream and fruit should be kept cold. They’re usually best eaten within a day or two, as the crust can soften up over time. You can make them ahead if you’re planning a party, and for some great make-ahead tips, you should totally check out how to make stuffed mushrooms ahead of time!
Can I use different fruits than the ones suggested?
Oh, 100%! The beauty of these tartlets is how adaptable they are. Instead of berries, try thinly sliced peaches, nectarines, or even a mix of kiwi and mango for a tropical twist. Just make sure whatever fruit you choose is ripe and not too watery. The apricot glaze is great for making most fruits look extra pretty, too!
Estimated Nutritional Information
Now, I’m not a nutritionist or anything, but roughly speaking, each of these darling mini tartlets is going to pack around 250-300 calories. You’re looking at about 15-20g of fat, maybe 5-7g of protein, and around 25-30g of carbs. Keep in mind this can totally change depending on the exact ingredients and brands you use, but it gives you a general idea!
Mini Fruit and Cream Tartlets
Ingredients
Equipment
Method
- For the tartlet shells: In a large bowl, whisk together the flour, sugar, and salt. Cut in the cold butter using a pastry blender or your fingertips until the mixture resembles coarse crumbs. Gradually add ice water, one tablespoon at a time, mixing until the dough just comes together. Do not overmix.
- Gather the dough into a disc, wrap it in plastic wrap, and refrigerate for at least 30 minutes.
- Preheat your oven to 375°F (190°C). Lightly grease your mini tartlet pans.
- Roll out the chilled dough on a lightly floured surface to about 1/8-inch thickness. Cut out circles to fit your tartlet pans. Press the dough into the pans and trim any excess. Prick the bottoms with a fork.
- Bake the tartlet shells for 12-15 minutes, or until golden brown. Let them cool completely in the pans before removing.
- For the pastry cream: In a medium saucepan, heat the milk over medium heat until it is steaming but not boiling. In a separate bowl, whisk together the egg yolks, sugar, and cornstarch until smooth.
- Gradually temper the egg yolk mixture by slowly whisking in about half of the hot milk. Pour the tempered egg mixture back into the saucepan with the remaining milk. Cook over medium-low heat, whisking constantly, until the cream thickens, about 5-7 minutes. Do not boil.
- Remove from heat and stir in the vanilla extract. Pour the pastry cream into a clean bowl, cover the surface directly with plastic wrap to prevent a skin from forming, and refrigerate until completely chilled, at least 1 hour.
- To assemble: Spoon the chilled pastry cream into the cooled tartlet shells. Arrange the mixed berries on top of the cream.
- If using, gently brush the berries with warmed apricot jam or glaze for a glossy finish. Serve immediately.