
Okay, so Fourth of July is coming up, and let’s be real, who wants to be stuck in a hot kitchen when you could be out enjoying the fireworks and BBQs? That’s exactly why I LOVE whipping up these no-bake cheesecake cups for parties. Seriously, they’re a lifesaver! I remember bringing them to a neighborhood get-together last year, and people were raving. They’re just so darn perfect for little hands (or big hands, ha!) and you can even make them ahead, which is a major win in my book. These little gems are my go-to for easy, delicious Fourth of July desserts that everyone devours.
Why You’ll Love These Fourth of July Desserts
Honestly, why would you NOT want to make these? They’re seriously the best little treats for any summer celebration. Here’s why they’re a total winner:
- Super Easy: No oven required! That means a cooler kitchen and less fuss for you.
- Perfect for Parties: They’re already portioned out, so no cutting or serving drama. Just grab and go!
- Make-Ahead Magic: Whip them up the day before or even two days ahead. They actually taste better after chilling!
- Crowd Pleaser: Who doesn’t love cheesecake? These cups are always a hit with kids and adults alike.
- Totally Portable: Pack them in a cooler and take them to your neighbor’s BBQ or a picnic in the park. Easy peasy.
Ingredients for Your Fourth of July Desserts
Alright, let’s get down to what makes these little bites of heaven tick! It’s honestly such a simple list, which is half the reason I adore them. You probably have most of this stuff hiding in your pantry right now!
For the Crust:
- 24 graham crackers, crushed
- 6 tablespoons butter, melted
For the Filling:
- 2 packages cream cheese, softened
- 1 cup powdered sugar
- 1 teaspoon vanilla extract
- 1 cup heavy cream, whipped to stiff peaks
And hey, if you want to jazz them up even more, don’t forget to grab some fresh berries, maybe a fruit compote, or even some extra whipped cream for topping!
Equipment Needed for No-Bake Cheesecake Cups
Okay, so you don’t need a whole fancy kitchen setup for these, thankfully! Just a few basics will do the trick. You’ll want a couple of mixing bowls, your trusty electric mixer (my stand mixer is my best friend here!), a good ol’ spatula, and your essential measuring cups and spoons. Oh, and grab a 12-cup muffin tin and some paper liners – those are key for easy removal and those cute little cup shapes!
How to Make These Easy Fourth of July Desserts
Alright, let’s get down to business and actually make these little slices of heaven! It’s honestly so straightforward, which is a huge plus when you’ve got a million other things to do for your Fourth of July bash. Trust me, these come together faster than you think!
Preparing the Crust for Your No-Bake Cheesecake Cups
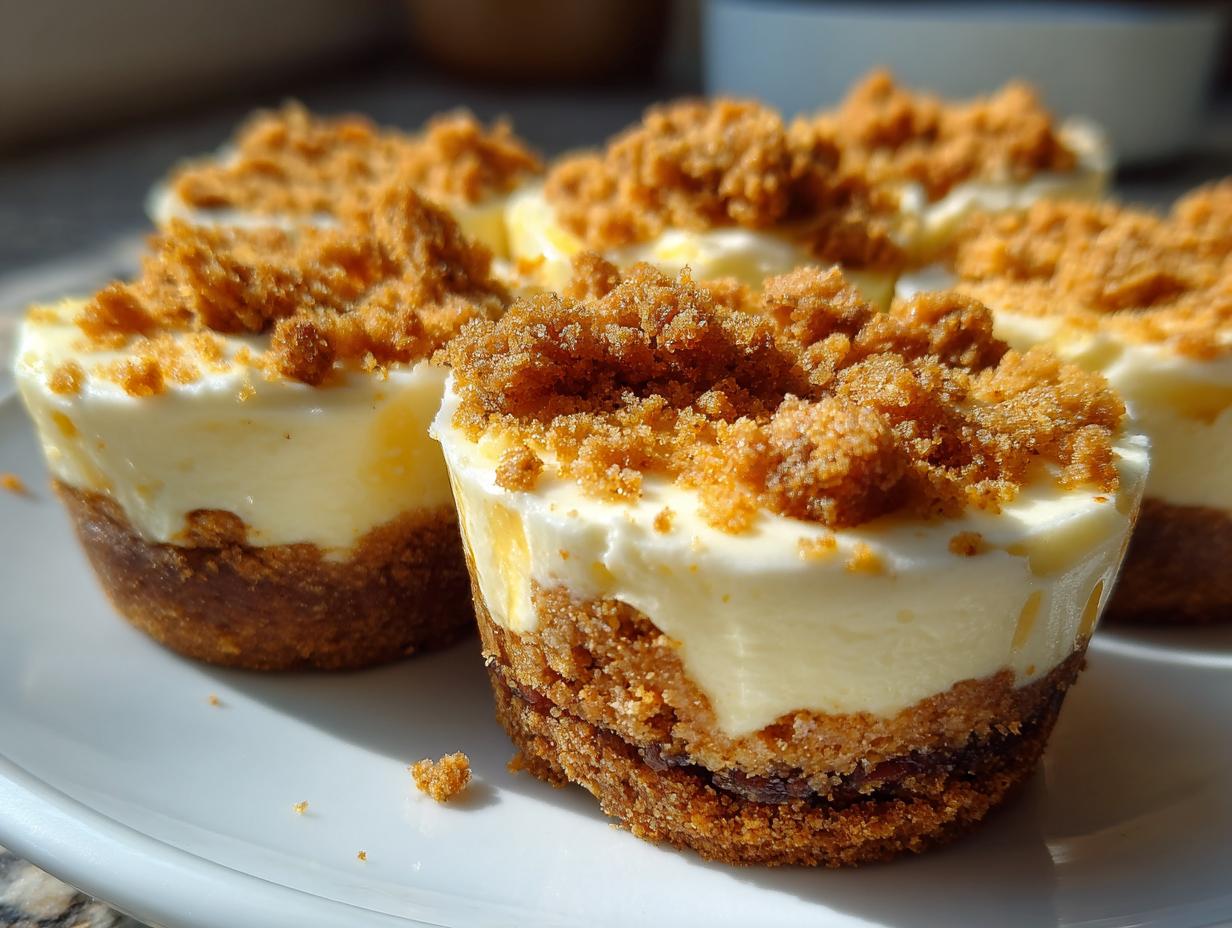
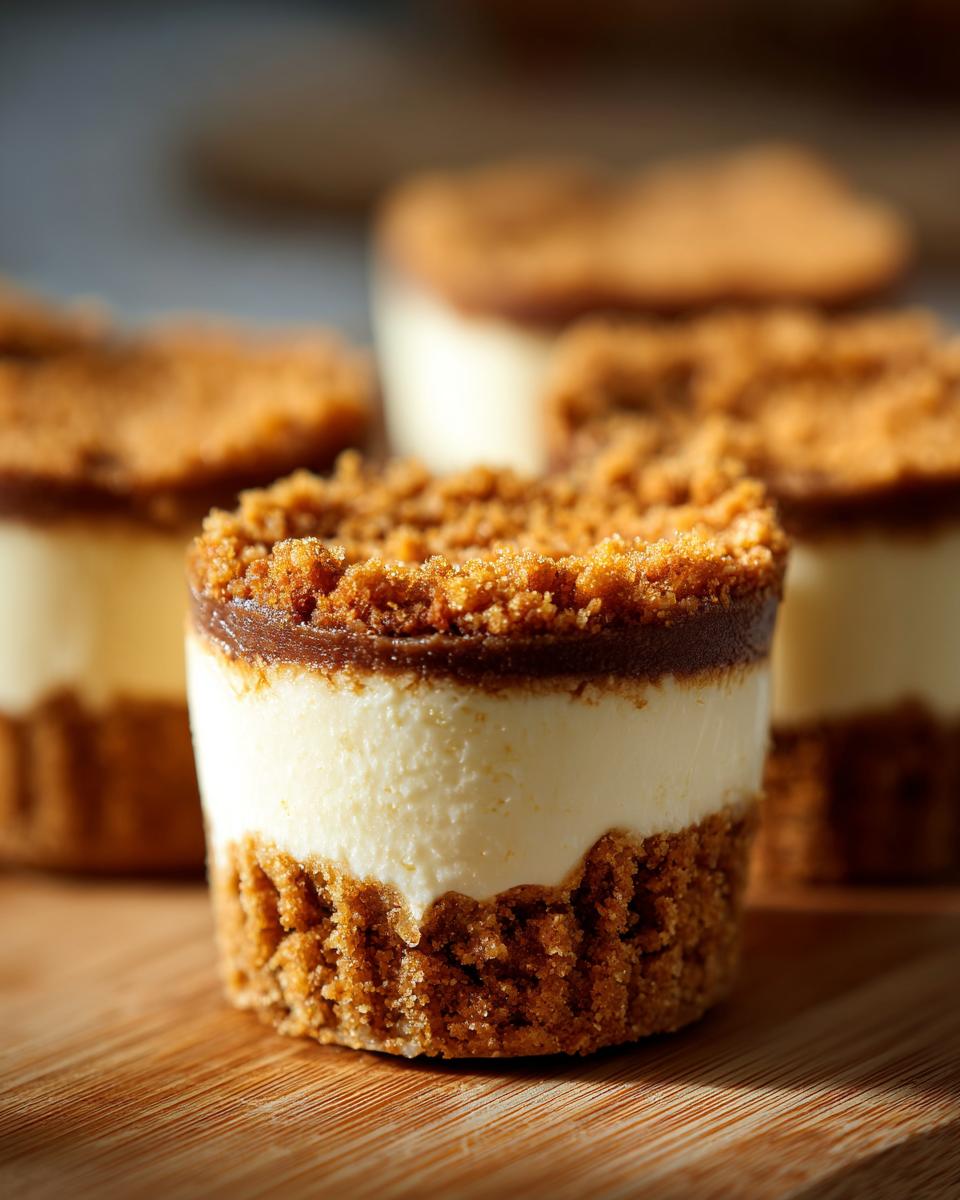
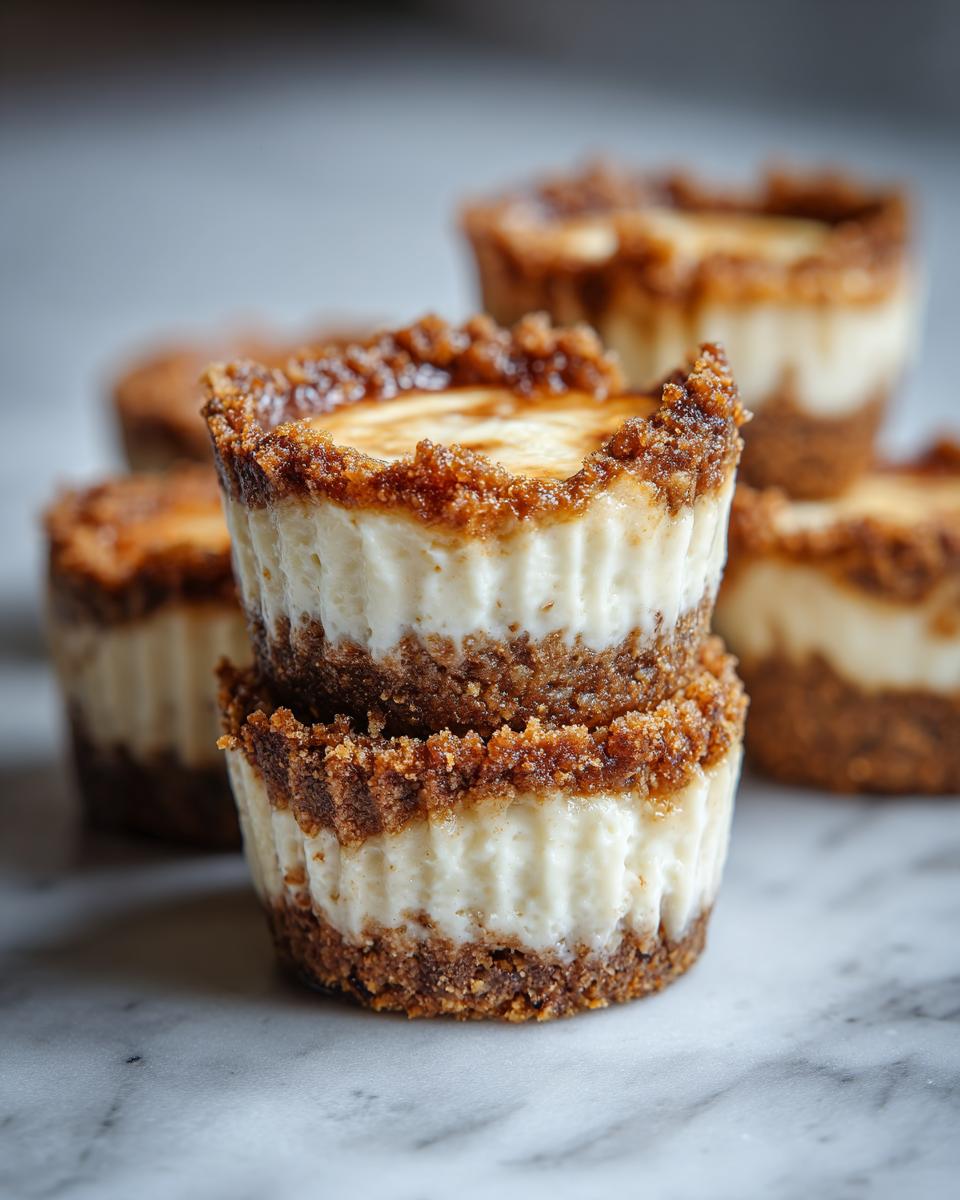
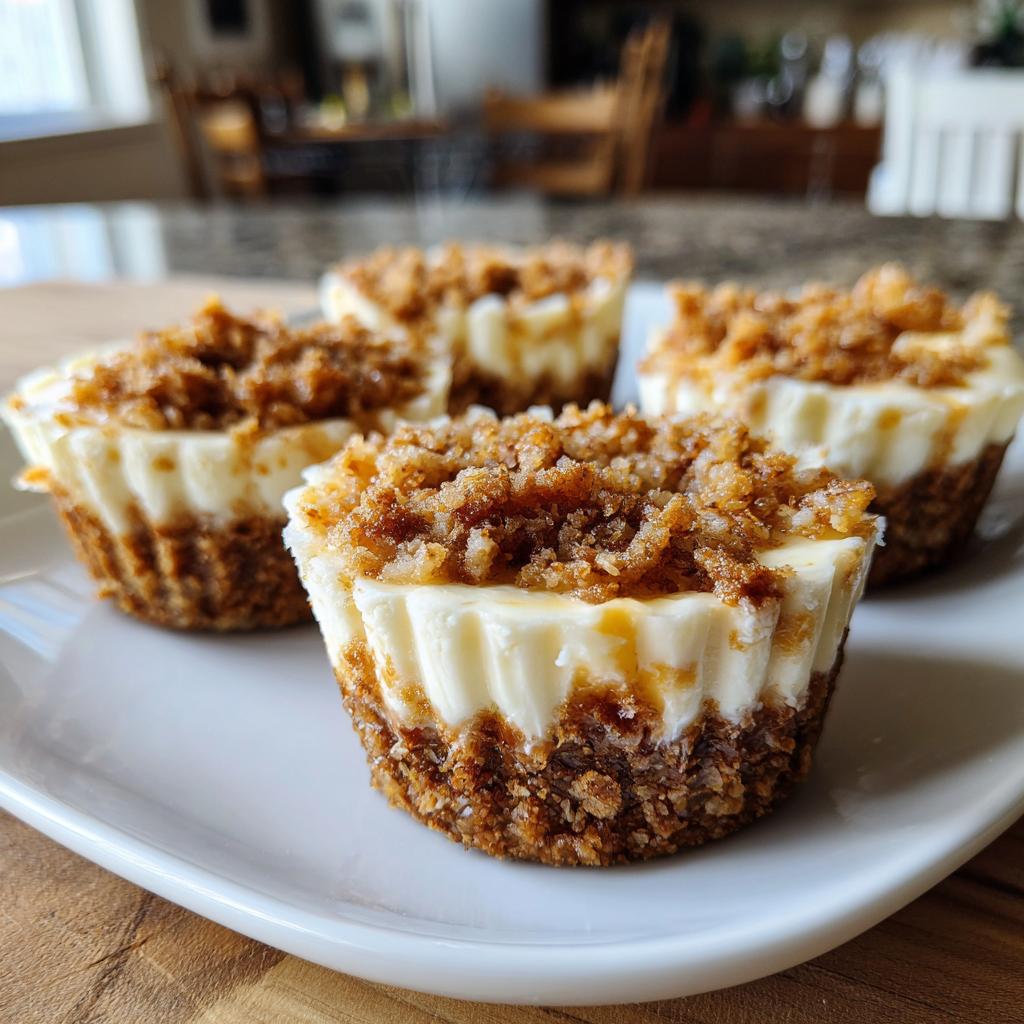
First things first, let’s get that yummy base ready. Grab your crushed graham crackers and mix them up with that lovely melted butter. You want it to look like wet sand, you know? Then, just press about 2 tablespoons of this mixture into the bottom of each paper liner in your muffin tin. It’s important to pack it down pretty good so it holds its shape when you take a bite!
Creating the Creamy Cheesecake Filling
Now for the star of the show – the filling! Make sure your cream cheese is nice and soft; it makes it so much easier to get a super smooth texture. Beat it with your electric mixer until there are absolutely no lumps. Then, toss in the powdered sugar and that splash of vanilla extract and beat again until it’s all combined and looks wonderfully creamy. The last step here is to gently fold in the whipped heavy cream. Be careful not to overmix it – you want it to stay light and airy, not turn into butter!
Assembling and Chilling Your Fourth of July Desserts
Okay, moment of truth! Spoon that delicious cream cheese filling evenly over the graham cracker crust in each of your paper liners. Once they’re all filled up, cover the whole muffin tin – plastic wrap works great – and pop it into the fridge. This is where the magic happens! You’ve gotta let them chill for at least 2 hours. Honestly, I usually go for longer, like 3-4 hours, or even overnight. The longer they chill, the firmer and yummier they get, and they’ll come right out of the liners super easily. You can check out more no-bake cheesecake tips if you’re curious!
Tips for Perfect Fourth of July Desserts
Alright, let’s talk about making these little cheesecake cups absolutely *perfect* every single time. It’s not complicated, but a few little tricks can really make a difference. First off, make sure your cream cheese is SOFT! I mean really soft, leave it on the counter for a good hour or two. It makes it SO much easier to get that smooth, creamy texture without any lumps. And that whipped cream? You want stiff peaks, but be careful not to over-whip it into butter! It sounds tricky, but just watch it – when you lift the beater, the cream should stand straight up. For the crust, feel free to switch it up! Oreos or shortbread cookies? They all work like a charm for a tasty base. You can even get some great ideas from here. Just remember, the chilling time is your friend – don’t rush it, or you’ll end up with a runny mess!
Ingredient Notes and Substitutions for Cheesecake Cups
Let’s chat about the ingredients for these yummy cheesecake cups! While the recipe is pretty straightforward, sometimes you want to switch things up or you’re missing something. For the crust, graham crackers are classic, but honestly, you can totally use crushed digestive biscuits, buttery shortbread cookies, or even gingersnaps for a little kick! Just make sure you crush ’em nice and fine. If you’re looking for something a little different, check out these mini pineapple upside-down cheesecakes for inspiration on crust variations. And regarding the cream cheese, if you need dairy-free, there are some decent cream cheese alternatives out there now that work pretty well, just make sure they’re meant for baking or chilling so they set up nicely!
Serving and Storing Your No-Bake Cheesecake Cups
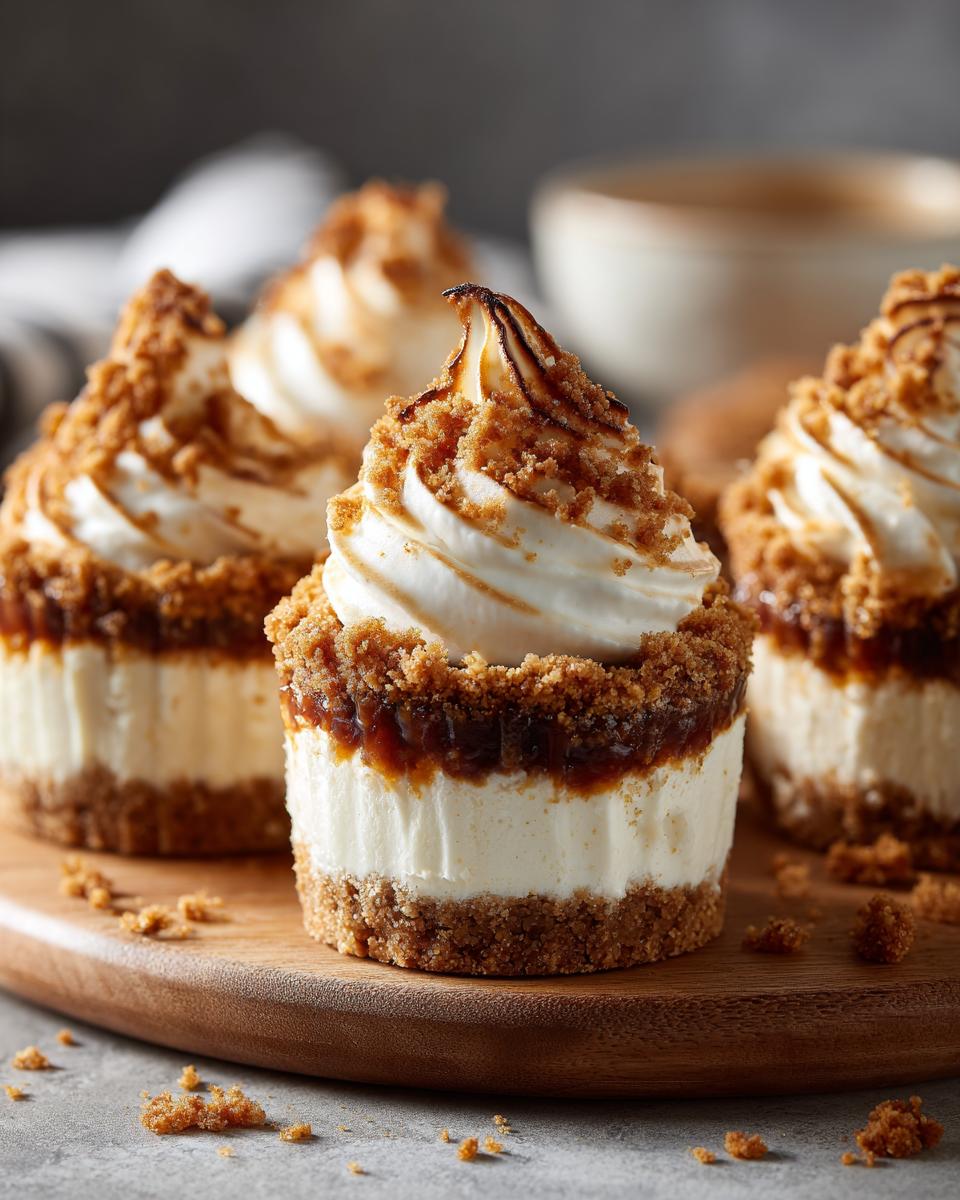
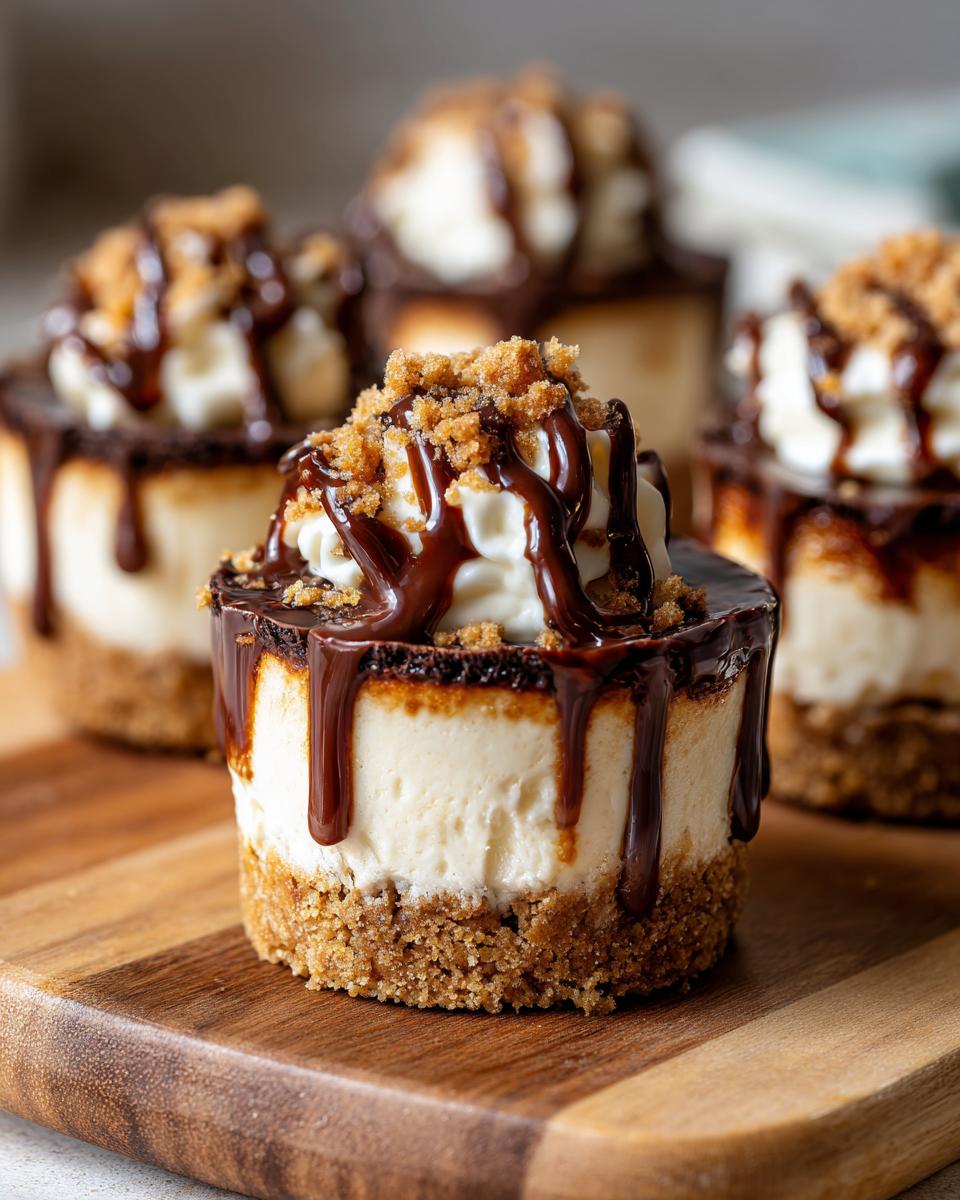
Alright, the fun part! Once these little beauties are all chilled and firm, it’s time to serve them up. The best part is they’re already perfectly portioned, but you can totally dress them up! A swirl of extra whipped cream on top never hurts, or pile on some fresh berries – raspberries, blueberries, strawberries, they all look and taste amazing against the creamy white. A drizzle of chocolate or caramel sauce is also a decadent touch, sort of like these chocolate strawberry yogurt clusters! If you happen to have any leftovers (which is rare!), just pop them back into an airtight container in the fridge. They’ll stay yummy for about 3-4 days, but honestly, they’re best within the first couple of days. You can totally make these a day or two ahead of your party – they actually get even better!
Frequently Asked Questions About Fourth of July Desserts
Got questions? I’ve got answers! These little cheesecake cups are pretty foolproof, but I get that you might have a few things on your mind. Let’s clear them up!
Can I make these ahead of time?
Oh, absolutely yes! This is one of the biggest reasons I love these for parties. You can totally make them a day or even two before your Fourth of July celebration. In fact, they taste even better after chilling for a while because all those flavors meld together. Just pop them in an airtight container in the fridge until you’re ready to serve!
What are the best toppings for these cheesecake cups?
Honestly, the topping possibilities are endless and part of the fun! A classic is fresh berries – think strawberries, blueberries, and raspberries, maybe even a mix for that festive red, white, and blue look. A dollop of extra whipped cream is always a good idea. If you’re feeling a little fancy, a drizzle of chocolate sauce or a sweet fruit compote (like cherry or blueberry!) works wonders too. You can also get some inspiration from these no-bake Oreo cheesecake bites for topping ideas!
Can I use a different type of cookie for the crust?
Yes, you totally can! Graham crackers are the traditional choice, but feel free to get creative. Crushed digestive biscuits, buttery shortbread, or even gingersnap cookies will give your crust a whole new flavor profile. Just follow the same ratio of crushed cookies to melted butter. For some awesome crust variations, you might even want to check out ideas for mini pineapple upside-down cheesecakes – they use different bases that are super yummy!
Why aren’t my cheesecake cups setting properly?
The most common reason for this is not chilling them long enough! Seriously, that 2-hour minimum chill time is crucial. Don’t rush it; patience here is key for firmness. Also, make sure your cream cheese was properly softened before mixing, and that you didn’t overmix the whipped cream, which can make it deflate. Ensure your heavy cream was whipped to proper stiff peaks!
Nutritional Information (Estimate)
Just a friendly heads-up, the nutritional info for these little delights can really change depending on exactly what you use and how big you make your servings. But, as a rough idea, each of these no-bake cheesecake cups usually lands somewhere around 250-300 calories, with about 15-20g of fat, a few grams of protein, and roughly 20-25g of carbs. Keep in mind that’s just an estimate, okay?
No-Bake Cheesecake Cups
Ingredients
Equipment
Method
- Line a 12-cup muffin tin with paper liners.
- In a medium bowl, combine the crushed graham crackers and melted butter. Mix until well combined.
- Press about 2 tablespoons of the graham cracker mixture into the bottom of each paper liner.
- In a large bowl, beat the softened cream cheese with an electric mixer until smooth.
- Add the powdered sugar and vanilla extract to the cream cheese mixture. Beat until combined.
- Gently fold in the whipped heavy cream until just combined. Do not overmix.
- Spoon the cream cheese filling evenly over the graham cracker crust in each liner.
- Cover the muffin tin and refrigerate for at least 2 hours, or until firm.
- Serve chilled.