
Oh, lemon bars! If you’re thinking about Dessert Recipes With Lemon Bars and Bright Citrus Flavor, you’ve absolutely come to the right place. There’s just something magical about that perfect bite: a buttery, crumbly shortbread crust topped with a sunshine-yellow, tangy-sweet lemon filling. My grandma used to make these for picnics, and the smell alone would make your mouth water! They’re the ultimate treat when you need a burst of bright, happy flavor, and trust me, this recipe strikes that sweet-and-tart balance just right. It’s surprisingly simple, too, which is always a big win in my book!
Why You’ll Love These Lemon Bars with Bright Citrus Flavor
Seriously, these lemon bars are a game-changer. Here’s why you’ll be making them again and again:
- Perfectly Balanced Flavor: That sweet-tart combo is just *chef’s kiss*!
- Super Easy to Make: No fancy techniques needed here, just mix and bake.
- Incredible Texture: A tender, buttery crust with a smooth, gooey filling.
- Bright & Cheerful: They look as good as they taste – pure sunshine on a plate!
- Crowd-Pleaser: Everyone devours these, from picky eaters to serious dessert critics.
- Versatile: Great for potlucks, bake sales, or just a Tuesday afternoon treat.
Gather Your Ingredients for Perfect Lemon Bars
Alright, let’s get our ingredients lined up! The beauty of these lemon bars is that they use pretty basic pantry staples, but using good quality stuff really makes a difference. Here’s what you’ll need to grab:
For the Crust:
- 1 cup unsalted butter, make sure it’s softened – this is key for a good crust!
- 1/2 cup granulated sugar
- 2 cups all-purpose flour
For the Lemon Filling:
- 4 large eggs – room temperature is best here!
- 1 1/2 cups granulated sugar
- 1/3 cup all-purpose flour
- 1/2 cup fresh lemon juice. Seriously, use fresh! It’s about 2-3 lemons.
- 1 tablespoon lemon zest – zesting those lemons first makes juice-squeezing easier!
And for that pretty finish? You’ll want 1/4 cup of powdered sugar for dusting right before serving. See? Nothing too crazy!
Step-by-Step Guide to Making Lemon Bars
Okay, buckle up, because we’re about to make some magic happen! Making these lemon bars is totally doable, even if you’re a kitchen newbie. The key is to follow along, and don’t rush the cooling part – that’s the hardest part, I know! If you’re ever looking for more amazing lemon bar recipes or just need inspiration, check out other great bloggers!
Preparing the Shortbread Crust
First things first, get that oven preheating to 350°F (175°C). While it’s warming up, grab your 9×13 inch pan. Line it with parchment paper, leaving some overhang on the sides – this makes lifting the bars out SO much easier later on. Trust me on this! Now, for the crust: in a medium bowl, cream together your softened butter and the 1/2 cup of sugar until it’s nice and fluffy. Gradually mix in the 2 cups of flour until it just comes together into a crumbly dough. Don’t overmix! Press this dough evenly into the bottom of your prepared pan. Pop it into the oven for about 15-20 minutes, just until it’s lightly golden around the edges.
Creating the Tangy Lemon Filling
While that crust is doing its thing in the oven, let’s whip up that zesty filling. In a separate bowl, whisk together the 4 large eggs and the 1 1/2 cups of granulated sugar. Keep whisking until it’s all nicely combined. Now, whisk in the 1/3 cup of flour until there are no lumps left – smoothness is key here! Finally, stir in that glorious fresh lemon juice and the lemon zest. You really want that fresh citrus kick, so don’t skimp on it! That’s it for the filling – super simple, right? Speaking of citrusy goodness, if you ever need a lighter option, this lemon chia pudding is fantastic!
Baking and Cooling Your Lemon Bars
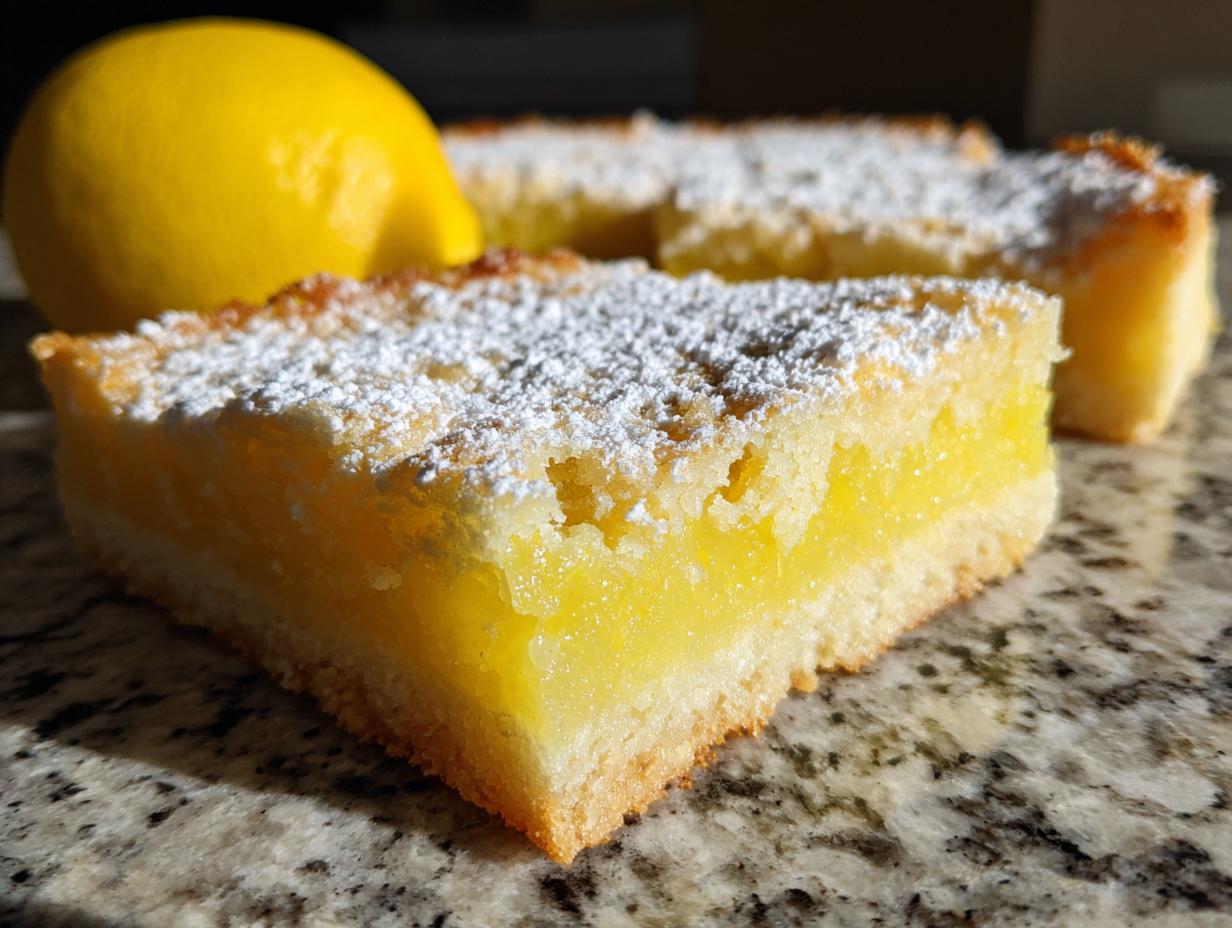
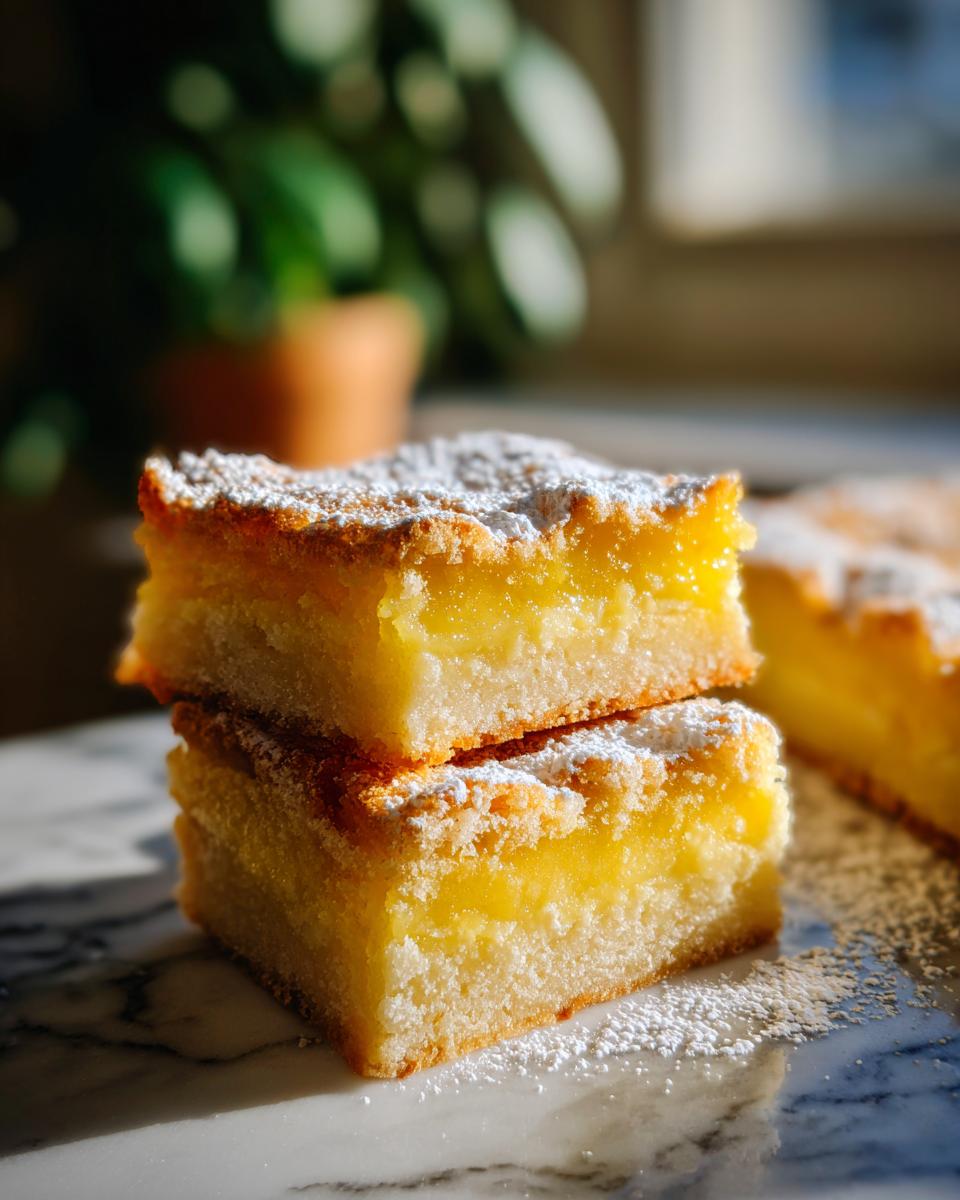
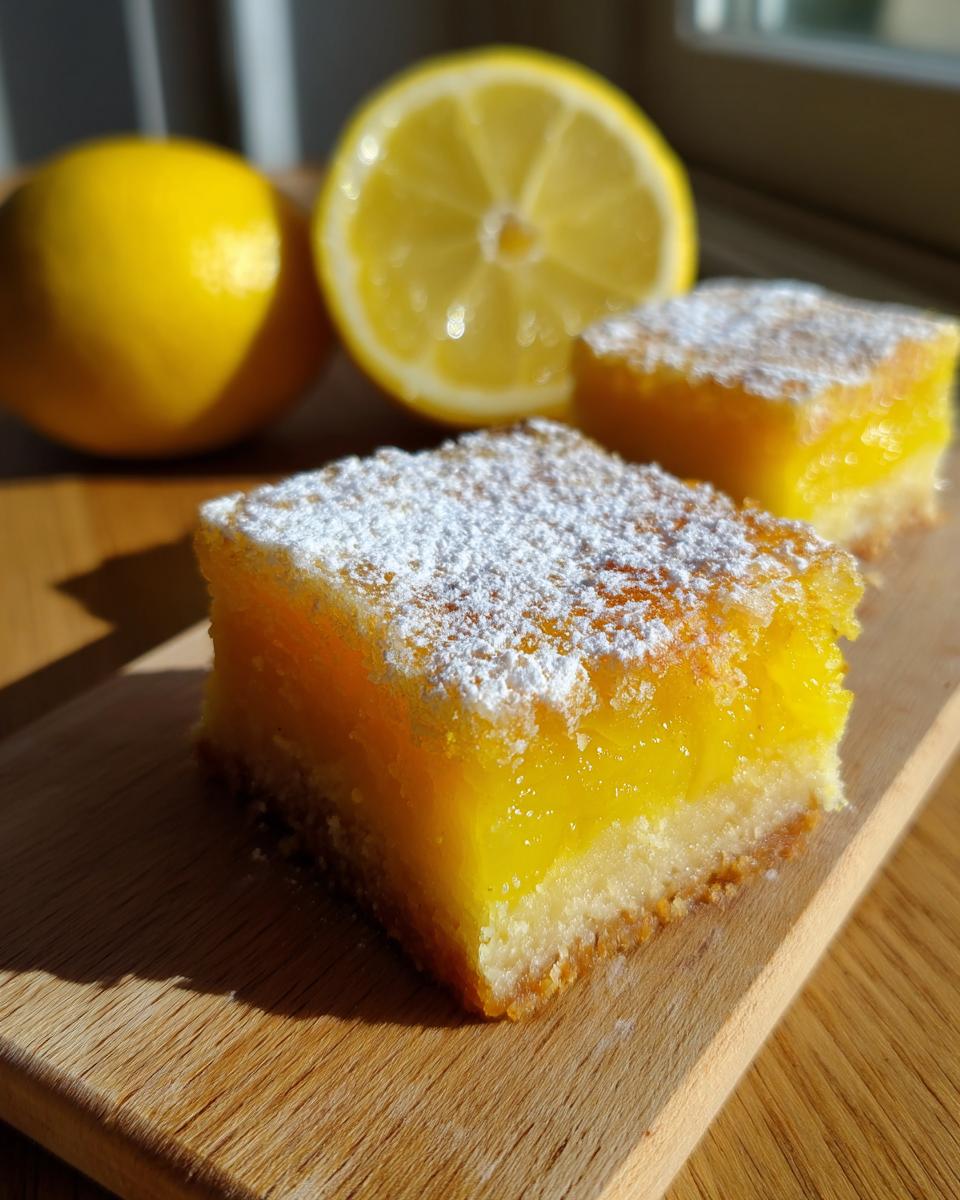
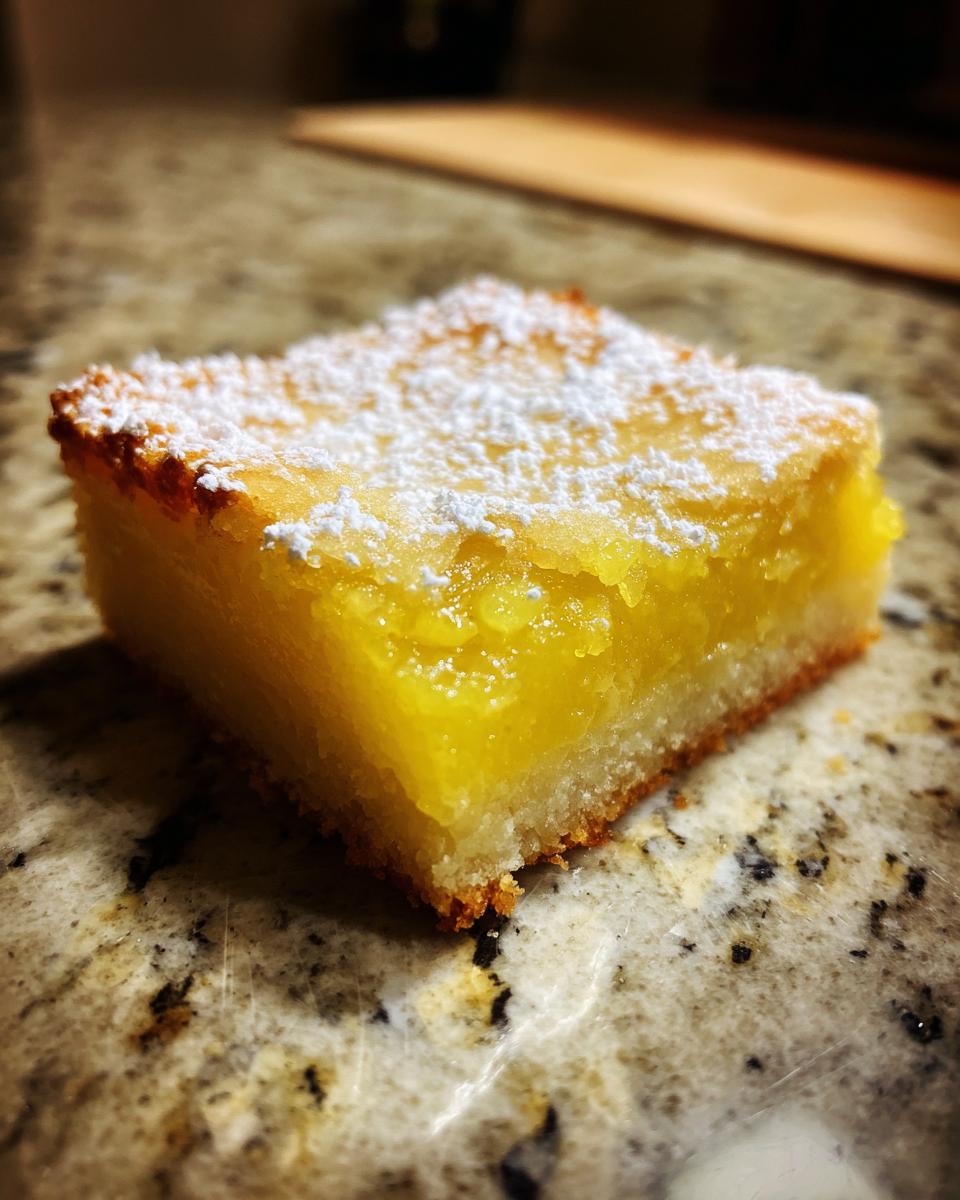
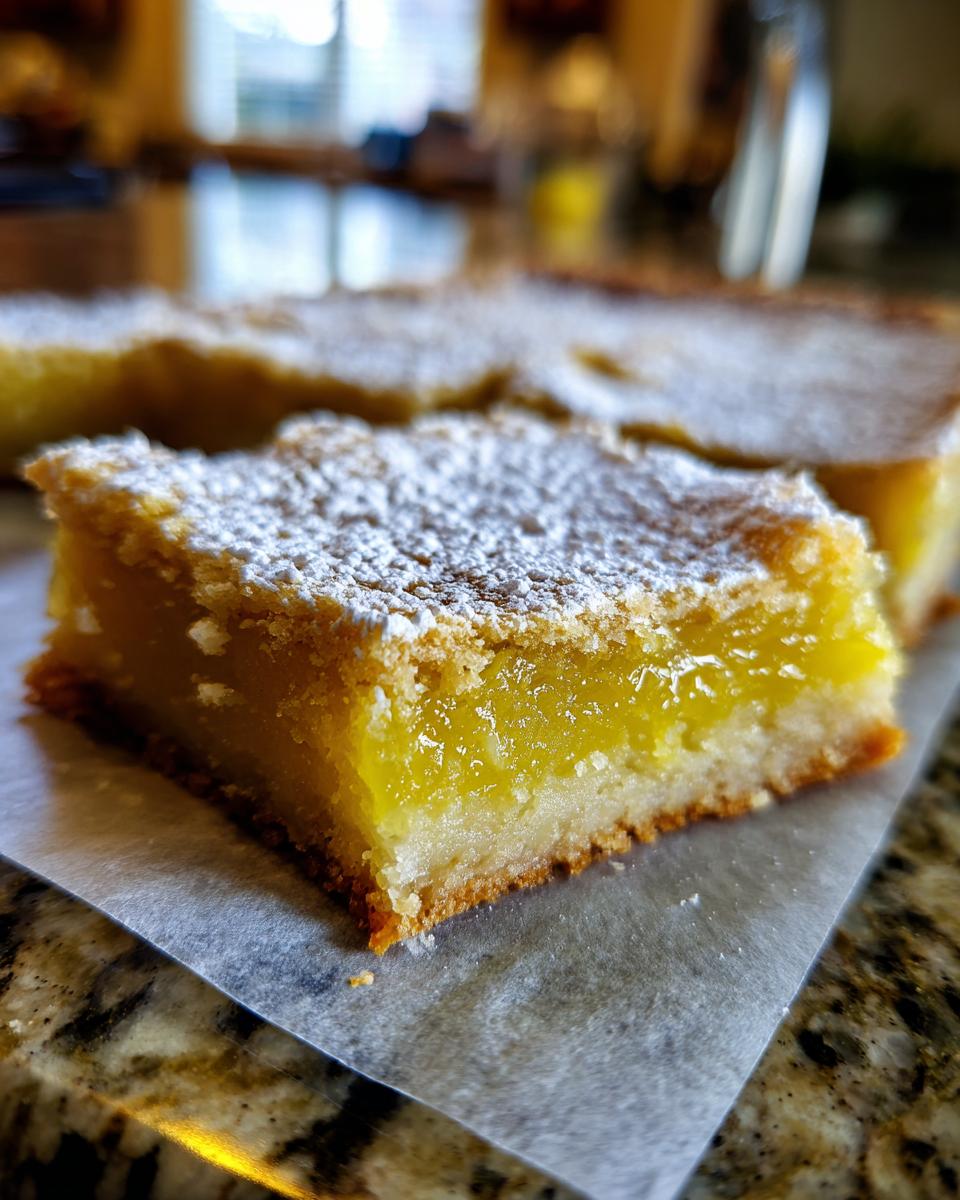
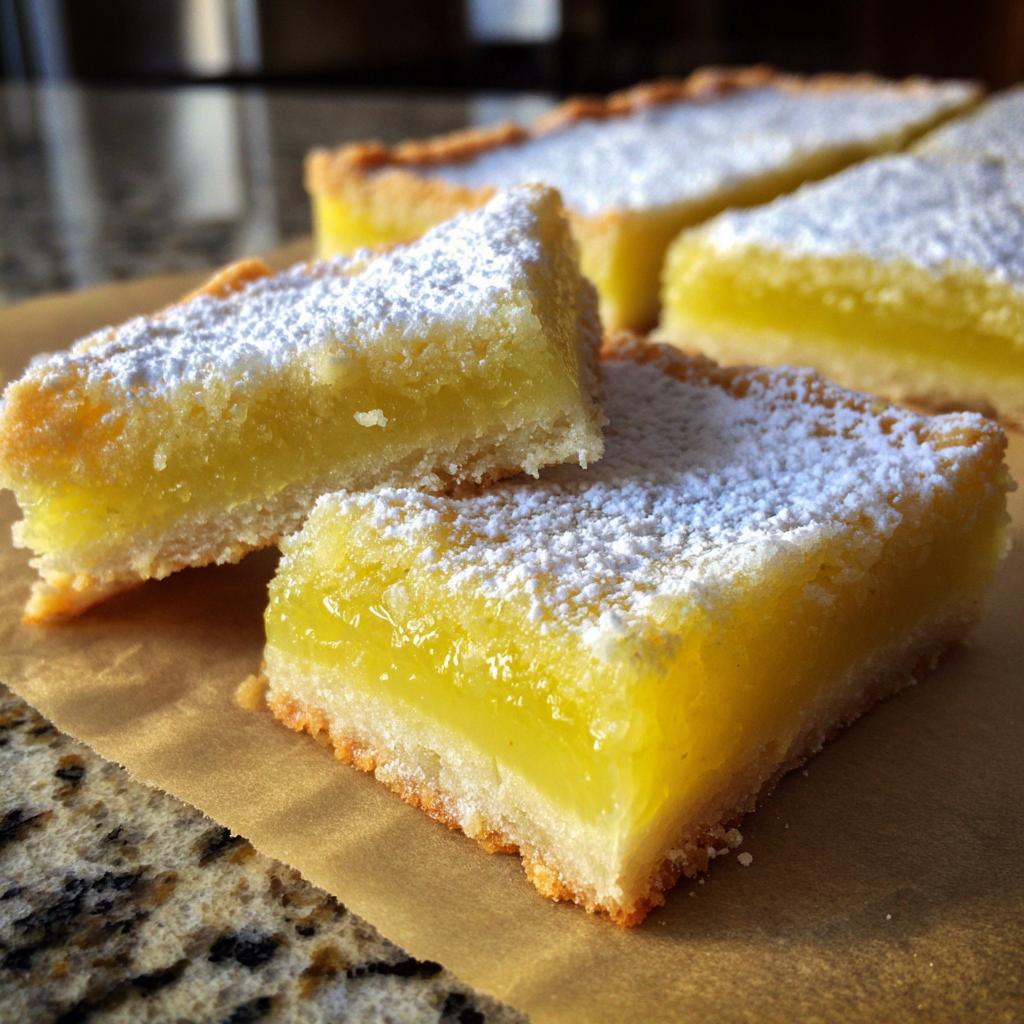
Once the crust has that light golden hue, carefully take it out of the oven. Pour that bright lemon filling evenly over the hot crust. It might seem a little thin, but have faith! Gently return the pan to the oven and bake for another 15-20 minutes. You’ll know they’re ready when the filling is set and the edges look lightly golden. The absolute hardest part? Letting them cool completely in the pan on a wire rack. Seriously, resist the urge to cut into them while they’re hot! Once they’re totally cool, use those parchment paper overhangs to lift the whole slab out. Then, cut into 16 perfect bars. Dust with powdered sugar and marvel at your work!
Tips for the Best Lemon Bars
Alright, my friends, let’s talk about making these lemon bars truly sing! It’s not just about following the steps; it’s about a few little tricks that make all the difference. First off, good ingredients really do matter. Use real butter, not that stuff in a tub – the flavor is just *so* much better for the crust. And please, please use fresh lemon juice and zest! Bottled stuff just doesn’t have that vibrant, natural zing. Oh, and about oven temps: ovens can be quirky, right? If you’re unsure, an oven thermometer is a total lifesaver to make sure you’re baking at exactly 350°F (175°C). For that lovely soft texture in the filling, don’t overbake them! Pull them out when the edges look set but the center might still jiggle ever so slightly. They’ll continue to set as they cool. And if you’re ever whipping up a lemon pasta salad, remember that same fresh lemon zest is a game-changer for savory dishes too! This lemony orzo salad is divine!
Ingredient Notes and Substitutions
Let’s chat a bit about these ingredients! For the crust, using unsalted butter is definitely the way to go. It gives you control over the saltiness, and honestly, the flavor is just richer. Stick with all-purpose flour for both the crust and filling – it works perfectly. Now, for the lemon. Fresh is *best*! Seriously, you can’t beat the bright flavor from freshly squeezed juice and zest. If you absolutely can’t find fresh lemons, some people have had luck with bottled lemon juice, but you might need to adjust the sweetness a bit. For the sugar, granulated is what this recipe is designed for, so I’d stick with that for the best texture and sweetness!
Serving and Storage for Your Lemon Bars
Okay, the moment of truth! Once your lemon bars have cooled completely and you’ve sliced them up, it’s time for that final flourish. A light dusting of powdered sugar makes them look so professional and adds just a hint of sweetness to balance that tart lemon. They’re perfect just as they are, but if you’re feeling fancy, a little dollop of whipped cream or a fresh berry on the side never hurt anyone! For storing, pop any leftovers into an airtight container. They’re best kept in the fridge, and they’ll stay delicious for about 3 days. While you’re thinking about yummy citrus treats, you should totally check out this lemon chia pudding!
Frequently Asked Questions About Lemon Bars
Got questions about making these bright, delightful lemon bars? I’ve got you covered!
Can I make lemon bars ahead of time?
Oh, absolutely! Lemon bars are actually fantastic for making ahead. They tend to get even better after a day or so as the flavors meld together. Just make sure they’re completely cooled, then store them in an airtight container in the fridge. They’re perfect for parties because you can bake them the day before and have one less thing to worry about on the big day!
Why are my lemon bars not setting?
This is a common little hiccup! Usually, it means they just need a bit more baking time. The filling might look set around the edges but is still jiggly in the middle. Pop them back in the oven for another 5-10 minutes, keeping a close eye on them. Make sure your eggs and flour were measured correctly too – those are key for the filling to set up properly. If they’re still a bit soft after cooling, they’re still delicious – just maybe a bit messier to cut!
What’s the best way to get a clean cut?
This is such a good question! The trick is to let them cool COMPLETELY. Seriously, that’s step one. Once they’re totally chilled, use a really sharp knife. To get extra clean lines, I like to wipe the knife clean with a damp paper towel between each cut. This removes any sticky filling that might otherwise drag and make a mess. For an even easier time, using that parchment paper overhang to lift the whole slab out before cutting is a lifesaver!
Can I use bottled lemon juice?
While fresh lemon juice is definitely my top recommendation for that vibrant, zingy flavor, I know it’s not always available. If you have to use bottled, opt for a good quality one. You might need to adjust the sweetness a little, as some bottled juices can be more tart or less flavorful than fresh. Start with the recipe as is, and if it tastes a bit too sharp, you can always add a touch more sugar to the filling mixture before baking. For similar bright, fruity vibes in a different dessert, you might adore these lemon blueberry cheesecake cookies!
Estimated Nutritional Information
Okay, so the deliciousness of these lemon bars is undeniable, but what about the numbers? Here’s a rough idea of what you’re looking at per bar (remember, these are estimates, and they can totally change depending on the brands you use and exactly how you measure!). Think of it as a general guide:
- Calories: Around 250-300 kcal per bar
- Fat: Roughly 12-15g
- Carbohydrates: About 30-35g
- Sugar: Typically 20-25g
- Protein: Around 3-5g
These figures are based on 16 bars from the recipe. Enjoy them guilt-free (or with a little bit of glorious guilt, that’s okay too!).
Lemon Bars
Ingredients
Equipment
Method
- Preheat your oven to 350°F (175°C). Line a 9×13 inch baking pan with parchment paper, leaving an overhang on the sides.
- For the crust: In a medium bowl, cream together the softened butter and 1/2 cup granulated sugar until light and fluffy. Gradually add the 2 cups of flour and mix until just combined to form a crumbly dough.
- Press the dough evenly into the bottom of the prepared baking pan. Bake for 15-20 minutes, or until lightly golden brown.
- For the filling: While the crust is baking, whisk together the eggs and 1 1/2 cups granulated sugar in a separate bowl until well combined.
- Whisk in the 1/3 cup flour until smooth. Stir in the fresh lemon juice and lemon zest.
- Pour the lemon filling evenly over the hot baked crust. Return the pan to the oven and bake for another 15-20 minutes, or until the filling is set and the edges are lightly golden.
- Let the lemon bars cool completely in the pan on a wire rack. Once cooled, use the parchment paper overhang to lift the bars out of the pan.
- Cut into 16 bars and dust with powdered sugar before serving.